Amazon Textract's advanced extraction features go beyond simple OCR to recover structure from documents: Including tables, key-value pairs (like on forms), and other tricky use-cases like multi-column text.
However, many practical applications need to combine this technology with use-case-specific logic - such as:
- Pre-checking that submitted images are high-quality and of the expected document type
- Post-processing structured text results into business-process-level fields (e.g. in one domain "Amount", "Total Amount" and "Amount Payable" may be different raw annotations for the same thing; whereas in another the differences might be important!)
- Human review and re-training flows
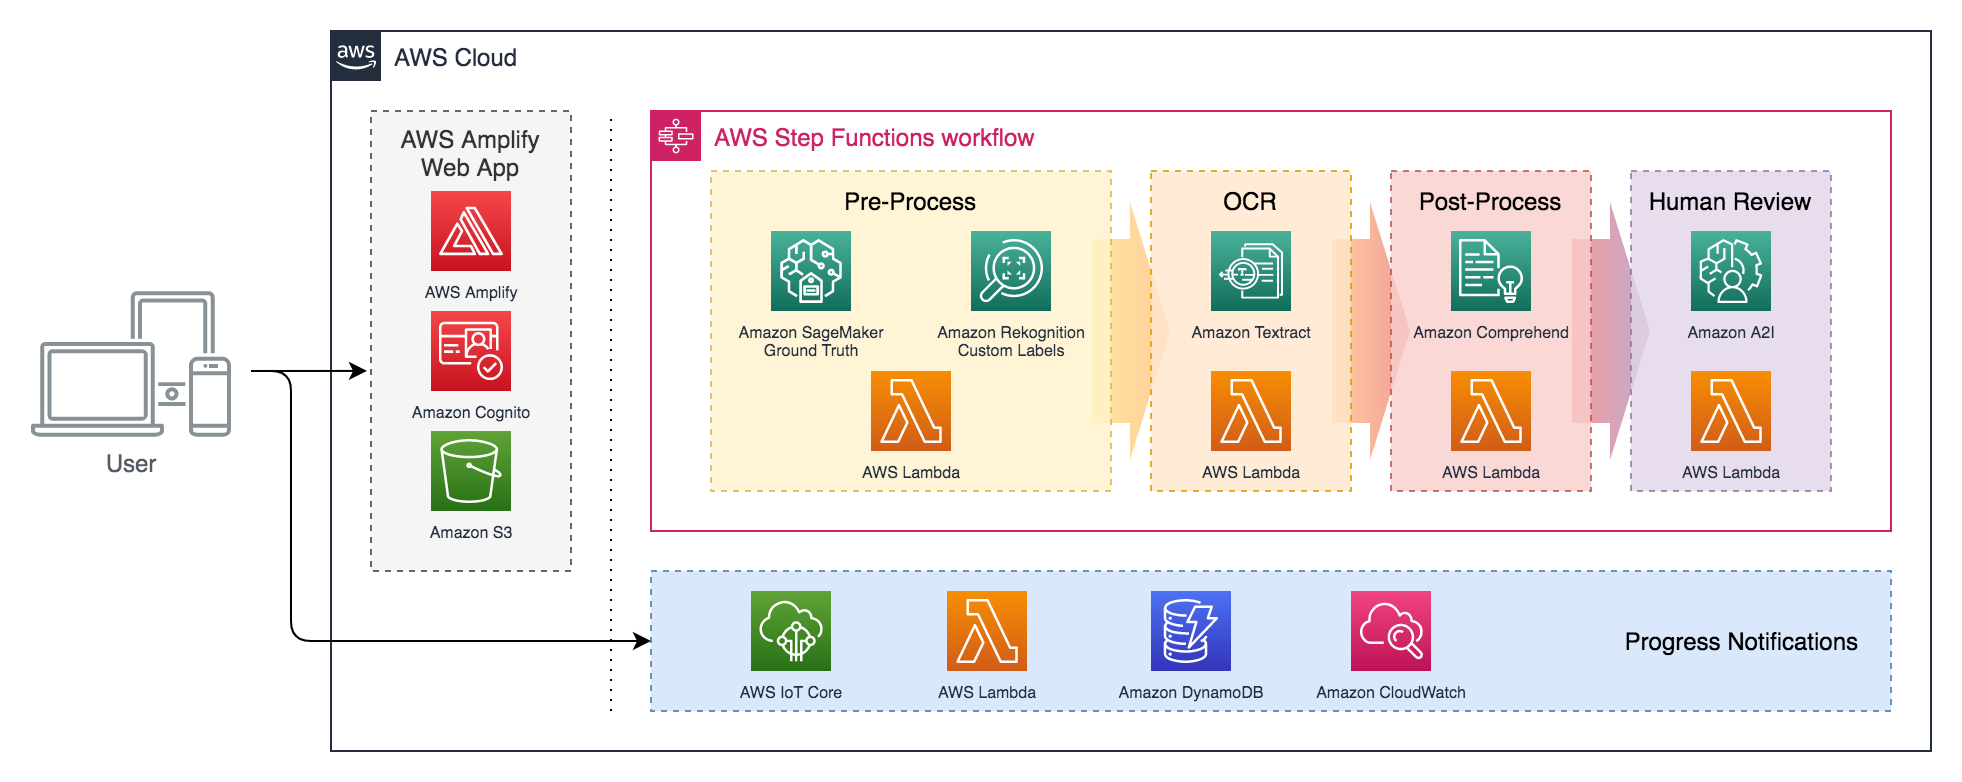
This solution demonstrates how Textract can be integrated with:
- Image pre-processing logic - using Amazon Rekognition Custom Labels to create a high-quality custom computer vision with no ML expertise required
- Results post-processing logic - using custom logic as well as NLP from Amazon Comprehend
- Human review and data annotation - using Amazon A2I and Amazon SageMaker Ground Truth
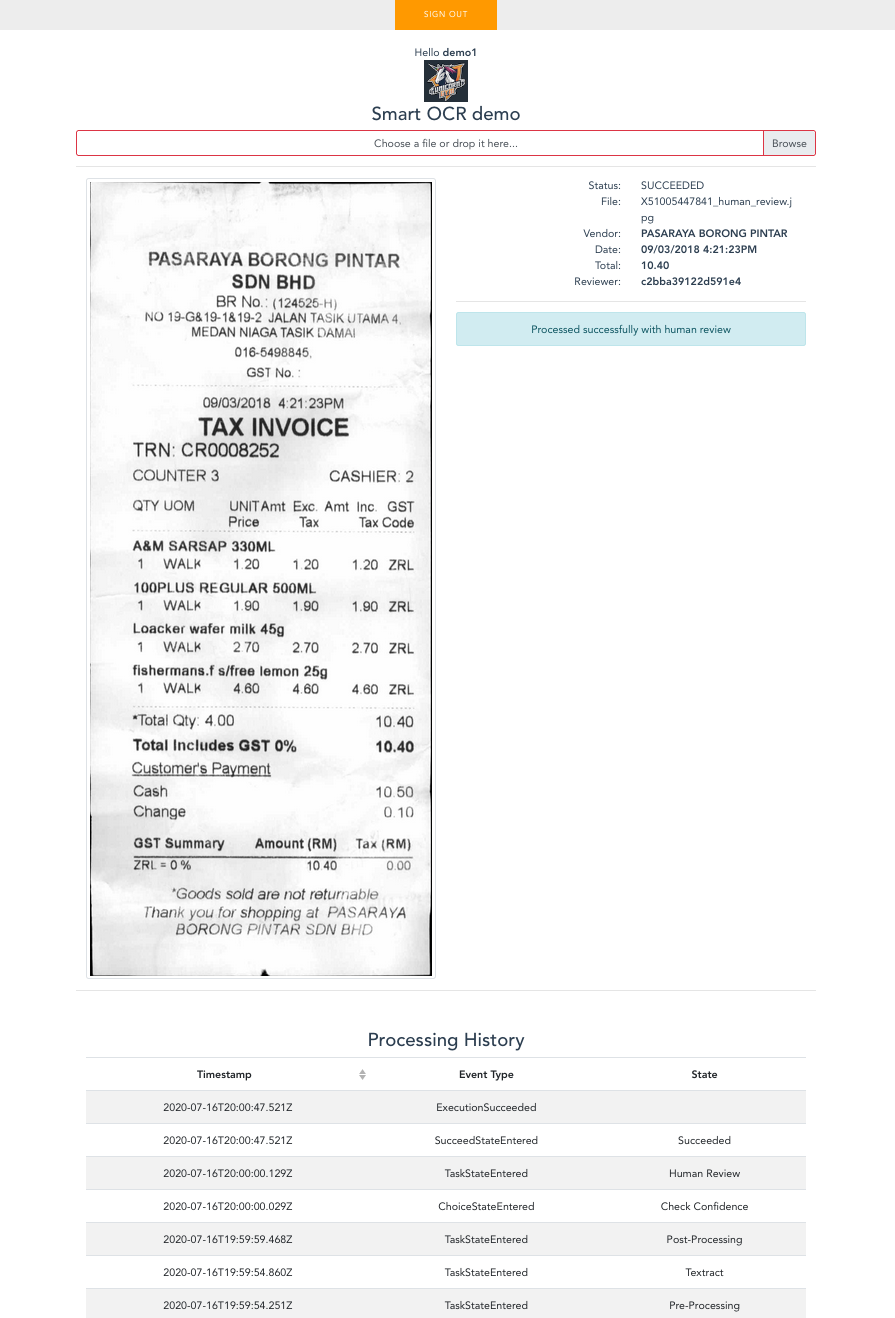
...on a simple example use-case: extracting vendor, date, and total amount from receipt images.
The design is modular, to show how this pre- and post-processing can be easily customized for different applications.
This overview diagram is not an exhaustive list of AWS services used in the solution.
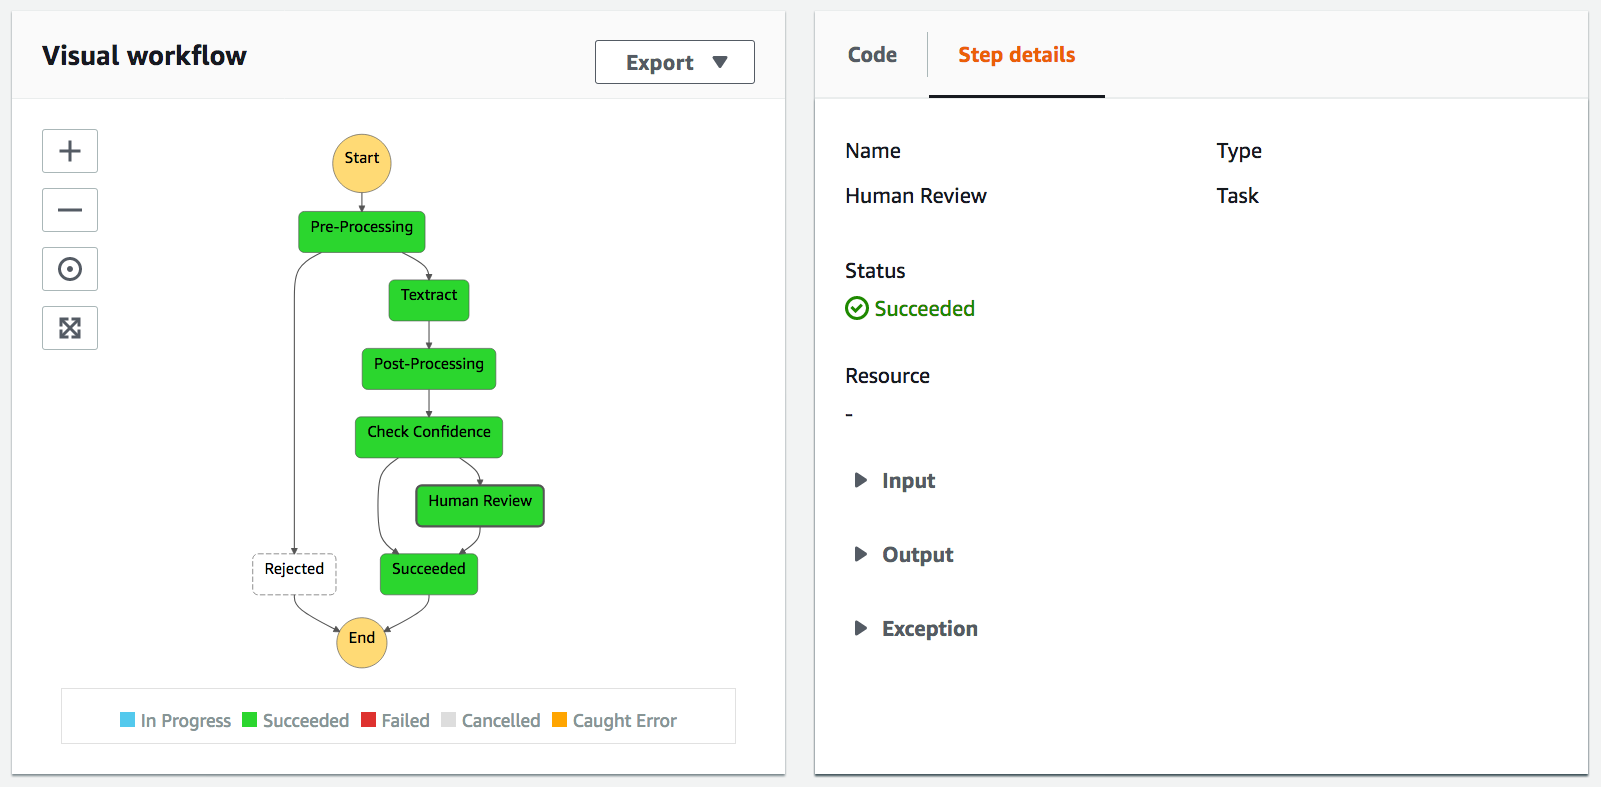
The solution orchestrates the core OCR pipeline with AWS Step Functions - rather than direct point-to-point integrations - which gives us a customizable, graphically-visualizable flow (defined in /source/StateMachine.asl.json):
The client application and associated services are built and deployed as an AWS Amplify app, which simplifies setup of standard client-cloud integration patterns (e.g. user sign-up/login, authenticated S3 data upload).
Rather than have our web client poll the state machine for progress updates, we push messages via Amplify PubSub - powered by AWS IoT Core.
The Amplify build settings (in amplify.yml with some help from the Makefile) define how both the Amplify-native and custom stack components are built and deployed... Leaving us with the folder structure you see in this repository:
├── amplify                   [Auto-generated, Amplify-native service config]
├── source
│   ├── ocr                       [Custom, non-Amplify backend service stack]
│   │   ├── human-review              [Human review integration with Amazon A2I]
│   │   ├── postprocessing            [Extract business-level fields from Textract output]
│   │   ├── preprocessing             [Image pre-check/cleanup logic]
│   │   ├── textract-integration      [SFn-Textract integrations]
│   │   ├── ui-notifications          [SFn-IoT push notifications components]
│   │   ├── StateMachine.asl.json     [Processing flow definition]
│   │   └── template.sam.yml          [AWS SAM template for non-Amplify components]
│   └── webui                     [Front-end app (VueJS, BootstrapVue, Amplify)]
├── amplify.yml               [Overall solution build steps]
└── Makefile                  [Detailed build commands, to simplify amplify.yml]
NOTE |
For details on each component, check the READMEs in their subfolders! |
|---|
If you have:
- A GitHub Account
- An AWS Account
- Understood that this solution may consume services outside the Free Tier, which will be chargeable
...then you can go ahead and click the button below, which will fork the repository and deploy the base solution stack(s):
From here, there are just a few extra (but not trivial) manual configuration steps required to complete your setup:
- Create a Rekognition Custom Labels model as described in the preprocessing component doc, and configure your
FunctionPreProcessLambda function's environment variable to reference it. - Create an Amazon A2I human review flow and workforce as described in the human-review component doc, and configure your
FunctionStartHumanReviewLambda function's environment variable to reference the flow. - Register a user account through the deployed app UI, log in, and check it's permissions are set up correctly as described in the ui-notifications component doc.
Now you should be all set to upload images through the app UI, review low-confidence results through the Amazon A2I UI, and see the results!


