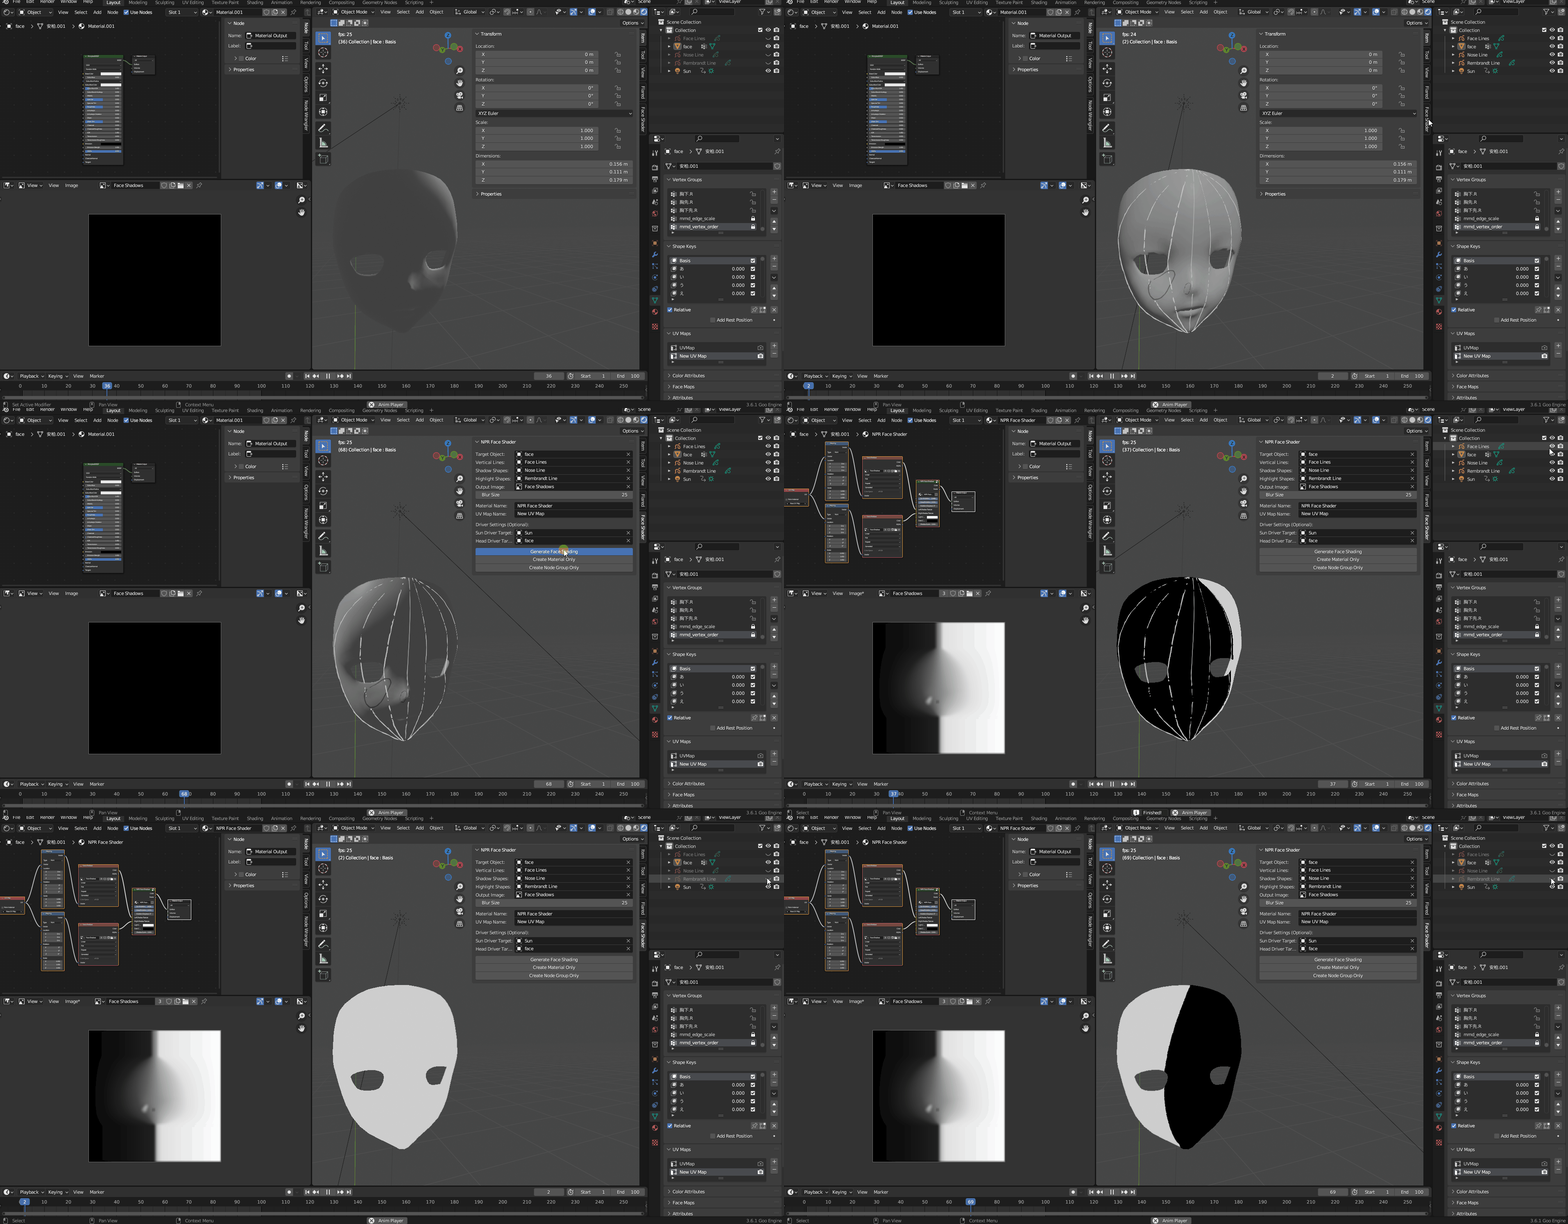
A Blender addon to easily build custom smooth lighting for use on NPR faces using grease pencil.
- One-click solution for horizontal lighting on NPR characters (potential substitute for normal editing)
- Utilizes user-drawn grease pencil lines to place shadows in flexible locations
- Automatic material and node group creation for shadow texturing
- Easy driver initialization for response to sun/head rotation
Note: As of now, this style of face shading only works for horizontal lighting shifts. It can be modified to work for vertical lighting, but you still can't readily blend between both. I am working to see if I can come up with a solution for this and will update this addon with any progress. For now, it at least supports the most common use case.
To install the addon, click on the green Code dropdown to the top right, and then click Download ZIP. This
will download a file named npr-face-shader-main.zip, and you can move that wherever you want. There is
no need to unzip this file; all you have to do is open Blender, navigate to
Edit > Preferences > Add-ons > Install and select the ZIP file. It may take a moment to load. Once it does,
click the check box on the entry that has just appeared and the addon should be good to go.
One important aspect of the face mesh is the UV map. Otherwise, any topology should work. The UV map should be laid out similarly to the below example:
If you already have a UV map for other textures, then you can simply create another one by selecting the
object, navigating to the Data tab on the right side (click the green triangle in the Properties panel),
opening the UV Maps dropdown, and clicking the plus button on the side. You may have to play around with
which one is active while you are unwrapping, but it should not conflict with any of your preexisting maps.
You can tell the addon to use this new map in the options.
When you're done unwrapping, you can start drawing the grease pencil lines. There should be three grease
pencil objects in total: one for the vertical face lines, one for shadow shapes, and one for highlight shapes.
Refer to the demo clip at the top of this page for how these should be drawn, and make sure they are drawn
directly onto the face (stroke placement set to Surface with an offset of 0.0).
After everything is drawn, select the objects you created in the Face Shader tab on the 3D View window. You
should also create a new image file for the addon to write to with whatever dimensions you'd like. Only the
top options here are required. You can also leave the UV Map Name field blank; it will just select the
active one if so. More information on the different parameters can be found below.
As a last step, click the Generate Face Shading button to set everything in motion. This is a fairly
computationally heavy process, so even with some performance optimizations it may take a while to complete.
Blender almost definitely hasn't crashed though, so just give it some time to work through everything. When it
does finish, a new material should be created and assigned to the target object, with custom face shadows
following the drawn guidelines. Changes to the light and dark textures (as well as whatever else) can be made
in the created material.
- Target Object - The object to apply the shading to.
- Vertical Lines - The grease pencil object containing the vertical line strokes (see demo clip).
- Shadow Shapes - The grease pencil object containing the shapes that should remain shaded longer (see demo clip).
- Highlight Shapes - The grease pencil object containing the shapes that should remain lit longer (see demo clip).
- Output Image - The output image for the shadow texture to be written to. Can be any resolution, but larger will mean a slower computation time.
- Blur Size - The size for a box blur applied to the final product that blends shapes and lines together for a smoother result. A larger value means smoother transitions and less exact line following.
- Material Name - The name of the new material to be created. If left blank or the material name already exists, a new material will not be created.
- UV Map Name - The name of the UV map to use for projection and texturing. Must be a valid UV map name from the target object. If left blank, the active UV map will be used instead.
- Sun Driver Target - An optional parameter that allows you to choose an object to use as the sun. This can be any object of any type, and its z-rotation will be linked to the material on creation.
- Head Driver Target - An optional parameter that allows you to choose an object to use as the head (for angle determination). This can be any object of any type, and its z-rotation will be linked to the material on creation. This can be the head itself or another object in more complex situations.
- Generate Face Shading - Perform the entire process of face shading generation. May take a while to complete.
- Create Material Only - Generates a new face shadow material using the selected image, but doesn't modify the image according to the other parameters. Can be used with a custom face shadow texture.
- Create Node Group Only - Adds a new node group to the project that can be used for an even more customized face shadow setup. This is the same group as is used in standard material creation.
Any issues you have can be sent as requests to emuman on Discord if they are clarifications, or created as
actual Issues if they are relevant as such.

