This repository contains useful info about making custom keyboards, which I find during creating my custom keyboard. First are some useful links about building keyboards, components, shops, ... Second my notes about building keyboard and last some information about software on pro micro like creating keyboard layout or flashing.
Below is some useful information about parts of the keyboard. Every section ends with a few useful links. Links, related to some parts it's in these parts.
If you want to have a slim keyboard (or you just want a PCB for your keyboard), you will need PCB. You can buy one or design it.
There are a few options, Arduino Pro Micro with Atmega32, STM32, Elite C microcontroller (like Pro Micro, but with USB C and some other improvements)
- Pro micro vs Elite article
- Another microcontroller discussion on Reddit
- Firmware QMK documentation
- Github project QMK firmware
- QMK firmware online configuration
- Github project TKM keyboard firmware with firmware for Atmel AVR and Cortex-M
- splitkb
- Alternatively as usual amazon and eBay
If you want to buy a split keyboard for yourself:
About switches are on the web lot of information and opinions. For build is this information unimportant, but if you are building a keyboard, check it and if you can test what is best for you.
It's good to buy some nice and comfy keycaps. I'm ignoring this theme here, but if you want to know more, check this site, or just use google, you can find a lot of articles about it.
This section contains information about keyboard building.
- switches
- keycaps
- microcontroller or two if you build a split keyboard(arduino pro micro in my case)
- diodes (to avoid ghosting)
- USB cable for power
- PCB or wire for connection
- keyboard case
- if you want to build a split keyboard: TRRS, RJ9 or I2C connectors and cable
Solder keyboard is relatively easy, but it's a lot of soldering. Just hold on wiring schema and everything will be ok.
Wiring is simple it's only a matrix of key switches. If you want to, you can check QMK hand wiring documentation. There is some very useful information. For information about split keyboard connections, QMK has documentation for this too.
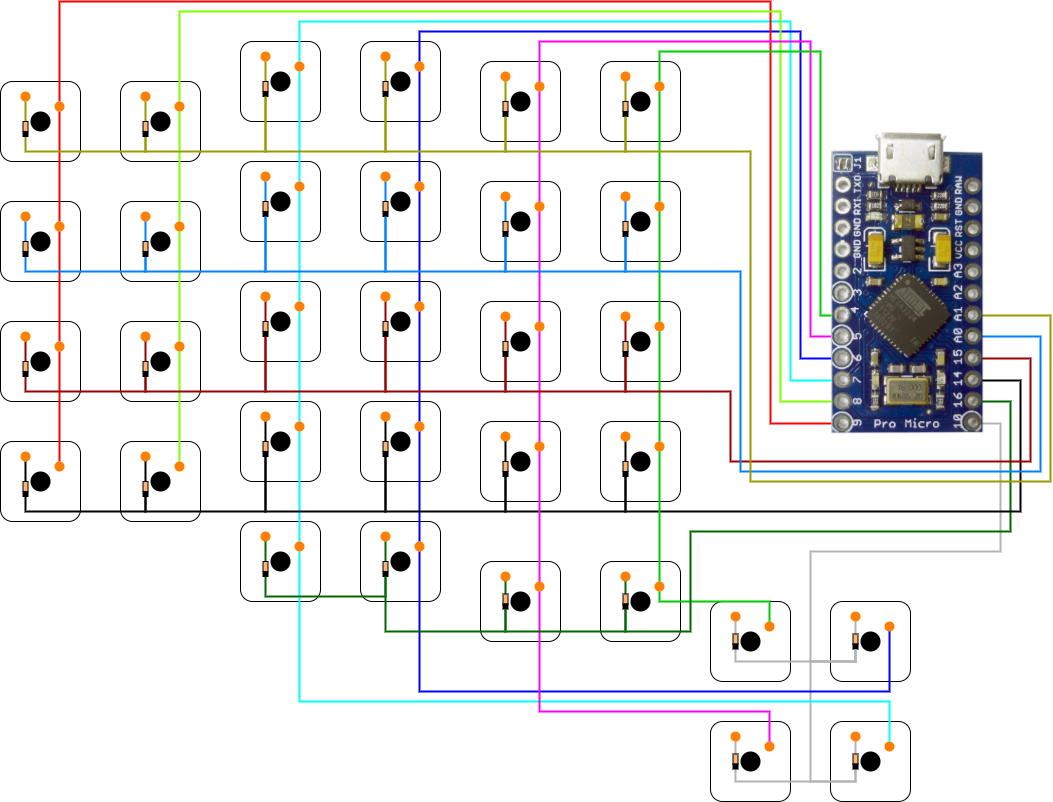
Below is the image of wiring for a right hand. The image is from the bottom of the keyboard. If you want the wiring of the left hand, you can mirror this image.
But be careful, if you have arduino pro micro, pins have different names, which can be confusing and in QMK code must be used pin names from spark pro micro (example of pin names is in code in section pro micro software). If you want to know the relation between pro micro and arduino pro micro pins names, check this.
If you want some detailed tutorials, here is a nice guide about building your dactyl keyboard. You can also check this tutorial. If you rather see a video, you can check this.
In this section is some info about pro micro software. I'm using QMK firmware. If you are solder your matrix to different pins, you can change them in code with:
#define MATRIX_COL_PINS { B5, B4, E6, D7, C6, D4 }
#define MATRIX_ROW_PINS { F6, F7, B1, B3, B2 }
Can be also used only for only one side with append define name with side. For example MATRIX_COL_PINS_RIGHT.
Some peoples do not like the default pro micro bootloader Caterina. You can replace it with another. I recommend QMK DFU (here is the guide) which is extended by a few functionalities against default DFU, but you can use it too (one guide is here).
Having a good keyboard layout is essential. You can have all your shortcuts near to your finger positions. You can use your normal keyboard layout, but why? About my keyboard layout, I`m writing here, but the text is in Czech. That's my native language and have some specific needs. So if your native language is English or you write primarily in that language, you can check Dvorak or Colemak (or lookup for other ones) keyboard layout. But be careful, these layouts are optimized for frequently used characters in English not in other languages.
QMK has a simple layout creator, you can use it to create and test your keyboard layout. This site also can compile QMK with your layout to hex file or you can only download layout in .json.
To translate .json keyboard layout to .c can be used this side. It's useful when you want to compile and flash your layout by the make of QMK CLI.
Here is a list of keycodes for QMK keyboards or if you want it in Github README then check here
For flash your keyboard you can use QMK Toolbox (but it is not available on Linux) with GUI, QMK CLI or make a file in the qmk repository
QMK CLI
sudo qmk flash -kb <keyboard> -km <layout>
If you want to compile to the hex file, you can use compile instead of flash.
Make:
sudo make <keyboard>:<layout>:flash
You can also use make without flash for compilation.
QMK CLI have dependency on avr-gcc but be careful, it's recommended to have it in version 8.x. I have no problem with the newest version, but it's good to know.
Allow me please a few words on the end. First I'm sorry for my English, it's crappy, but I'm trying my best.
Second building your keyboard is fun, but sometimes things can go wrong. I have luck and do everything right on the first try, but some peoples write about they messed up this or that. So, it's happened. Don't be upset or sad about that. This is an experience too and next time, you will do it right.
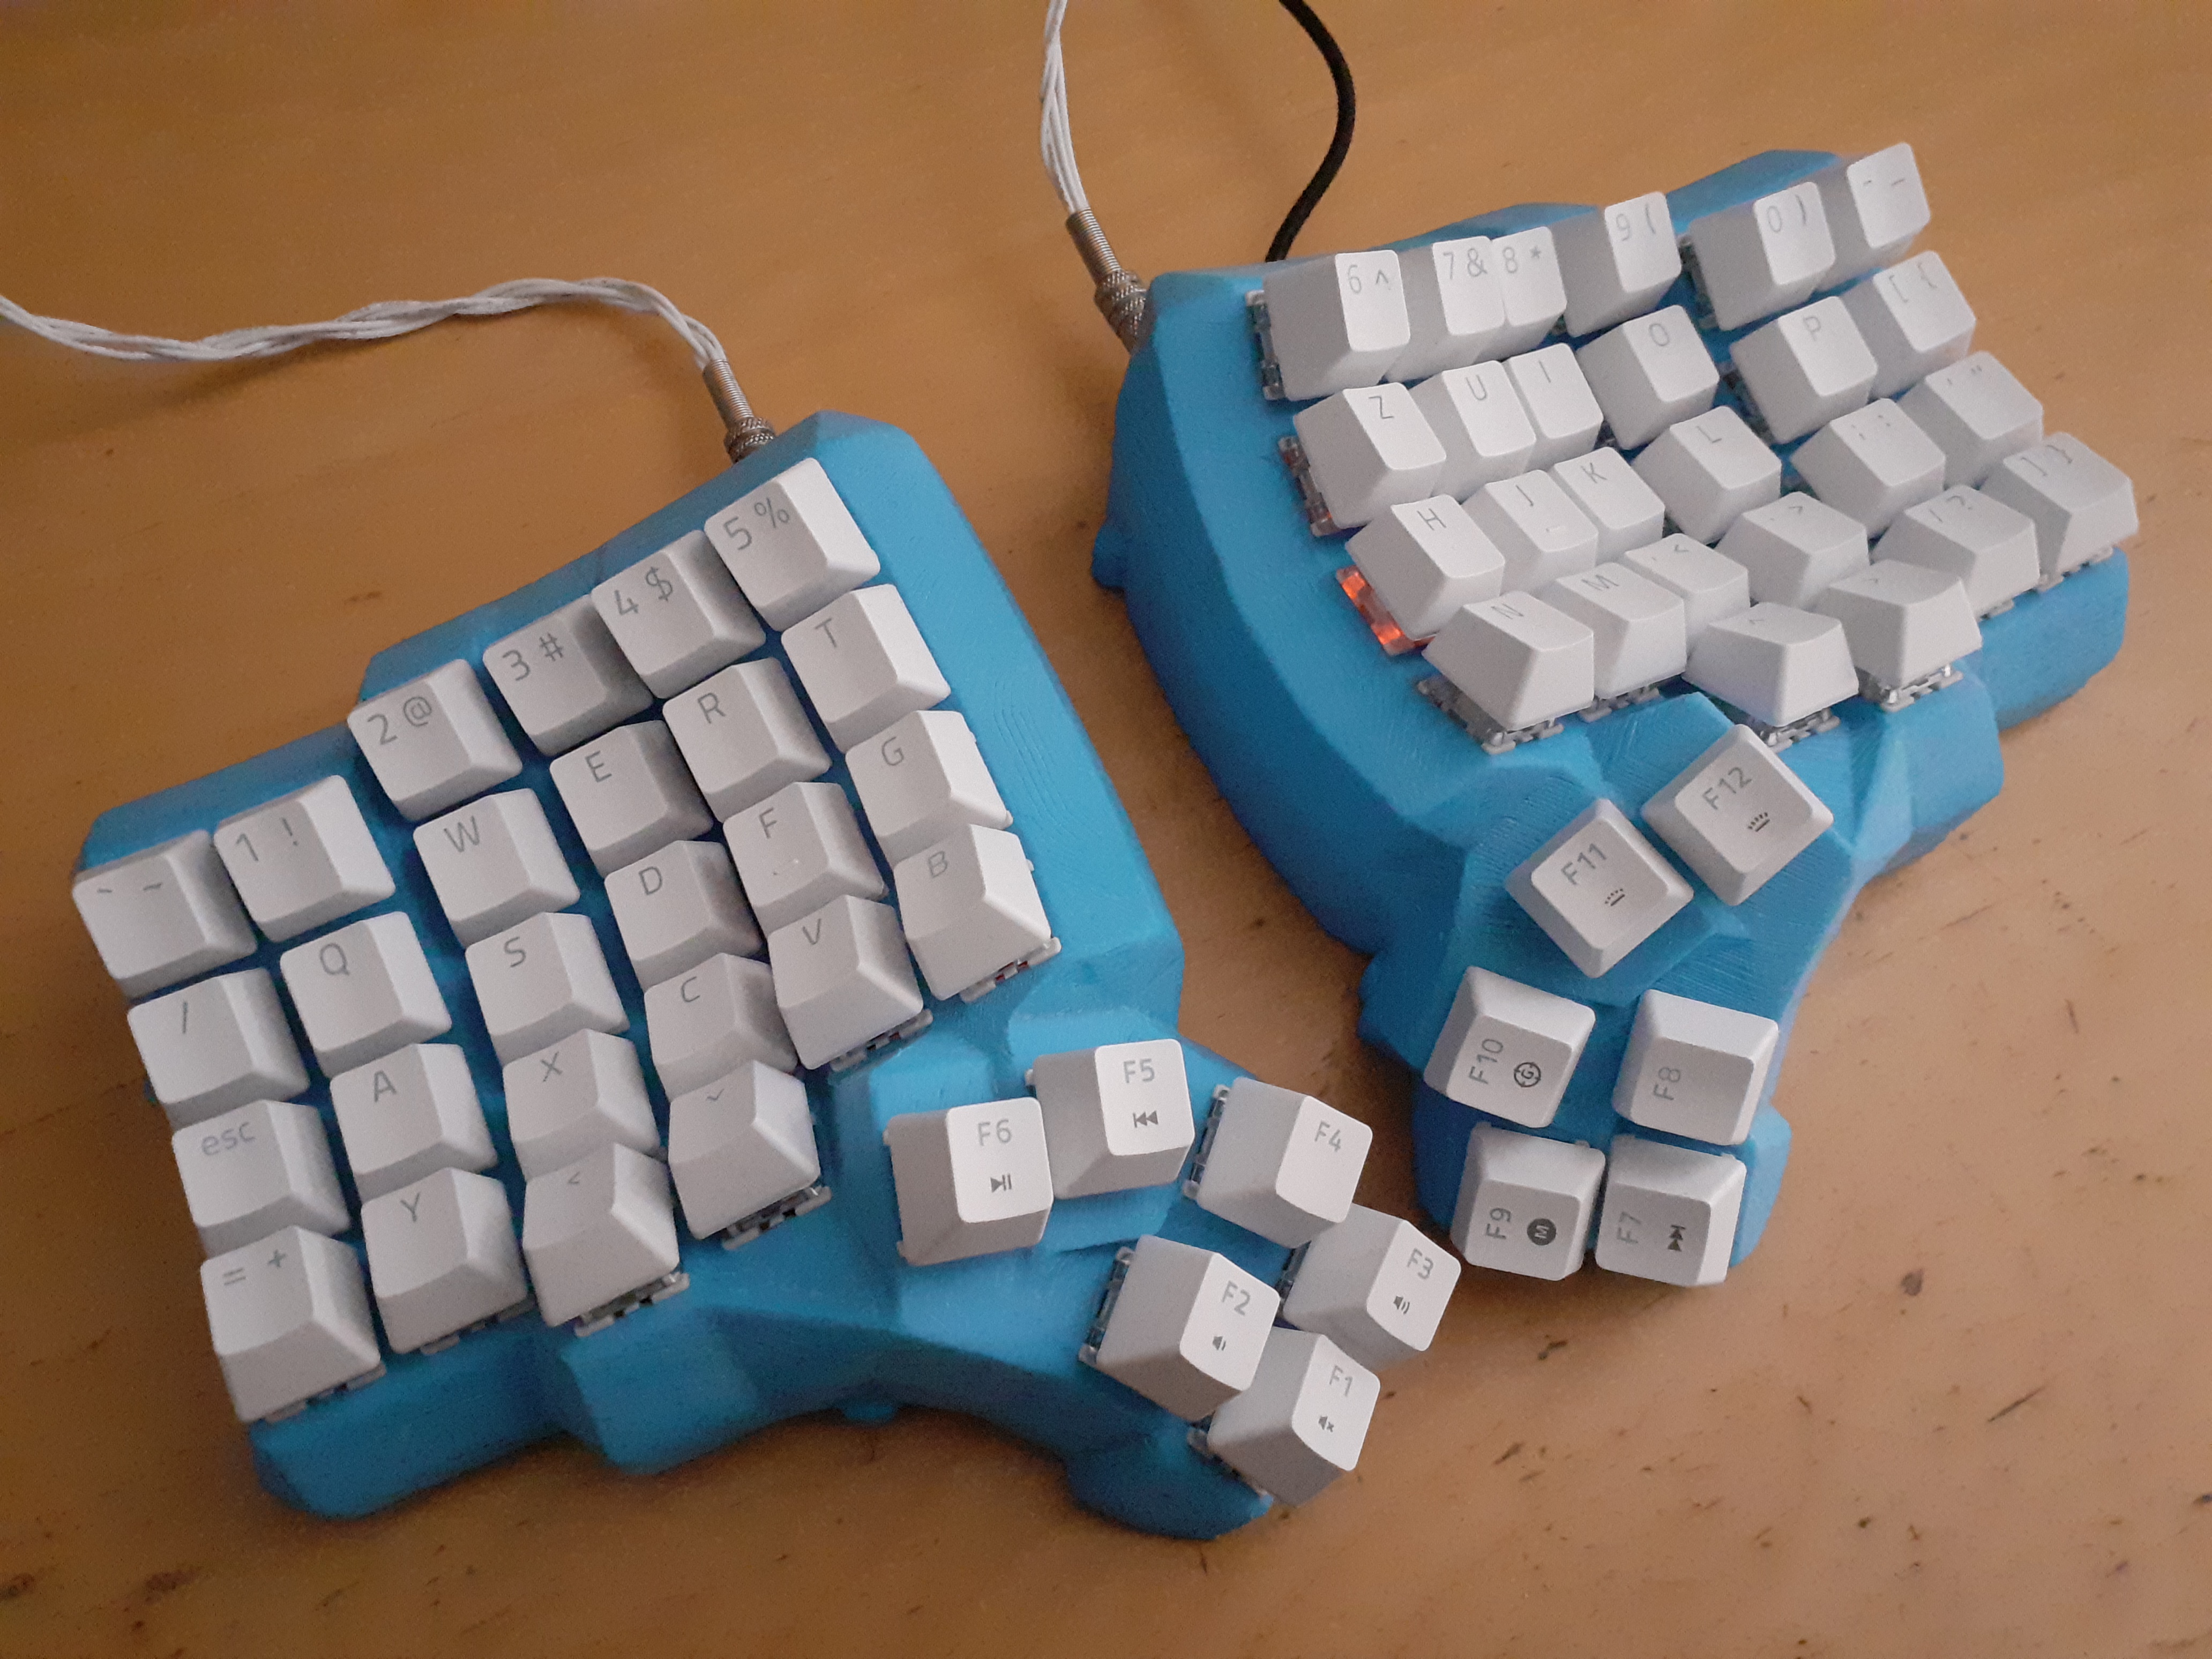
And if you want to check my custom dactyl keyboard, the picture is below.The body is 3D printed and a little bit sanded, but I'm too lazy to do it properly. Maybe next time I will. Or not, I'm really lazy.

