Initial wiring test for the Banana Pi (BPI-M1).
In contrast to the Raspberry Pi the Banana Pi does wiring internally a little bit different when it comes to things like GPIO, SPI, PWM and things like that. So we have to check out how this works first: We use switching on and off a LED for that.
By replacing wiringBP by wiringPi it can be used for Raspberry Pi too (not tested).
- Examples doing this can be found here (wiki lemaker) and here (github lemaker). Also here.
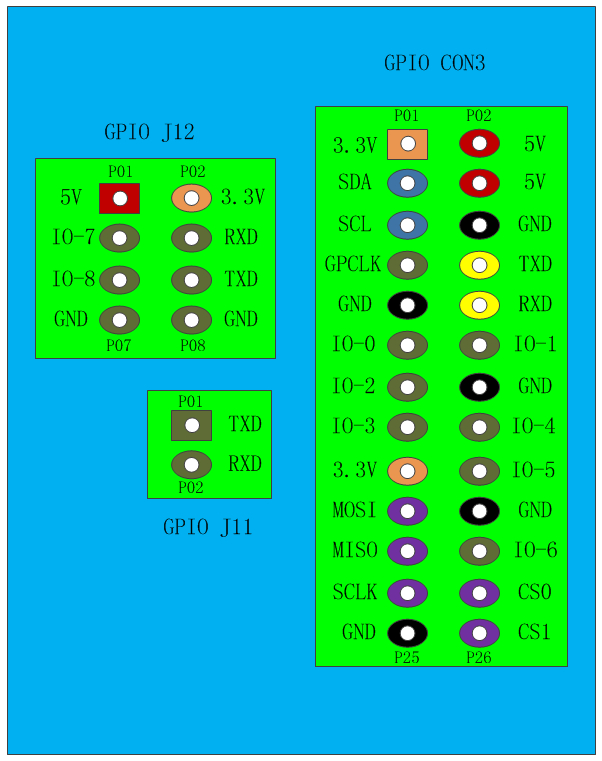
- A good overview of the BPI-M1 can be found here.
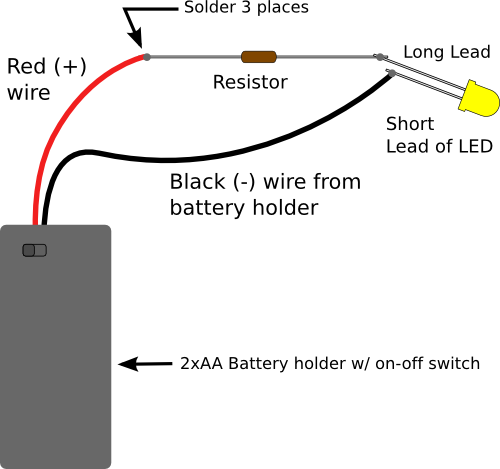
Be sure to use a resistor and also connect the correct side of the LED (long lead) to +.

(copyright notice: the image was taken from www.evilmadscientist.com)

(copyright notice: the image was taken from lemaker homepage)
Clone the repository and run ./build. This installs includes and library in /usr/local/include and /usr/local/lib.
Go to the source directory and use the mighty force of shining CMake :D to compile the pico project.
The wiringPi sub folder contains the internal interface library for the installed wiringBP library.
(I used Armbian stretch on the Banana Pi but also more recent versions should work).