The Dice Championship project is about exploring how a simple voice app - Dice Championship - can be implemented and extended using different frameworks, platforms and services. It was initiated (and published to the Alexa Skill store) by me (Florian Hollandt), but contributions of ideas, implementations and improvements are very welcome. :)
This version of Dice Championship implements its leaderboard with AWS Aurora, a MySQL-based relational database service and is part of AWS RDS. One neat feature that distinguishes it from a vanilla RDS database is that it auto-scales with demand and is inactive when it's not needed (similar to Lambda and DynamoDB, if you use 'On-Demand' capacities). So on the plus side, it might be more robust for usage spikes and be more economical during slow times, but on the minus side it might have higher latency when making a request to a 'cold' Aurora database.
Here are some ways in which this implementation differs from the base version, which implements the leaderboard with a DynamoDB table:
| Base version | Aurora version | |
|---|---|---|
| AWS Services required | DynamoDB | RDS + Secrets Manager |
| Complexity of setup | Low | Moderately high |
| Querying capabilities |
DynamoDB operations (put, get, scan, query etc) |
MySQL 5.6 compatible |
| Latency |
tbd*
|
tbd*
|
| Costs |
tbd*
|
tbd*
|
* Stay tuned for future blog posts in which I plan to compare latency and costs for different leaderboard implementations!
With Aurora, you don't establish a connection and query the database directly (as you've seen in the MySQL example), but you use the AWS SDK's Data API, which in turn treats your database credentials as an AWS Secret instance that your runtime environment needs to have access to.
This makes Aurora a bit tricky to set up - But don't worry, I've got you covered with this step-by-step guide!
- Setting up the project folder
- Clone this repository, run
npm install --saveand make a copy of.env.examplenamed.env. We'll use environment variables to set up all the required credentials.
You can already make a decision about your favorite AWS region for the steps and services described below, and include it in your.envfile like this:AURORA_REGION='eu-west-1'
- Clone this repository, run
- Setting up your Aurora database
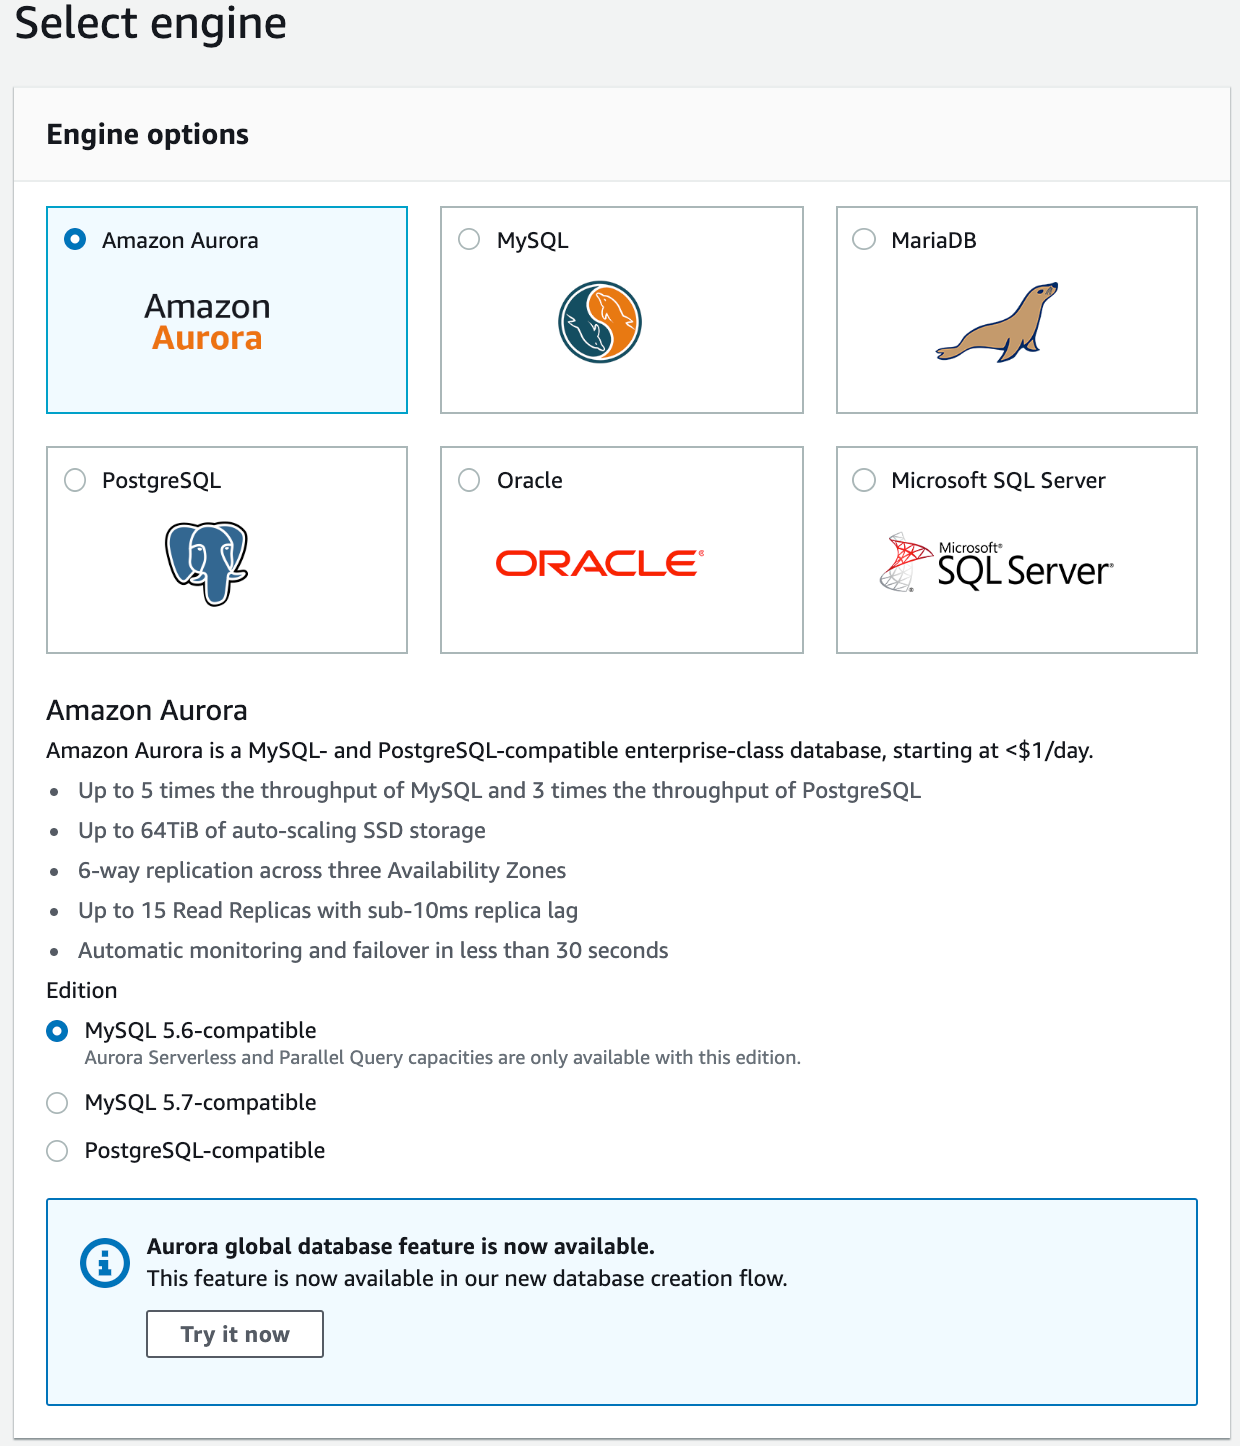
- Go to the AWS RDS console's database overview, click on 'Create database', select 'Amazon Aurora' with the 'MySQL 5.6-compatible' edition, and confirm:
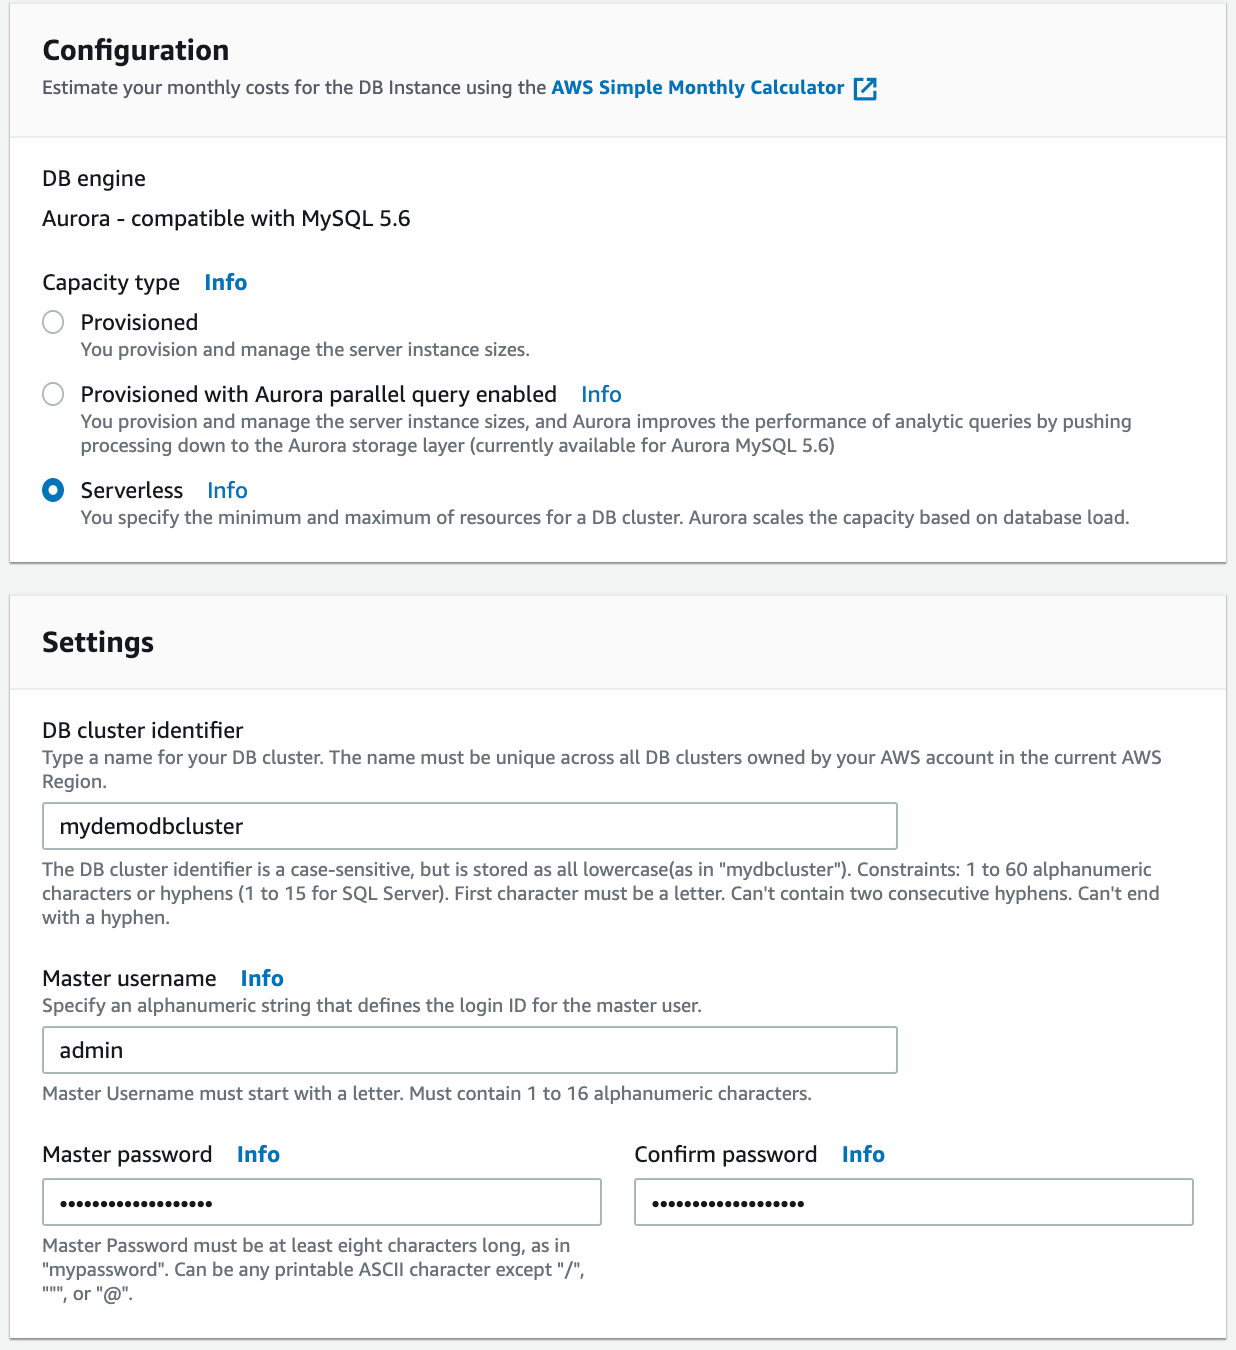
- Select the 'Serverless' capactiy type, and then create a name, username and password for your new database cluster (no need to write them into your
.envfile, they will be retrieved using AWS Secrets Manager, but more on that later):
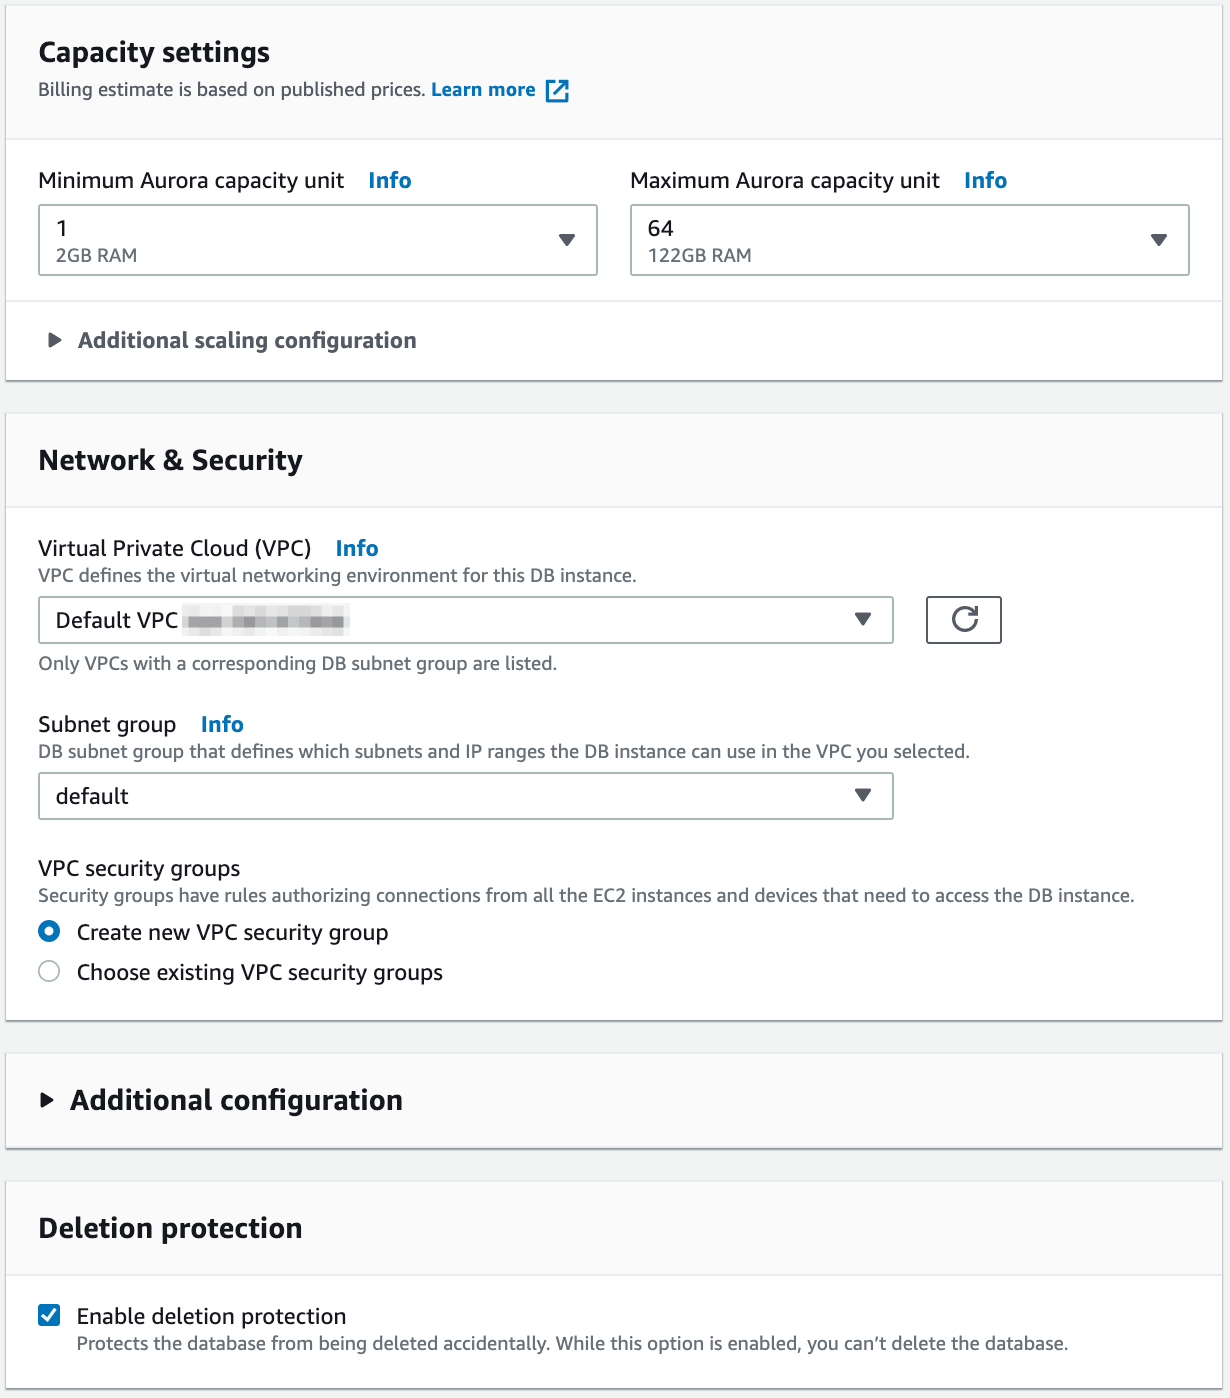
- At the third page of the setup wizard you can leave things at their defaults, although if you lean towards paranoia (like me) you might want to limit auto-scaling to 2 capacity units for testing purposes:
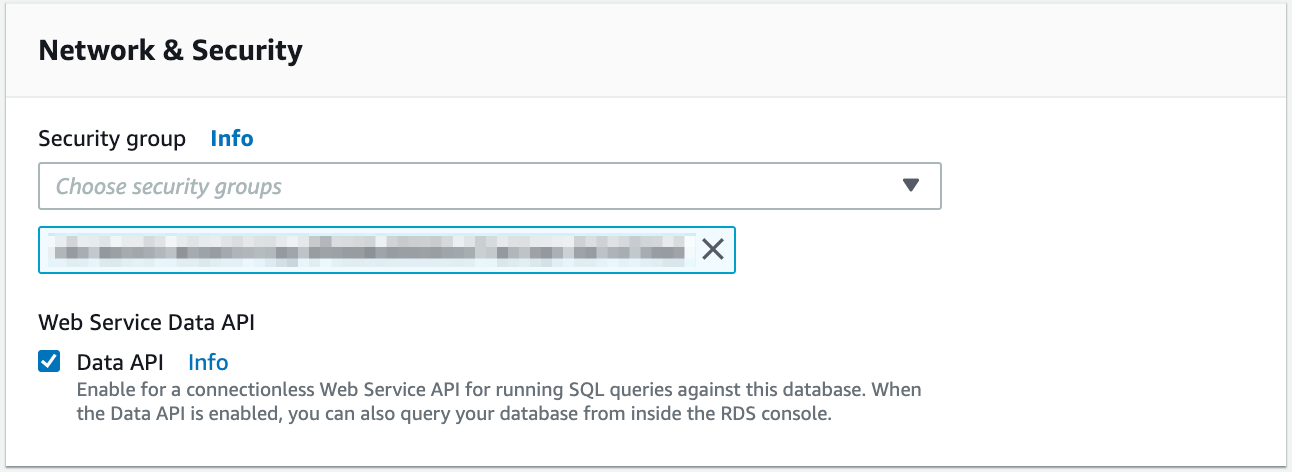
- To enable the Data API, go back to the RDS database overview, select your new cluster, click on 'Modify', enable the 'Web Service Data API' checkbox and click 'Continue':
- From the details of your newly created Aurora cluster, get the database ARN under 'Configuration' and save it as the value of
AURORA_CLUSTER_ARNin your.envfile. - Now you can make your first connection to your cluster! Again, go to the RDS database overview, select your cluster, find the dropdown 'Actions' and select 'Query'.
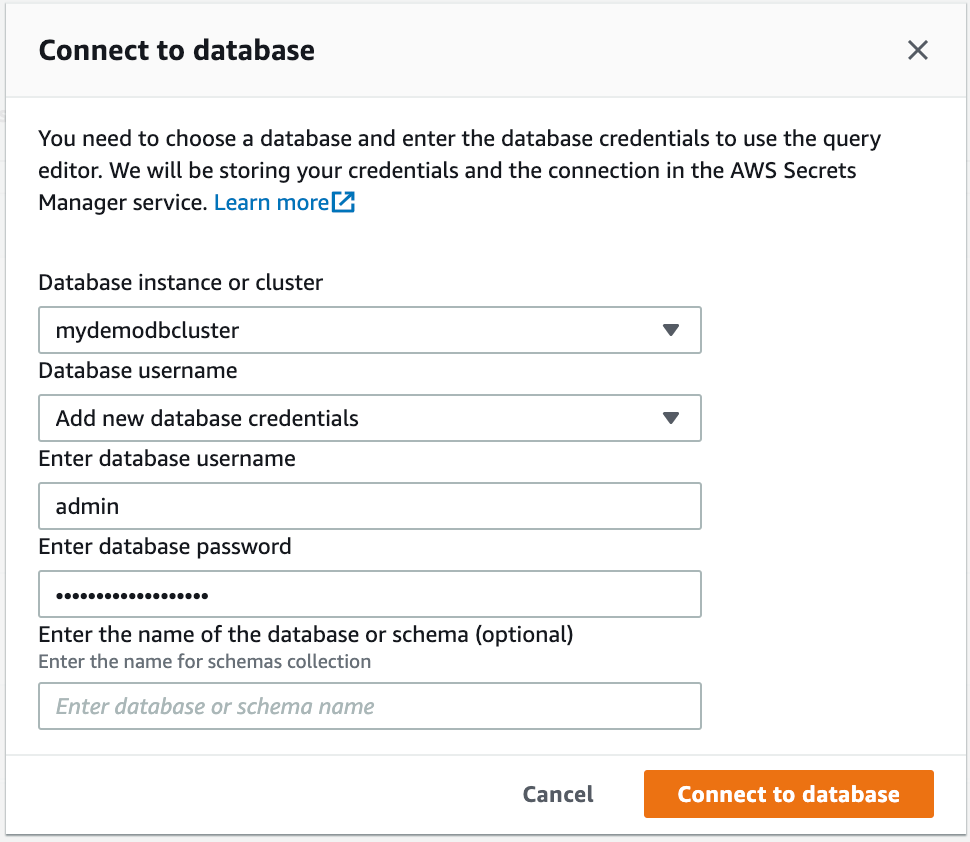
- You're now asked to enter your username and password a last time before they are saved to AWS Secrets Manager. Enter them and 'Connect to database':
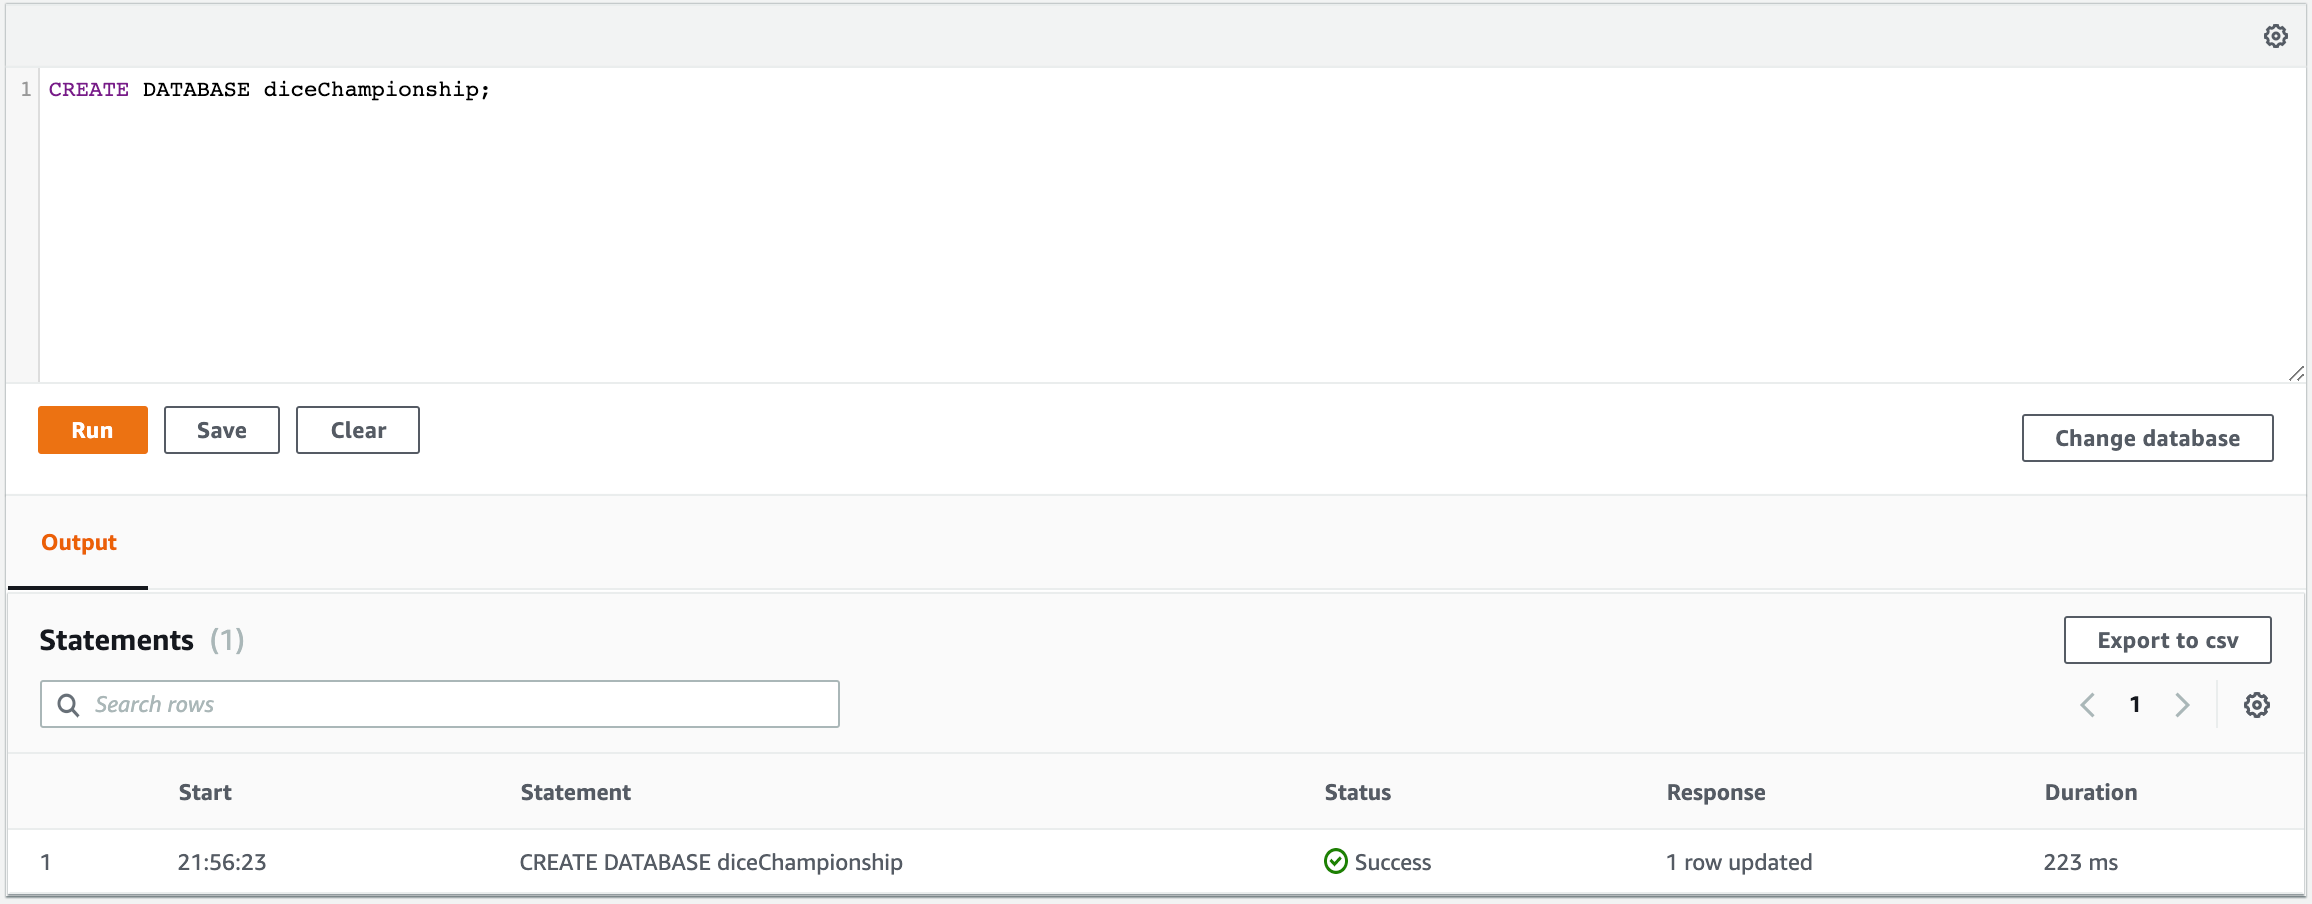
- You can now create a database within your cluster via MySQL query. In case you want to name your database 'diceChampionship', use the query
CREATE DATABASE diceChampionshipand hit 'Run'. Also, save the database name as the value ofAURORA_DATABASE_NAMEin your.envfile:
- Go to the AWS RDS console's database overview, click on 'Create database', select 'Amazon Aurora' with the 'MySQL 5.6-compatible' edition, and confirm:
- Get the Secrets Manager credentials for your Aurora database
- Go to the AWS Secrets Manager's Secrets overview, open the details for the Aurora credentials secret you have created in step 2, and save the secret's ARN as the value of
AURORA_SECRET_ARNin your.envfile:
- Go to the AWS Secrets Manager's Secrets overview, open the details for the Aurora credentials secret you have created in step 2, and save the secret's ARN as the value of
- Setting up access to your Aurora database
- Depending on whether you want to run the Skill locally or on Lambda, you need either a programmatic user (aka serivce account) a role with access to both your new cluster and its credentials secret. To cover both, start out by creating a new AWS IAM policy 'diceChampionship_policy' using the one from the
policy.jsonfile in this repo. - Replace the Resource part for the
SecretsManagerDbCredentialsAccessgroup with the ARN from step 3 to be sure no other secrets of yours can be accessed with this policy. - Create a new AWS IAM user 'diceChampionship_user' with programmatic access and only the policy
diceChampionship_policy. Instead of downloading the credentials file, you can directly copy the access key ID and secret access key into your.envfile as the values ofAURORA_ACCESS_KEY_IDandAURORA_SECRET_ACCESS_KEY. - Simliarly, create a new AWS IAM role
diceChampionship_rolewith the policydiceChampionship_policy. It already has access to CloudWatch logs.
- Depending on whether you want to run the Skill locally or on Lambda, you need either a programmatic user (aka serivce account) a role with access to both your new cluster and its credentials secret. To cover both, start out by creating a new AWS IAM policy 'diceChampionship_policy' using the one from the
- Creating your Lambda function
- Open the AWS Lambda functions overview in your selected region and hit Create function.
- Give your Lambda a Node 8.10 runtime (or above) and the existing role 'diceChampionship_role' from step 4.
- Add 'Alexa Skills Kit' as a trigger for your Lambda function. For now you can disable the restriction to a defined Skill ID.
- Copy the environment variables
AURORA_SECRET_ARN,AURORA_CLUSTER_ARNandAURORA_DATABASE_NAMEand their respective values from your local.envfile to the Lambda's environment variable section. - Copy the Lambda's ARN into your local
.envfile, as the value ofLAMBDA_ARN_STAGING(more on staging below).
- Creating the Alexa Skill
- This is something you could do directly in the Alexa developer console, but here we're using the Jovo CLI because it's super convenient. So be sure to have the Jovo CLI installed and optimally your ASK CLI and AWS CLI profiles set up.
- Write the name of the ASK CLI profile you plan to use into your local
.envfile as e.g.ASK_PROFILE='default'. - Now execute
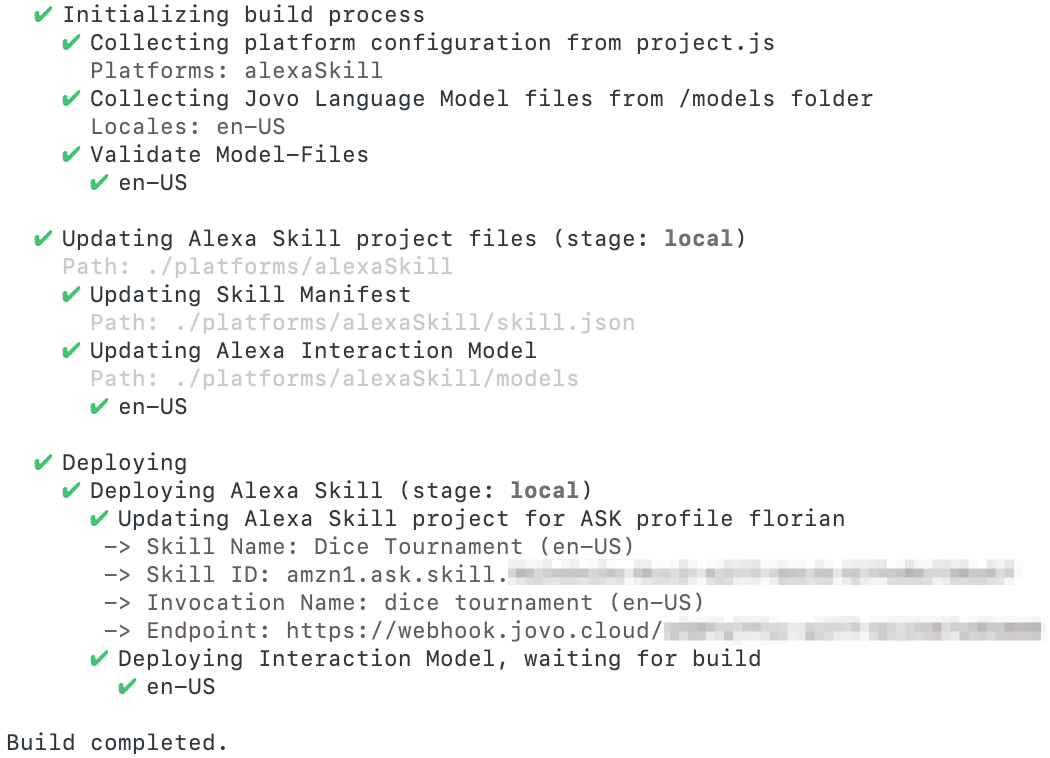
jovo build --stage local --deployfrom your command line. This builds the Skill manifest (platforms/alexaSkill/skill.json) and language model (platforms/alexaSkill/models/en-US.json) from the information in the project configuration file (project.js) and the Jovo language model (models/en-US.json), and uses them to set up a new Skill 'Dice Tournament' in your Alexa developer console.
The result should look like this:
- Now copy the Skill ID from the console output and paste it as the value of the
SKILL_ID_STAGINGvariable in your.envfile. - Execute
jovo run --watchfrom your command line to activate your local endpoint
You can already test your Skill in the Alexa developer console, or on your device by saying "Alexa, open Dice Tournament"!
The remaining steps are optional, but recommended. Before we proceed to uploading the Skill to Lambda, let me explain the staging setup.
- Reviewing the staging setup
- This project comes with a setup for three stages, to propagate good practices and let you try out things both locally and on Lambda, because it might behave differently (e.g. in terms of latency)
* It would make sense for your live Skill to use a different database than the `local` and `staging` stages
- Uploading your Skill code to Lambda
- After having reviewed the staging setup, it's clear that uploading your Skill to Lambda is as easy as building and deploying the staging stage of your project.
- To be able to upload your code to Lambda with the Jovo CLI, make sure your AWS CLI profile is linked to your ASK CLI profile, and has Lambda upload privileges
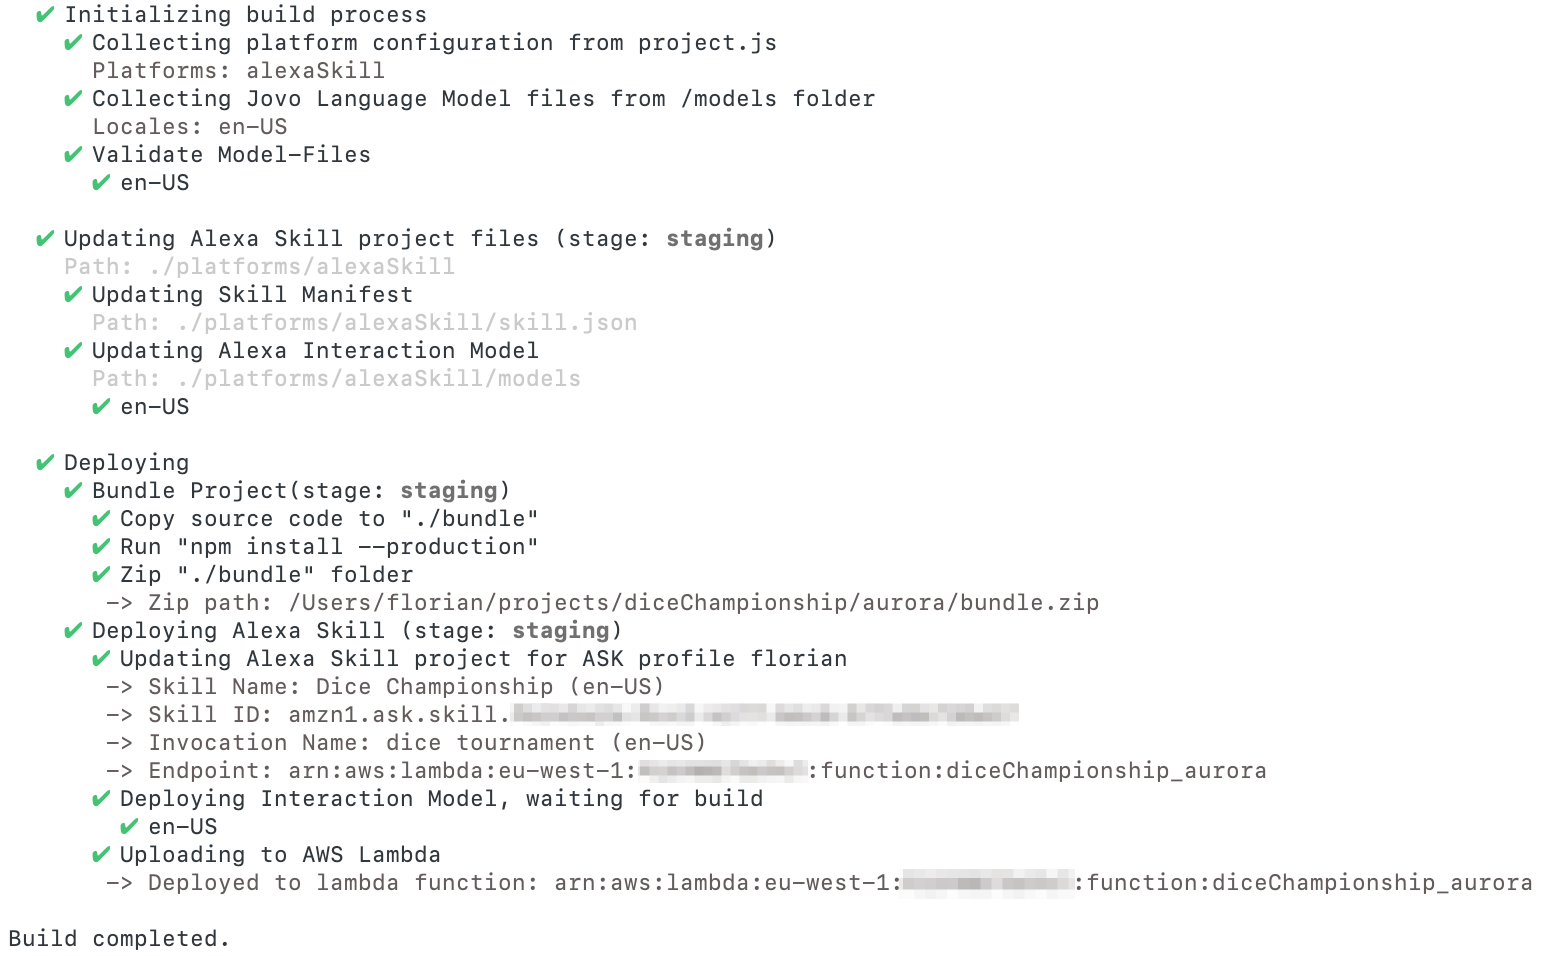
- Now all you need to do it execute
jovo build --stage staging --deploy - The result should look like this:
- Again, you can now test your Skill in the Alexa developer console just like after step 5, in the same Skill
- Preparing and deploying the live stage
- I'll cover this part more briefly than the ones before, because it's more about deployment than about getting this Skill to work
- First, you need a new Lambda function - Just set one up like in step 4 (with the same role, trigger and environment variables), and copy its ARN as the value of
LAMBDA_ARN_LIVEin your.envfile - If you want to use a different DynamoDB table for your live stage, you need to set one up (with the same hash key
id), paste its name into the environment variableDYNAMODB_TABLE_NAMEof your Lambda function, and accordingly expand your policydiceChampionship_policy's resource part - To set up the new Skill (using the new Lambda endoint, the invocation name 'dice championship', and an expanded version of the manifest including a different Skill icon), execute
jovo build --stage live --deploy. - After the first deployment, copy the new Skill's ID and paste it as the value of
SKILL_ID_LIVEin your.envfile
Before checking your leaderboard, it makes sense to play some sessions so it's already populated. What's the highest score you can roll? 🎰
Similar to step 2 of the setup, go to the RDS database overview, select your cluster, find the dropdown 'Actions' and select 'Query'.
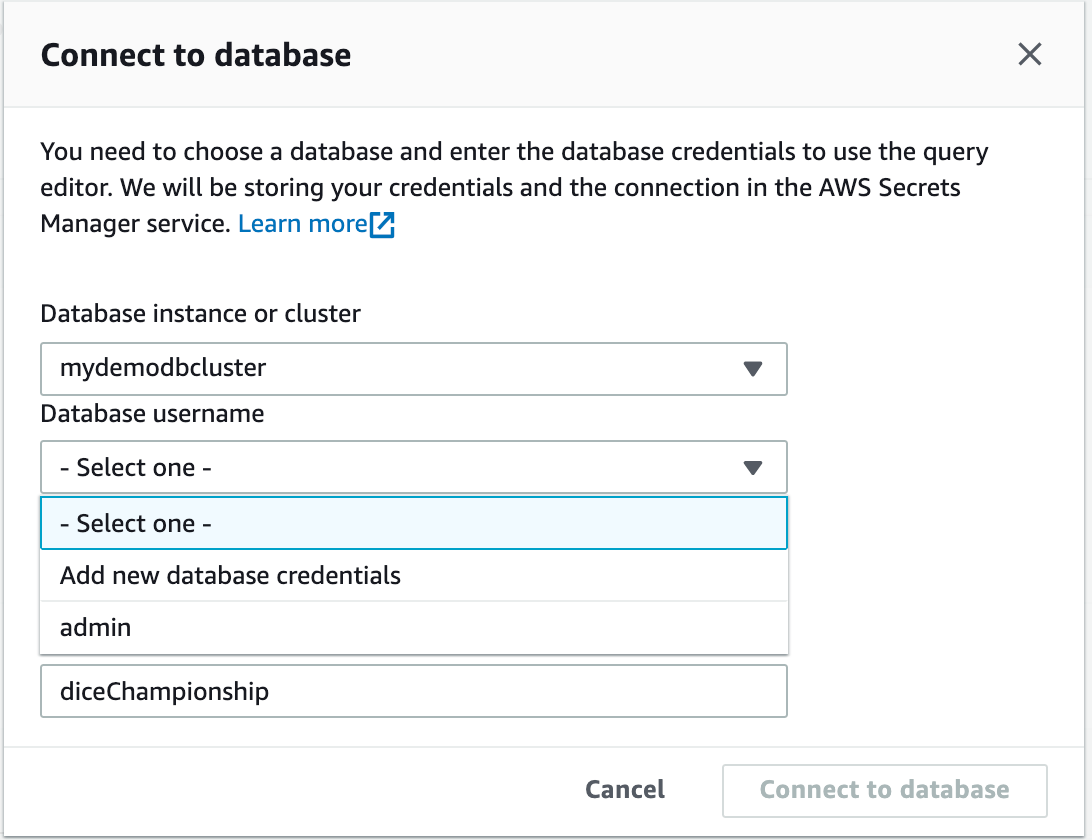
Your connection to the cluster might already be established, but if it isn't you will again see the following pop-up:
In this case, select the set of credentials you already established in step 2 ("admin" in the case of my screenshot), and directly connect to the "diceChampionship" database within the selected cluster.
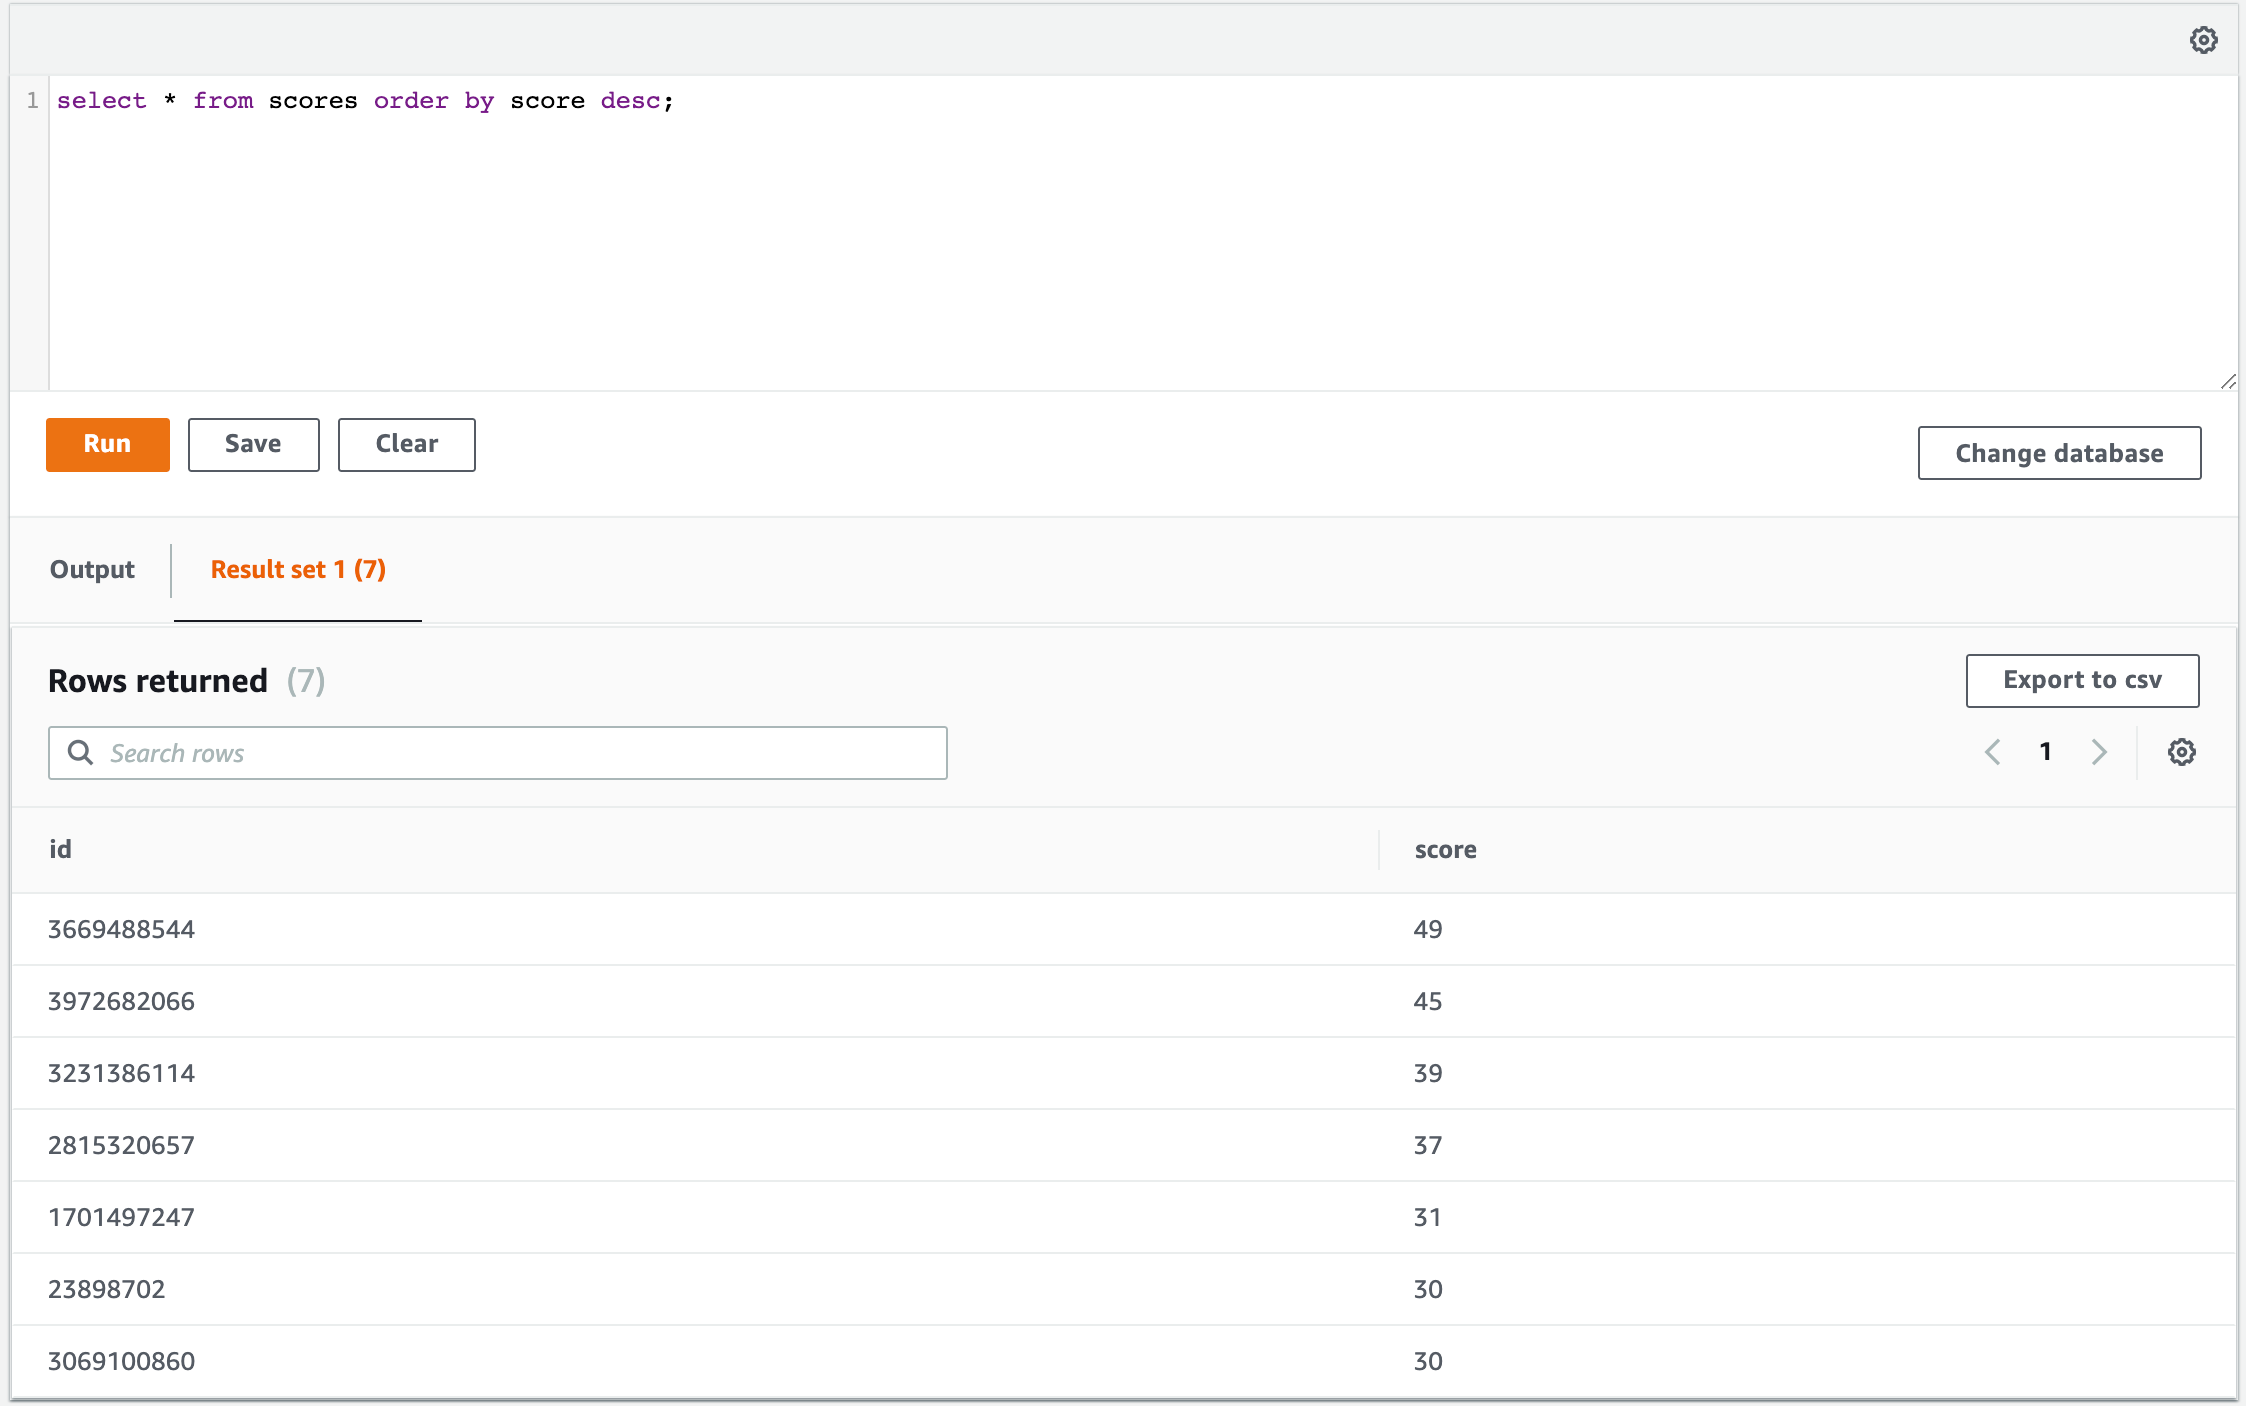
Now you should be in the RDS Query Editor, where you can enter MySQL statements like select * from scores order by score desc; and hit 'Run' to see the result. If you play some more and want to see the updated leaderboard, you need to click on 'Run' again to refresh the result:
I hope you find both this entire project and the individual variants interesting and valuable. Again, if you like this project and want to see it implementing your favorite platform, service or feature, please get in touch or start implementing right away.

