The Dice Championship project is about exploring how a simple voice app - Dice Championship - can be implemented and extended using different frameworks, platforms and services. It was initiated (and published to the Alexa Skill store) by me (Florian Hollandt), but contributions of ideas, implementations and improvements are very welcome. :)
This version of Dice Championship implements its leaderboard with Google Spreadsheets — pretty much a cloud-based version of an Excel file. While spreadsheets might sound like a weak implementation choice at first, they have benefits like being highly accessible to non-tech staff on collaborative projects.
There are two ways in which live data can be retrieved from Google Spreadsheets programmatically:
- Public access is to publish the spreadsheet to the web and to retrieve the data by making a
GETrequest with the URL, without need for authentication. However, this does not allow write access to the data. - Private access is to access the spreadsheet data via the Google Sheets API, without exposing it to public. This requires a service account with dedicated access to the spreadsheet, which is a bit less trivial to set up, but allows updating and adding data within the spreadsheet.
So, for this project a private spreadsheet is obviously the right choice, and below you'll find a detailled description how to set it all up. I additionally publish the spreadsheet to the web, so you can see the data in this leaderboard in real time here.
Here are some ways in which this implementation differs from the base version, which implements the leaderboard with a DynamoDB table:
| Base version | Google Spreadsheet version | |
|---|---|---|
| Services required | AWS DynamoDB | Google Cloud Spreadsheet API |
| Complexity of setup | Low | Moderate |
| Querying capabilities |
DynamoDB operations (put, get, scan, query etc) |
Custom oerations |
| Robustness | High (auto-scaling) |
Low (capacity limit)*
|
| Latency |
tbd**
|
tbd**
|
| Costs |
tbd**
|
tbd**
|
* The Google Spreadsheet API has a capacity limit of 100 requests per minute and user, after which it shuts down for some time!
** Stay tuned for future blog posts in which I plan to compare latency and costs for different leaderboard implementations!
The most labor-intensive part of the setup is to activate the Google Spreadsheeet API and create a service account (roughly the Google Cloud equivalent of a programmatic user in AWS). If you've done that once, connecting any other Google Spreadsheet to your voice app will be very easy.
Let's get started with this step-by-step guide! We're assuming that you already have a Google Cloud account and created a project (mine is named 'My Project' in the following screenshots).
- Setting up the project folder
- Clone this repository, run
npm install --saveand make a copy of.env.examplenamed.env. We'll use environment variables to set up all the required credentials.
- Clone this repository, run
- Activating the Google Spreadsheet API
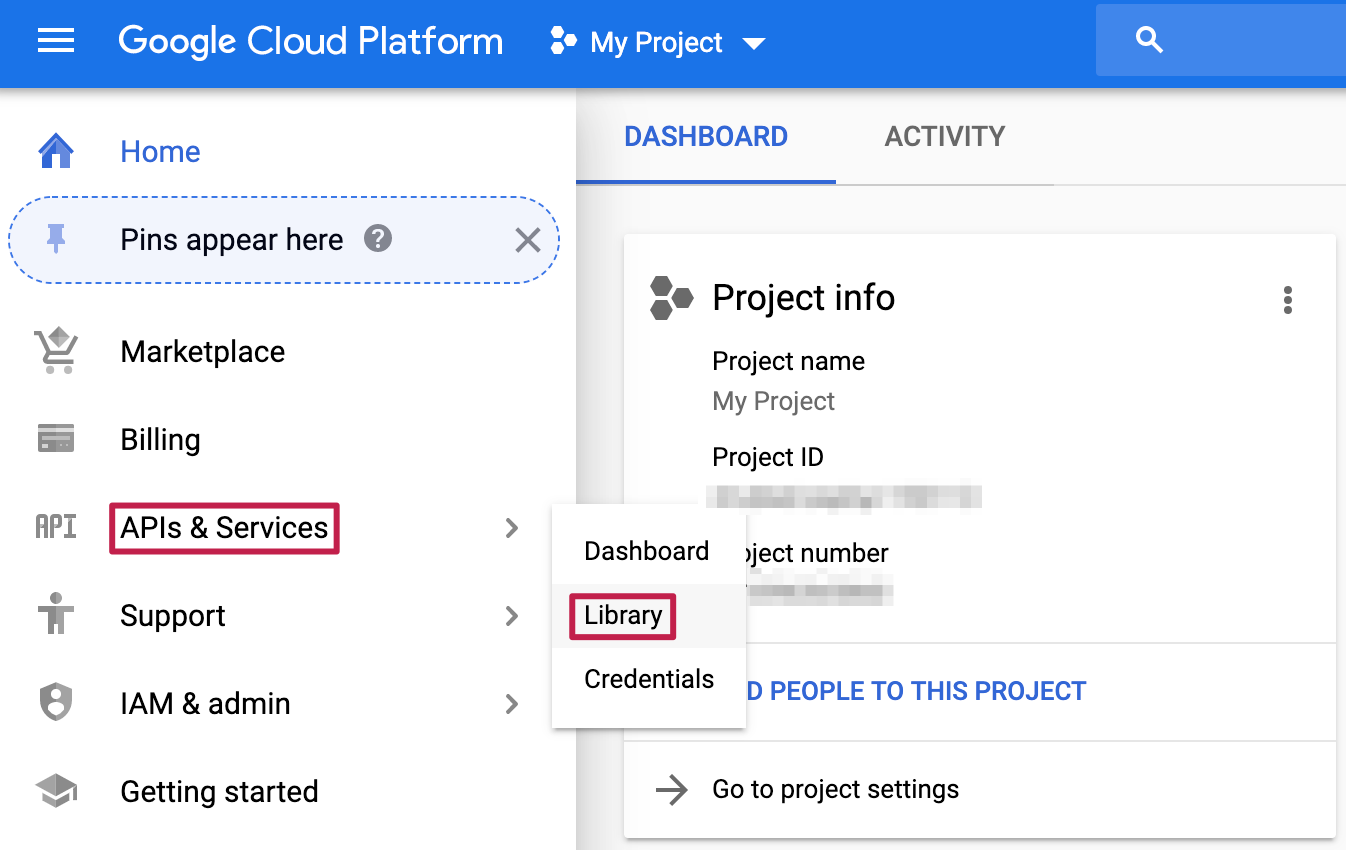
- Before you can use the Spreadsheet API to read from and write to public Spreadsheets, you need to activate it. From the Google Cloud console home, you can find the API Library by navigating to "APIs and Services > Library":
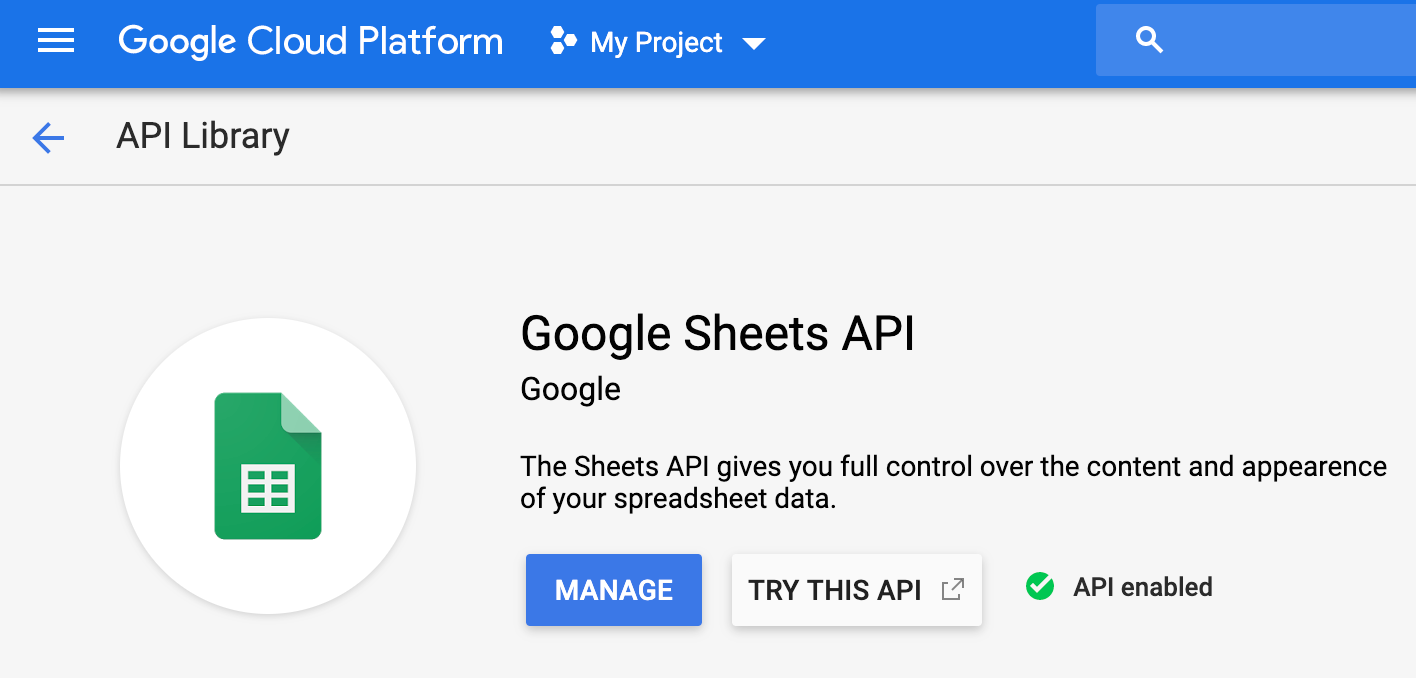
- At the API overview, don't get distracted by the wealth of services at your hand. Find the Google Sheets API, select it, and then enable it:
- Before you can use the Spreadsheet API to read from and write to public Spreadsheets, you need to activate it. From the Google Cloud console home, you can find the API Library by navigating to "APIs and Services > Library":
- Create a service account
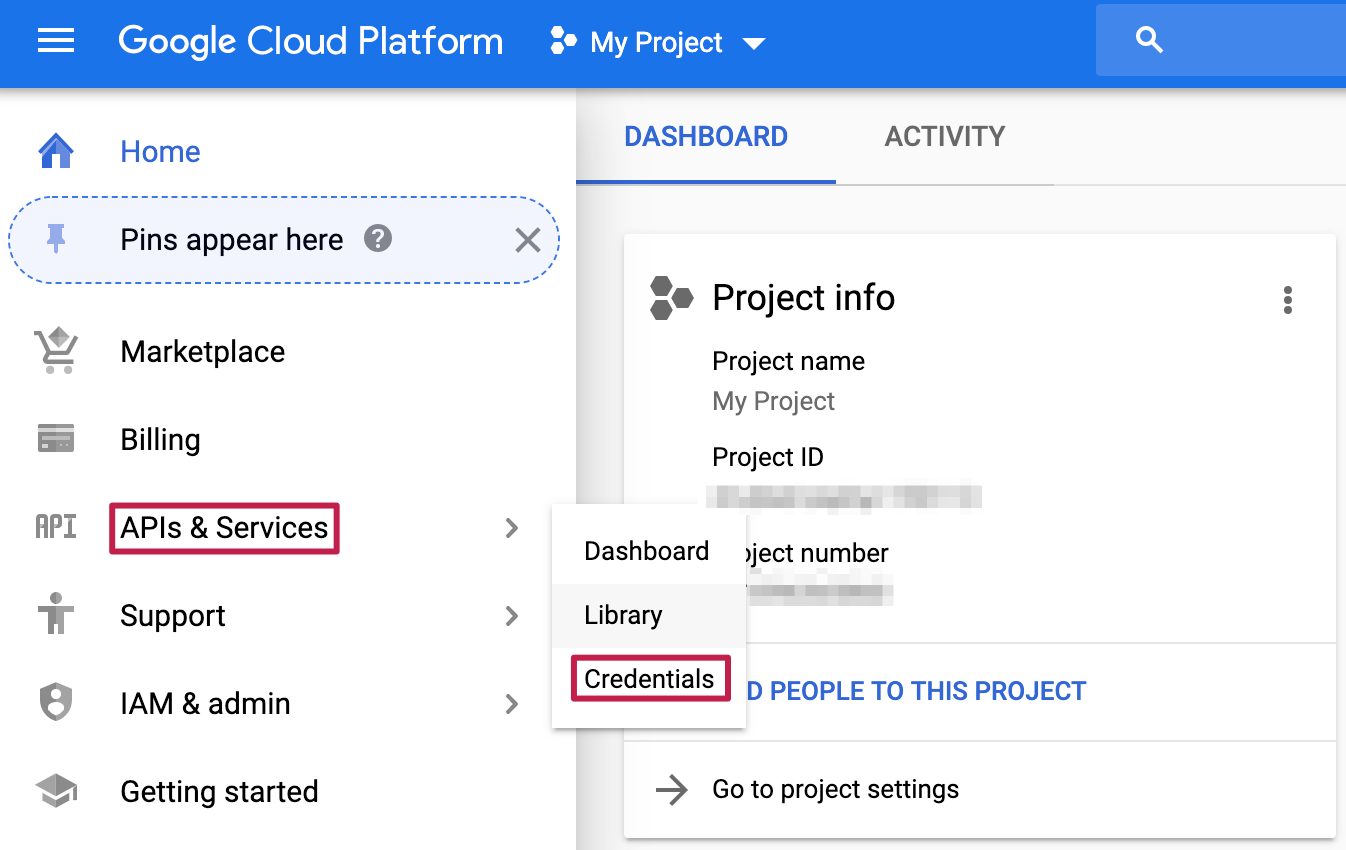
- Go back to the Google Cloud console home, and from there find the Credentials overview by navigating to "APIs and Services > Credentials":
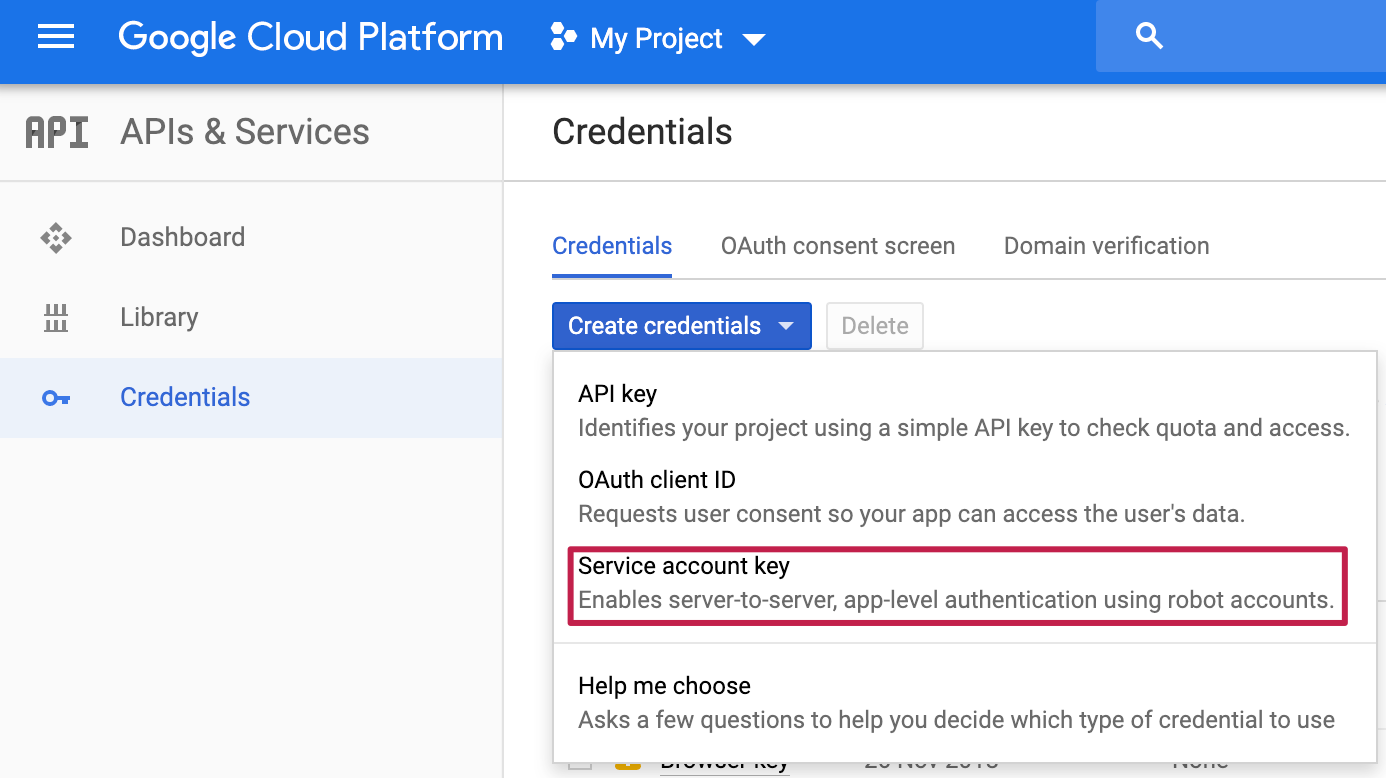
- Once there, find the "Create credentials" button, and select the "Service account key" option from the dropdown, and confirm:
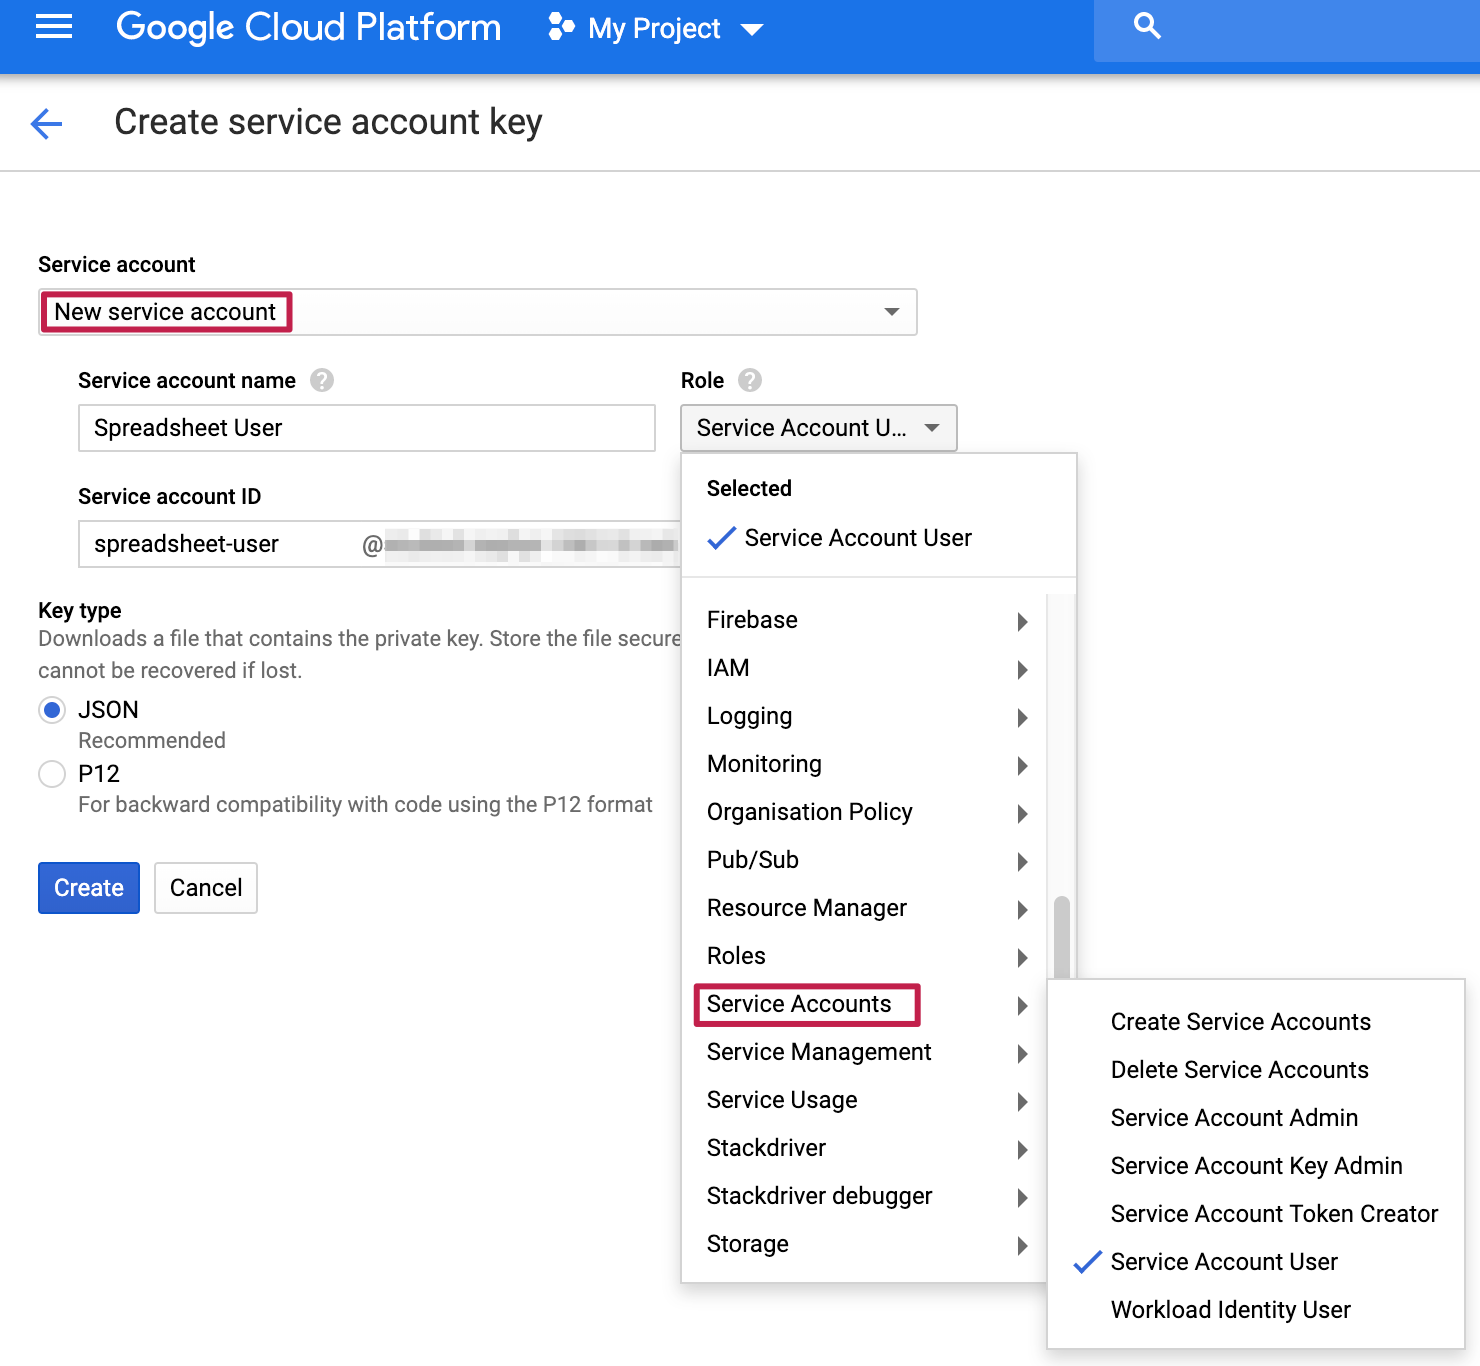
- In the "Create service account key" screen, select "New service account" from the dropdown
- Now select a name for your service account. In my example, it's "Spreadsheet User"
- At the role dropdown, select "Service Accounts > Service Account User"
- Make sure "JSON" is selected as the key type, and hit "Confirm":
- Go back to the Google Cloud console home, and from there find the Credentials overview by navigating to "APIs and Services > Credentials":
- Integrate the credentials file to your project folder
- After the previous step, a file with your new service account's credentials should have been automatically downloaded
- Rename the file to
credentials.jsonand place it in the foldersrc/spreadsheet/ - Open the credentials file with a text editor and take a look at it. The contents should look similar to that of the example file
credentials.example.json:
{

"type": "service_account",

"project_id": "my-project-123123",

"private_key_id": "0123456789abcdef0123456789abcdef012345678",

"private_key": "-----BEGIN PRIVATE KEY-----\n###KEY###\n-----END PRIVATE KEY-----\n",

"client_email": "spreadsheet-user@my-project-123123.iam.gserviceaccount.com",

"client_id": "012345678901234567890",

"auth_uri": "https://accounts.google.com/o/oauth2/auth",

"token_uri": "https://accounts.google.com/o/oauth2/token",

"auth_provider_x509_cert_url": "https://www.googleapis.com/oauth2/v1/certs",

"client_x509_cert_url": "https://www.googleapis.com/robot/v1/metadata/x509/spreadsheet-user%40my-project-123123.iam.gserviceaccount.com"

} - At this point, you can already copy the email adress from the value of the
client_emailfield, because you'll need it in the next step.
- Set up the Google Spreadsheet
- Open the Google Sheets homepage. Note that it doesn't need to be on the same Google account as the one your Google Cloud account is registered on
- Create a new spreadsheet. For me, that's done using the colored "+" icon on the bottom right.
- You should now have a new spreadsheet titled "Untitled spreadsheet". You'll need to change the name (e.g. to "Dice Championship - Leaderboard") before you can invite your service account to it.
- No the first thing to do while you still have your service account's email adress copied, is to click the "Share" button on the top right.
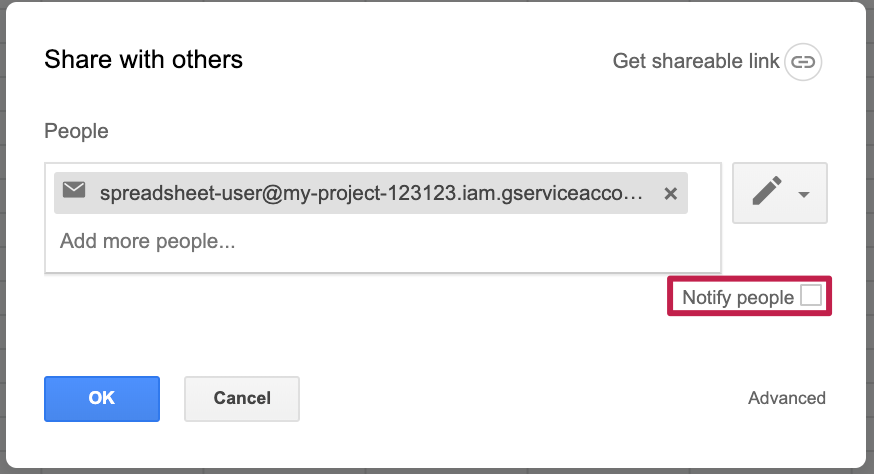
- Now paste your service account's email adress into the 'People' line. Uncheck the 'Notify people' box to avoid getting a bounce message for that adress:
- Now copy the spreadsheet ID from the URL into the value of
SPREADSHEET_IDin your.envfile:
- Now make sure that the name of the sheet agrees with what's configured in your
config.jsfile by renaming the sheet toscores:
- The last thing to do while you're here is to create a header row, but that's just an optional cosmetic thing. If you want to do so, I recommend 'id' in
A1and 'score' inB1.
- Creating your Lambda function
- Open the AWS Lambda functions overview in your selected region and hit Create function.
- Give your Lambda a Node 8.10 runtime (or above) and a regular Lambda execution role with access to Cloudwatch
- Add 'Alexa Skills Kit' as a trigger for your Lambda function. For now you can disable the restriction to a defined Skill ID.
- Copy the environment variable
SPREADSHEET_IDand and its value from your local.envfile to the Lambda's environment variable section. - Copy the Lambda's ARN into your local
.envfile, as the value ofLAMBDA_ARN_STAGING(more on staging below).
- Creating the Alexa Skill
- This is something you could do directly in the Alexa developer console, but here we're using the Jovo CLI because it's super convenient. So be sure to have the Jovo CLI installed and optimally your ASK CLI and AWS CLI profiles set up.
- Write the name of the ASK CLI profile you plan to use into your local
.envfile as e.g.ASK_PROFILE='default'. - Now execute
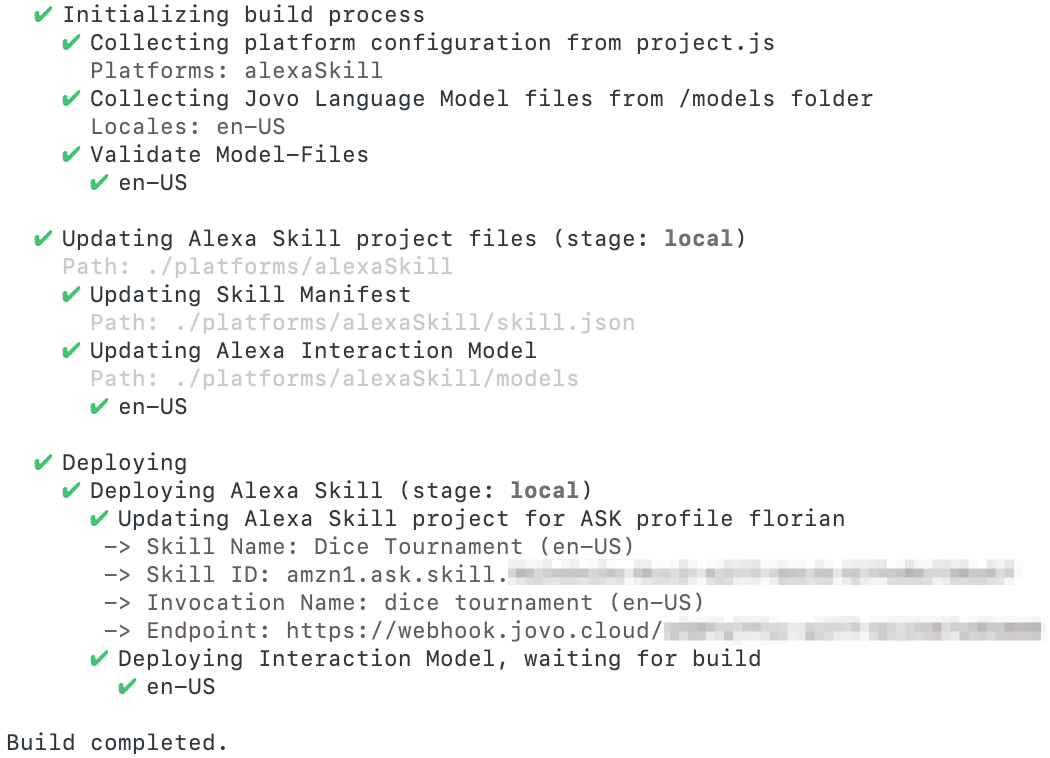
jovo build --stage local --deployfrom your command line. This builds the Skill manifest (platforms/alexaSkill/skill.json) and language model (platforms/alexaSkill/models/en-US.json) from the information in the project configuration file (project.js) and the Jovo language model (models/en-US.json), and uses them to set up a new Skill 'Dice Tournament' in your Alexa developer console.
The result should look like this:
- Now copy the Skill ID from the console output and paste it as the value of the
SKILL_ID_STAGINGvariable in your.envfile. - Execute
jovo run --watchfrom your command line to activate your local endpoint
You can already test your Skill in the Alexa developer console, or on your device by saying "Alexa, open Dice Tournament"!
The remaining steps are optional, but recommended. Before we proceed to uploading the Skill to Lambda, let me explain the staging setup.
- Reviewing the staging setup
- This project comes with a setup for three stages, to propagate good practices and let you try out things both locally and on Lambda, because it might behave differently (e.g. in terms of latency)
* It would make sense for your live Skill to use a different database than the `local` and `staging` stages
- Uploading your Skill code to Lambda
- After having reviewed the staging setup, it's clear that uploading your Skill to Lambda is as easy as building and deploying the staging stage of your project.
- To be able to upload your code to Lambda with the Jovo CLI, make sure your AWS CLI profile is linked to your ASK CLI profile, and has Lambda upload privileges
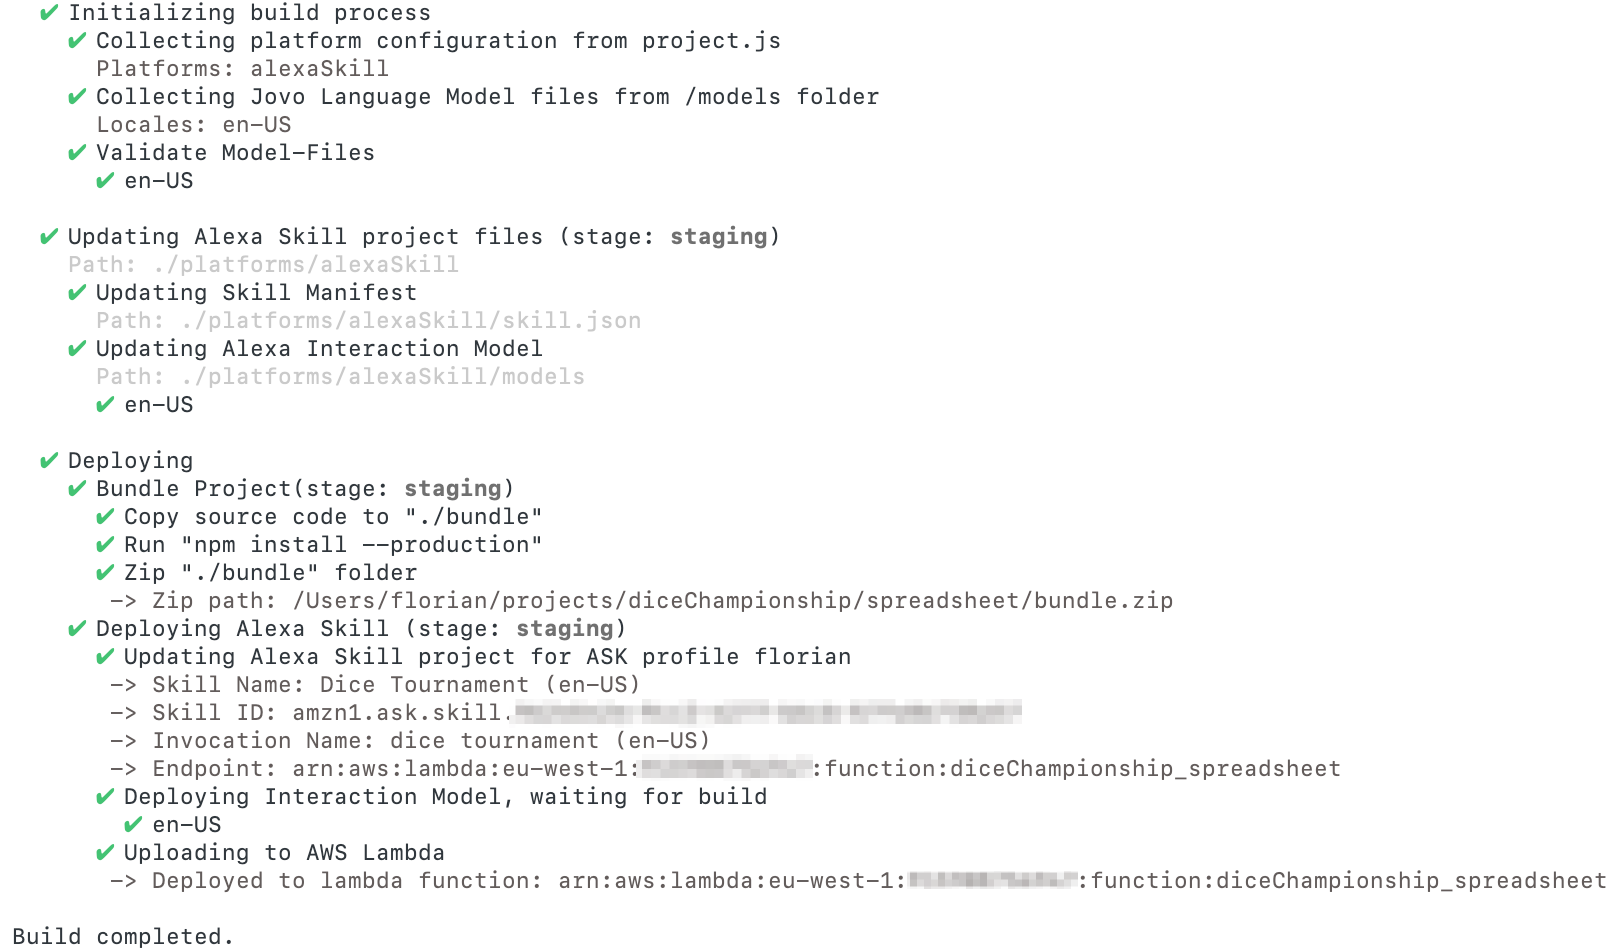
- Now all you need to do it execute
jovo build --stage staging --deploy - The result should look like this:
- Again, you can now test your Skill in the Alexa developer console just like after step 5, in the same Skill
- Preparing and deploying the live stage
- I'll cover this part more briefly than the ones before, because it's more about deployment than about getting this Skill to work
- First, you need a new Lambda function - Just set one up like in step 4 (with the same role, trigger and environment variables), and copy its ARN as the value of
LAMBDA_ARN_LIVEin your.envfile - If you want to use a different spreadsheet for your live stage, you need to set a new one up by repeating step 6, and pasting its ID into the environment variable
SPREADSHEET_IDof your Lambda function - To set up the new Skill (using the new Lambda endoint, the invocation name 'dice championship', and an expanded version of the manifest including a different Skill icon), execute
jovo build --stage live --deploy. - After the first deployment, copy the new Skill's ID and paste it as the value of
SKILL_ID_LIVEin your.envfile
The beauty of this Spreadsheet version is that you don't need to query a database to investigate your leaderboard, but that you can watch it all happen in real time. So my recommendation is to simply play a couple of sessions while having your Spreadsheet open and watching the numbers in real time.
I hope you find both this entire project and the individual variants interesting and valuable. Again, if you like this project and want to see it implementing your favorite platform, service or feature, please get in touch or start implementing right away.

