![]()
A powerful WordPress plugin for the ForVoyez platform that automatically generates SEO-optimized alt text for images.
- Description
- Features
- Requirements
- Installation
- Configuration
- Usage
- Development
- BrowserSync Configuration
ForVoyez Auto Alt Text for Images is a WordPress plugin that leverages AI technology to automatically generate high-quality, SEO-friendly alt text for images in your content. This plugin enhances your website's accessibility and search engine optimization effortlessly.
- 🤖 AI-powered alt text generation
- 🖼️ Bulk processing for existing images
- 🔄 Automatic processing for new uploads
- 🎨 Customizable output formats
- 🌐 Multi-language support
- 🧰 User-friendly WordPress admin interface
- WordPress 5.0 or higher
- PHP 8.2 or higher
- Composer
- Node.js and npm
-
Download the plugin zip file or clone the repository:
git clone https://github.com/forvoyez/auto-alt-text-for-images.git
-
Navigate to the plugin directory:
cd auto-alt-text-for-images -
Install PHP dependencies:
composer install
-
Install Node.js dependencies:
npm install
-
Activate the plugin through the WordPress admin interface.
- Go to the ForVoyez Auto Alt Text settings page in your WordPress admin area.
- Enter your ForVoyez API key.
- Configure any additional settings according to your preferences.
After installation and configuration:
- The plugin will automatically generate alt text for new image uploads.
- To process existing images:
- Go to Media Library
- Select the images you want to process
- Choose "Generate Alt Text" from the bulk actions dropdown
- You can manually edit any generated alt text as needed.
To use BrowserSync with your WordPlate project:
-
Create a
bs-config.cjsfile in the project root:module.exports = { proxy: 'localhost:8000', // Replace with your PHP server port files: [ 'public/**/*.php', 'resources/**/*.php', 'public/**/*.css', 'public/**/*.js', ], notify: false, }
-
Start the PHP server:
php -S localhost:8000 -t public
-
Start BrowserSync:
browser-sync start --config bs-config.cjs
BrowserSync will now monitor specified files and auto-reload your browser on changes.
├── assets/
├── includes/
├── templates/
├── tests/
├── bs-config.cjs
├── composer.json
├── package.json
├── auto-alt-text-for-images.php
├── README.md
└── ...
If you want to know what is going on, install and run the plugin. Then, in the code, add the following line:
error_log(print_r($variable, true));This will print the variable to the PHP error log. You can find the log file location in your PHP configuration.
search for error_log in your php.ini file.
for linux it is usually /var/log/php/php_error.log
for windows it is usually C:\php\logs\php_error.log or C:\wamp64\logs\php_error.log
you can also use phpinfo() to find the log file location.
then to stream the log file to your terminal, use the following command:
tail -f /var/log/php/php_error.logand for windows :
Get-Content C:\php\logs\php_error.log -Wait -Tail 10-
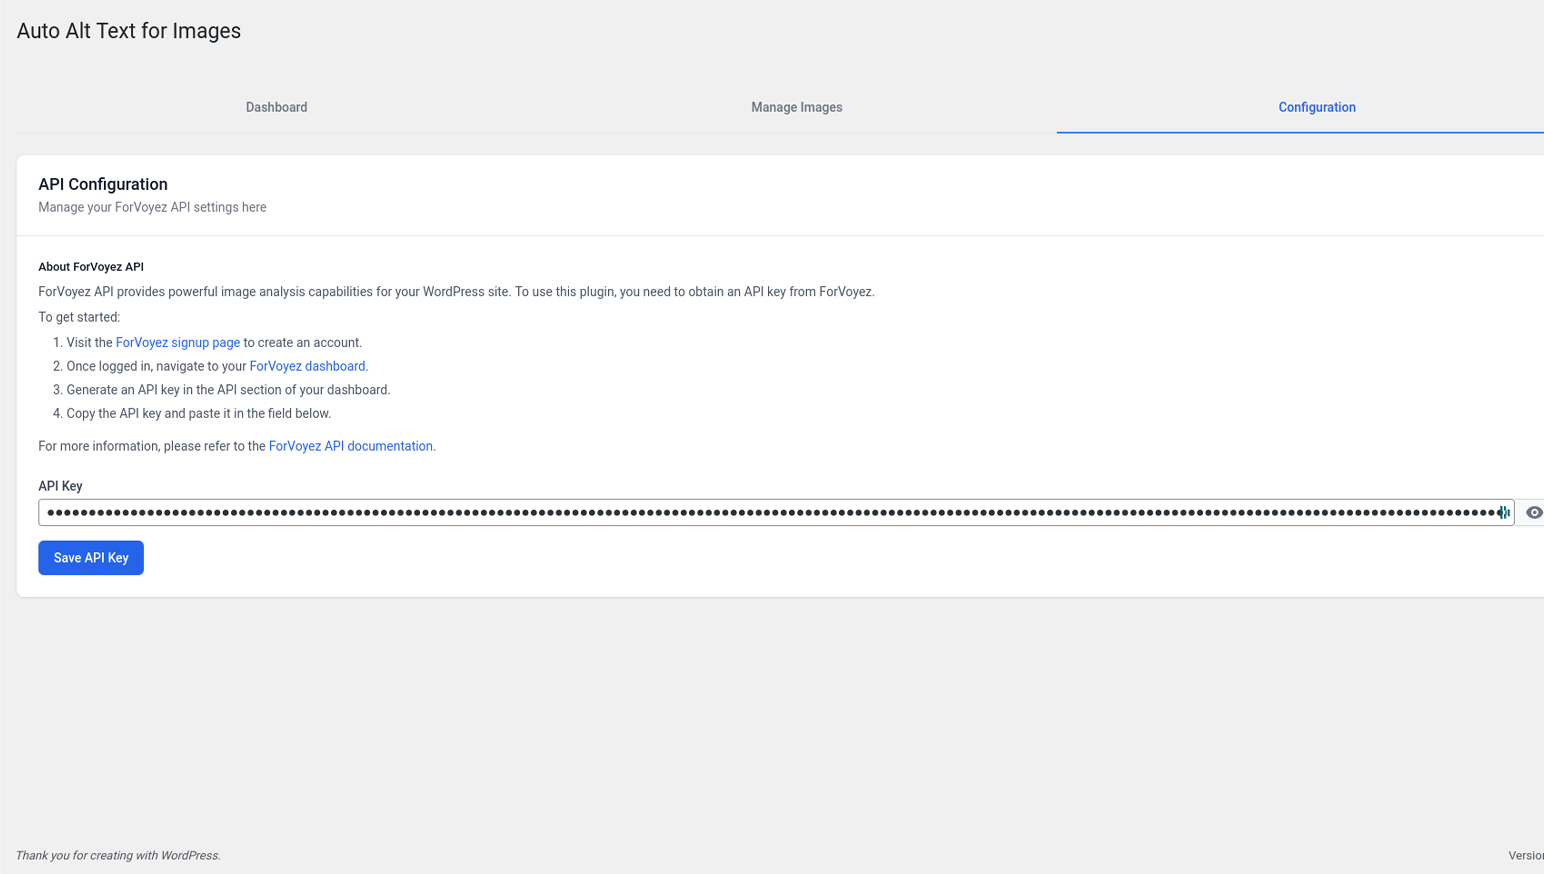
API Configuration
 The plugin's configuration interface allows easy setup of your ForVoyez API key. This page provides step-by-step instructions on how to obtain and configure your API key to start using the plugin.
 -
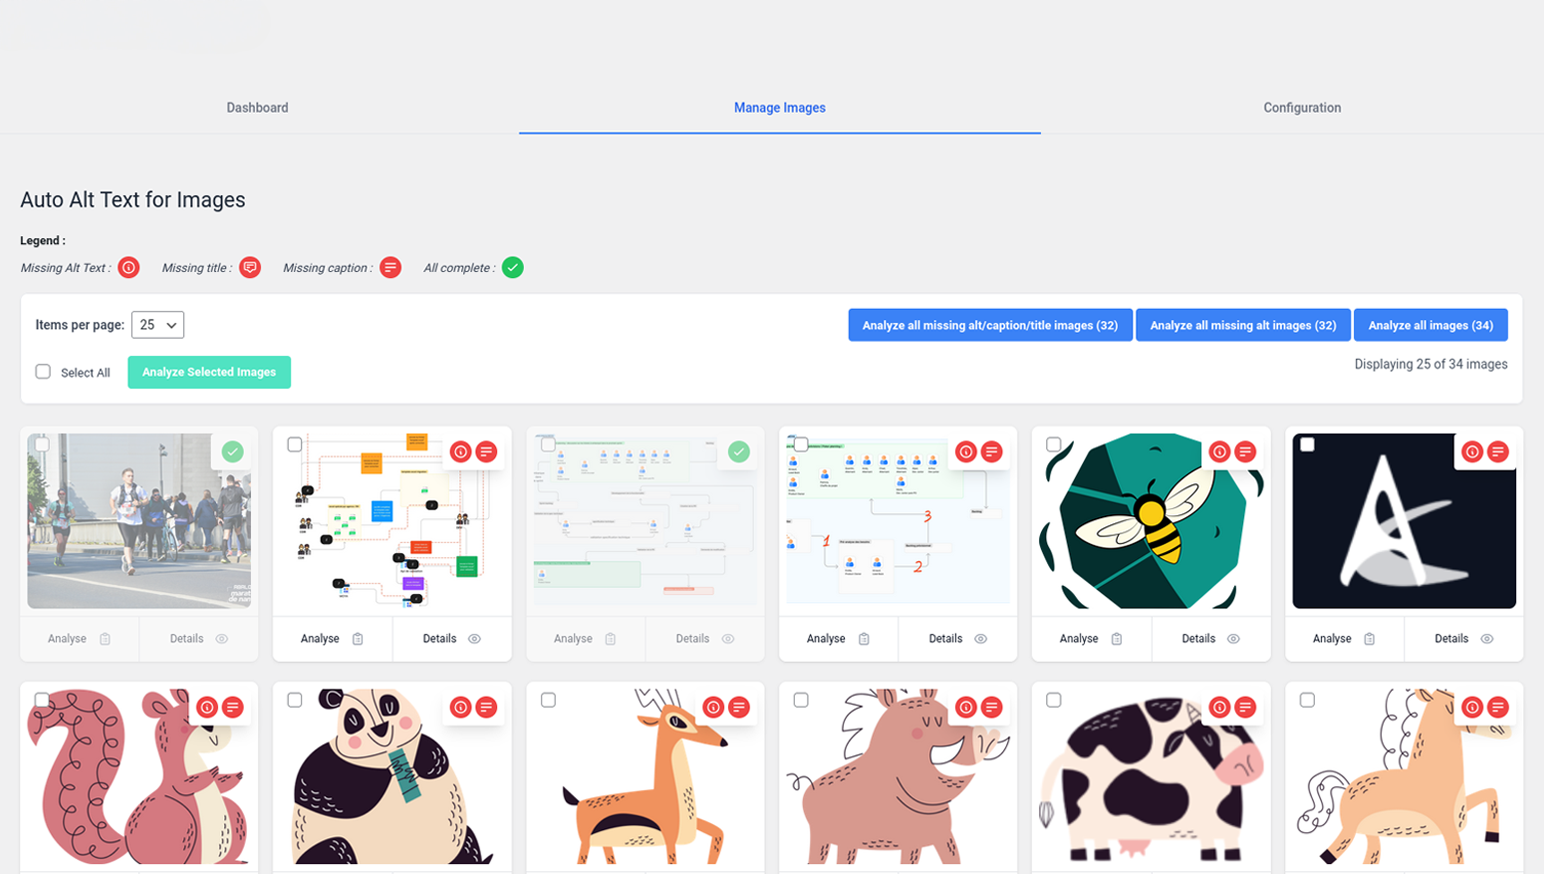
Image Management Interface
 The main image management dashboard of the plugin. It displays a grid view of your WordPress media library with visual indicators for missing metadata. Users can easily select and analyze images individually or in bulk.
 -
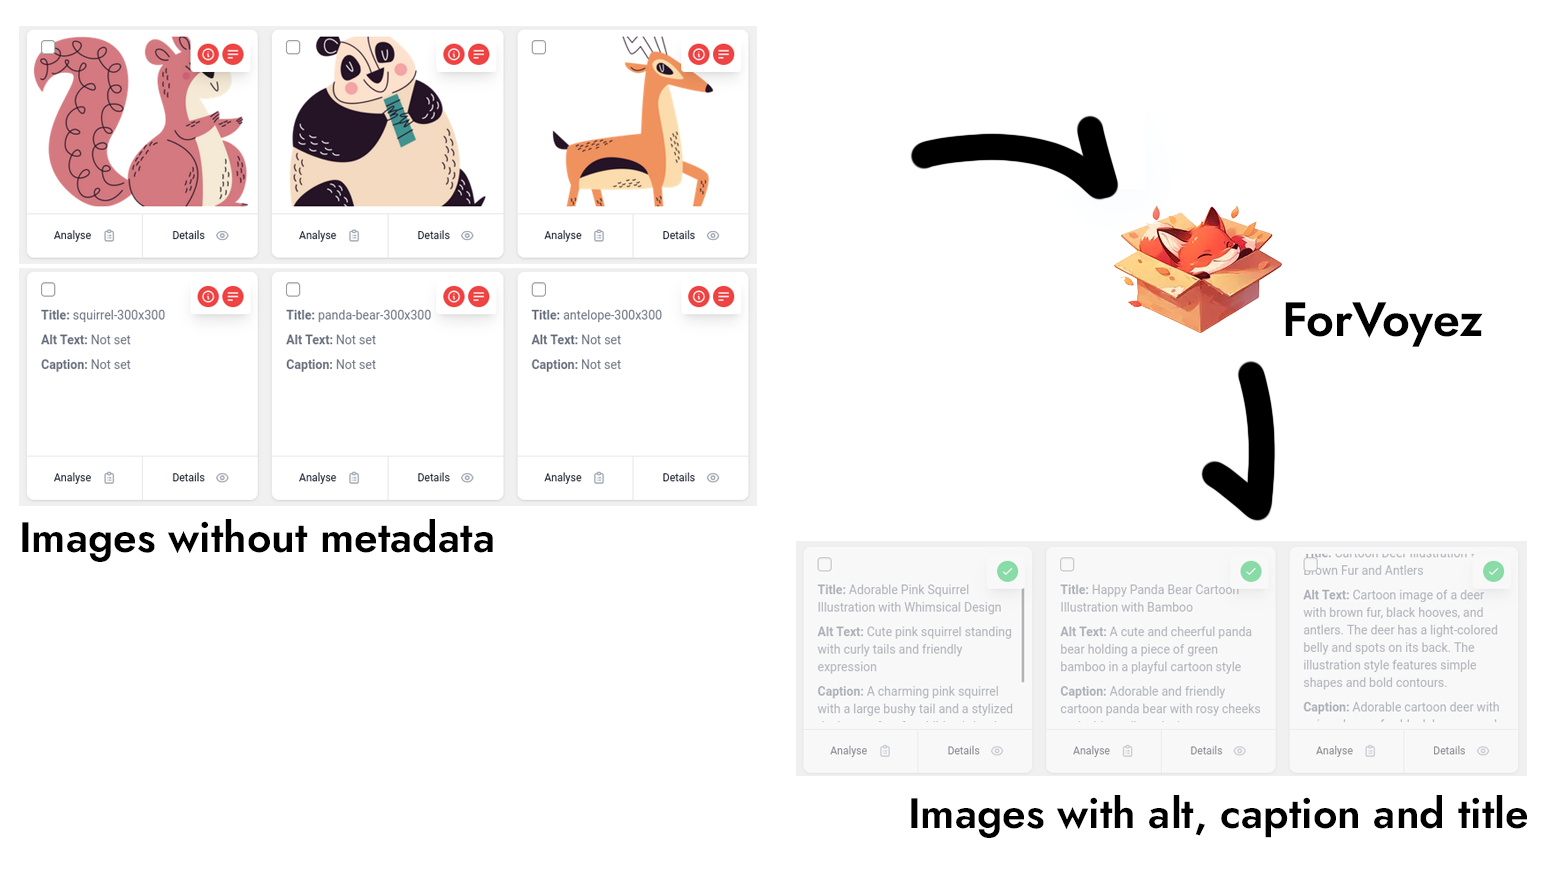
Results Example
 This screenshot showcases the plugin's ability to generate high-quality alt text and meta descriptions. It displays examples of automatically generated titles, alt texts, and captions for a variety of image types, demonstrating the AI's versatility and accuracy.


Certainly. Here's the README section in English:
To run the tests for this plugin, you'll need a MySQL/MariaDB database with a root user having all privileges. Here are the steps to set up your environment:
- MySQL or MariaDB installed
- Composer
- PHP 7.4 or higher
-
Log in to MySQL as root:
sudo mysql -u root -pEnter the root password if prompted.
-
Grant all privileges to the root user:
GRANT ALL PRIVILEGES ON *.* TO 'root'@'localhost' WITH GRANT OPTION;
FLUSH PRIVILEGES;
-
If the above command fails, follow these troubleshooting steps:
a. Stop the MariaDB service:
sudo systemctl stop mariadbb. Ensure no MySQL processes are running:
ps aux | grep mysqlIf processes are found, stop them:
sudo kill -9 [PID]c. Start MySQL in safe mode:
sudo mysqld_safe --skip-grant-tables --skip-networking &d. Repair the database tables:
sudo mysqlcheck -u root --repair --all-databasesor
sudo mysqlcheck -u root --skip-password --repair --all-databasese. Log in to MySQL and reset the root password:
mysql -u rootFLUSH PRIVILEGES; USE mysql; ALTER USER 'root'@'localhost' IDENTIFIED BY 'root'; FLUSH PRIVILEGES; EXIT;
f. Restart MySQL normally and grant privileges:
sudo systemctl start mariadb
mysql -u root -p
GRANT ALL PRIVILEGES ON *.* TO 'root'@'localhost' WITH GRANT OPTION; FLUSH PRIVILEGES;
Once the database is configured, you can run the install db tests with the following command:
composer run install-wp-tests
This command will install the WordPress test environment and run the plugin's unit tests.
If you encounter any issues while running the tests, make sure the database connection information in the bin/install-wp-tests.sh file is correct.
To run the tests, use the following command:
./vendor/bin/phpunit [file path].php
Made with ❤️ by ForVoyez