Modular course teaching the use of napari for image visualisation and analysis
- Request a CAMP desktop session
- Start the CAMP desktop session
- Open xterm terminal
- run the following code in the terminal:
ml purge
ml Anaconda3
conda create -y -n napari-env python=3.8
conda activate napari-env
conda install napari
ml VirtualGL
vglrun napari
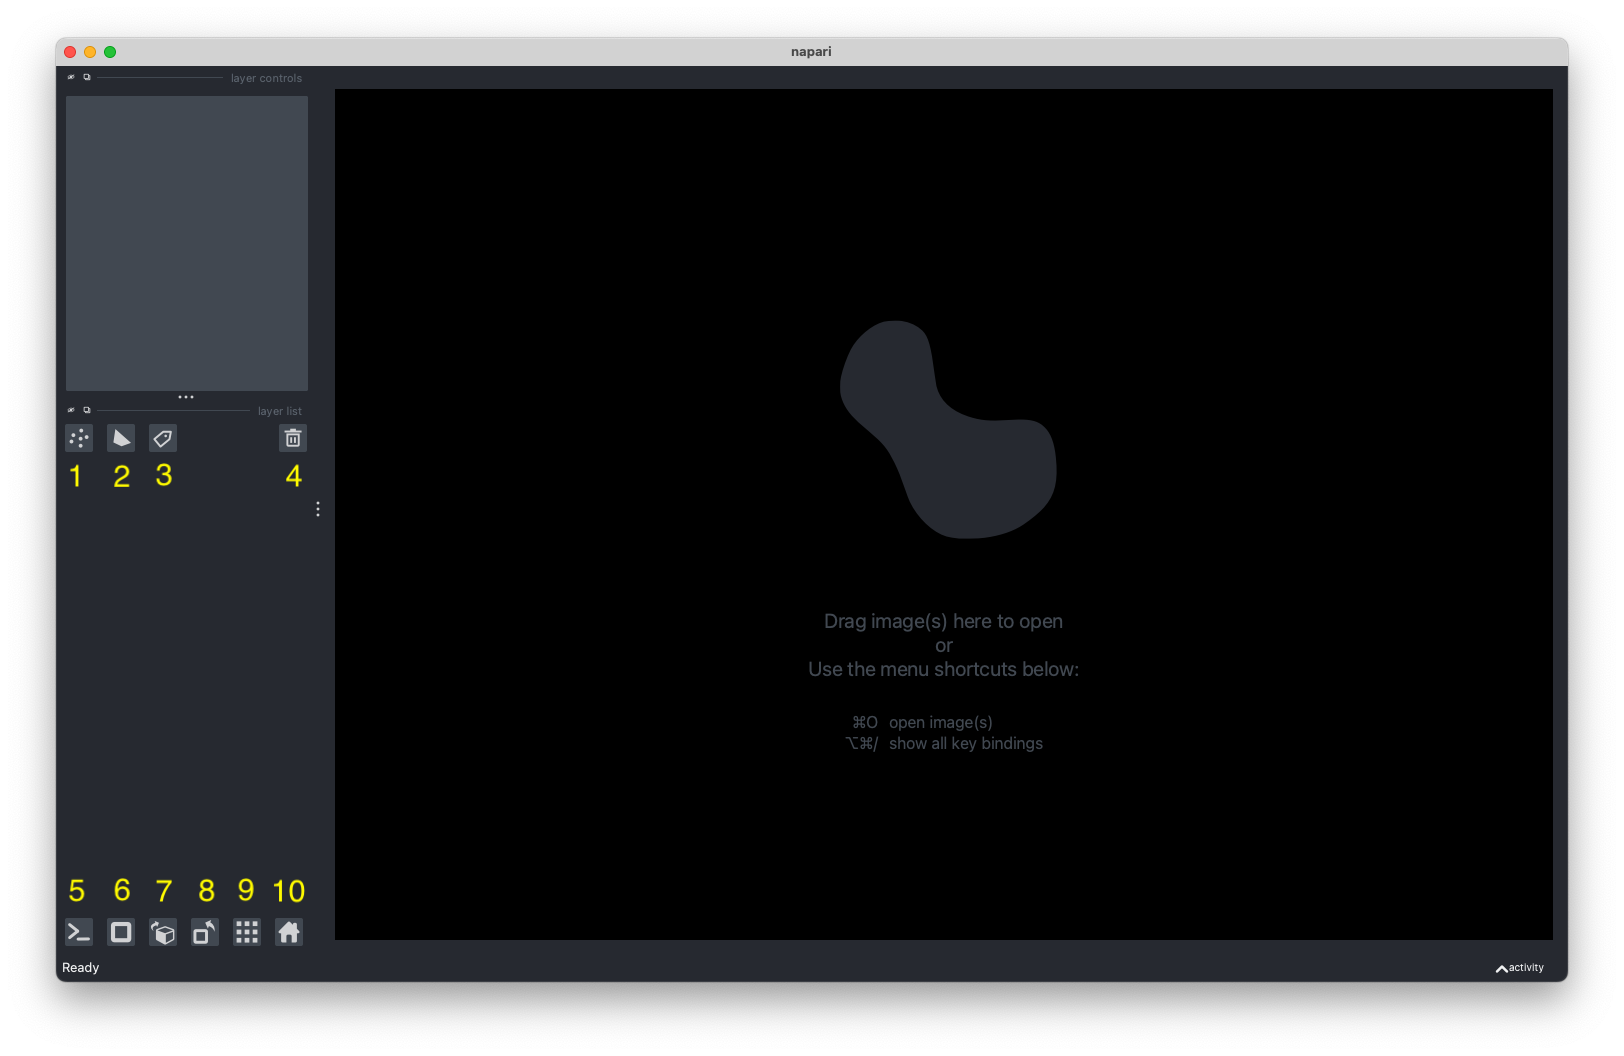
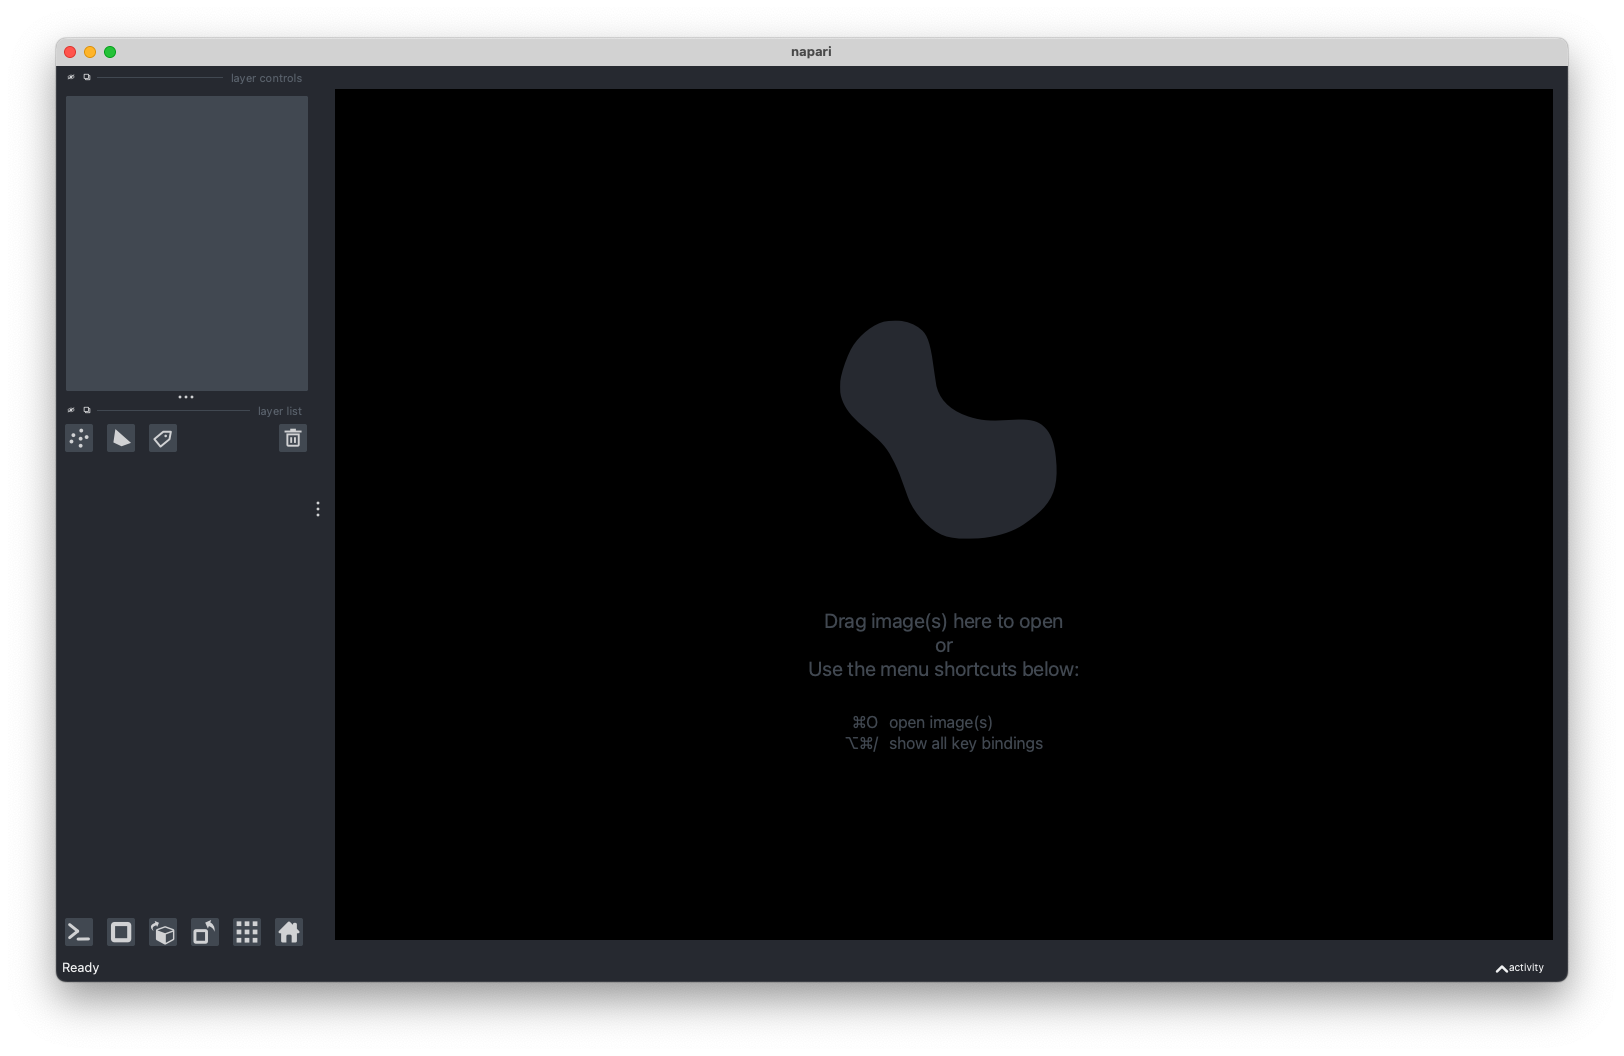
After running the previous code you should then see the following blank interface:
The following will go into more detail about each element of the interface.

- New Points Layer - This will create a new
napariPointsand add it to theViewer. ThePointslayer allows you to display anNxDarray ofNpoints inDcoordinates. More info here. - New Shape Layer - This will create a new
napariShapesand add it to theViewer. TheShapeslayer allows you to display a list ofNxDarrays, where each array corresponds to one shape. More info here. - New Labels Layer - This will create a new
napariLabelslayer and add it to theViewer. TheLabelslayer allows you to take an array of integers and display each integer as a different random color with the background color 0 rendered as transparent. More info here. - Delete Selected Layer - This will delete a selected layer from the
Viewer. - Show/Hide IPython Console - The built-in IPython console will allow you to programmatically interact with the viewer.
- Toggle ndisplay - This will change the
Viewerto view any visible layers in three-dimensions. - Change order of the visible axis - This will transpose a layer across all of its axis.
- Transpose order of the last two visible axis - This will transpose a layer only across its last two visible axis.
- Toggle grid mode - This will change the layout of the
Viewerto show all layers in a grid layout. - Reset viewer to original state - This will reset the
Viewerto show a layer in its original state.
Inorder to launch napari from a python script, within your script you must
import napari , and create the Viewer.
In the following code we will launch napari and load an image from
skimage.data.
from skimage import data
import napari

# store the astronaut dataset from skimage
img = data.astronaut()

# create a Viewer and add an image
viewer = napari.view_image(img)

# start the event loop and show the viewer
napari.run()
The napari interface will then open with the astronaut image loaded:
To open an image stored locally in napari using a python script you
must first read in your image, add it to the Viewer and then run napari.
To read in an image we can use the skimage.io imread function.
Like before
from skimage.io import imread
import napari

# reading image from path
img = imread("/path/to/image")

viewer = napari.view_image(img)

napari.run()OME-Zarr is a "Next Generation" file format (NGFF) which stores images as a hierarchy with multiple levels of resolutions and optionally associated labels.
.                             # Root folder, potentially in S3,
│                             # with a flat list of images by image ID.
│
├── 123.zarr                  # One image (id=123) converted to Zarr.
│
└── 456.zarr                  # Another image (id=456) converted to Zarr.
    │
    ├── .zgroup               # Each image is a Zarr group, or a folder, of other groups and arrays.
    ├── .zattrs               # Group level attributes are stored in the .zattrs file and include
    │                         # "multiscales" and "omero" (see below). In addition, the group level attributes
    │                         # must also contain "_ARRAY_DIMENSIONS" if this group directly contains multi-scale arrays.
    │
    ├── 0                     # Each multiscale level is stored as a separate Zarr array,
    │   ...                   # which is a folder containing chunk files which compose the array.
    ├── n                     # The name of the array is arbitrary with the ordering defined by
        │                     # by the "multiscales" metadata, but is often a sequence starting at 0.
        │
        ├── .zarray           # All image arrays must be up to 5-dimensional
        │                     # with the axis of type time before type channel, before spatial axes.
        │
        └─ t                  # Chunks are stored with the nested directory layout.
           └─ c               # All but the last chunk element are stored as directories.
              └─ z            # The terminal chunk is a file. Together the directory and file names
                 └─ y         # provide the "chunk coordinate" (t, c, z, y, x), where the maximum coordinate
                    └─ x      # will be dimension_size / chunk_size.
We can use the plugin napari-ome-zarr either in the command line from on the napari interface to open OME-Zarr files.
To do this from the command line open the terminal.
Activate the napari conda environment using the following command:
conda activate napari-env
Now the conda environment is active we can now open napari and the local OME-Zarr file using the following command:
napari --plugin napari-ome-zarr "~/ome_zarr_data/xyzct_8bit__mitosis.zarr"
As well as being able to open OME-Zarr files stored locally we can also open OME-Zarr files that are stored remotely.
This can be done once again by using the terminal.
We again activate the napari conda environment using the following command:
conda activate napari-env
Now the conda environment is activated we like before type in the napari and --plugin-ome-zarr but this time we can
add the link to the remotely stored OME-Zarr file like so:
napari --plugin napari-ome-zarr "https://s3.embl.de/ome-zarr-course/ome_zarr_data/xyzct_8bit__mitosis.zarr"
Using napari-ome-zarr we are even able to open files as large as 8 Terabytes in size as shown in the following:
napari --plugin napari-ome-zarr "https://s3.embl.de/i2k-2020/platy-raw.ome.zarr"
!!! WARNING !!!
If you attempt to zoom in or out of the image you may experience some lag or even napari crashing. The reason for this is that when zooming in your increasing the resolution of the image and by extension loading more and more data to your RAM. If the amount of data exceed the capacity of your RAM this will cause your napari to automatically shut down.

