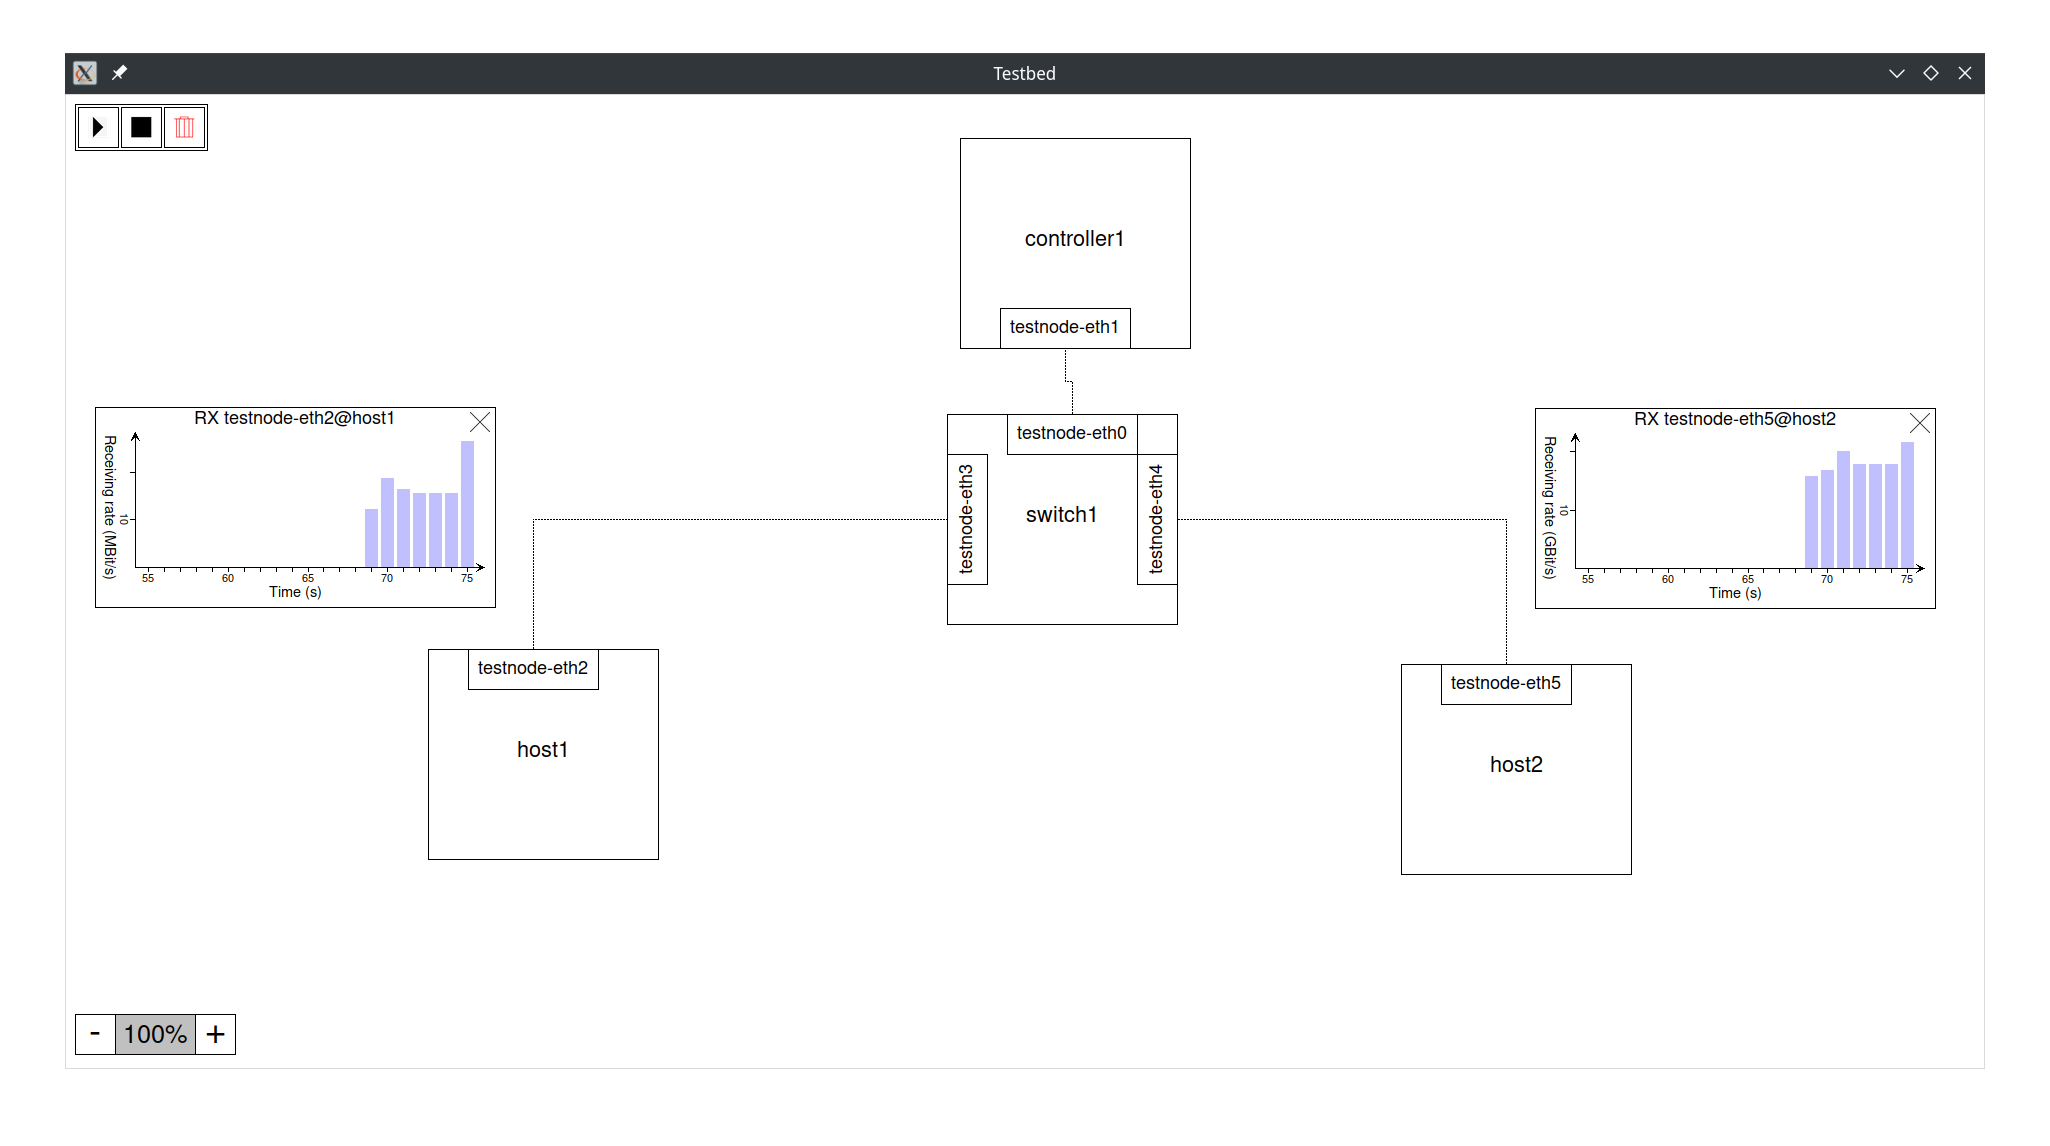
A distributed network testbed featuring ovs, ryu and other hosts in a cluster of lxc enabled hosts. Focus is on extensibility for the future, option for offline deployment and online-mode (as in mininet/distrinet).
- Linux with pacman or apt. (Installation can still be performed manually for other package managers, if required.)
- Enough system resources to host lxc containers.
- Node: A physical computation system that executes services
- Service: A service running on a node
Clone this repository and run the interactive install script:
sudo ./setup_all.shThis needs to be performed on any node participating in either bootstrapping or deploying services.
To remove all components again, run the uninstall script accordingly:
sudo ./uninstall_all.shTo get started, have a look at the examples. Ready to deploy your first testbed? Let us generate the topology description (intermediate representation) first. The general pipeline of the testbed is as follows:
Python topology script -> Intermediate representation (json) -> Deployment/Export
First, we change workdir to the testbed folder within this repo.
cd testbedFrom there, we can now generate the intermediate representation from one of the examples (in the examples we do not need the optional args):
./generate_topology.sh ../examples/simple_switch.py [topology args]Now we have multiple options to deploy the testbed on our local node. If you want to deploy on multiple nodes or another node, you will need to edit the python script or choose offline deployment.
To export via SSH you need to be able to establish SSH connections to all nodes that participate in your testbed. You need to setup an ssh daemon on every node and launch a local ssh agent that authenticates you.
To prepare localhost for ssh as required by most examples one typically has to run:
ssh-keygen #Save somewhere
cat <PATH_TO_YOUR_PUBKEY> >> /root/.ssh/authorized_keys #You might need to create /root/.ssh before
systemctl start sshd
# The following commands have to be run in every shell you use the testbed from
eval $(ssh-agent)
ssh-add <PATH_TO_YOUR_PRIVATE_KEY>To export/launch via console, use the remote_topology.sh script.
To run a command on a remote service, use the execute_command.sh script.
For our example, we can deploy by simply running:
./remote_topology.sh start_allUsage for remote_topology.sh:
./remote_topology.sh <start_all|stop_all|destroy_all>
./remote_topology.sh <start|stop|destroy> <nodes|services>
./remote_topology.sh ping <service1> <service2[:intf]>
./remote_topology.sh iperf <service1> <service2[:intf]> [port] [interval] [time] [<client options> [| <server options>]]
./remote_topology.sh ifstat <service|node> <intf>
./remote_topology.sh <up|down> <service|node> <intf>
./remote_topology.sh setqdisc <service|node> <intf> [<delay(ms)> [<delay-variation(ms)> [<delay-correlation(0;1)> [<loss(0;1)> [<loss-correlation(0;1)>]]]]]
Nodes and services can be prefixed with \"node:\" or \"service:\" to resolve ambiguity."
Usage for execute_command.sh:
./execute_command.sh <service_name> <cmd> [args]To export/launch the topology via a graphical user interface and get a live overview over all your services, statistics and more, you can also run:
./gui.sh [-f|--fullscreen]-f and --fullscreen are flags to enable full screen.
To export scripts that can be run later on any linux system, run:
./export_topology.sh [export_path]If you believe that something is not working, make sure to open an issue on this repository so we can look into the issue you are having. Some common issues are described here.
Sometimes containers can not reach each other. This can be due to network configuration errors the testbed can not influence, bugs or third party software blocking traffic (such as firewalls). In this case make sure to use a tool like tcpdump or wireshark to find out where traffic is being blocked and then investigate into what could block the specific traffic. A common utility blocking traffic for our testbed is iptables, which can be circumvented by running the following command:
sysctl -w net.bridge.bridge-nf-call-iptables=0This command is being run automatically when you launch the testbed for the first time, so errors related to this may occur after the first reboot. You can of course always run setup.sh again to apply the correct environment again (good for startup scripts).
Sometimes the installation script may not be able to install all requirements that you need. This particulary applies to tkinter, which might sometimes be detected as already installed while it is in fact not. Please make sure to find out from error messages if a required tool is missing and install it yourself afterwards.
Part of this work is inspired or taken from Distrinet. As these parts are interleaved with our code base, they are not specifically marked but acknowledged here. This mainly applies to the service definitions for ryu and ovs.
- Fritz Windisch
This piece of software is licensed under the GNU General Public License v3. Please consult the LICENSE file accompanying this repository for further details.
