TDD 是一种开发方法。它要求在编写某个功能的代码之前先编写测试代码,然后只编写使测试通过的功能代码,通过测试来推动整个开发的进行。这有助于编写简洁可用和高质量的代码。
TDD 的实践步骤如下:
- 首先编写一项无法通过的测试(由于此时尚无功能代码,因此测试会失败)
- 再编写可使其通过的功能代码
- 对初始代码进行重构,直到自己对其设计感到满意
在传统开发实践中,测试始终是中流砥柱,但 TDD 强调的是“测试先行”,而非在开发周期即将结束时才考虑测试。瀑布模型采用的是验收测试(acceptance test),涉及许多人员,通常是大量最终用户(而非开发人员),且该测试发生在代码实际编写完毕之后。如果不将功能覆盖范围作为考虑因素,这种方法看起来的确很好。很多时候,质量保证专业人员仅对他们感兴趣的方面进行测试,而非进行全面测试。
为什么要TDD? 能够解决什么问题?
Advantages: 1)测试即文档,单元测试是不会说谎的文档。 2)测试驱动开发是对开发的限制,如果测试写得好,程序的设计就不会太差,模块的耦合性就不会太强
先写测试对于设计的好处在于,先写测试先定义新的类,以及定义类与类之间的关系,就是在定义类与类之间如何交互,每个类如何暴露自己的接口,类和类之间的引用关系。这时,测试代码会逼迫开发者认真考虑如何分解类与类之间的耦合关系,这样产生的实现代码更容易利用了IoC和DIP的模式,实现面向接口编程。
回头看后写测试的情况,因为从一开始开发者把重心放在实现的细节和功能需求的往复上,对于代码设计、类的关系和定义很容易疏于考虑,产生的结果可能是耦合紧,可测试性差。
3)修改代码的时候会比较有保障
4)编写测试时的过程可以帮助自己理解和细化需求,分解问题,然后逐个覆盖逐个解决,步步为营;
需要维护的代码(Hello World 还有 Demo 不用)
需求/接口变化比较不频繁 ( 测试也是代码,程序结构变化频繁的时候,测试本身可能不容易维护 )
业务上没很多关联和耦合 ( 网络请求,读写数据库,虽然可以增加接口进行解耦,但是构建测试上下文的过程会变得比较复杂 )
TDD 在开发中应该如何操作
1) 明确当前要完成的功能。可以记录成一个 TODO 列表。
2) 快速完成针对此功能的测试用例编写。
3) 测试代码编译不通过。
4) 编写对应的功能代码。
5) 测试通过。
6) 对代码进行重构,并保证测试通过。
7) 循环完成所有功能的开发。
源码:github.com/google/googletest 文档:官方文档 教程:Unit Testing C++ with Google Test - JET BRAINS
In addition to many internal projects at Google, Google Test is also used by the following notable projects:
- The Chromium projects (behind the Chrome browser and Chrome OS).
- The LLVM compiler.
- Protocol Buffers, Google's data interchange format.
- The OpenCV computer vision library.
- tiny-dnn: header only, dependency-free deep learning framework in C++11.
// main.cpp
#include <gtest/gtest.h>

int main(int argc, char* argv[])
{
    testing::InitGoogleTest(&argc, argv);
    return RUN_ALL_TESTS();
}// macro_test.cpp
#include <gtest/gtest.h>
// 定义一个待测试函数
auto add = [](auto a, auto b) { return a + b; };
TEST(Addition, CanAddInt)
{
EXPECT_EQ(add(2, 2), 4);
}
TEST(Addition, CanAddFloat)
{
EXPECT_FLOAT_EQ(add(2.4f, 4.2f), 6.6f);
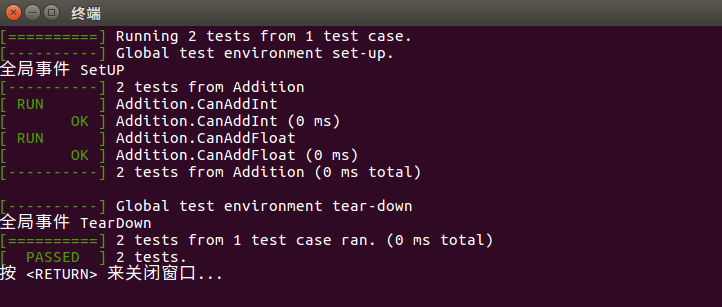
}上面可以看到,编写一个测试案例是多么的简单。 我们使用了TEST这个宏,它有两个参数,官方的对这两个参数的解释为:[TestCaseName,TestName]
上面使用到了EXPECT_EQ这个宏,这个宏用来比较两个数字是否相等。Google还包装了一系列EXPECT_* 和ASSERT_*的宏,而EXPECT系列和ASSERT系列的区别是:
- EXPECT_* 失败时,案例继续往下执行。
- ASSERT_* 失败时,直接在当前函数中返回,当前函数中ASSERT_*后面的语句将不会执行。
| Fatal assertion | Nonfatal assertion | Verifies |
|---|---|---|
ASSERT_TRUE(condition); |
EXPECT_TRUE(condition); |
condition is true |
ASSERT_FALSE(condition); |
EXPECT_FALSE(condition); |
condition is false |
| Fatal assertion | Nonfatal assertion | Verifies |
|---|---|---|
ASSERT_EQ(val1, val2); |
EXPECT_EQ(val1, val2); |
val1 == val2 |
ASSERT_NE(val1, val2); |
EXPECT_NE(val1, val2); |
val1 != val2 |
ASSERT_LT(val1, val2); |
EXPECT_LT(val1, val2); |
val1 < val2 |
ASSERT_LE(val1, val2); |
EXPECT_LE(val1, val2); |
val1 <= val2 |
ASSERT_GT(val1, val2); |
EXPECT_GT(val1, val2); |
val1 > val2 |
ASSERT_GE(val1, val2); |
EXPECT_GE(val1, val2); |
val1 >= val2 |
字符串比较:
ASSERT_STREQ
ASSERT_STRNE
ASSERT_STRCASEEQ
ASSERT_STRCASENE
其他:
EXPECT_FLOAT_EQ
EXPECT_DEATH
EXPECT_THROW
EXPECT_ANY_THROW
g++ -P -E ./macro_test.cpp >> macro_test.i#include <gtest/gtest.h>
// 定义一个待测试函数
auto add = [](auto a, auto b) { return a + b; };
class Addition_CanAddInt_Test : public ::testing::Test {
public:
Addition_CanAddInt_Test() {}
private:
virtual void TestBody();
static ::testing::TestInfo* const test_info_ __attribute__ ((unused));
Addition_CanAddInt_Test(Addition_CanAddInt_Test const &);
void operator=(Addition_CanAddInt_Test const &);
};
::testing::TestInfo* const Addition_CanAddInt_Test ::test_info_ =
::testing::internal::MakeAndRegisterTestInfo(
"Addition", "CanAddInt", __null, __null,
::testing::internal::CodeLocation("./macro_test.cpp", 6),
(::testing::internal::GetTestTypeId()),
::testing::Test::SetUpTestCase,
::testing::Test::TearDownTestCase,
new ::testing::internal::TestFactoryImpl< Addition_CanAddInt_Test>);
void Addition_CanAddInt_Test::TestBody()
{
switch (0)
case 0:
default:
if (const ::testing::AssertionResult gtest_ar =
(::testing::internal:: EqHelper<
(sizeof(::testing::internal::IsNullLiteralHelper(add(2, 2))) == 1)>
::Compare("add(2, 2)", "4", add(2, 2), 4)))
;
else
::testing::internal::AssertHelper(
::testing::TestPartResult::kNonFatalFailure,
"./macro_test.cpp", 8,
gtest_ar.failure_message()) = ::testing::Message();
}
class Addition_CanAddFloat_Test : public ::testing::Test {
public:
Addition_CanAddFloat_Test() {}
private:
virtual void TestBody();
static ::testing::TestInfo* const test_info_ __attribute__ ((unused));
Addition_CanAddFloat_Test(Addition_CanAddFloat_Test const &);
void operator=(Addition_CanAddFloat_Test const &);
};
::testing::TestInfo* const Addition_CanAddFloat_Test ::test_info_ = ::testing::internal::MakeAndRegisterTestInfo( "Addition", "CanAddFloat", __null, __null, ::testing::internal::CodeLocation("./macro_test.cpp", 11), (::testing::internal::GetTestTypeId()), ::testing::Test::SetUpTestCase, ::testing::Test::TearDownTestCase, new ::testing::internal::TestFactoryImpl< Addition_CanAddFloat_Test>);void Addition_CanAddFloat_Test::TestBody()
{
switch (0) case 0: default: if (const ::testing::AssertionResult gtest_ar = (::testing::internal::CmpHelperFloatingPointEQ<float>("add(2.4f, 4.2f)", "6.6f", add(2.4f, 4.2f), 6.6f))) ; else ::testing::internal::AssertHelper(::testing::TestPartResult::kNonFatalFailure, "./macro_test.cpp", 13, gtest_ar.failure_message()) = ::testing::Message();
}
#include <iostream>
#include <gtest/gtest.h>

class FooEnvironment
        : public testing::Environment {
public:
    virtual void SetUp() {
        std::cout << "全局事件 SetUP" << std::endl;
    }
    virtual void TearDown() {
        std::cout << "全局事件 TearDown" << std::endl;
    }
};

int main(int argc, char* argv[])
{
    // 注册全局事件
    testing::AddGlobalTestEnvironment(new FooEnvironment);

    testing::InitGoogleTest(&argc, argv);
    return RUN_ALL_TESTS();
}
要实现全局事件,必须写一个类,继承 testing::Environment 类,实现里面的 SetUp 和 TearDown 方法。
- SetUp() 方法在所有案例执行前执行
- TearDown() 方法在所有案例执行后执行
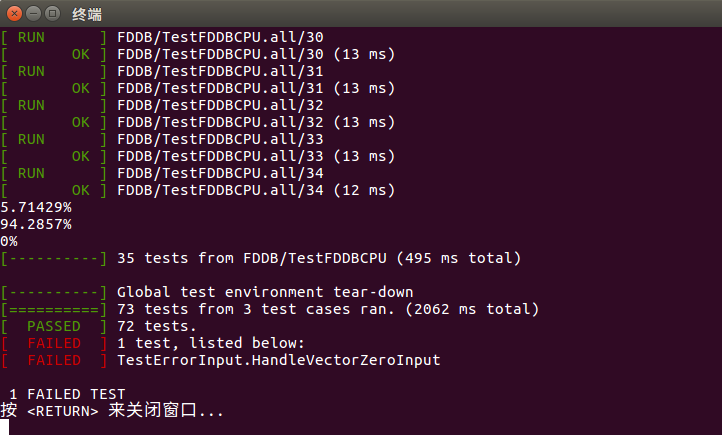
运行结果:
// macro_test_f.cpp
#include <gtest/gtest.h>

class FooTest :
        public testing::Test {
public:
    static void SetUpTestCase() {}
    static void TearDownTestCase() {}
    virtual void SetUp() {}
    virtual void TearDown() {}
};

TEST_F(FooTest, Test1)
{
}

TEST_F(FooTest, Test2)
{
}
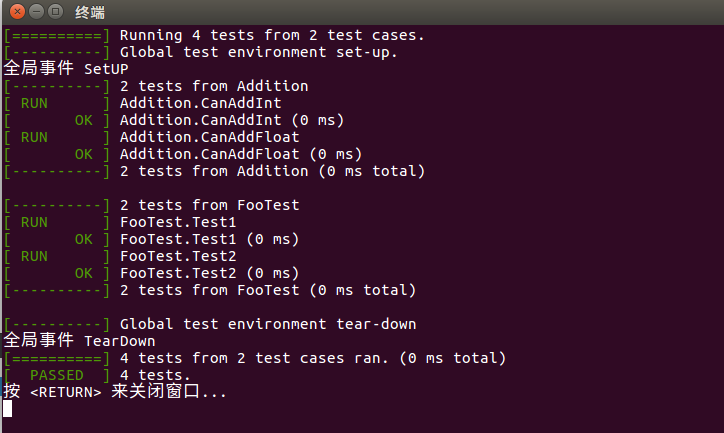
我们需要写一个类,继承 testing::Test,然后实现两组方法
- SetUpTestCase() 方法在 TestCase 开始前执行
- TearDownTestCase() 方法在 TestCase 结束后执行
- SetUp()方法在每个 Test 之前执行
- TearDown()方法在每个 Test 之后执行
运行结果:
// macro_test_p.cpp
#include <gtest/gtest.h>

auto add = [](auto a, auto b) { return a + b; };

class AddTestWithParam
    : public ::testing::Test
    , public ::testing::WithParamInterface<int>
{
};

TEST_P(AddTestWithParam, HandleReturn)
{
    int n = GetParam();
    EXPECT_EQ(add(n, 10), n + 10);
}

INSTANTIATE_TEST_CASE_P(EQUAL,
                        AddTestWithParam,
                        testing::Values(3, 5, 11, 23, 17));
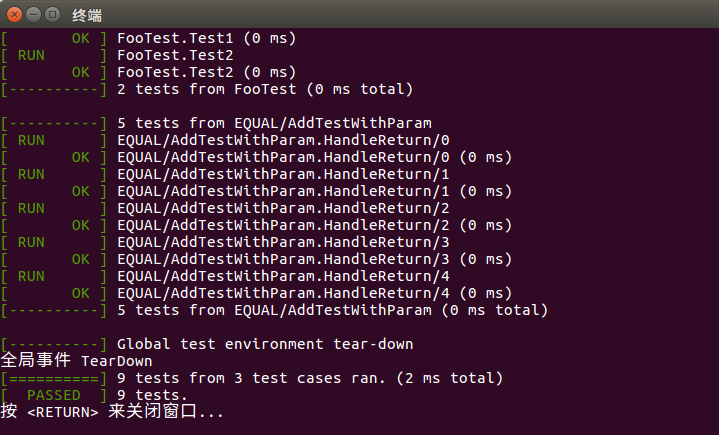
INSTANTIATE_TEST_CASE_P
第一个参数是测试案例的前缀,可以任意取。
第二个参数是测试案例的名称,需要和之前定义的参数化的类的名称相同,如:IsPrimeParamTest
第三个参数是可以理解为参数生成器,上面的例子使用test::Values表示使用括号内的参数。Google提供了一系列的参数生成的函数:
运行结果:
定接口
virtual AIStatus detect(
    const cv::Mat& imgSrc,
    vector<Rect> *pVRects,
    vector<vector<cv::Point2f>> *pVvPoints=NULL,
    vector<SRecogInfo> *pVRecogResults=NULL) = 0;
FDDB 人脸标注
2002_07_28_big_img_416.jpg
3
60.933903 44.468305 -1.530098 98.276900 82.268230  1
52.564676 35.774346 -1.460712 321.103651 63.475043  1
23.958142 18.064426 1.553739 364.859591 103.521632  1
2002_08_07_big_img_1393.jpg
2
163.745742 109.136126 1.236962 132.225074 172.180404  1
134.196339 96.693777 -1.276447 204.178610 271.741124  1
2002_08_26_big_img_292.jpg
1
163.778521 101.169600 1.543931 148.203875 181.913193  1
2002_08_26_big_img_301.jpg
1
166.948740 108.322300 1.377403 144.199819 197.377459  1
2003_01_13_big_img_195.jpg
1
81.043000 62.000000 -1.298475 187.311671 101.154428  1
2002_07_26_big_img_532.jpg
9
51.889492 33.394627 -1.502245 245.113481 133.696345  1
54.576501 38.488467 1.527672 181.971806 82.479070  1
49.398518 29.843745 1.437926 98.197429 59.428833  1
47.648948 28.245858 1.513057 6.655783 36.699163  1
44.437752 30.284679 -1.478244 40.422777 13.905788  1
49.143573 31.955262 1.550535 135.210922 50.421439  1
38.724294 30.275047 1.479142 268.345804 14.771547  1
46.233421 29.684012 1.498761 279.356598 62.823034  1
57.401922 30.723317 1.405984 450.000000 194.870692  1
2002_08_20_big_img_550.jpg
...
...
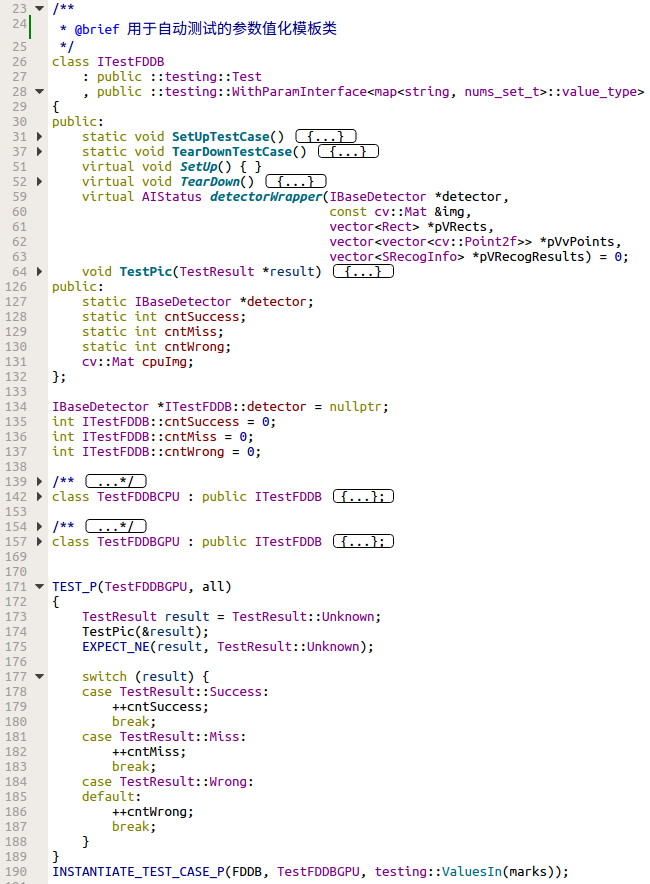
定义存储结构
/**
 * @brief 存储 FDDB 人脸标注的数据类型
 */
using nums_t = std::tuple<float, float, float, float, float, int>;

/**
 * @brief 一幅图片中所有人脸
 */
using nums_set_t = std::set<nums_t>;
存标注文档信息的容器
std::map<std::string, nums_set_t> marks;定义转换函数和检测函数
/**
 * @brief 将 FDDB 标注文档的数据转换为 cv::Rect 类型
 *
 * @param nums
 * @return cv::Rect
 */
cv::Rect toCVRect(const nums_t &nums)
{
    float ra = std::get<0>(nums);
    float rb = std::get<1>(nums);
    float cx = std::get<3>(nums);
    float cy = std::get<4>(nums);
    return cv::Rect(cx - ra, cy - rb, 2 * ra, 2 * rb);
}

/**
 * @brief 计算 IoU
 *
 * @param lhs
 * @param rhs
 * @return T 区间[0, 1]范围内的值
 */
template <typename T>
T IoU(const cv::Rect &lhs, const cv::Rect &rhs)
{
    auto areaOfIntersection = (T)((lhs & rhs).area());
    return areaOfIntersection / (lhs.area() + rhs.area() - areaOfIntersection);
}
运行结果:


