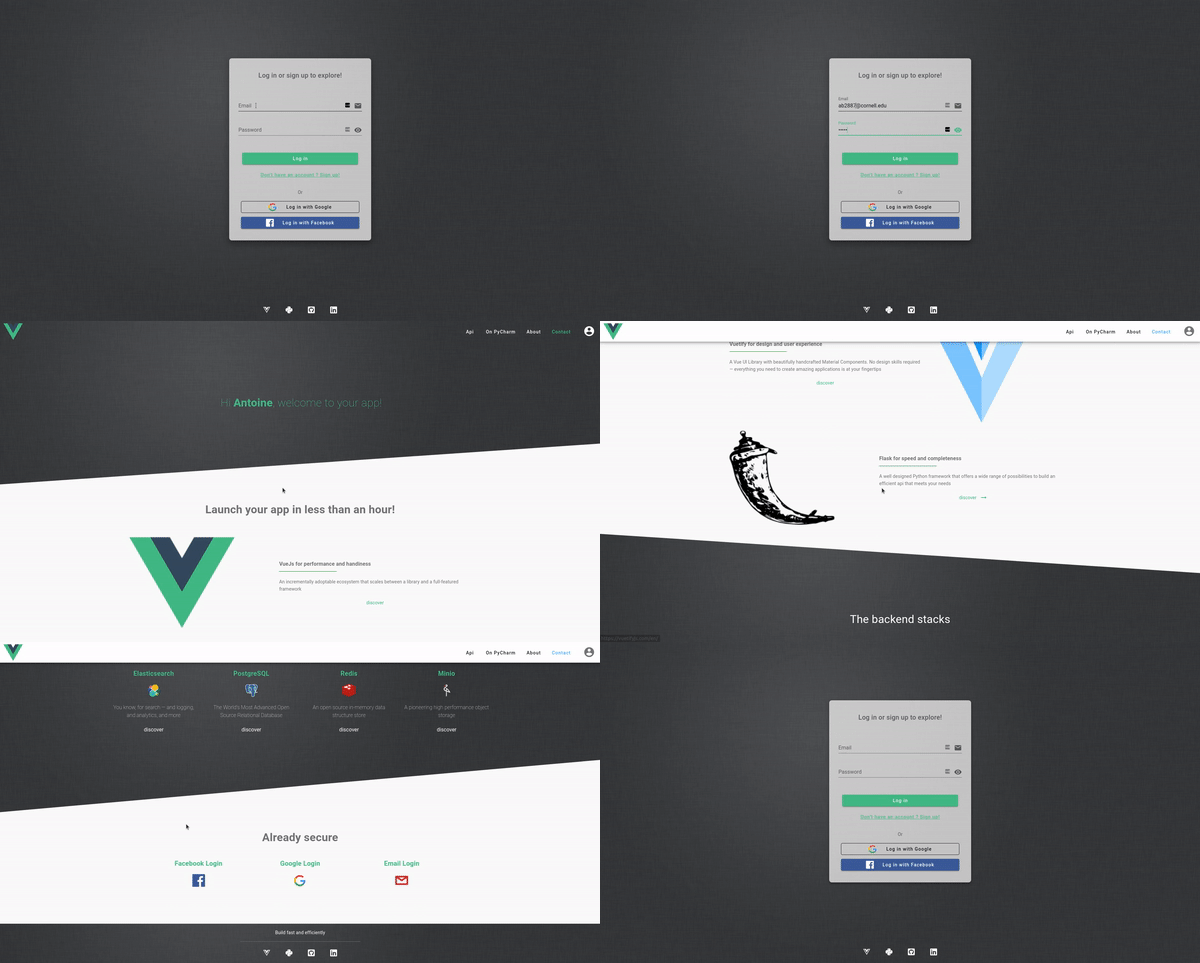
A ready-to-use and customizable web app template with VueJs for frontend and Flask for backend, running on https. Whether you are a beginner or an experienced developer, launch your app and start developing your first feature in one hour!
The front end runs on https://localhost:8080. It is a Vue CLI 3 project that uses the v2 of the CSS library
Vuetify. The landing page is the login page. Another template will be released soon for apps
that don't necessarily require users to authenticate.
An authentication module is implemented, as well as a convenient global notification system to improve user experience. The front end also contains a job module, to retrieve jobs from the backend and display their progress.
├── front
        ├── public                                      # Config files
        │    ├── favicion.ico                           # App icon
        │    └── index.html                             # Main html file
        ├── src                                         # Frontend main folder
        │    ├── assets                                 # Media and fonts
        │    ├── components                             # Custom components files
        │    │    ├── auth                              # Auth components
        │    │    │    ├── EmailLogin.vue               # Email login component
        │    │    │    ├── FacebookLogin.vue            # Facebook login component
        │    │    │    └── GoogleLogin.vue              # Google login component
        │    │    └── util                              # Util components
        │    │         ├── Header.vue                   # Header component
        │    │         └── Jobs.vue                     Vue router # Jobs component
        │    ├── modules                                # Useful modules
        │    │    ├── auth                              # Auth files
        │    │    │    ├── email.js                     # Email auth functions
        │    │    │    ├── facebook.js                  # Facebook auth functions
        │    │    │    ├── google.js                    # Google auth functions
        │    │    │    └── util.js                      # Common auth functions
        │    │    ├── jobs                              # Job store functions
        │    │    ├── notifications                     # Notification store function
        │    │    └── router                            # Vue router
        │    ├── pages                                  # Pages of the app
        │    │    ├── auth                              # Auth pages
        │    │    │    ├── callback                     # Callback pages
        │    │    │    │    ├── FacebookCallback.vue    # Facebook auth callback page
        │    │    │    │    └── GoogleCallback.vue      # Google auth callback page
        │    │    │    └── Login.vue                    # Login page
        │    │    └── Home.vue                          # Home page
        │    ├── plugins                                # App plugins
        │    │    └── vuetify.js                        # Vuetify setup
        │    ├── App.vue                                # Vue app
        │    └── main.js                                # Create app
        ├── .env.development                            # Development environment
        ├── babel.config.js                             # Babel configuration
        ├── package.json                                # Packages and dependencies
        ├── package-lock.json                           # Packages and dependencies
        └── vue.config.js                               # Vue configuration
The back end runs on https://localhost:5000. It uses docker containers to run an api, a worker (jobs are queued with
RQ) and a scheduler. It contains the following:
- PostgreSQL database
- Elasticsearch database plugged with a Kibana interface
- Minio storage
- Redis cache
- Email module to send emails
Like the front end, it contains an authentication module, as well as a global customizable error handler.
├── back
    ├── config                              # Config files
    │    └── config.dev.json                # Development config
    ├── {{cookiecutter.project_name}}                                 # Backend main folder
    │    ├── api                            # Routes registration
    │    │    ├── errors.py                 # Exceptions handler
    │    │    └── jobs.py                   # Job retriever
    │    ├── auth                           # Auth files
    │    │    ├── email_login.py            # Email auth blueprint
    │    │    ├── facebook_login.py         # Facebook auth blueprint
    │    │    └── google_login.py           # Google auth blueprint
    │    ├── core                           # Architecture files
    │    │    ├── cache.py                  # Redis cache
    │    │    ├── config.py                 # Config object
    │    │    ├── database.py               # PostgreSQL database
    │    │    ├── elasticsearch.py          # Elacticsearch database
    │    │    ├── mail.py                   # Email module
    │    │    └── storage.py                # Minio storage
    │    ├── exceptions                     # Customized exceptions
    │    ├── managers                       # Functions to interact with resources
    │    ├── models                         # Resources
    │    ├── storage                        # Storage blueprint
    │    ├── app.py                         # Create app
    │    └── config.py                      # JWT config
    ├── templates                           # Html templates for emails
    ├── DockerFile                          # Launch script
    ├── requirements.txt                    # Packages and dependencies
    ├── run.py                              # Run the app
    └── worker.py                           # Register the worker
No need to spend some precious time on authentication! The template contains a full built-in JWT module that allows three types of authentication:
- Email login
- Google OAuth 2.0 login
- Facebook OAuth 2.0 login
We will see how to quickly set up the auth module with your own credentials for Google and Facebook and with your own email address to send emails to activate an account or to change a password for example.
You will need the following to run the template:
- Docker Engine and Docker Compose
- Python 3.6 or higher
- NodeJs 10 or higher and npm (npm goes with Node, no need to do anything)
- Cookicutter Python package
Clone this repository on your machine by running
$ cookiecutter https://github.com/antoinebrtd/flask-vue-template.git
You wil be prompted some questions about your options, and the template will be cloned with your desired ones!
That's it! Now let's configure your app.
Note: You can skip this part if you don't want your app running under Https locally. Just remove the
devServerfield infront/vue.config.js, and modify the localhost urls inback/config/config.dev.jsonandfront/.env.development. Know that Facebook login might not work under Http.
To run the app under Https in development mode, you will need to create your own certificates.
Install mkcert for your OS. Initialize it with
$ mkcert -install
Then create a certs folder in the front folder. You can create your self-signed certificates for the frontend server by running
$ cd ~/<YOUR_REPO_NAME>/front/certs && mkcert localhost
This will create two files, localhost.pem and localhost-key.pem, in front/certs.
Repeat the operation for the backend server: create a certs folder in the back folder, then run
$ cd ../../back/certs && mkcert localhost
Https is now configured!
Warning: The files
config.json,facebook.jsonandgoogle.jsonyou will create in this section contain your credentials. They are ignored in the repo tree and should never be pushed on Github. There is no need to edit the fileconfig.dev.json, also make sure not to add any credentials in it, since this one is pushed on Github.
The authentication module is already integrated in the template. All you need to do is to make it work with your own credentials.
In back/config, create a file named config.json, and copy paste the content of config.dev.json in it.
Modify config.json to add your email and password in the email section. Then, in back/app/core/mail.py, modify line 62 with your email
and the name you want to appear in mailboxes.
Note: If you are using a Gmail address, make sure to authorize apps.
Log in your Facebook developer account, and create an new app ID. Then, under products, add the Facebook login product.
In settings, add localhost in app domains field.
In back/config, create a file named facebook.json, and copy paste the following,
replacing with your credentials:
{
    "app_id": "your_app_id",
    "project_id": "your_project_name",
    "auth_uri": "https://www.facebook.com/v5.0/dialog/oauth",
    "token_uri": "https://graph.facebook.com/v5.0/oauth/access_token",
    "client_secret": "your_client_secret_key",
    "app_token": "your_app_token",
    "redirect_uris": [
      "http://localhost:5000/auth/facebook/callback",
      "https://localhost:5000/auth/facebook/callback"
    ],
    "javascript_origins": [
      "http://localhost:8080",
      "https://localhost:8080"
    ]
}
You can check how to obtain an access token for your app.
Log in your Google console platform, and create a new project.
Create an external authorization screen (just fill in your app name), then create some new OAuth credentials under credentials section.
In the javascript origins field, add http://localhost:8080 and https://localhost:8080. In redirect URIs, add http://localhost:5000/auth/google/callback
and https://localhost:5000/auth/google/callback. Save and you're good to go!
Just download the config file directly from the credentials section, rename it google.json and move it to back/config. Your file should look like this:
{
  "web": {
    "client_id": "your_app_id",
    "project_id": "your_project_name",
    "auth_uri": "https://accounts.google.com/o/oauth2/auth",
    "token_uri": "https://oauth2.googleapis.com/token",
    "auth_provider_x509_cert_url": "https://www.googleapis.com/oauth2/v1/certs",
    "client_secret": "your_client_secret_key",
    "redirect_uris": [
      "http://localhost:5000/auth/google/callback",
      "https://localhost:5000/auth/google/callback"
    ],
    "javascript_origins": [
      "http://localhost:8080",
      "https://localhost:8080"
    ]
  }
}
Authentication module is set up!
Navigate to front folder, and install dependencies:
$ npm install
Start the development server:
$ npm start
From the front folder, run the following to launch the docker containers:
$ cd .. && docker-compose up -d
Create a virtual environment in the backend folder:
$ cd back && python3 -m venv /venv
Install the requirements in it:
$ source venv/bin/activate && pip install -r requirements.txt
Launch the api server, the worker and the scheduler:
$ python run.py
$ rq worker -c <YOUR_PROJECT_NAME>.core.cache
$ python clock.py
Your app is now running, enjoy!


