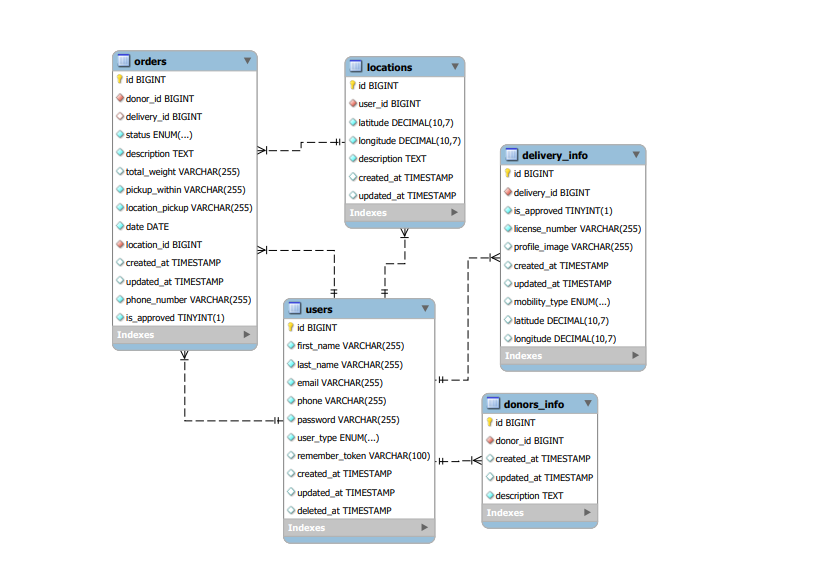
A mobile app is designed to facilitate the donation process of excess food wastes, connecting donors with delivery drivers. Complemented by a desktop admin panel, the system enhances food waste distribution, fostering a more sustainable and compassionate community.
- As a donor (individual, restaurant, or store), I want to donate excess food easily, so that I can contribute to reducing food waste in my community.
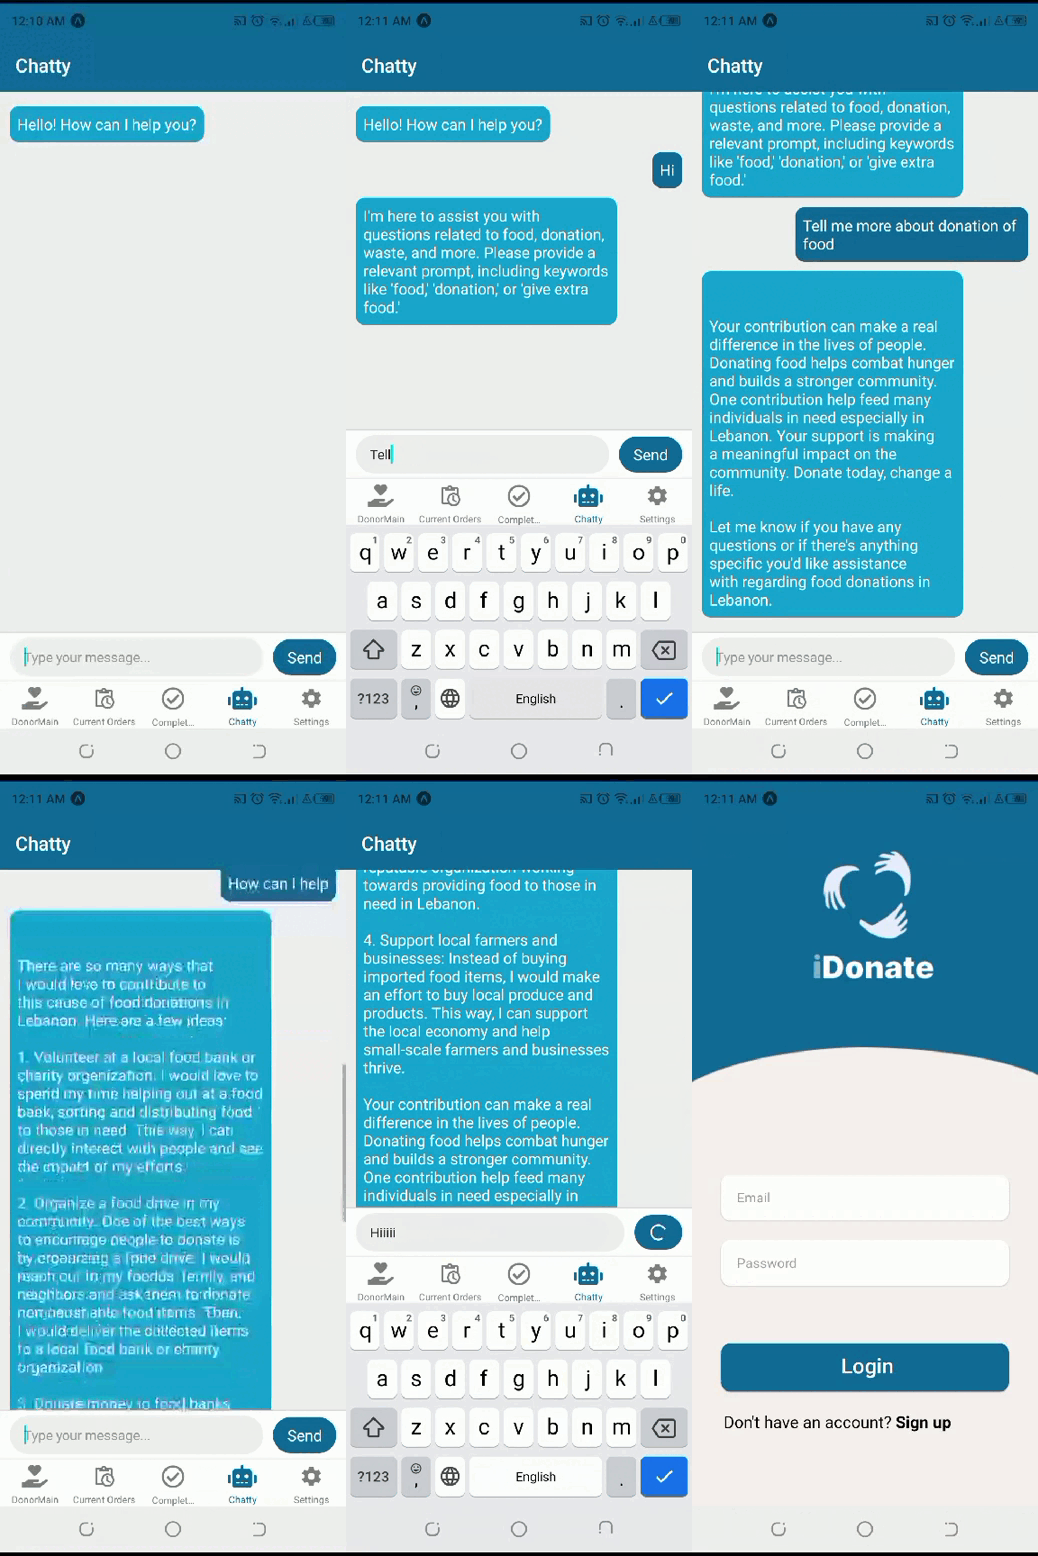
- As a donor, I want to be able to chat with an AI bot specialized in answering questions about food waste donation, so I can inquire further about donations and receive answers to my queries.
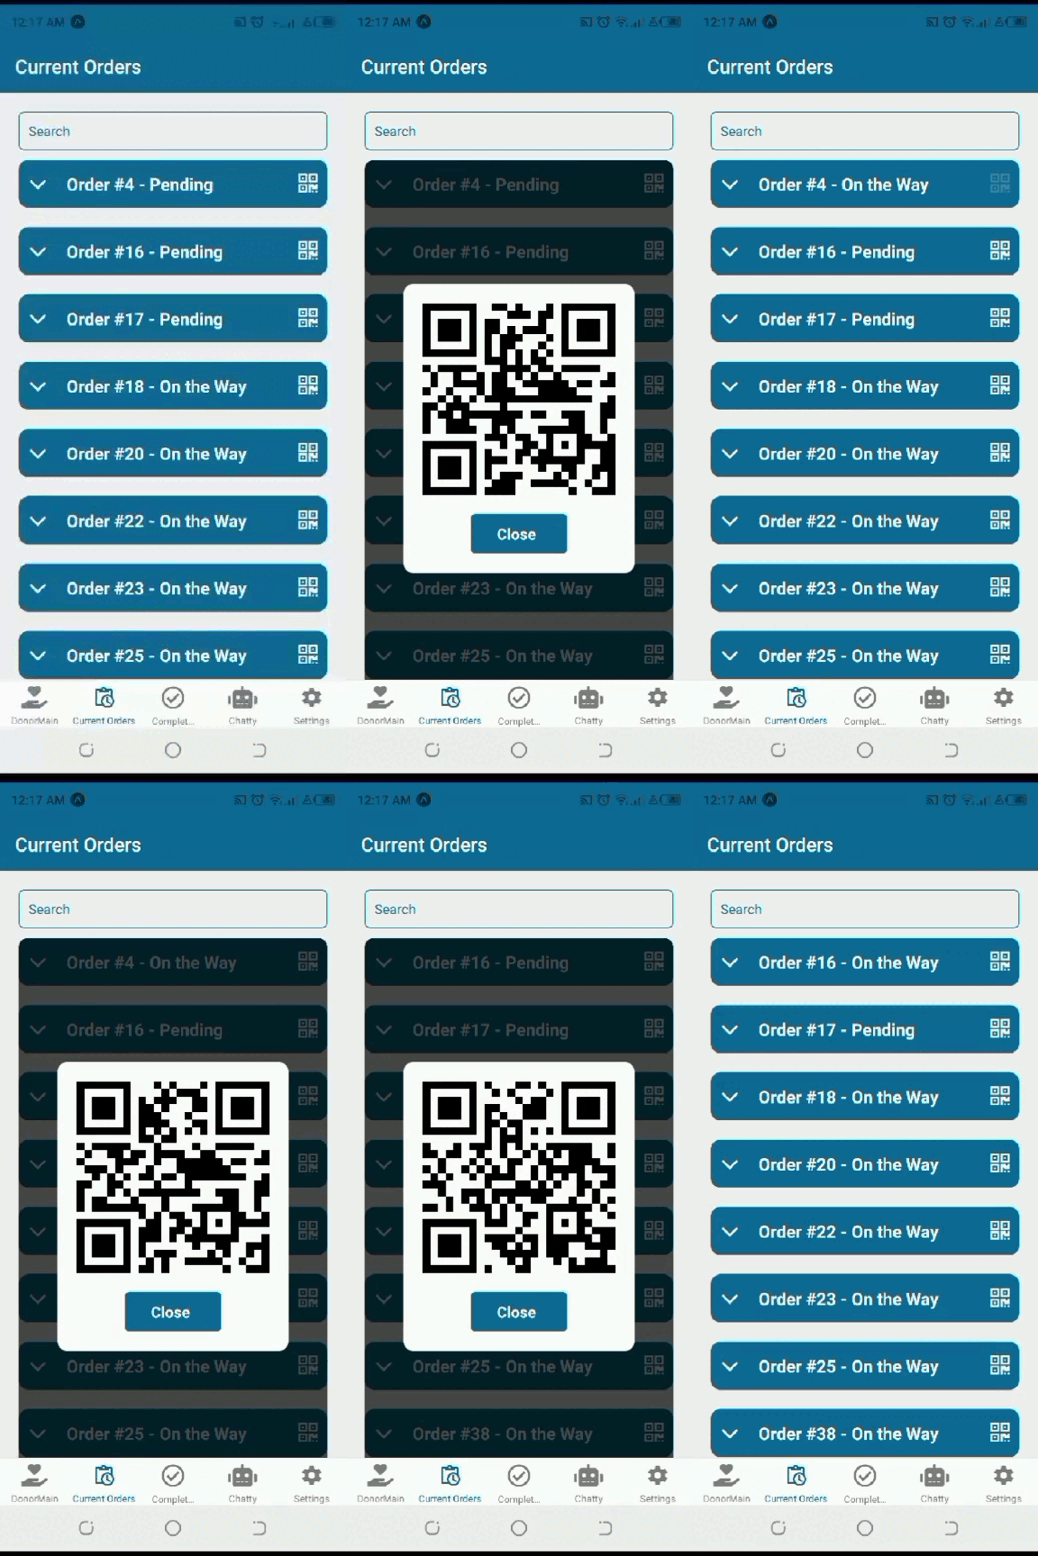
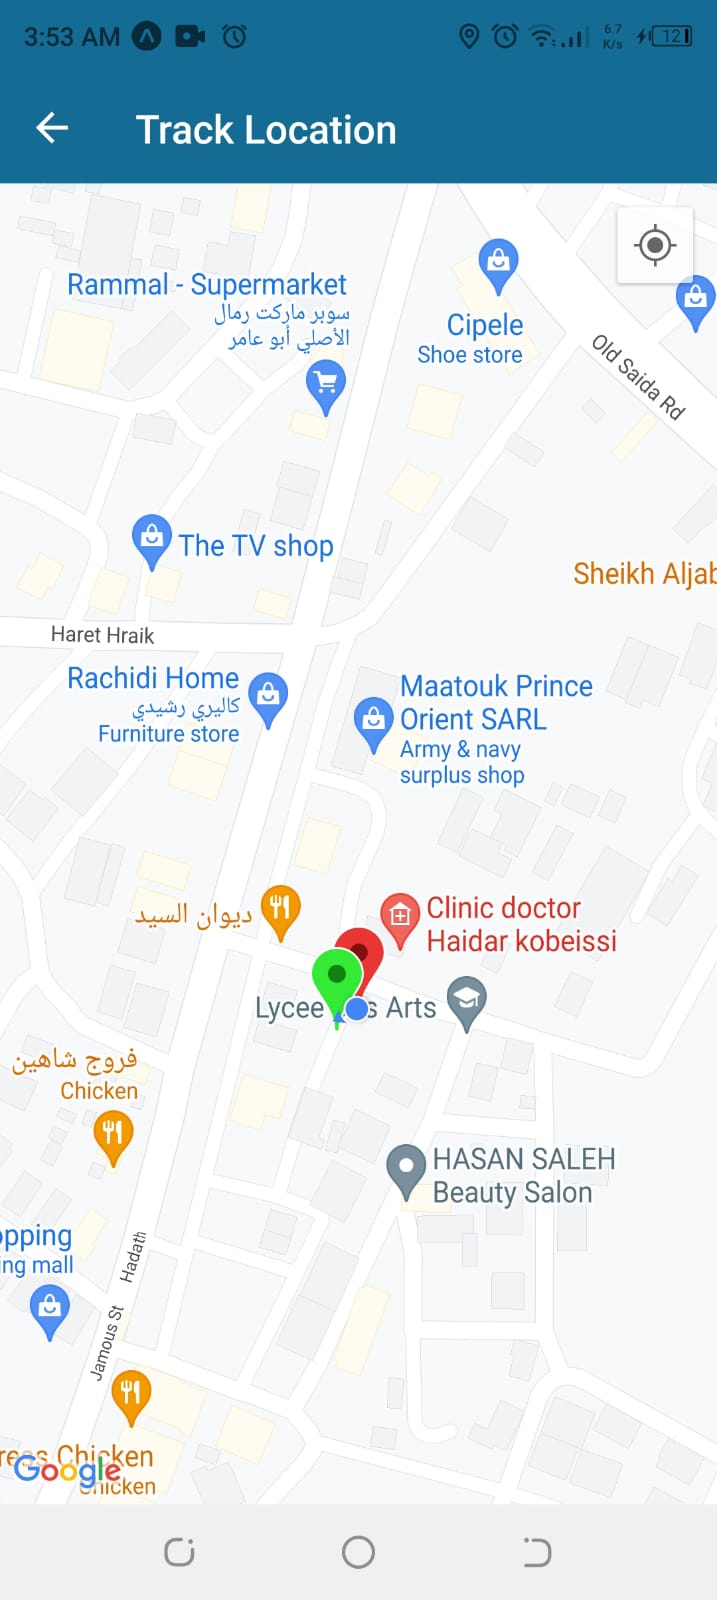
- As a donor, I want to be able to track the live location of the delivery, so that I can stay updated about whether my order is received and donation completed or not yet.
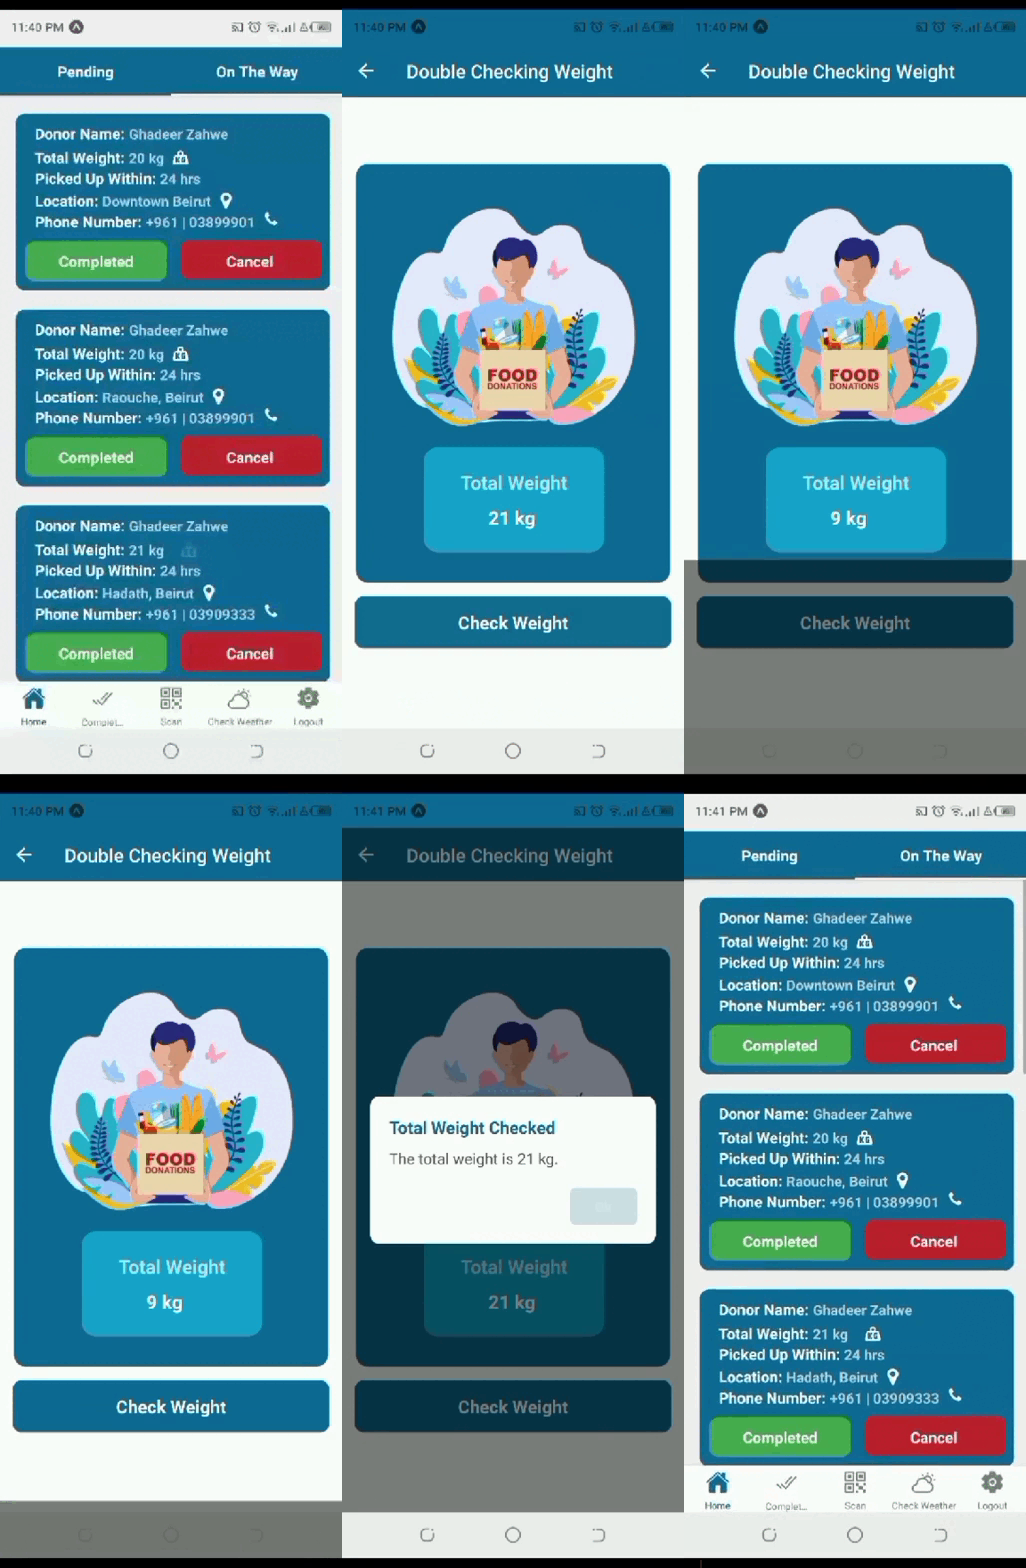
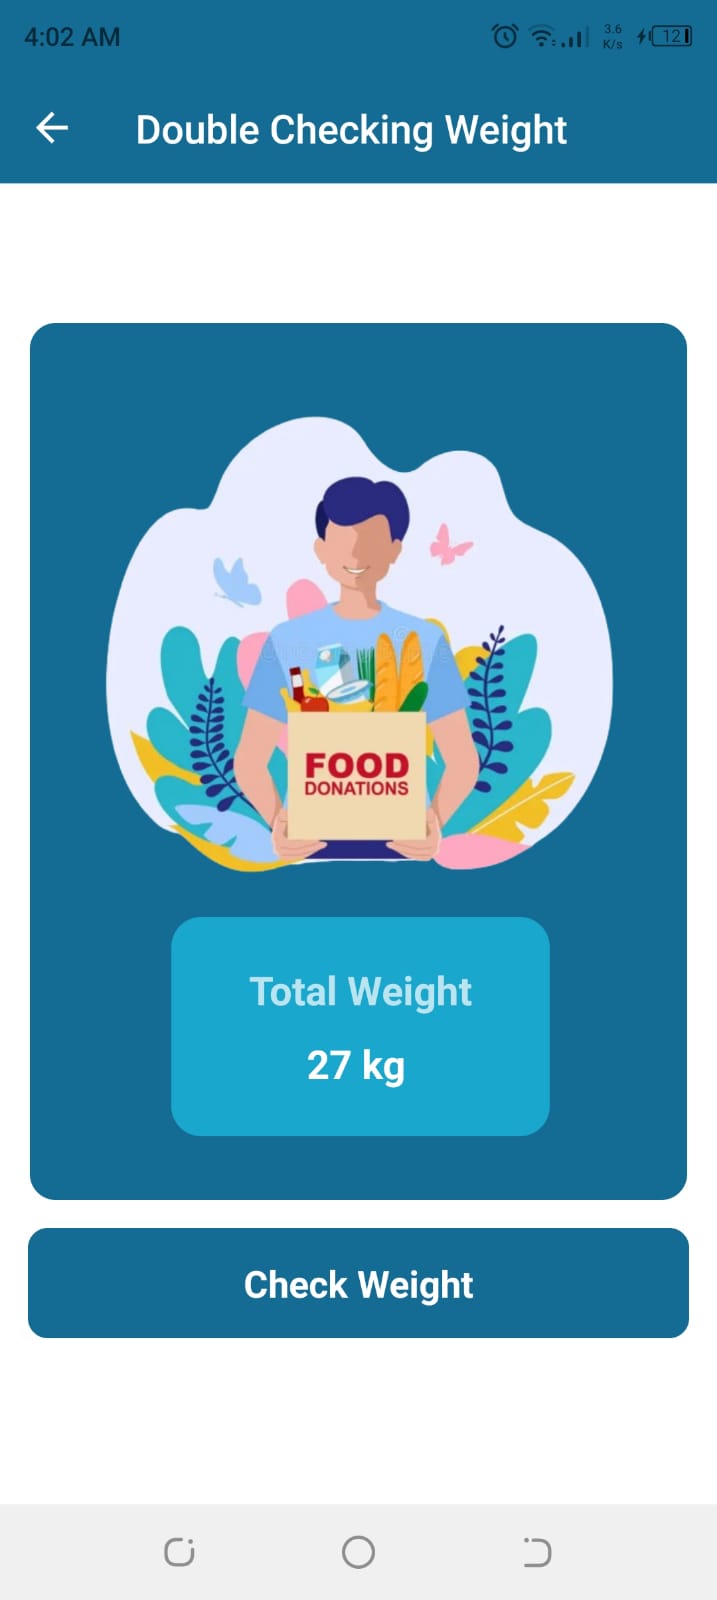
- As a delivery driver, I want to be able to check the weight of the donated food using an IoT smart weight sensor, so that I can accurately verify the weight of the food waste donation before delivering it.
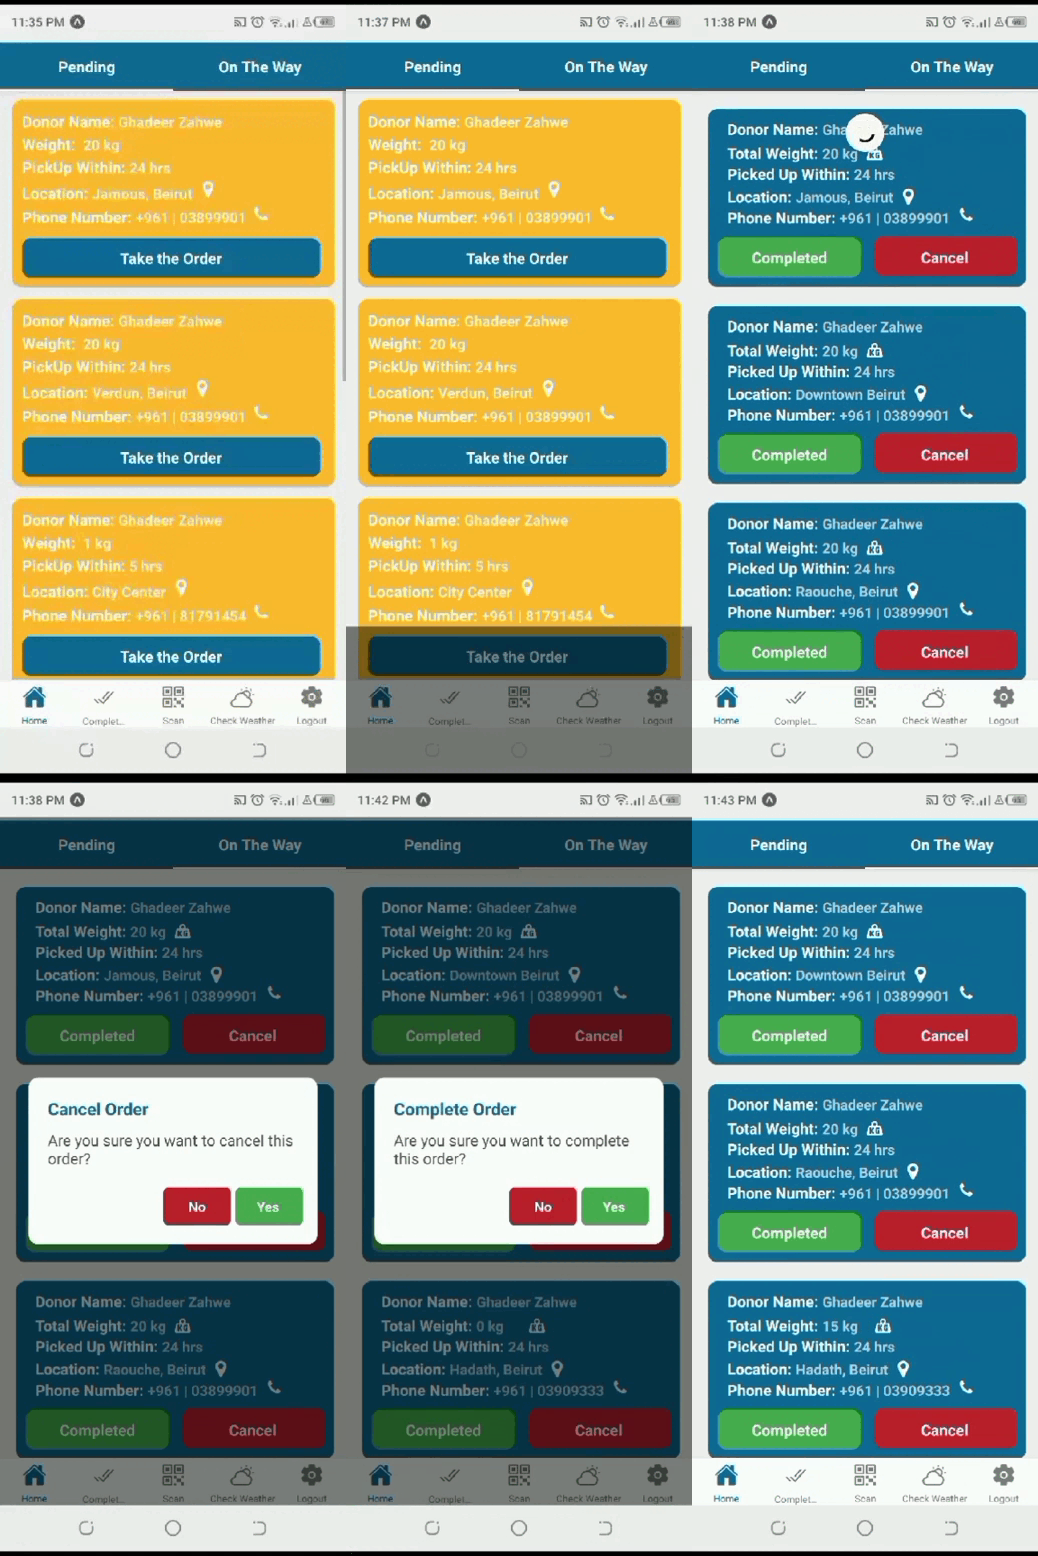
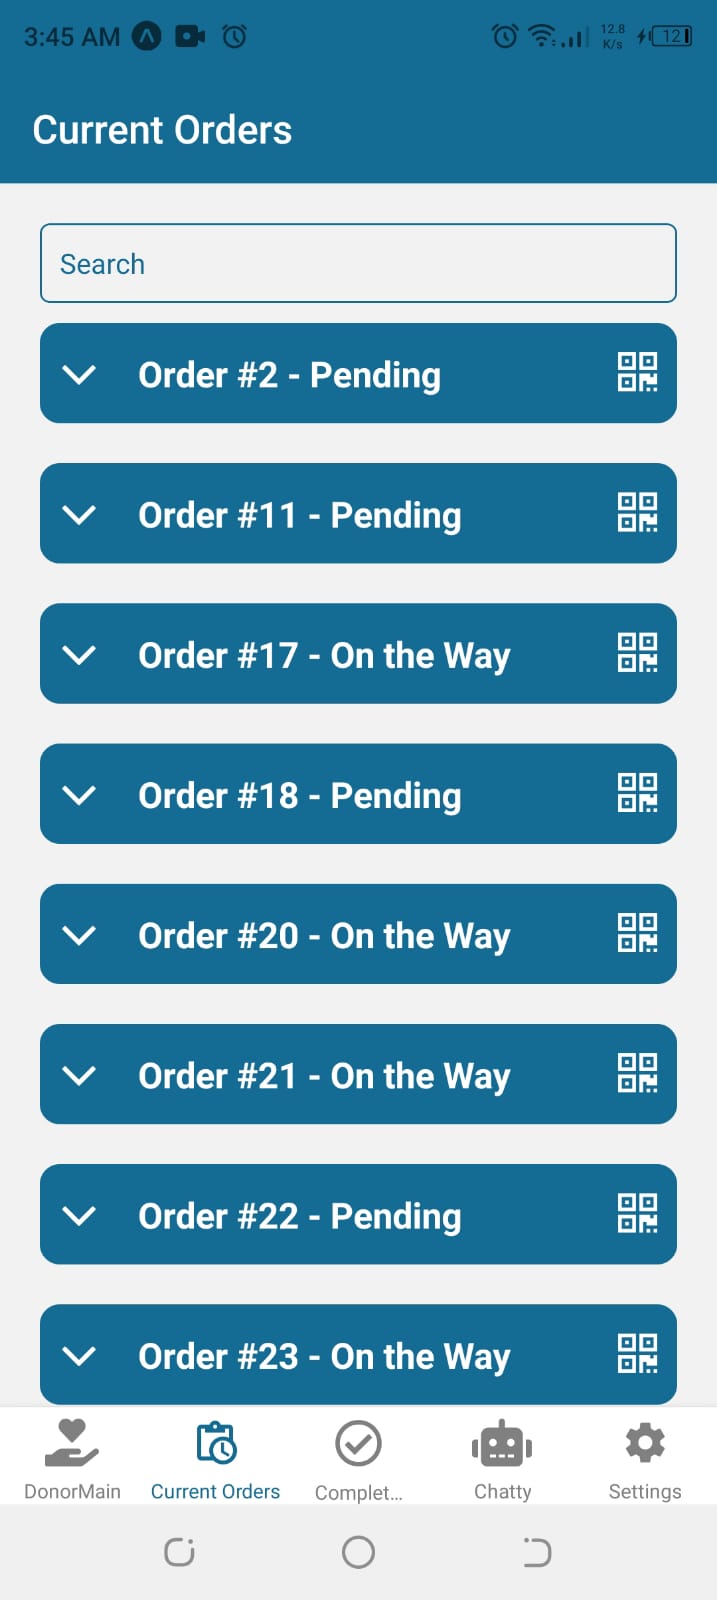
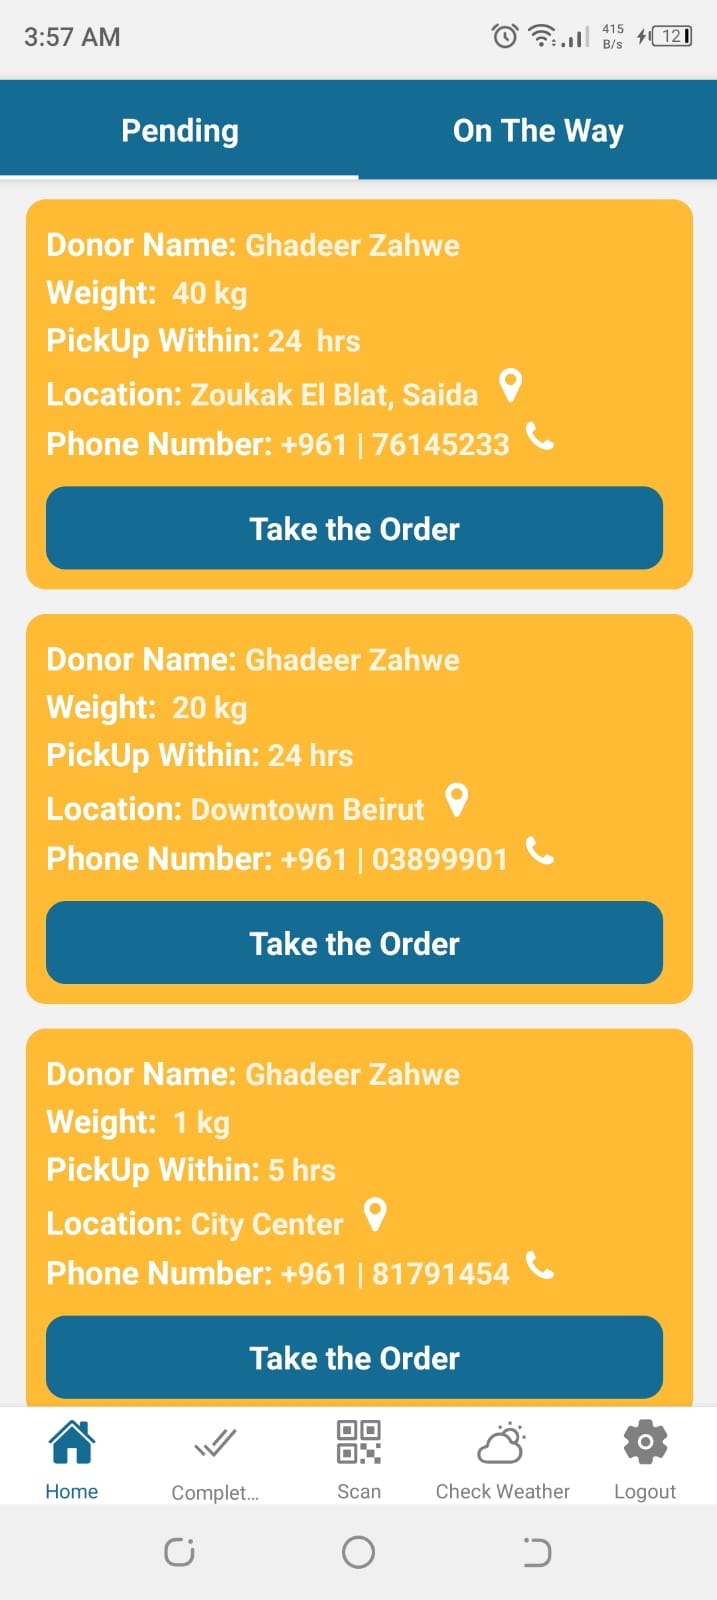
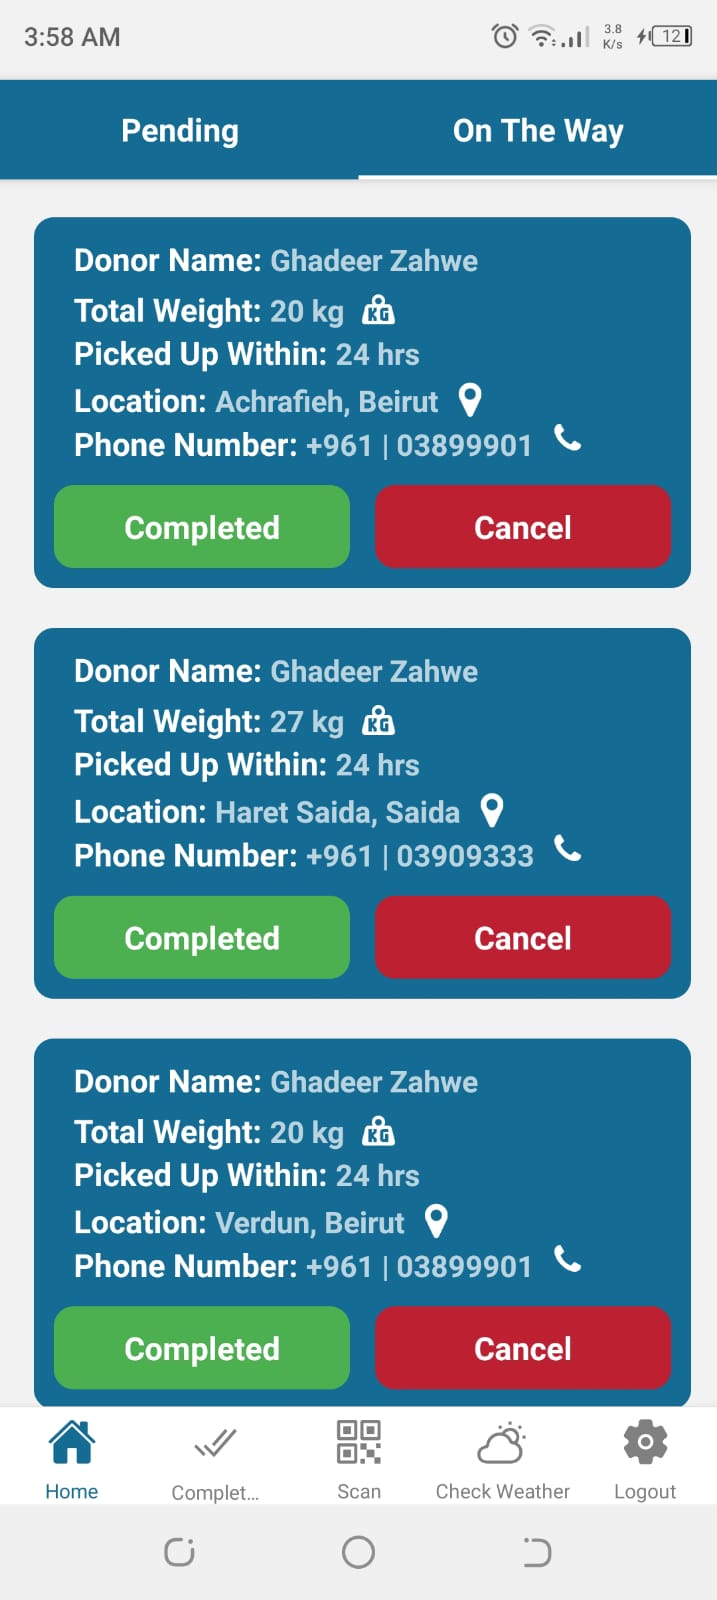
- As a delivery driver, I want to scan the QR code of the donor, so that the order status is updated.
- As a delivery driver, I want to be able to call the donor so that I can reach him for more details or inform him about any update.
- As a delivery driver, I want to check the weather temperature based on my current location, so that I can make informed decisions about the mode of transportation to use (e.g., motorcycle or car) for the delivery.
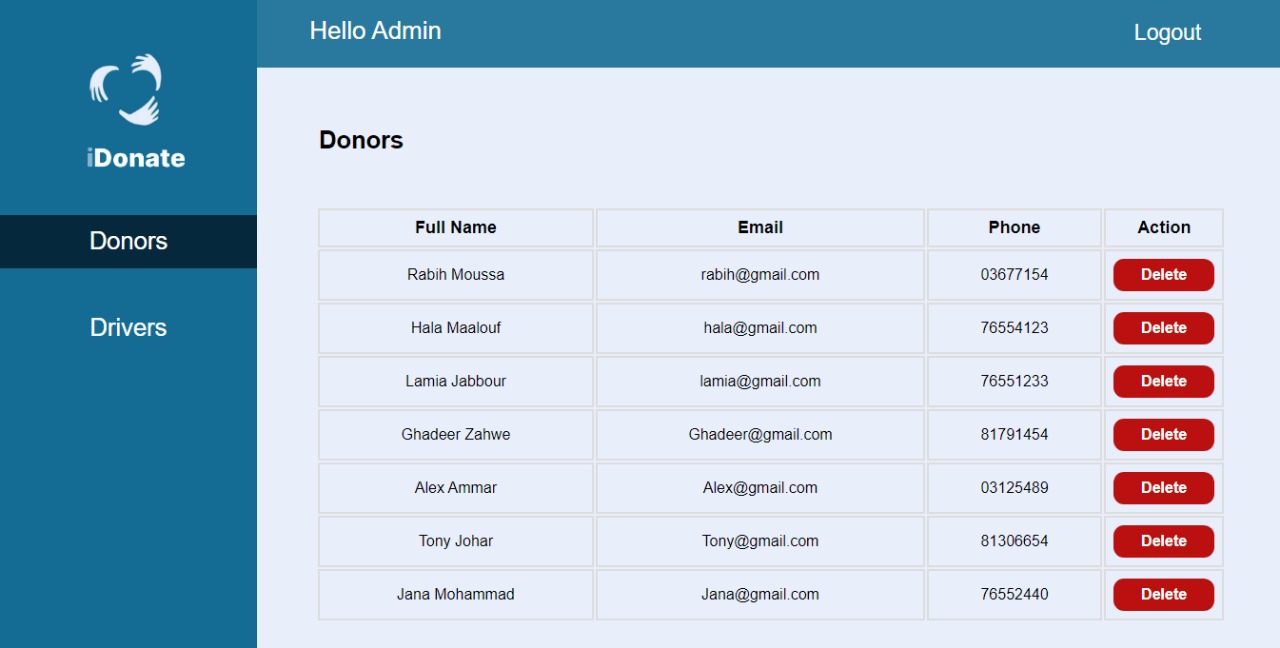
- As an admin, I want to be able to view real-time information about both users, so that I can monitor the system's performance.
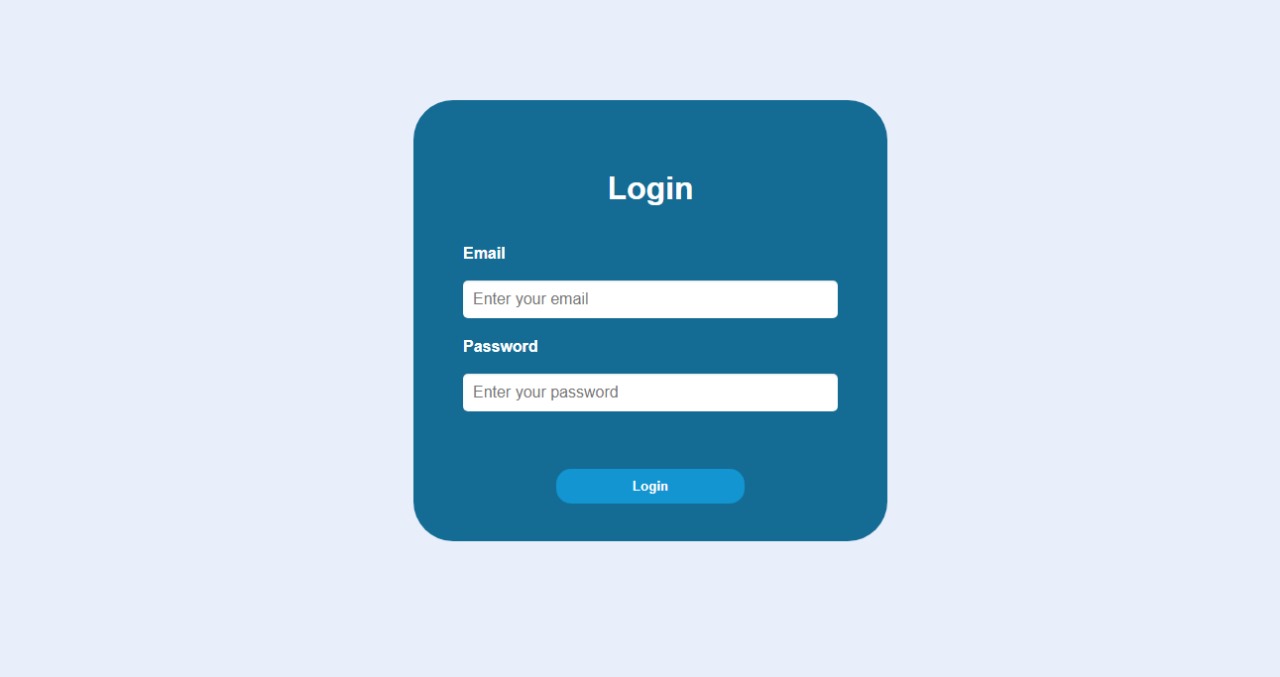
- As an admin, I want to be able to approve registered delivery drivers, so that only authorized drivers can provide their services.
- As an admin, I want to be able to delete users, so that I can ensure the smooth functioning of the app's services.
-
This project uses the React Native app development framework. React Native is a cross-platform hybrid app development platform which allows us to use a single codebase for apps on mobile, desktop, and the web.
-
This project uses Laravel framework for backend,Laravel serves as a backend framework for PHP web development, offering features and tools that streamline backend processes, such as routing, database management, authentication, and API development, empowering developers to build robust and scalable server-side applications efficiently.
-
For persistent storage (database), the app uses the MySQL package which allows the app to create a custom storage and save it to a local database.
-
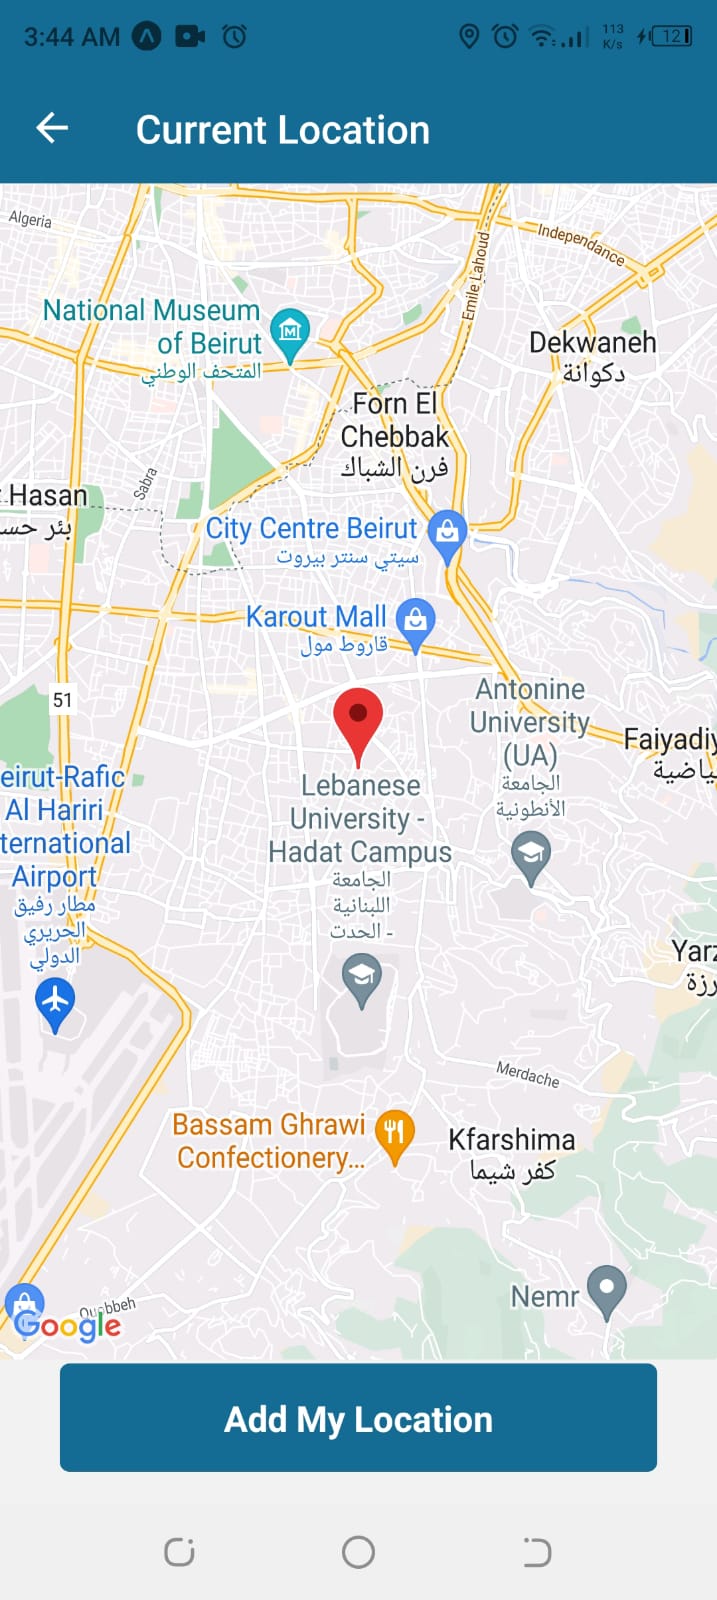
For location tracking, the app uses Expo Location Library which supports Android and iOS.
-
This project uses third-party integration with OpenAI to empower AI-driven chat capabilities.
-
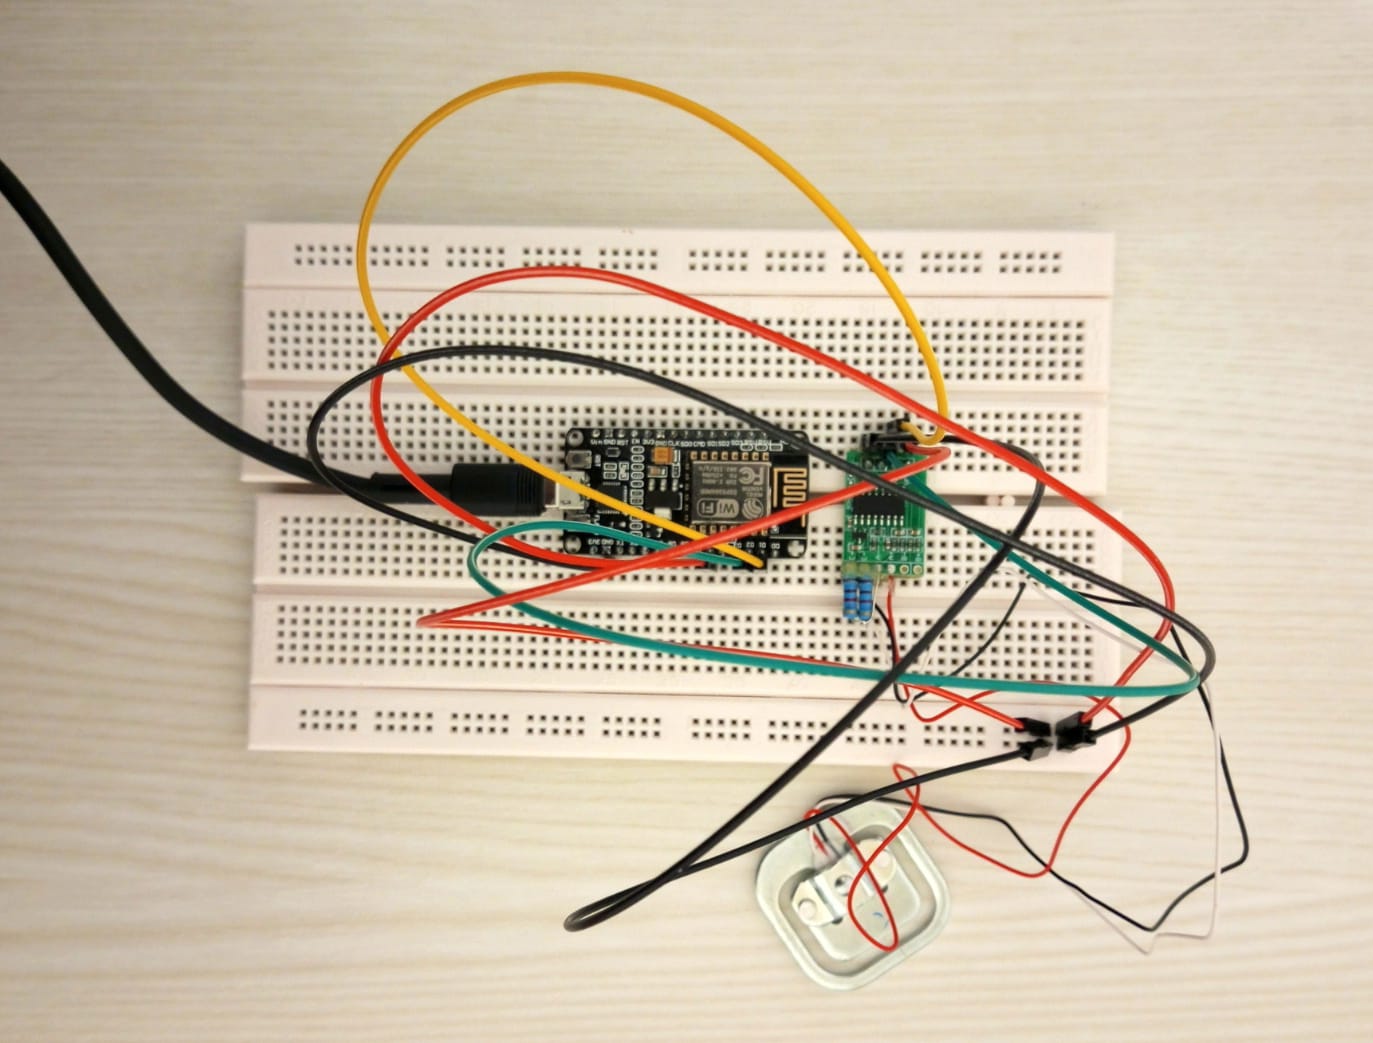
For the IoT smart weight sensor that detects any change in the food weight value, the app utilizes the EKT464885 Load Cell Sensor, designed as a half-bridge body scale component, to accurately measure the weight of food in addition to the ESP8266 Module, which employs HTTPClient to send requests and update the current food weight.
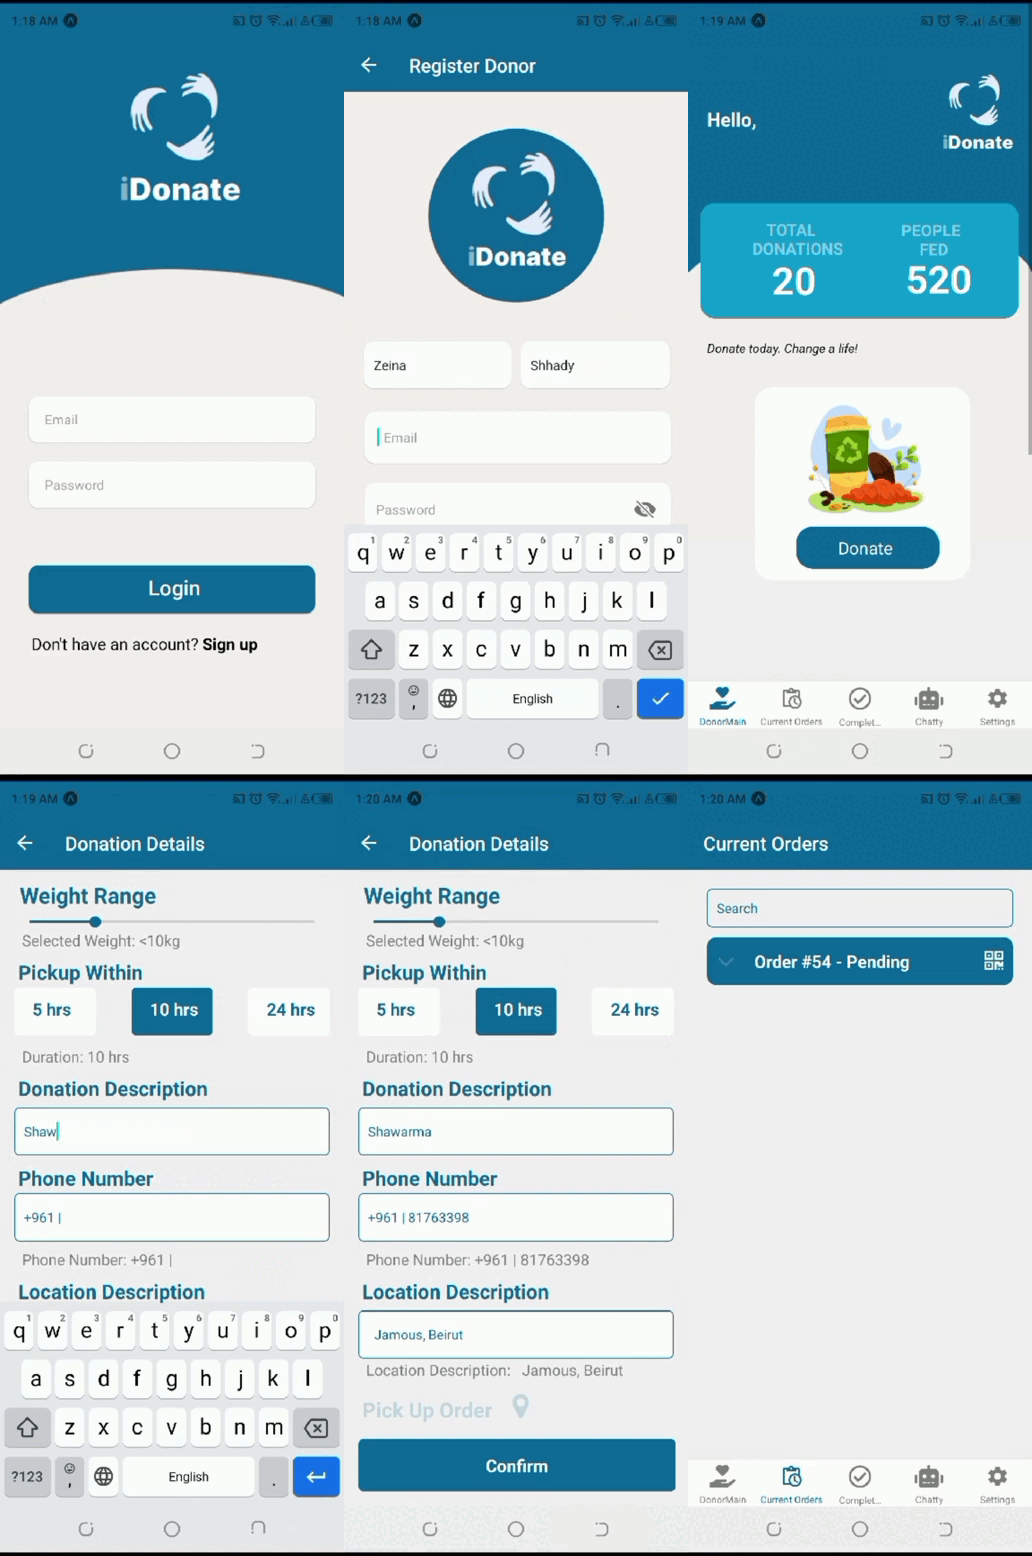
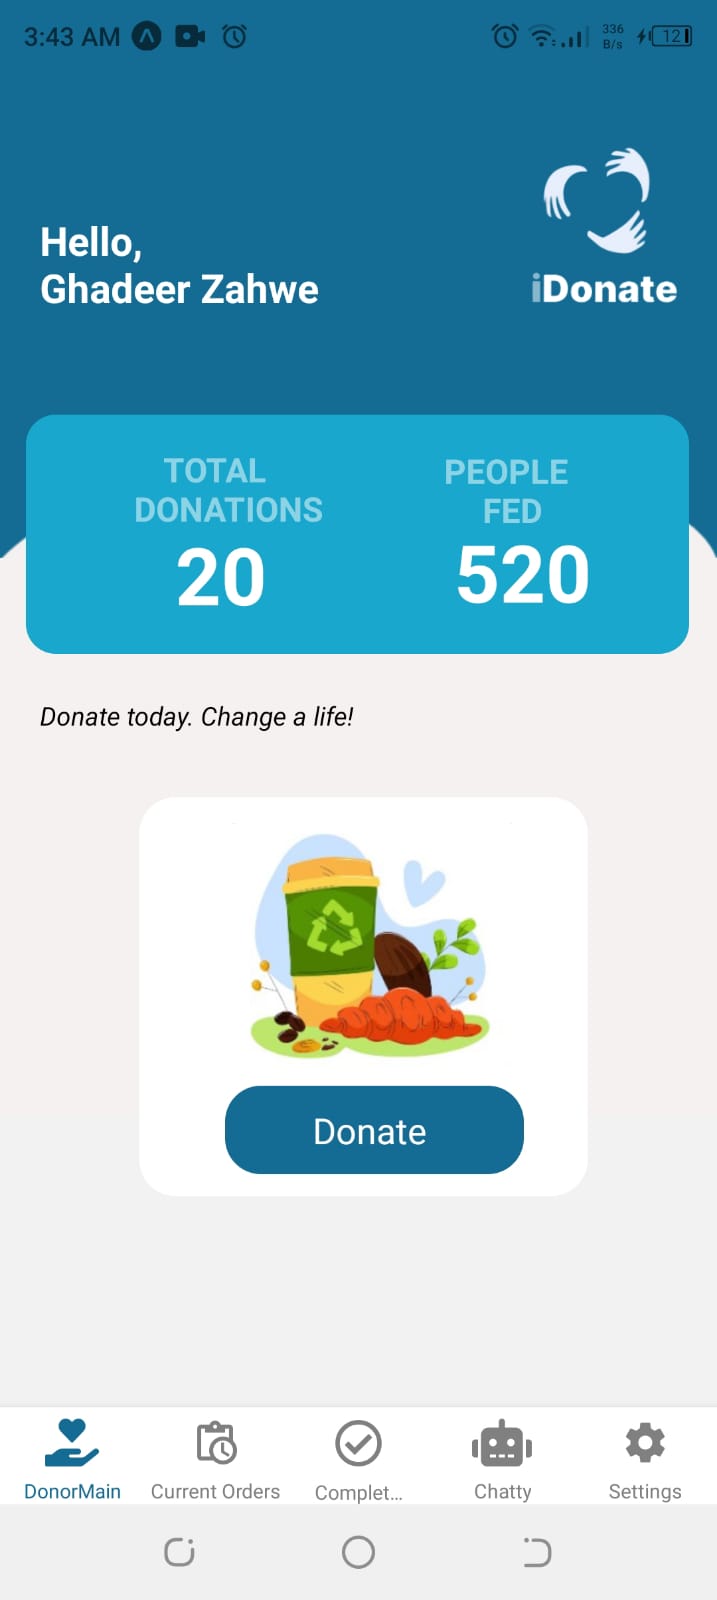
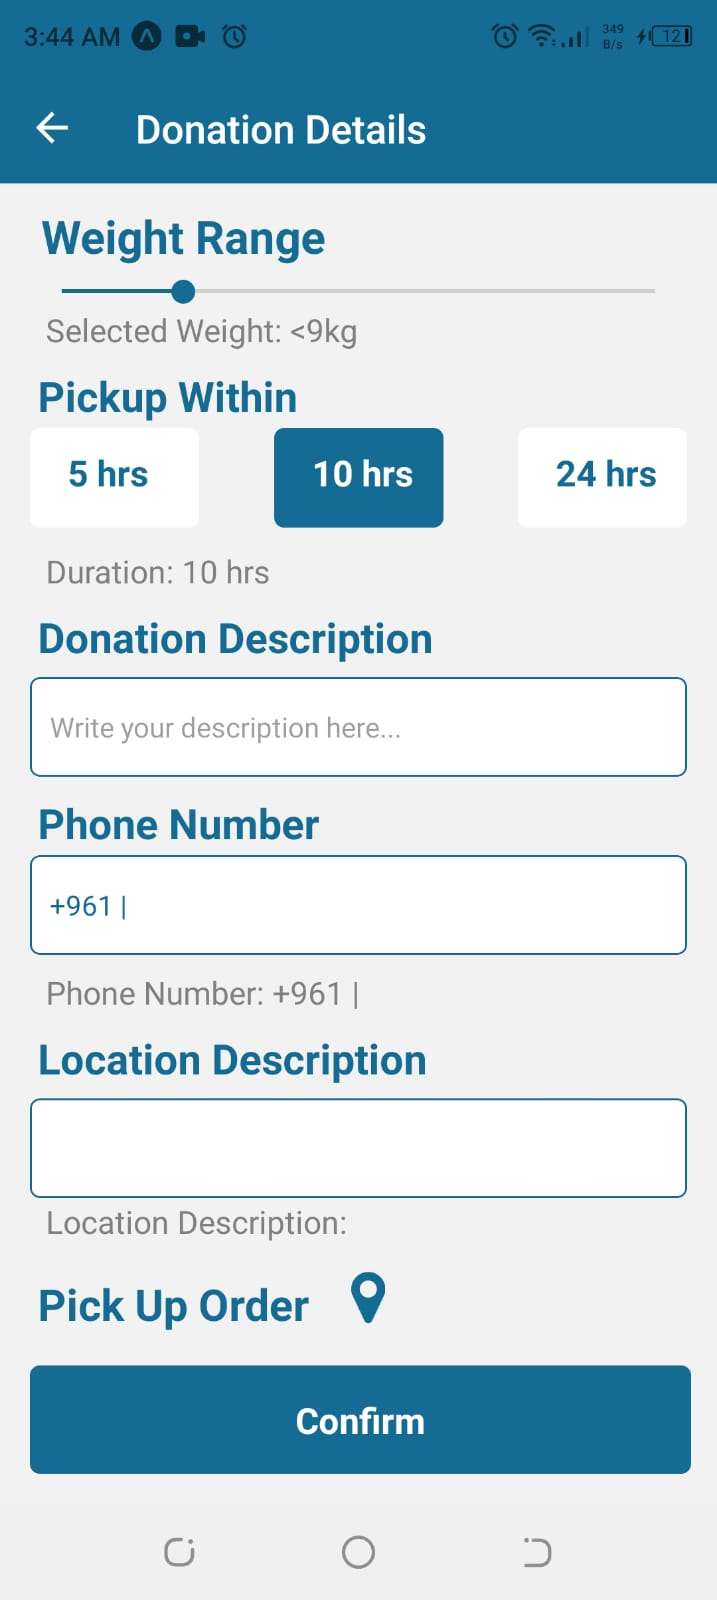
We designed iDonate using wireframes and mockups, iterating on the design until we reached the ideal layout for easy navigation and a seamless user experience.
- Check more Mockups on Figma figma
| Donor Main | Add Donation | Donor Current Order | Delivery Current Orders |
|---|---|---|---|
| Add Donation | Track Order | Chat | Scan Order |
|---|---|---|---|
 |
 |
 |
 |
| Check Weight | Delivery Current Orders | Delivery Scan Screen | Check Current Temperature |
|---|---|---|---|
 |
 |
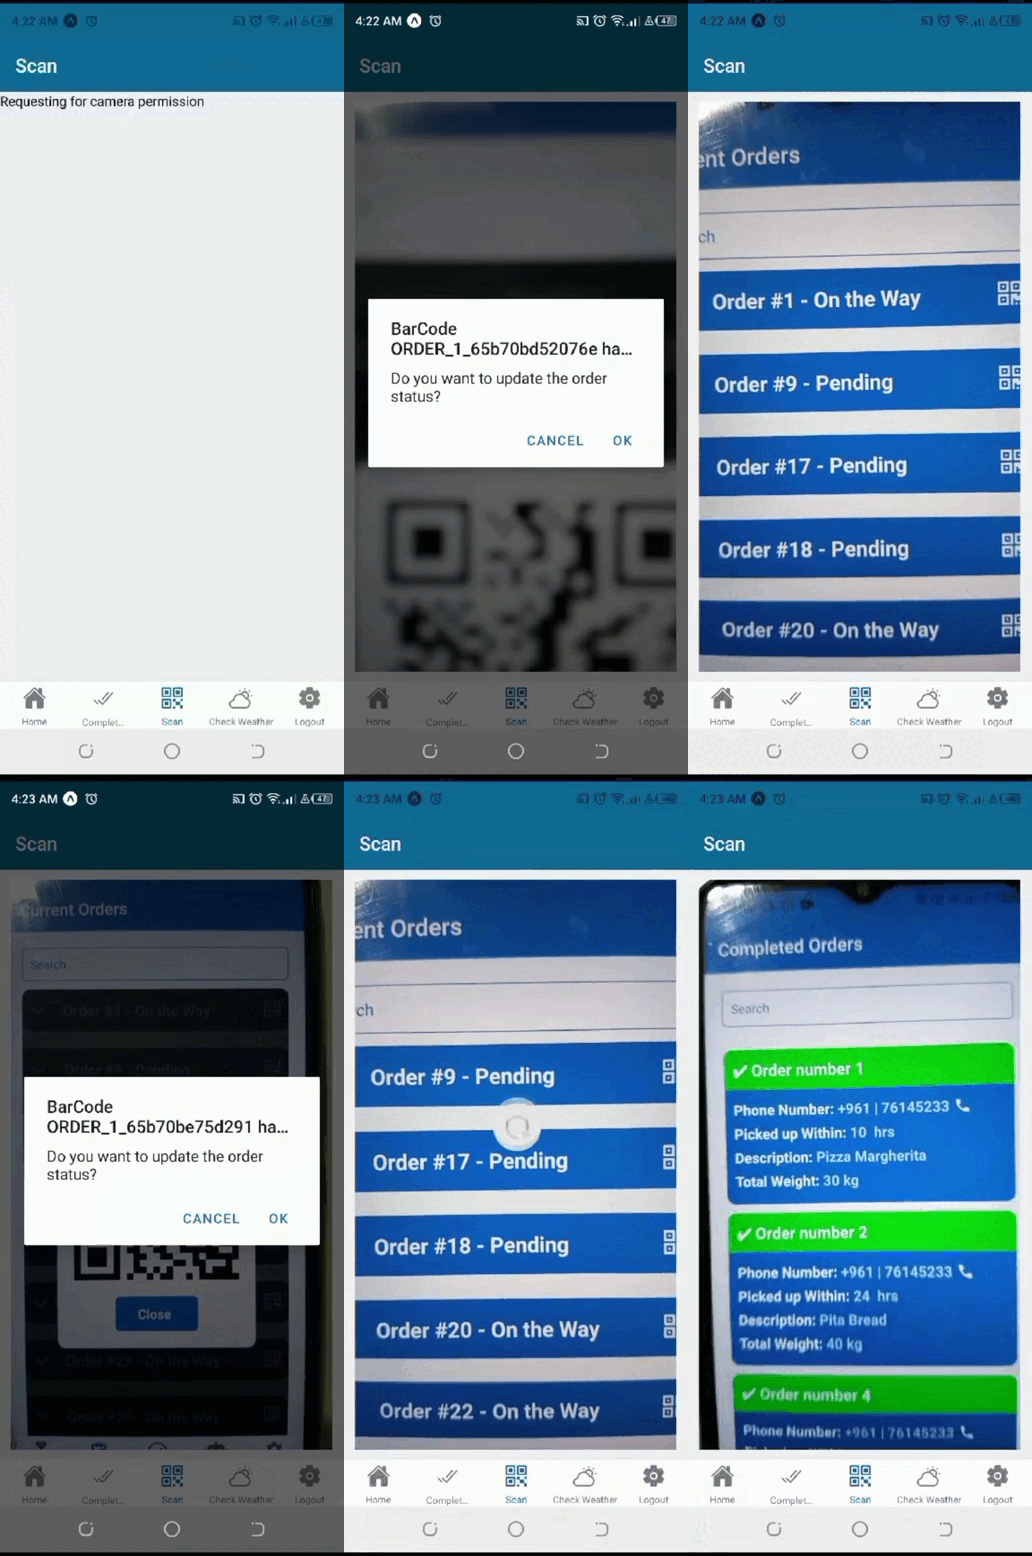 |
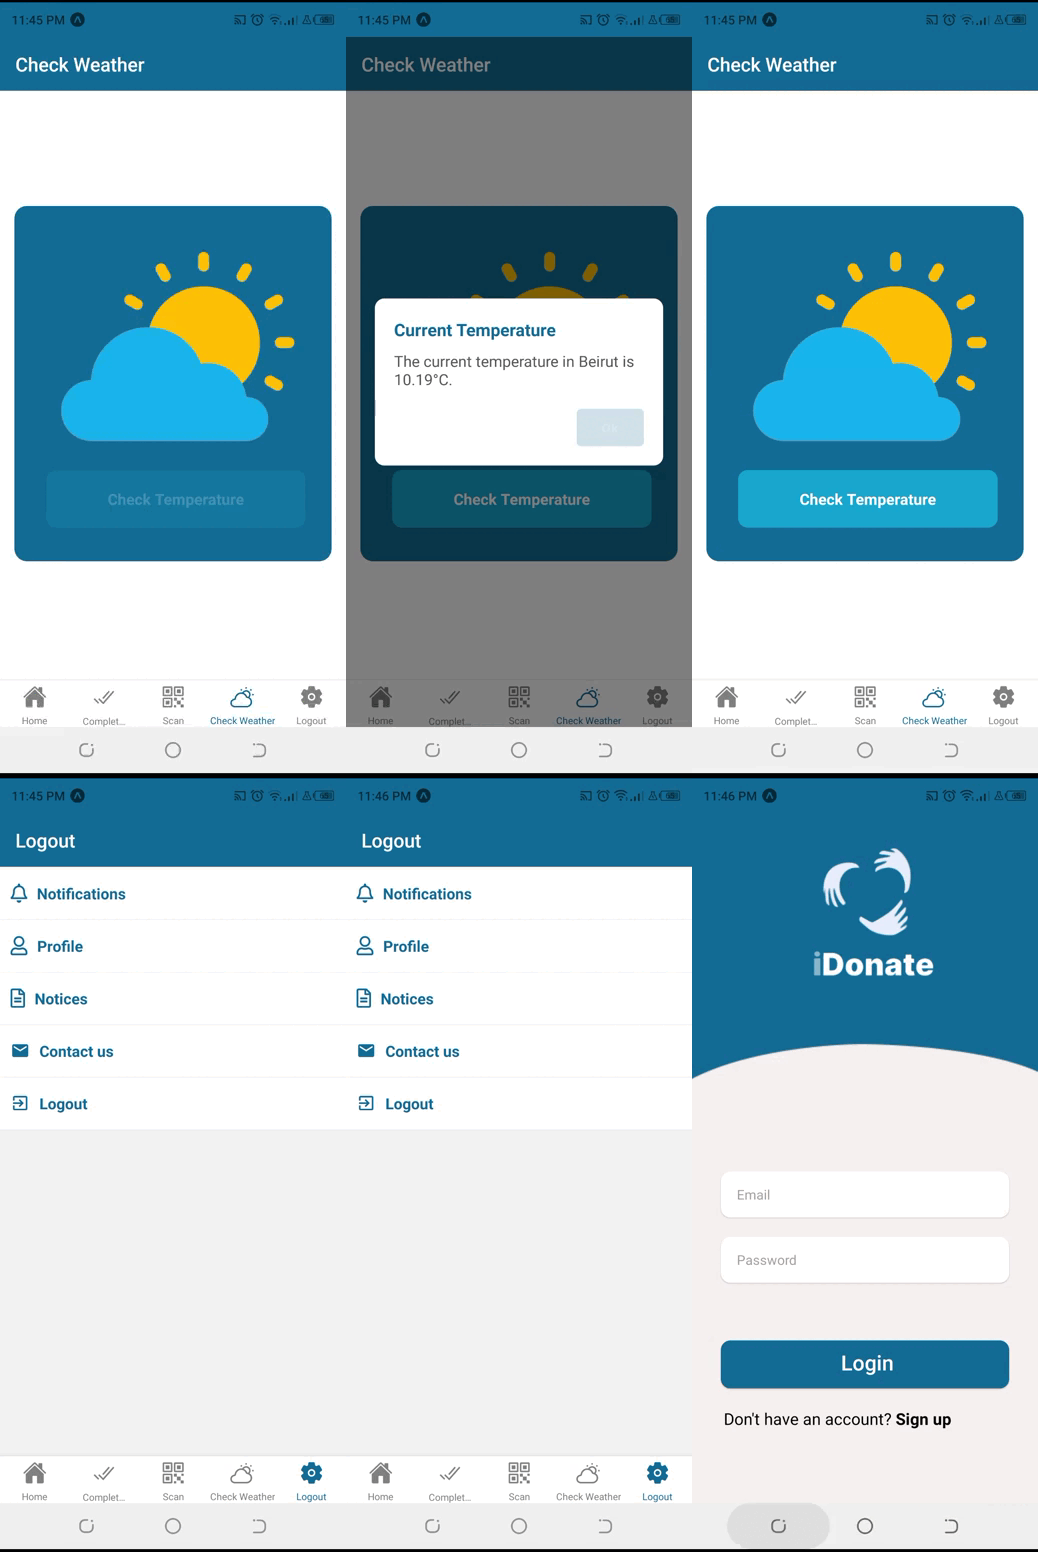 |
Donor.mp4 |
Delivery.mp4 |
Track.mp4 |
Register_Delivery.mp4 |
Scan.mp4 |
Check_Weight.mp4 |
| Login screen | Register screen | Register Donor | Register Delivery |
|---|---|---|---|
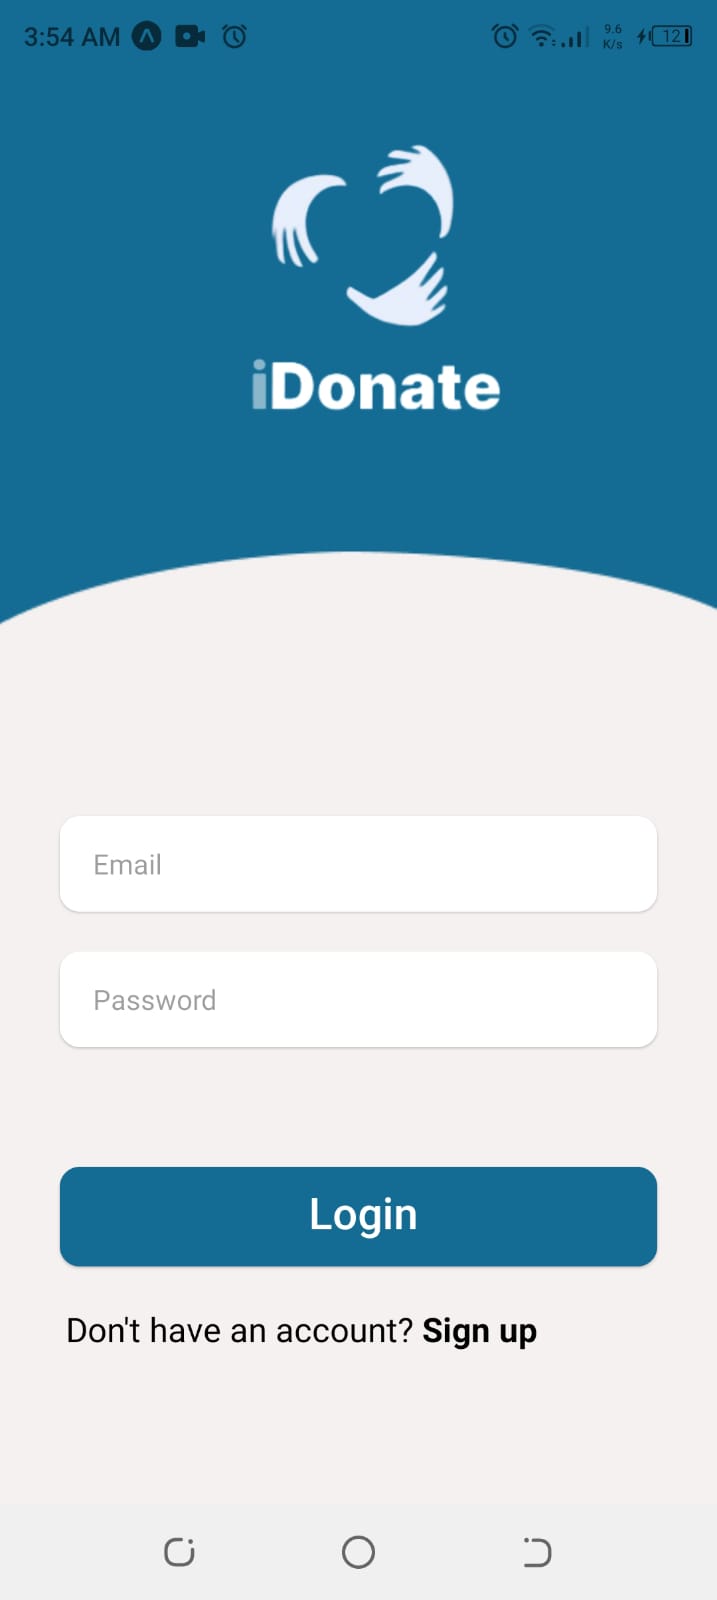 |
 |
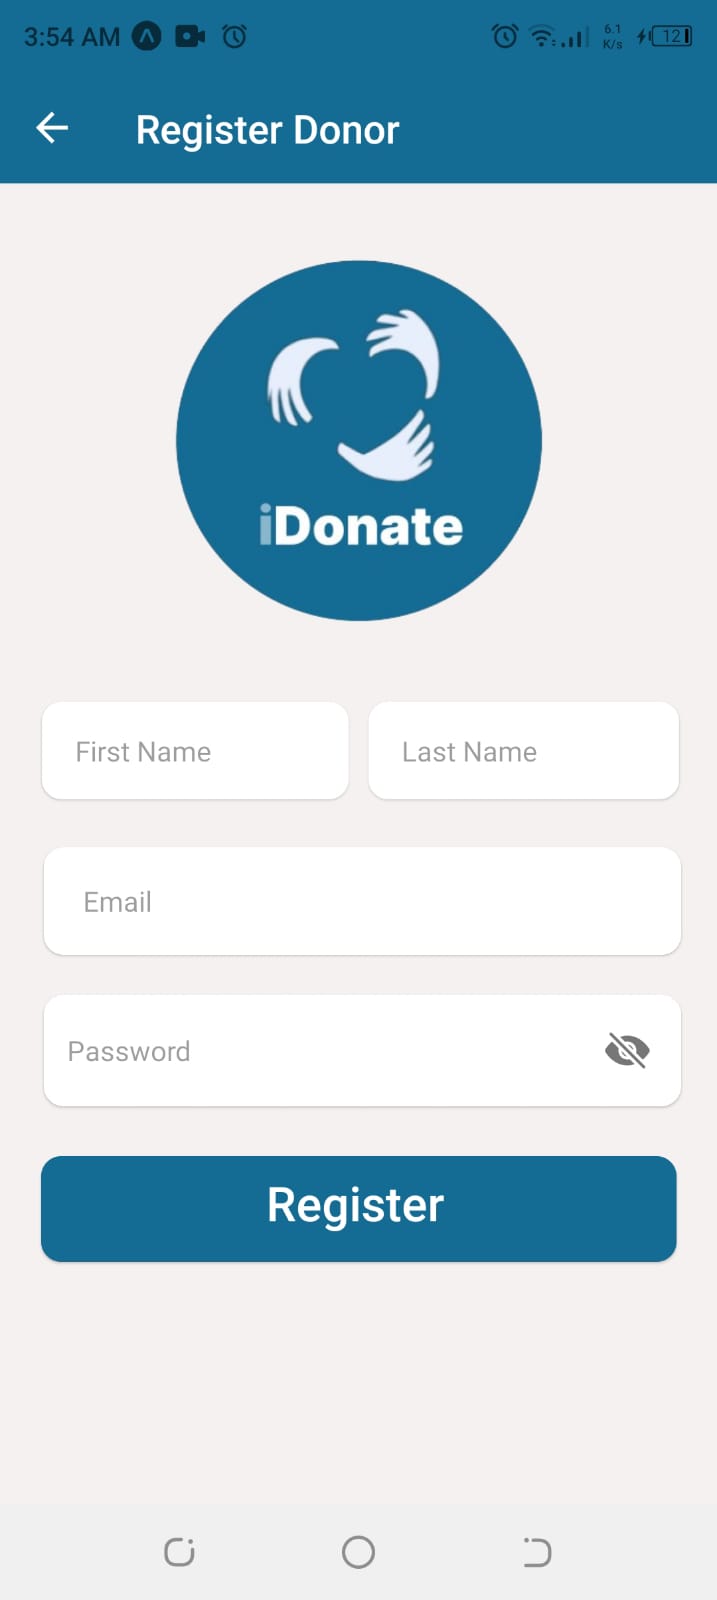 |
 |
| Home screen | Add Donation | Add Current Location | Current Orders |
|---|---|---|---|
 |
 |
 |
 |
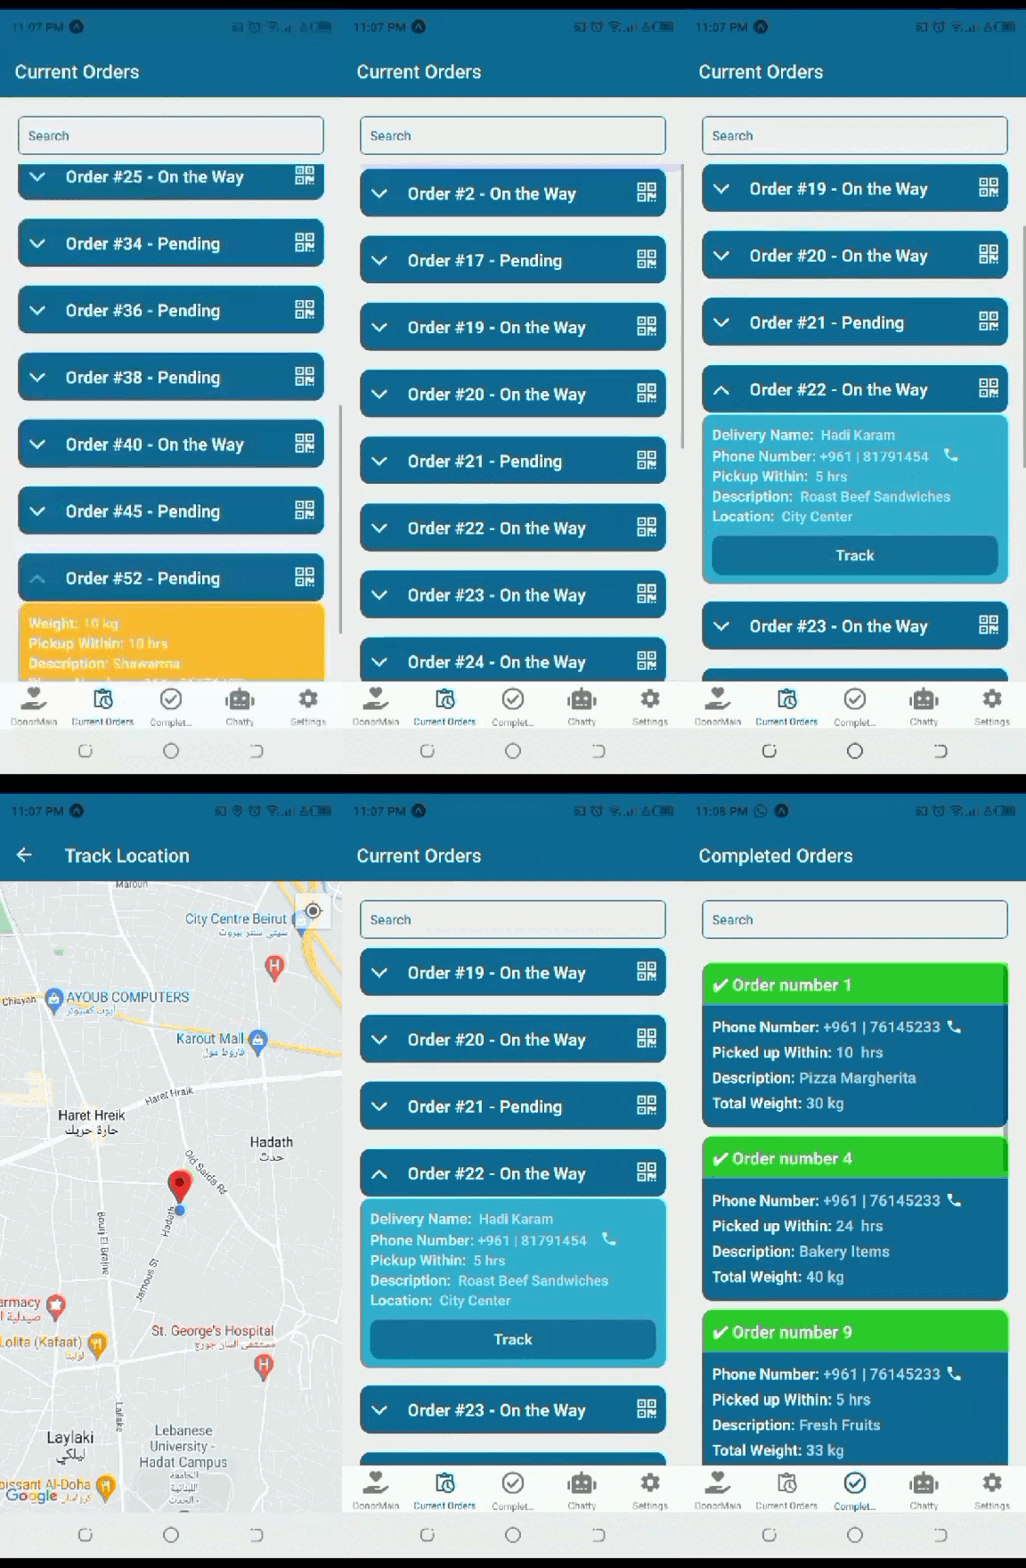
| Donor Current Orders | Completed Orders | ChatBot Screen | Settings screen |
|---|---|---|---|
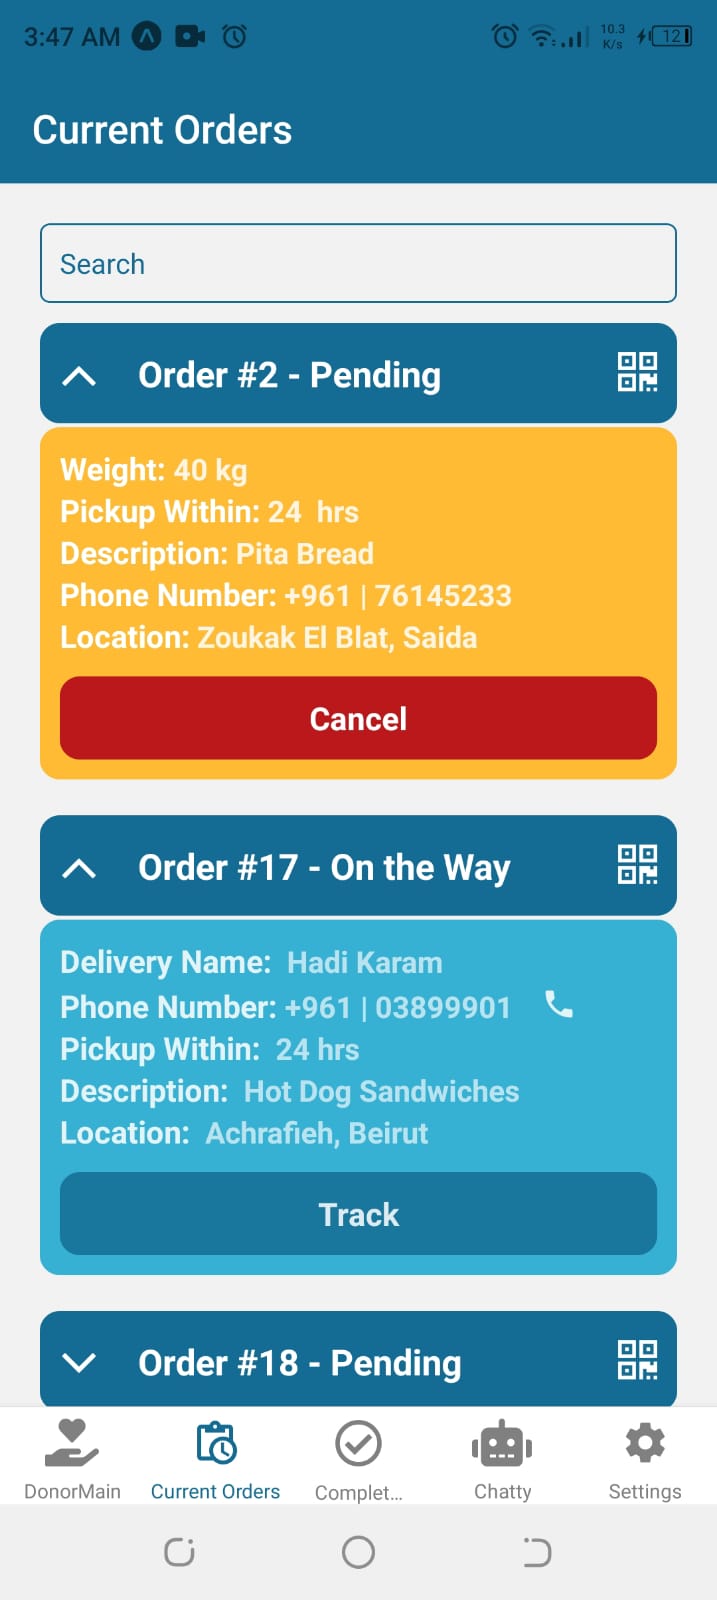 |
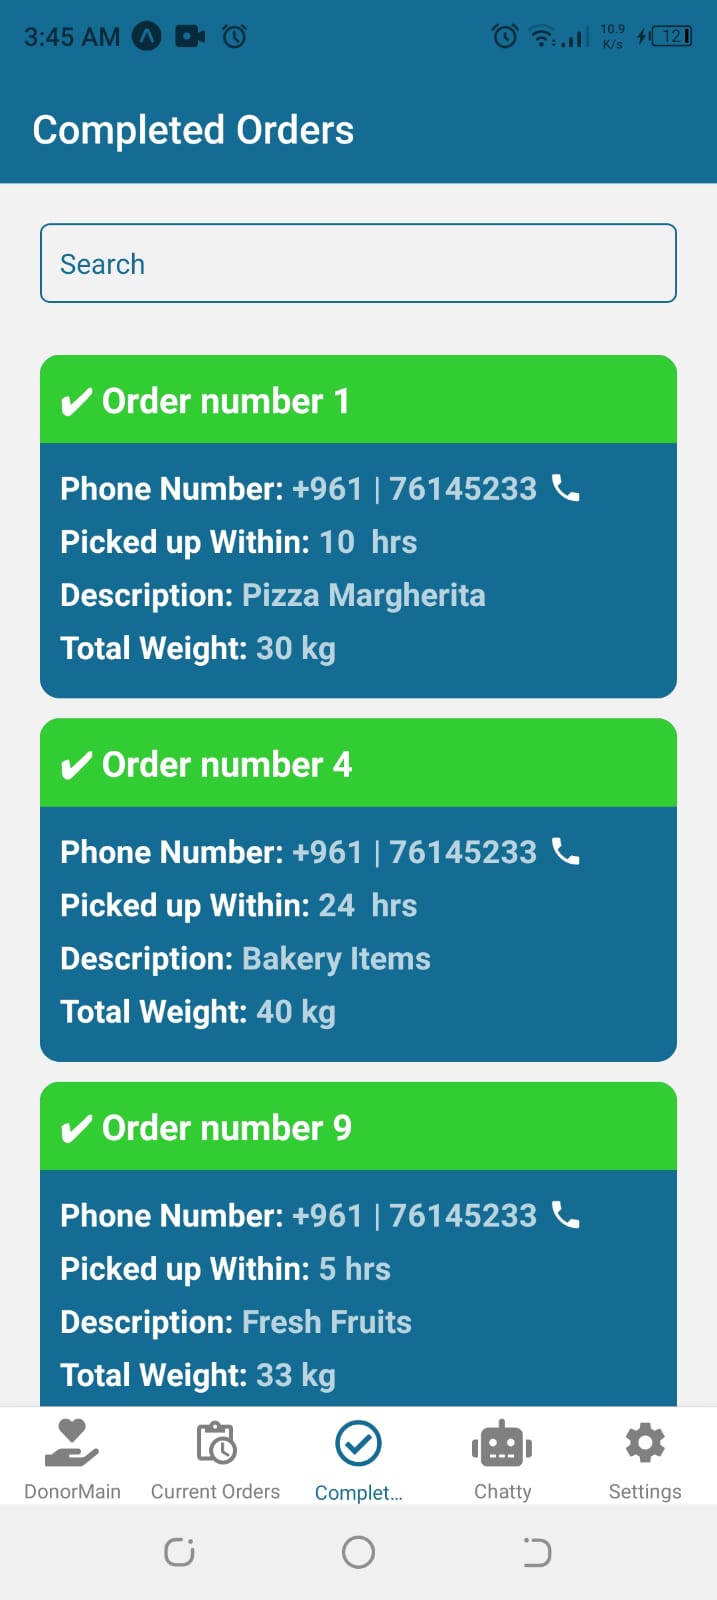 |
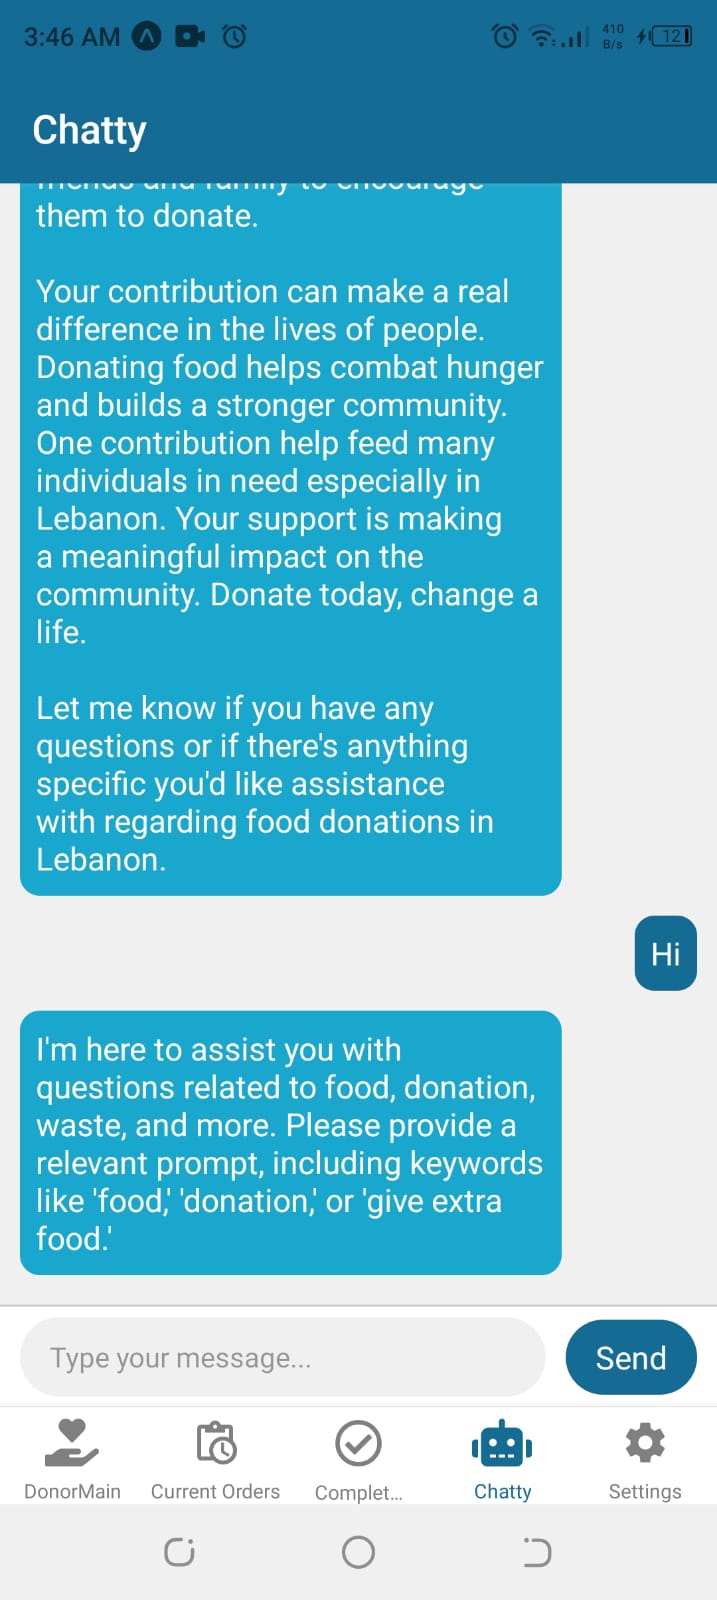 |
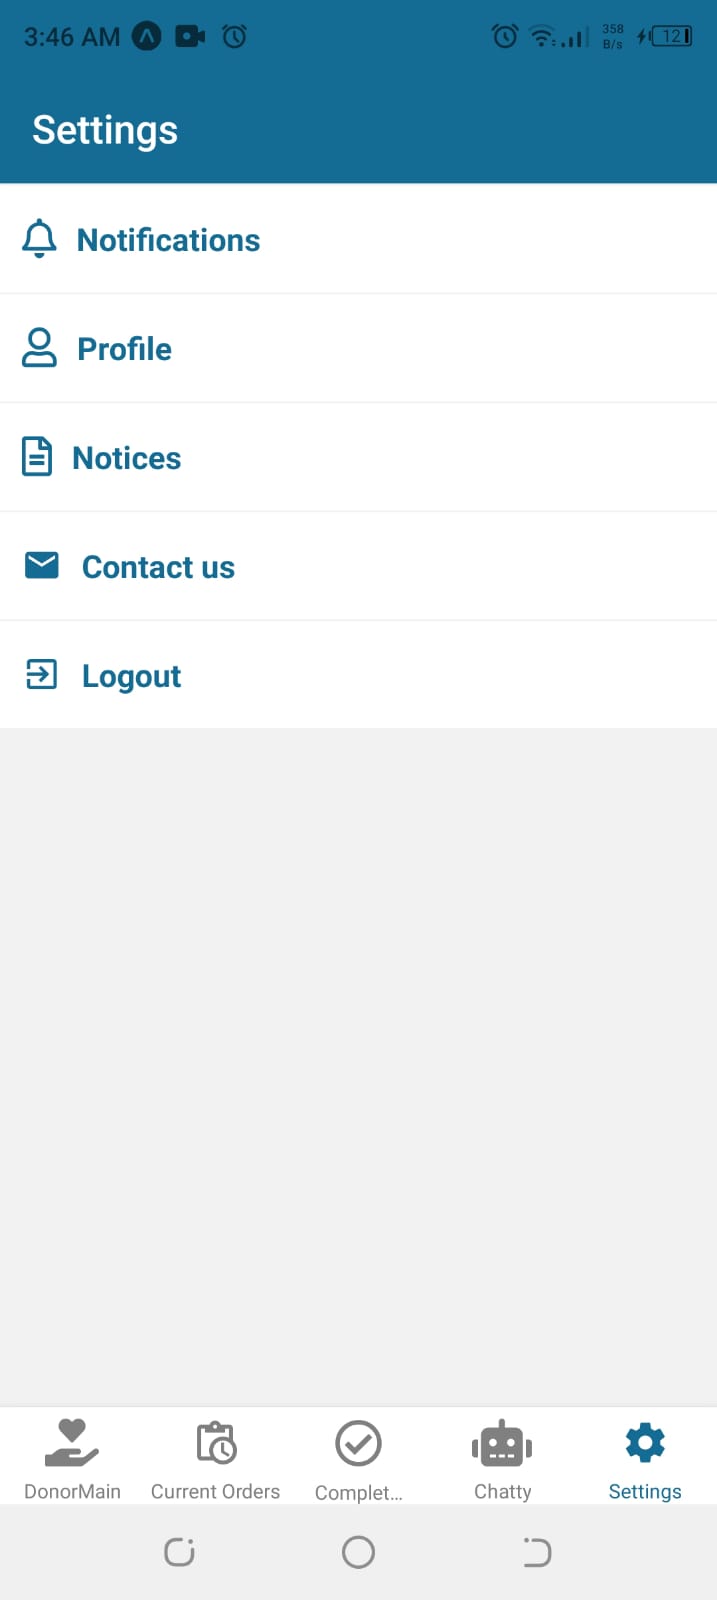 |
| Track Location screen | Delivery Pending | Delivery On The Way | Check Weight |
|---|---|---|---|
 |
 |
 |
 |
| Login screen | Donor Screen |
|---|---|
 |
 |
The Arduino IoT weight sensor system includes components like an ESP8266 chip for WiFi connectivity, an HX711 amplifier for accurate weight measurements, and an EKT464885 load cell body scale sensor for real-time weight data retrieval. Integrating these modules on a breadboard and programming them using the Arduino IDE, we've created a reliable sensor weight. The system consistently updates the weight of food donations for orders to the backend.
For a more detailed understanding of the Arduino setup and code intricacies, please refer to the comprehensive documentation: Smart Weight Sensor.
| Smart Weight Sensor |
|---|
 |
video_arduino.mp4 |
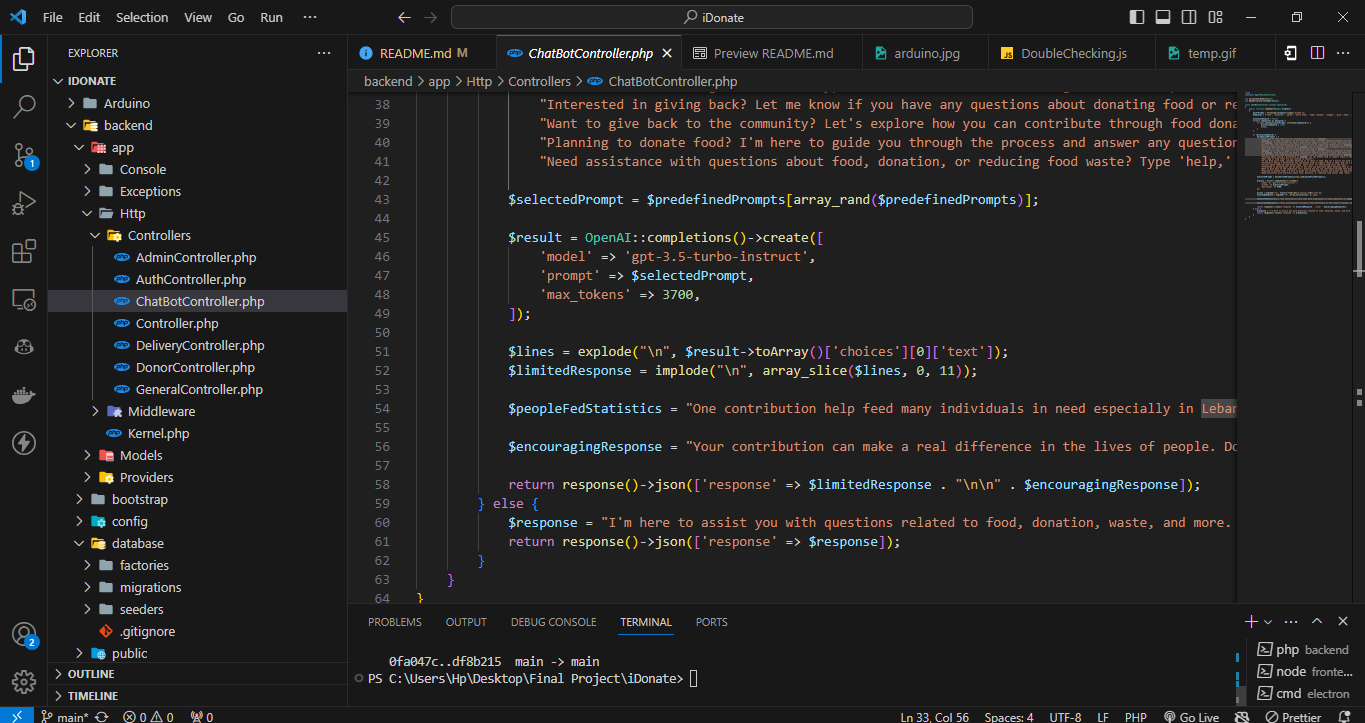
In this project, I leverage OpenAI's powerful natural language processing capabilities to develop an AI chatbot dedicated to assisting donors with inquiries related to food donation. The chatbot intelligently responds to user prompts, providing information and guidance on various aspects of food donation, waste reduction, and community support.
The chatbot incorporates sophisticated prompt engineering techniques to ensure contextually relevant and informative responses. By constructing detailed prompts that encapsulate user intent and conversational context, the chatbot effectively guides the AI model to provide tailored answers that align with the user's needs and preferences.
Key Features:
1- Keyword Recognition: The chatbot identifies relevant keywords related to food donation, waste, and community support to trigger appropriate responses.
2- Dynamic Interaction: Continuously updating prompts based on the conversation history allows the chatbot to maintain a natural and engaging dialogue flow with the user.
3- Role Specification: Clear definition of the chatbot's role as a donor assistance AI ensures that responses are aligned with the user's expectations and the context of the conversation.
This OpenAI donor chatbot enhances the user experience by providing valuable information and guidance on food donation-related inquiries, empowering donors to make a positive impact on their communities. For further details on the chatbot's functionality and implementation, please refer to the provided code.
| OpenAi prompt screen |
|---|
 |
- This project is deployed to Amazon Linux 2023 backend, by using the following steps :
- Update Amazon Linux 2023 Packages
- Install LAMP Stack
- Start and enable the Apache and MariaDB services
- Create Database
- Install PHP Composer for Laravel on on Linux 2023
- Download the Laravel framework project
- Install Laravel on Amazon Linux 2023
- Create the Laravel environment configuration file
- Apache Configuration for PHP Laravel App
- Get the Laravel demo page
Here are the AWS deployment commands I used to deploy my Laravel server:
-
Update Amazon Linux 2023 Packages:
sudo dnf update
-
Install LAMP Stack (Linux, Apache, MySQL, PHP):
sudo dnf install httpd mariadb*-server php php-mysqlnd -
Start and Enable the Apache and MariaDB Services:
sudo systemctl enable --now httpd
sudo systemctl enable --now mariadb
-
LogIn to MySWL and CREATE Database:
 sudo mysql
 CREATE DATABASE yourdb;
 CREATE USER 'youruser'@'localhost' IDENTIFIED BY 'password';
 GRANT ALL ON yourdb.* to 'youruser'@'localhost';
 FLUSH PRIVILEGES;
 quit;
-
Install PHP Composer for Laravel on Amazon Linux 2023:
curl -sS https://getcomposer.org/installer | php sudo mv composer.phar /usr/local/bin/composer sudo chmod +x /usr/local/bin/composer -
Clone the Laravel Project:
cd /var/www sudo dnf install git -y sudo git clone RepoLink -
Give Permission to Your Current to Access the Laravel Folder:
cd /var/www/RepoNameLaravel
sudo chown -R $USER /var/www/laravel
-
Install Laravel on Amazon Linux 2023:
composer install
sudo chown -R apache.apache /var/www/laravel
sudo chmod -R 755 /var/www/laravel
sudo chmod -R 777 /var/www/laravel/storage
-
Create the Laravel Environment Configuration File:
sudo cp .env.example .env
sudo php artisan key:generate
sudo nano .env
-
Go to the Database Section and Change the Values:
Database Name
Database Username
Database Password
Save the file using Ctrl+O, hit the Enter key, and then exit the file using Ctrl+X.
-
Apache Configuration for PHP Laravel App:
sudo nano /etc/httpd/conf.d/laravel.conf
-
Add the Following Lines:
 <VirtualHost *:80>
    ServerName laravel.example.com
    DocumentRoot /var/www/laravel/public

    <Directory /var/www/laravel>
           AllowOverride All
    </Directory>
  </VirtualHost>
-
Restart the Apache:
sudo systemctl restart httpd
-
Get Access to Your IP:
curl ipinfo.io
You will receive a list of details about your server. 'ip' is the IP adress of your new server. You can access it in the url of your browser.
NOTE: To access Laravel's Server APIs, use the following IP address: 80.79.145.161/api
For more details, check Backend
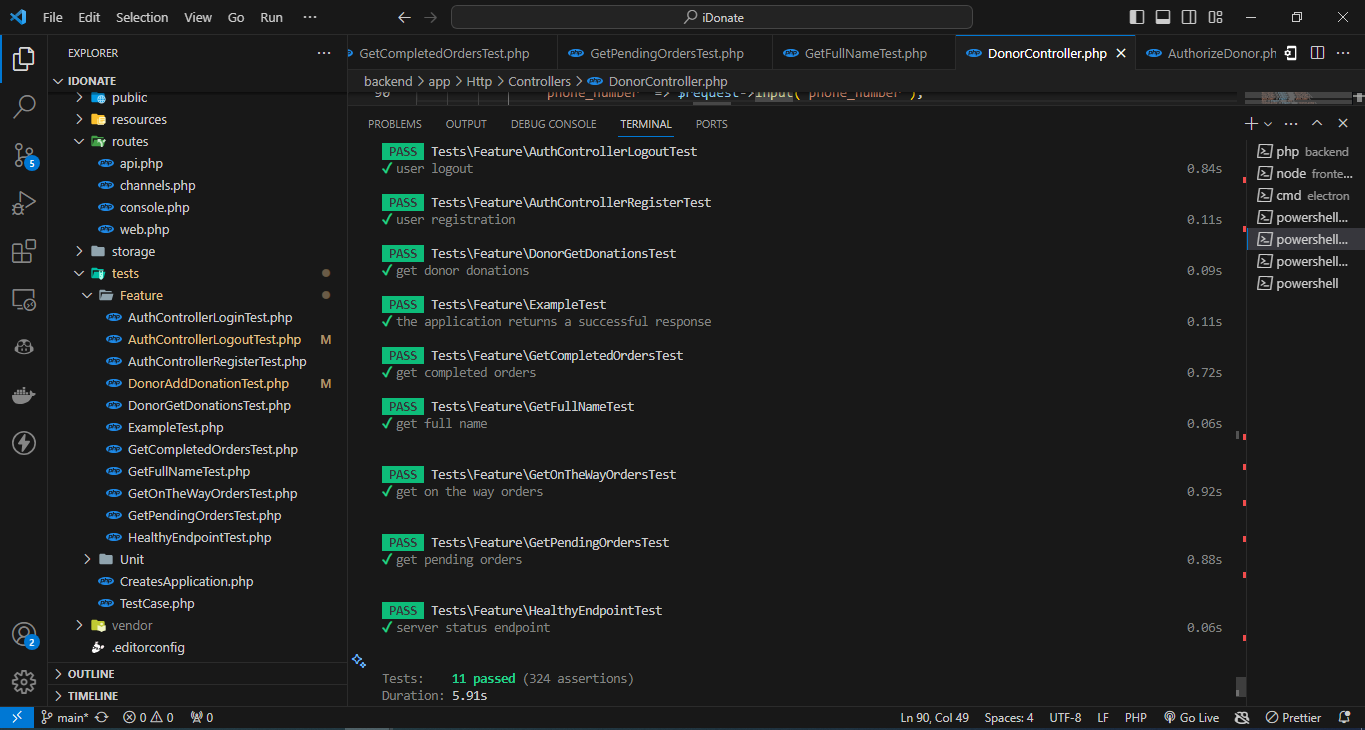
- This project employs rigorous unit testing methodologies to ensure the reliability and accuracy of code components. By systematically evaluating individual units of the software, we guarantee a robust foundation, identifying and addressing potential issues early in the development process.
To set up iDonate locally, follow these steps:
-
Install NPM from: NPM
-
Install composer from: Composer
-
Database server: Any Apache HTTP Server, MariaDB database server, recommended XAMPP This is an example of how to list things you need to use the software and how to install them.
Below are the steps to follow to run the project
- Clone the repo
git clone https://github.com/GhadeerZahwe/iDonate.git
- Install NPM packages for admin by opening terminal in
electronand runnpm install
- Install NPM packages for user react native by opening terminal in
frontendand runnpm install
- Install Composer packages for server by opening terminal in
backendand runOr if error occurscomposer install
composer update
In backend:
-
Copy
.env.examplefile and rename it.envyou can runcp .env.example .env
-
Open your
.envfile and change the database name (DB_DATABASE) to whatever you need or toidonate_db, username (DB_USERNAME) and password (DB_PASSWORD) field correspond to your configuration if you configured them. -
Run the following command for laravel ,JWT and Database (you must have your XAMPP server running)
php artisan key:generate
php artisan jwt:secret
php artisan migrate
php artisan storage:link
php artisan serve --host <YOUR_LOCAL_IPv4@> --port 8000
you can get your IPV4@ by running
on windows
ipconfig
on linux
ifconfig
Go to electron:
-
IN
\src\hooks\http-hook.jschange IP to you IPV4@ or server IP@URL = "SERVER_IP@/api/ony";
-
In The Terminal Run
npm start
In frontend :
-
Copy "or Create"
.env.examplefile and rename it.envyou can runcp .env.example .env
-
Add Server IP@ /Link
BASE_URL=<SERVER_IP>/api/ony
-
In
\hooks\request.jschange IP to you IPV4@ or server IP@const URL = "SERVER_IP@/api/ony";
-
In The Terminal Run
npx expo start
Congratulations, The App Must be Working Now.
Some Installation may be different on different OS. The app was never tested on an ios devices .
Enjoy your tour and please provide me with feedback. 🎉
