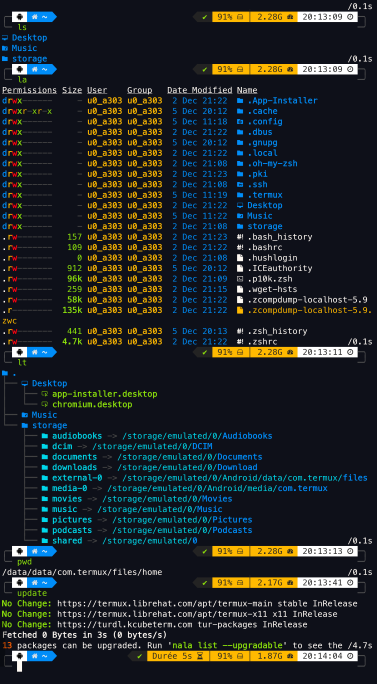
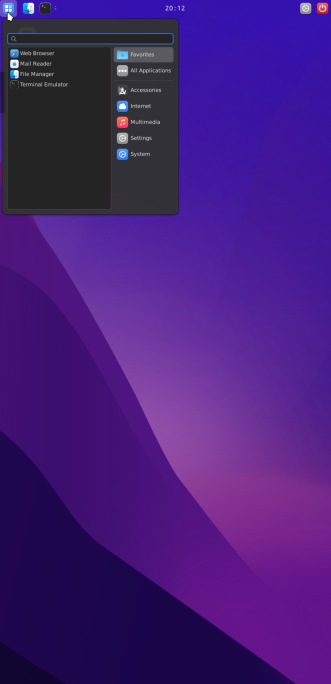
From selecting a shell to applying a cursor pack to performing stylish clicks in a complete Debian development environment that fits in your pocket : dozens of parameters are available in OhMyTermux.
-
Install Termux from F-Droid, GitHub or Play Store.
-
Install OhMyTermux with Gum (recommended🔥) :
curl -sL https://raw.githubusercontent.com/GiGiDKR/OhMyTermux/1.0.0/install.sh -o install.sh && chmod +x install.sh && ./install.sh --gum🧊 Alternative installation method
curl -sL https://raw.githubusercontent.com/GiGiDKR/OhMyTermux/1.0.0/install.sh -o install.sh && chmod +x install.sh && ./install.sh✅ Functional arguments
--gum | -g              # Using Gum as Command Line Interface
--shell | -sh           # Shell selection
--package | -pk         # Packages installation
--xfce | -x             # XFCE installation
--proot | -pr           # Debian PRoot installation
--font | f              # Font selection
--x11 | -x              # Termux-X11 installation
--skip | -sk            # Skip initial configuration
--verbose | -v          # Detailed outputs
--help | -h             # Show help
Individually selectable packages
Zsh configuration
Fish configuration
Termux Display
Termux configuration
- Custom aliases (common aliases + specific aliases depending on the package or plugin installed)
-
Setup an XFCE desktop for native Termux environment.
-
Using Termux-X11 : the server as well as the APK are downloaded and then installed from Termux or manually.
-
✅ 3 configurations are available :
1️⃣ Minimal
Only the necessary packages :
termux-x11-nightly        # Termux-X11
virglrenderer-android     # VirGL
xfce4                     # XFCE
xfce4-terminal            # Terminal
2️⃣ Recommended
Minimal installation + following packages :
netcat-openbsd            # Network Utility
pavucontrol-qt            # Sound Control
thunar-archive-plugin     # Archives
wmctrl                    # Window Control
xfce4-notifyd             # Notifications
xfce4-screenshooter       # Screenshot
xfce4-taskmanagerb        # Task Manager
xfce4-whiskermenu-plugin  # Whisker Menu
And the following interface elements :
WhiteSur-Theme            # https://github.com/vinceliuice/WhiteSur-gtk-theme
WhiteSur-Icon             # https://github.com/vinceliuice/WhiteSur-icon-theme
Fluent-Cursors            # https://github.com/vinceliuice/Fluent-cursors
WhiteSur-Wallpapers       # https://github.com/vinceliuice/WhiteSur-wallpapers
3️⃣ Custom
The contents of the Minimal installation + the choice among :
jq                        # JSON Utility
gigolo                    # File Manager
mousepad                  # Text Editor
netcat-openbsd            # Network Utility
parole                    # Media Player
pavucontrol-qt            # Sound Control
ristretto                 # Image Manager
thunar-archive-plugin     # Archives
thunar-media-tags-plugin  # Media
wmctrl                    # Window Control
xfce4-artwork             # Artwork
xfce4-battery-plugin      # Battery
xfce4-clipman-plugin      # Clipboard
xfce4-cpugraph-plugin     # CPU Graph
xfce4-datetime-plugin     # Date and Time
xfce4-dict                # Dictionary
xfce4-diskperf-plugin     # Disk Performance
xfce4-fsguard-plugin      # Disk Monitoring
xfce4-genmon-plugin       # Generic Widgets
xfce4-mailwatch-plugin    # Mail Monitoring
xfce4-netload-plugin      # Network Loading
xfce4-notes-plugin        # Notes
xfce4-notifyd             # Notifications
xfce4-places-plugin       # Places
xfce4-screenshooter       # Screenshot
xfce4-taskmanager         # Task Manager
xfce4-systemload-plugin   # System Load
xfce4-timer-plugin        # Timer
xfce4-wavelan-plugin      # Wi-Fi
xfce4-weather-plugin      # Weather Information
xfce4-whiskermenu-plugin  # Whisker Menu
The choice among following interface elements :
Theme :
WhiteSur-Theme            # https://github.com/vinceliuice/WhiteSur-gtk-theme
Fluent-Theme              # https://github.com/vinceliuice/Fluent-gtk-theme
Lavanda-Theme             # https://github.com/vinceliuice/Lavanda-gtk-theme
Icons :
WhiteSur-Icon             # https://github.com/vinceliuice/WhiteSur-icon-theme
McMojave-Circle           # https://github.com/vinceliuice/McMojave-circle-icon-theme
Tela-Icon                 # https://github.com/vinceliuice/Tela-icon-theme
Fluent-Icon               # https://github.com/vinceliuice/Fluent-icon-theme
Qogir-Icon                # https://github.com/vinceliuice/Qogir-icon-theme
Cursors :
Fluent-Cursors # https://github.com/vinceliuice/Fluent-cursorsWallpapers :
WhiteSur-Wallpapers # https://github.com/vinceliuice/WhiteSur-wallpapers -
The ability to install a web browser, either Chromium or Firefox.
Important
The recommended installation uses approximately 3,5 GB of disk space.
Debian PRoot installation with an application installer that are unavailable with Termux or Debian package managers.
-
start: start a Termux-X11 session. -
debian: access Debian PRoot installation from the terminal.
Warning
Process completed (signal 9) - press Enter
How to fix this error
You need to run this adb command to fix the process 9 error that will force close Termux :
adb shell "/system/bin/device_config put activity_manager max_phantom_processes 2147483647"
To do this without using a PC you have several methods : First, Connect to WIFI.
Method 1 : Install adb in Termux by running this code:
pkg install android-tools -y
Then open settings and enable developer's options by selecting "About phone" then hit "Build" 7 times.
Back out of this menu and go into developer's options, enable wireless debugging then click into there to get the port number then click pair device to get the pairing code.
Put settings into split screen mode by pressing the square button on the bottom right of your phone, and hold the settings icon until the split screen icon shows up.
Then select Termux and in settings select pair with a code. In Termux type adb pair then enter your pairing info.
After you have completed this process you can type adb connect and connect to your phone with the ip and port provided in the wireless debugging menu. You can then run the fix command :
adb shell "/system/bin/device_config put activity_manager max_phantom_processes 2147483647"
Method 2 :
Install LADB from Playstore or from GitHub.
In split screen have one side LADB and the other side showing developer settings. In developer settings, enable wireless debugging then click into there to get the port number then click pair device to get the pairing code. Enter both those values into LADB. Once it connects run the fix command :
adb shell "/system/bin/device_config put activity_manager max_phantom_processes 2147483647"
Version 1.0.0 :
- Initial release
- Separate XFCE / Debian install to run native Termux XFCE
- Add selectable graphical interface elements (Themes, Fonts, Cursors, Wallpapers)
- Add a password for the Debian proot user
- Integrate Fish configuration (Plugins, Prompts, Alias)
- Add more selectable packages
- Add Python modules
- Integrate a Termux theme selection
- Integration of OhMyTermuxScript
- Integration of OhMyObsidian
Tip
🚩 French version is available.


