Management and Integration with your Kubernetes dev environment more efficient.
- Connect: Direct access remote Kubernetes cluster: KT Connect use sshuttle as the vpn tool to access remote Kubernetes cluster network.
- Exchange: Developer can exchange the workload to redirect the request to local app.
- Mesh: You can create a mesh version in local host and redirect to your local
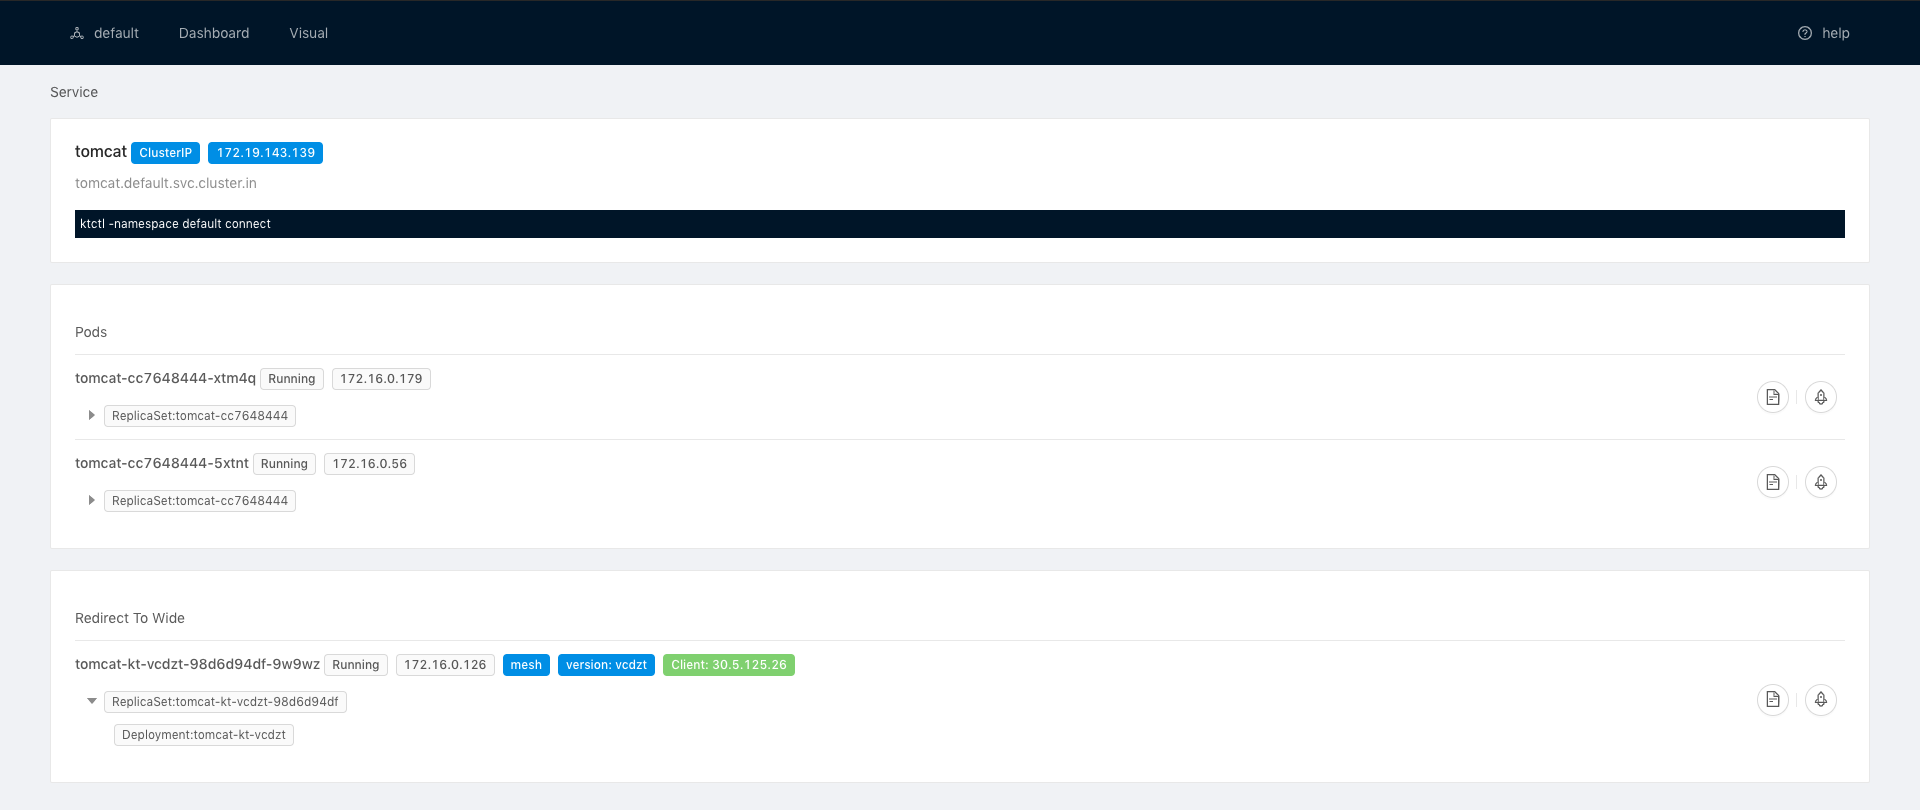
- Dashboard: A Dashboard view you can know how the environemnt is use.
You can download and install the ktctl from Downloads And Install
$ kubectl run tomcat --image=tomcat:7 --expose --port=8080
kubectl run --generator=deployment/apps.v1 is DEPRECATED and will be removed in a future version. Use kubectl run --generator=run-pod/v1 or kubectl create instead.
service/tomcat created
deployment.apps/tomcat created

# Deployment info
$ kubectl get deployments -o wide --selector run=tomcat
NAME     DESIRED   CURRENT   UP-TO-DATE   AVAILABLE   AGE   CONTAINERS   IMAGES     SELECTOR
tomcat   1         1         1            1           12m   tomcat       tomcat:7   run=tomcat

# Pods info
$ kubectl get pods -o wide --selector run=tomcat
NAME                     READY   STATUS        RESTARTS   AGE   IP             NODE                                NOMINATED NODE
tomcat-cc7648444-r9tw4   1/1     Running       0          2m    172.16.0.147   cn-beijing.i-2ze11lz4lijf1pmecnwp   <none>

# Service info
$ kubectl get svc tomcat
NAME     TYPE        CLUSTER-IP       EXTERNAL-IP   PORT(S)    AGE
tomcat   ClusterIP   172.19.143.139   <none>        8080/TCP   4m
$ sudo ktctl connect
2019/06/19 11:11:07 Deploying proxy deployment kt-connect-daemon in namespace default
2019/06/19 11:11:07 Pod status is Pending
2019/06/19 11:11:09 Pod status is Running
2019/06/19 11:11:09 Success deploy proxy deployment kt-connect-daemon in namespace default
2019/06/19 11:11:18 KT proxy start successful
Access PodIP:
curl http://172.16.0.147:8080
Access ClusterIP:
$ curl http://172.19.143.139:8080
Access Server internal DNS address
$ curl http://tomcat.default.svc.cluster.local:8080
Create Tomcat 8 in local and expose 8080 port
docker run -itd -p 8080:8080 tomcat:8
$ ktctl exchange tomcat --expose 8080
2019/06/19 11:19:10  * tomcat (0 replicas)
2019/06/19 11:19:10 Scale deployment tomcat to zero
2019/06/19 11:19:10 Deploying proxy deployment tomcat-kt-oxpjf in namespace default
2019/06/19 11:19:10 Pod status is Pending
2019/06/19 11:19:12 Pod status is Running
2019/06/19 11:19:12 Success deploy proxy deployment tomcat-kt-oxpjf in namespace default
SSH Remote port-forward for POD starting
2019/06/19 11:19:14 ssh remote port-forward start at pid: 3567
Access local tomcat by internal service DNS address:
Note: if
kubectl connectnot running, you can only access from cluster
$ curl http://tomcat.default.svc.cluster.local:8080 | grep '<h1>'
<h1>Apache Tomcat/8.5.37</h1> #
You can know more from Mesh Best Practices
The most different from mesh and exchange is exchange will scale the origin workload replicas to zero. And messh will keep it and create a pod instance with random version, after this user can modifi the Istio route rule let the specific request redirect to local, and the environment is working as normal:
$ ktctl mesh tomcat --expose 8080
2019/06/19 22:10:23 'KT Connect' not runing, you can only access local app from cluster
2019/06/19 22:10:24 Deploying proxy deployment tomcat-kt-ybocr in namespace default
2019/06/19 22:10:24 Pod status is Pending
2019/06/19 22:10:26 Pod status is Pending
2019/06/19 22:10:28 Pod status is Running
2019/06/19 22:10:28 Success deploy proxy deployment tomcat-kt-ybocr in namespace default
2019/06/19 22:10:28 -----------------------------------------------------------
2019/06/19 22:10:28 |    Mesh Version 'ybocr' You can update Istio rule       |
2019/06/19 22:10:28 -----------------------------------------------------------
2019/06/19 22:10:30 exchange port forward to local start at pid: 53173
SSH Remote port-forward POD 172.16.0.217 22 to 127.0.0.1:2217 starting
2019/06/19 22:10:30 ssh remote port-forward exited
2019/06/19 22:10:32 ssh remote port-forward start at pid: 53174
Dashboard can help your know how your dev environemnt is used.
You can install KT Connect Dashboard As Follow Install Dashboard

