![]()
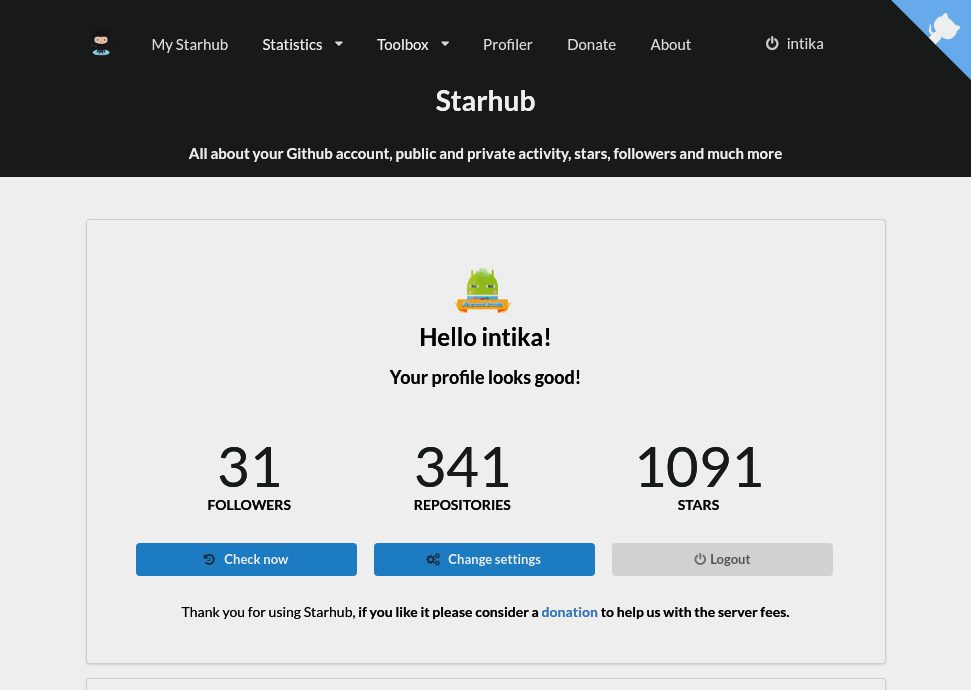
All about your Github account, public and private activity, stars count, release download count, who followed/unfollowed and starred/unstarred your Github repositories plus daily email notification about changes and much more.
- My-Starhub: display total repos, stars and followers
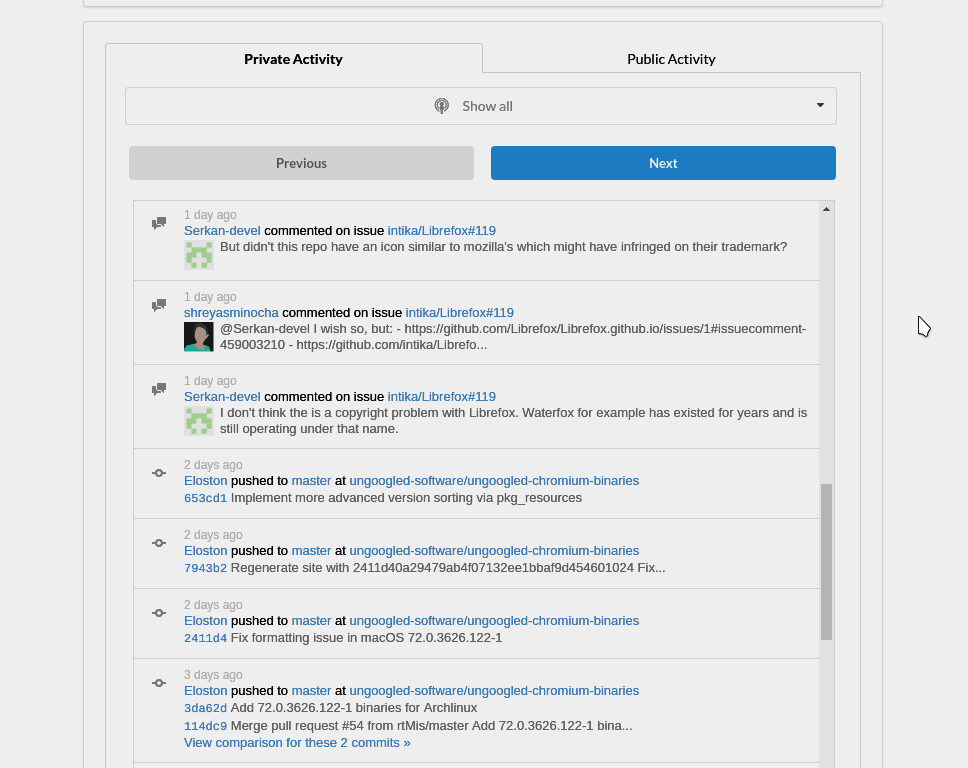
- My-Starhub: public and private activity history listing plus filter
- My-Starhub: watch all repos for changes
- My-Starhub: daily email notification (only on changes)
- My-Starhub: notification for new followers, un-follower, stars, un-star
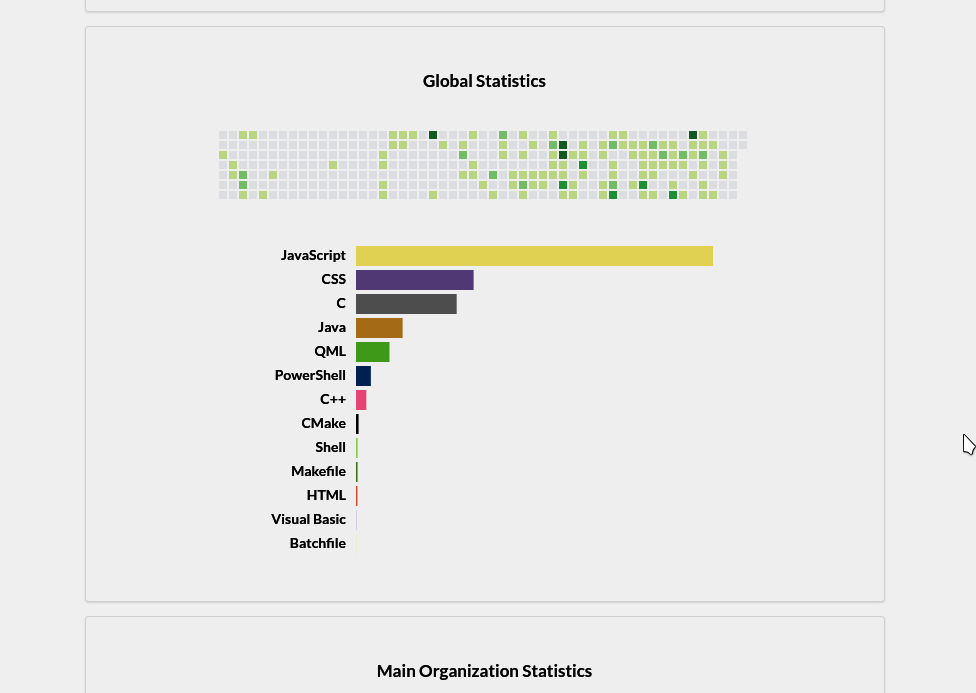
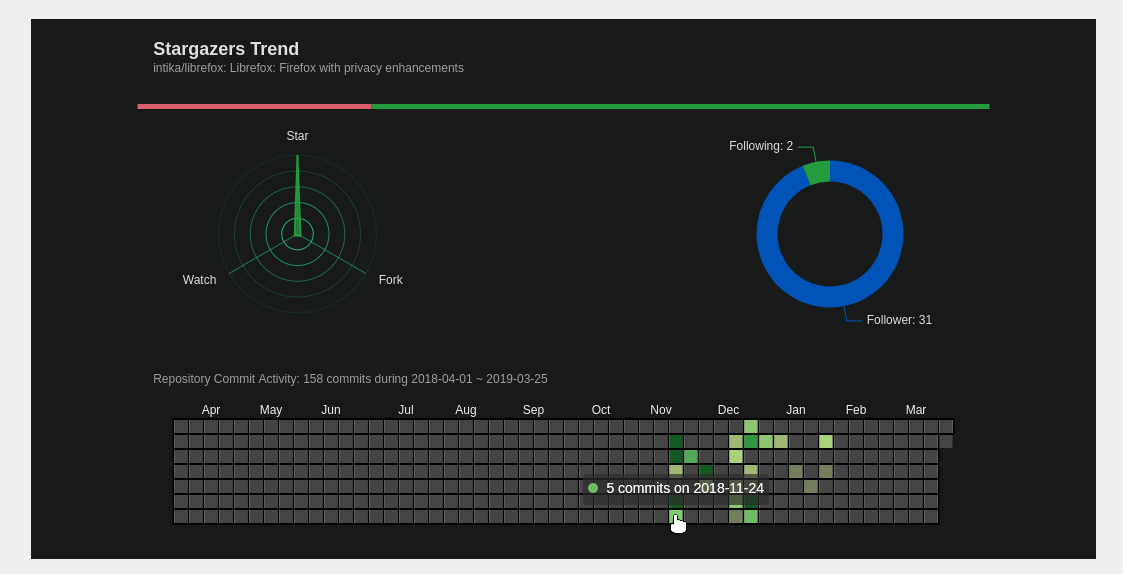
- My-Starhub: global user statistics on activities and used languages
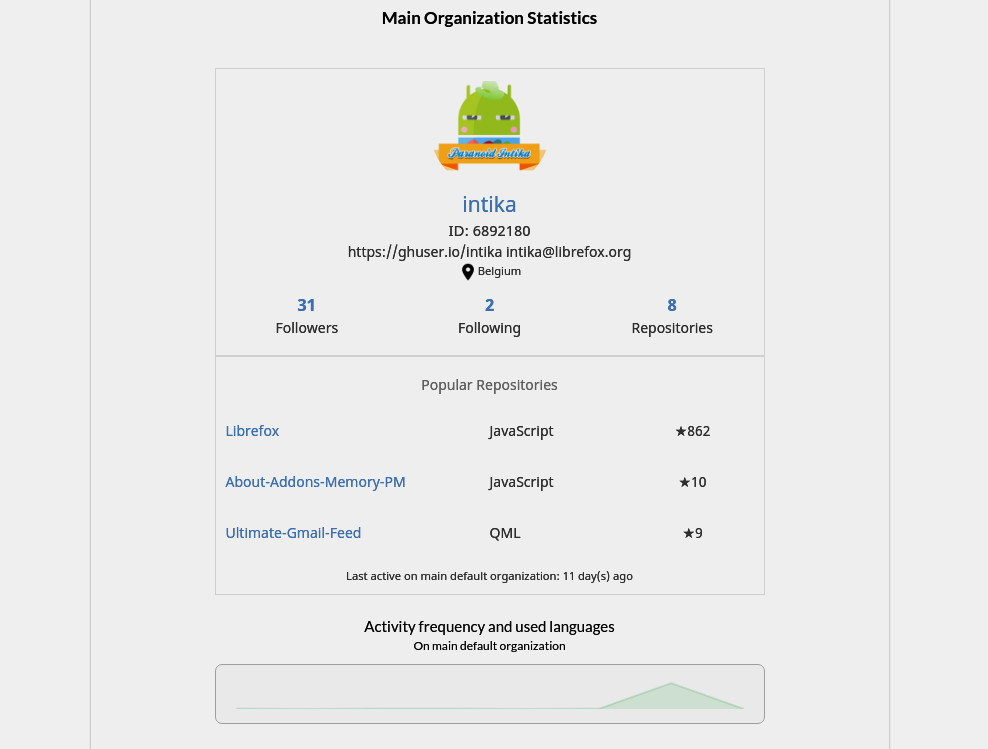
- My-Starhub: main user organization statistic
- My-Starhub: list search and filter starred repos
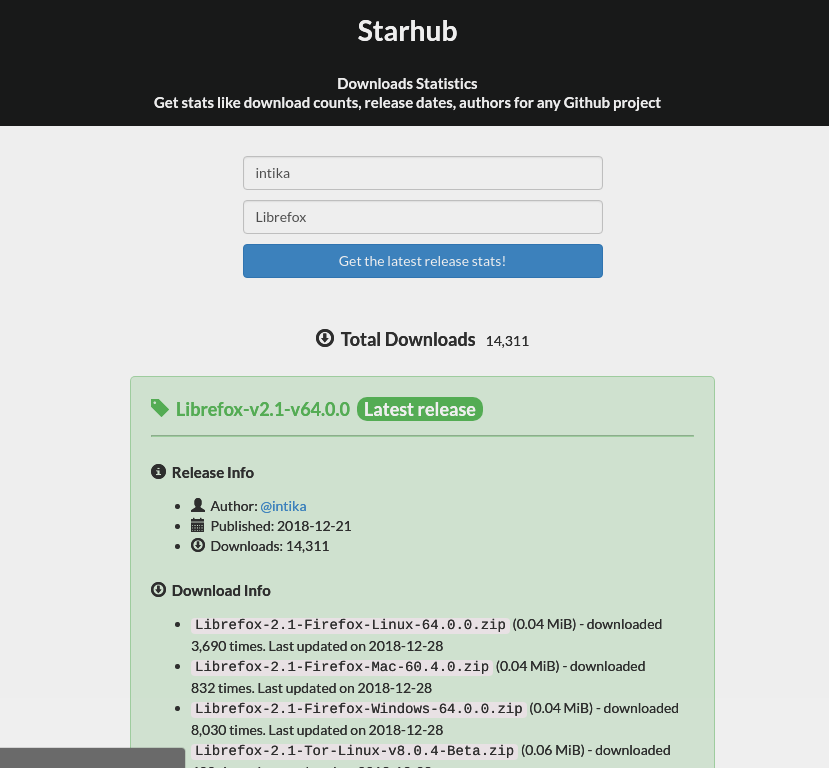
- Statistics: stars and releases downloads counter analytics
- Tools: github applications selection and listing
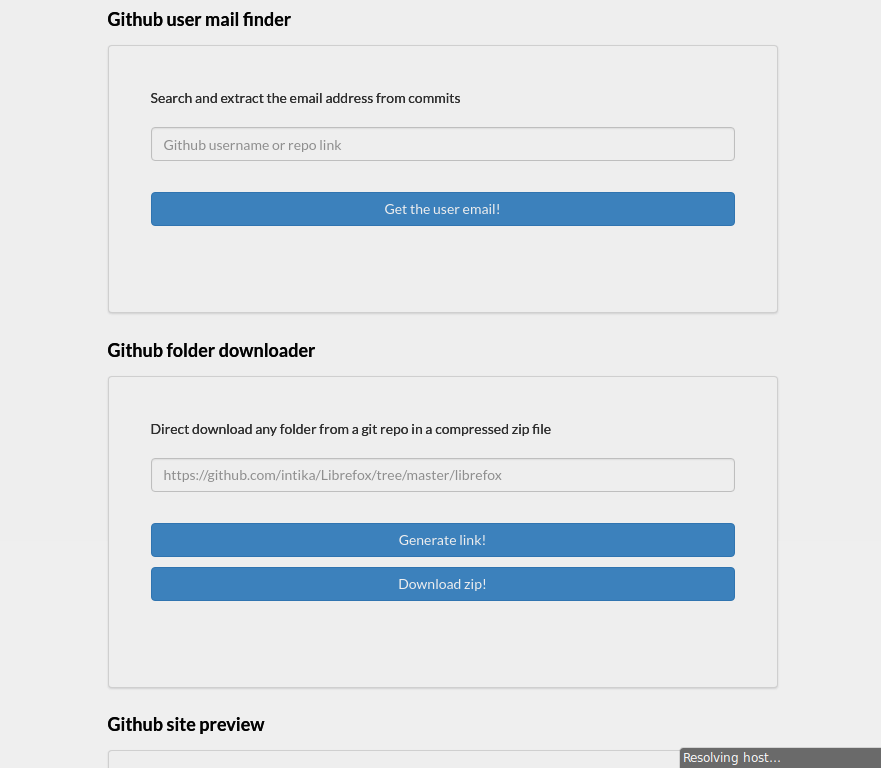
- Tools: mail finder, username and user-id converter, site preview and git downloader
- Profiler: github profile for any github user with various statistics
- Profiler: direct access (starhub.be/github-user-name)
- And much more...


Cloning
For Go projects to work they have to be cloned on the right places.
Let's assume ~/Code/Go as our default Go projects folder.
So:
git clone git@github.com:Github-Web-Apps/Starhub.git
cd Starhub
Dependencies
Now, install Go 1.11+ and run:
make setupTo install the other project's dependencies.
Building
Just run:
make buildRunning the tests
Just run:
make testDatabase setup
Start up postgres and run:
createdb watchub
for sql in ./migrations/*; do psql watchub -f $sql; done
Tunnel with ngrok
To test the entire flow, you'll need to install ngrok.
Install it, then just run:
ngrok http 3000Then, create an application on github.
Fill it like this:
- Application name:
Starhub-Dev-Username - Homepage URL: the ngrok http forwarding URL, e.g.
https://6f7ca783.ngrok.io - Application description: empty
- Authorization callback URL: same as homepage url, but with a
/login/callbacksuffix. e.g.:https://6f7ca783.ngrok.io/login/callback
GitHub will then give you a Client ID and a Client Secret.
Export them like this:
export GITHUB_CLIENT_ID="your client id"
export GITHUB_CLIENT_SECRET="your client secret"
And then just run the app:
go run main.go