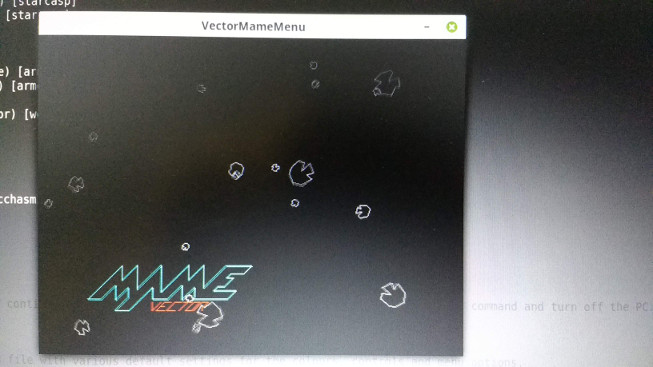
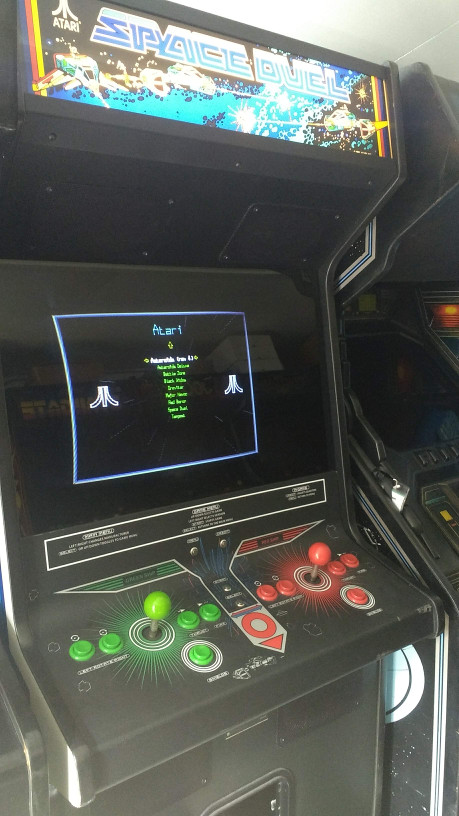
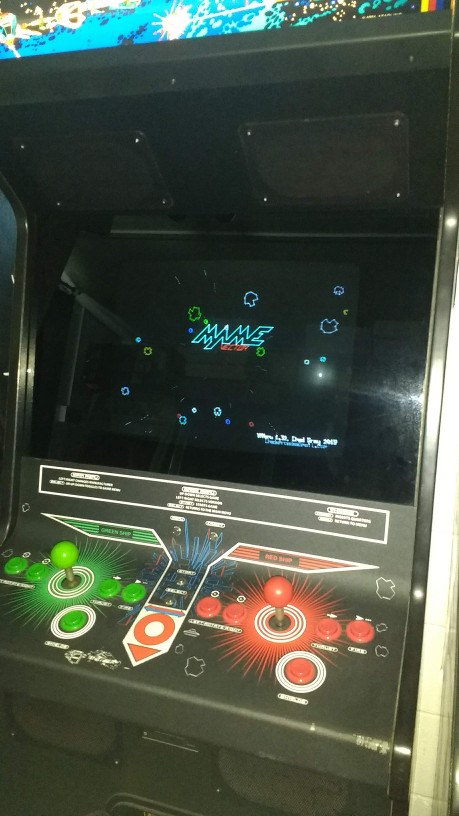
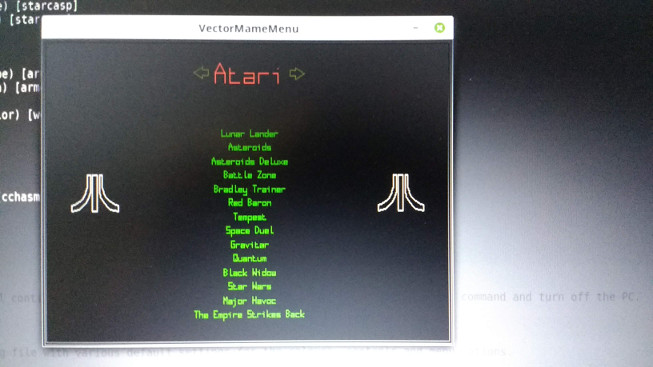
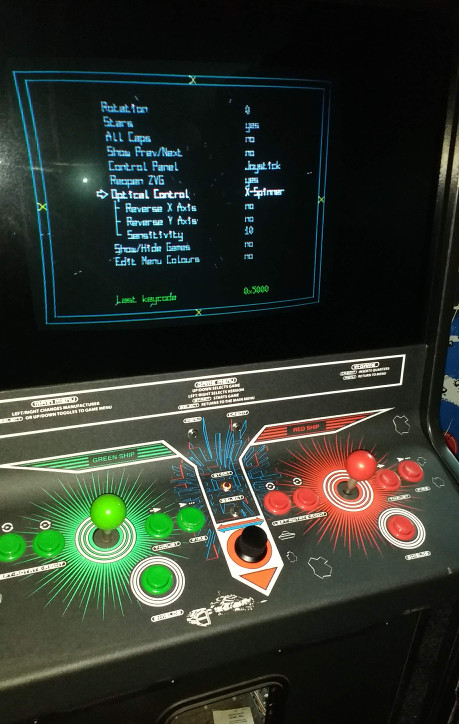
A menu system vector games running on a real vector monitor for DOS Mame with a ZVG card
- Requires iniparser from Nicolas Devillard, at https://github.com/ndevilla/iniparser
- Requires the ZVG DOS and/or Linux SDK
- Requires a DJGPP compile environment under DOS, I used the same version as used for DOS MAME circa .104
You can find a walk-through of setting up such an environment here: http://mamedev.emulab.it/haze/reallyoldstuff/compile036dos.html
I'm no C coder, please be gentle. This was my first attempt at C, I'm sure my code is far from optimal and inefficient in places. As you've probably gathered, I'm also new to Git so please be patient whilst I get to grips with things and get the files more orderly to aid compilation.
VMMenu was created as I'd had an unused ZVG for a number of years with the intention of fitting it to a dedicated cab. I was aware of the initial menu written by fellow UKVACcer Ian Boffin, sadly Ian lost the source code in a hard drive crash so there was no chance of it being updated to address any issues and suggested improvements. I found myself in a converted farm building in the North East of Scotland during a long, cold and dark winter. I had no cabs with me, but I did have a Vectrex... so a plan was formed. I contacted Ian and told him I intended to write a new menu, and Ian very kindly sent me the remaining files he did have - vector co-ordinates for the Mame logo and some of the manufacturer logos. This would save a lot of work! With the vectrex connected to the ZVG and a Win98 DOS PC to hand, I began coding.
After a while I was able to move my Asteroids Deluxe Cabaret home and testing moved from the Vectrex to the Arcade Cabinet. Still black and white, but it was good to be able to play vector mame on a proper cab.
I soon had a working system which I was happy with, so I contacted Zonn at Zektor and told him about my work. The menu was included in subsequent releases of the ZVG CD.
A couple of years later the ZVG drivers were ported to Linux, and I ported the menu over too. I moved development to the Linux PC and created a Windows XP VirtualBox PC to handle the DOS compilation from the same source code. You could maybe set up cross compiling for a simpler setup but doing so is beyond my skillset. The Linux port has the advantage of being able to mirror the vector screen to the PC monitor, this greatly aids with development as you can test code without needing the ZVG or a vector monitor attached, and see what the colours will look like should you only have a B&W monitor. I originally developed using a vectrex as a monitor, so the original colour work was done "blind".
Today I have two ZVG cabs: the original Asteroids Deluxe Cabaret, and an upright Space Duel with a custom multivector control panel. Both have the ZVG fitted sympathetically, with the system plugging into the original wiring loom via the game board connector. The AR board handles the sound amplification so the volume control in the cabs still work too.
I still get the odd query about the menu, so I decided that I'd put it up on GitHub rather than have it languish in a virtual PC. I hope somebody finds it useful... it would be nice to see some new vector games written for DOS/Linux :-)
-
Download and unzip the VMMenu files
-
Download the iniparser files from https://github.com/ndevilla/iniparser
-
Download the Linux ZVG SDK files from https://github.com/ChadsArcade/zvg-linux
-
Copy the dictionary and iniparser .h and .c files into the VMMenu/iniparser directory
-
Copy the ZVG files from the inc and shared folders into the VMMenu/Linux/zvg directory
You will need the SDLLib1.2-dev and -gfx files:
sudo apt install libsdl1.2-dev libsdl-gfx1.2-dev
The Linux menu is now built against SDL2, you will need the SDL Lib2-dev and mixer files:
sudo apt install libsdl2-dev
sudo apt install libsdl2-mixer-2.0-0 libsdl2-mixer-dev
Copy the makefile from the VMMenu/Linux directory to VMMenu
The makefile now supports all OS targets, and should cater for their foibles.
Then run:
make target=linux clean
make target=linux
which will create the vmmenu file in the current directory
Optionally you can install upx and use the compile.sh script in the VMMenu/Linux directory to compile and compress the resulting vmmenu file.
This works even on a Raspberry Pi, obviously you won't be able to hook up a ZVG board to a Pi... but you can develop and test the code and simulate how it will look on a vector monitor.
Linux doesn't support parallel port DMA so requires a different environment variable to DOS:
ZVGPORT=P{port} M{monitor type}
port is usually 378 - check your BIOS.
Monitor type is made up of a combination of 5 bits:
0x01 flip the display in the X direction
0x02 flip the display in the Y direction
0x04 if set, handle the spot killer
0x08 if set, mix colors down to B&W
0x10 if set, no overscanning is allowed (1024x768 max clip)
e.g. M4 = standard colour monitor with spot killer, M12=standard B&W monitor with spot killer
e.g. export ZVGPORT="P378 M4"
For keyboard LED support (often used to flash the start buttons) you will need to run the menu as root. Optionally, run:
sudo make target=linux install
which will set the suid bit.
You will need a working DJGPP environment to compile VMMenu for DOS. There are many tutorials online for this.
-
Download and unzip the VMMenu files
-
Download the iniparser files from https://github.com/ndevilla/iniparser
-
Download the DOS ZVG SDK files
-
Copy the dictionary and iniparser .h and .c files into the VMMenu/iniparser directory
-
Copy the ZVG files from the inc and shared folders into the VMMenu/DOS/zvg directory
Copy the makefile from the VMMenu/DOS directory to VMMenu
The makefile now supports all OS targets, and should cater for their foibles.
Then run:
make target=DOS clean
make target=DOS
which will create the vmmenu.exe file in the current directory
Optionally you can install upx and use the compile.bat script in the VMMenu/DOS directory to compile and compress the resulting vmmenu.exe file. Note that this batch file will first attempt to copy the source files to the current location before compilation, this is because I tended to house the source on a Linux PC and compile from an XP virtual machine. You may wish to edit out the file copy commands if you are working directly under XP/DOS.
A Linux version of VMame was produced a few years ago, unfortunately I don't have the src code. I decided to build a Linux booting PC to try in the ZVG cab and compare the 2 builds. Here are my findings:
DOS VMame               Linux VMame

LED support in games    No LED support in games
No attract mode         Attract mode, plays a random game for xx seconds
Cosmic Chasm works      Cosmic Chasm retrace lines and sound problems in ZVG mode
Overlay colours correct Overlay colours wrong (e.g tanks white in Armor Attack)
ECP Parallel mode       Std parallel mode, no DMA
Some slowdown           Severe slowdown (e.g in ESB)
Needs DOS soundcard     Use any soundcard
Very fast boot          Fast boot
Just switch off         Must shutdown OS
ZVG 1, 2 and 3 options  Only renders to vector monitor, can't change settings
                        in games with tab menu as there is no VGA displayed
The Linux build shows promise as it's a supported platform, unfortunately without the src code it's currently impossible to fix the issues with the build. Until things change I am sticking with DOS.
VMMenu should be launched toward the end of your AUTOEXEC.BAT file, after you have initialised your sound card and any other devices such as mice. Here is an example AUTOEXEC file:
@echo off
SET PATH=C:\;C:\DOS;C:\drivers\sbpci\DOSDRV
lh C:\DOS\dosed >NUL
lh C:\DOS\ansi.com >NUL
prompt $p$g

lh C:\mouse\bin\CTMOUSE.EXE
SET ZVGPORT=P378 D3 I7 M4

SET SBPCI=C:\DOSDRV
SET BLASTER=A220 I5 D1 H7 P330 T6
SBLOAD
SBINIT

SMARTDRV /x
cd \vmame
vmmenu

:: switch off when done
shutdown -s 5
When VMMenu is quit, the AUTOEXEC.BAT file will continue from the next line, in this example it will run the shutdown command and turn off the PC.
When first run, VMMenu will create a vmmenu.cfg file with various default settings for the colours, controls and menu options. There are 4 sections to the file:
- [interface], customises how the menu behaves
- [controls], this is for mouse/spinner options
- [keys], defines which keys are bound to which menu functions
- [colours], defines the colours and intensities of various elements on screen
[interface]
Most of the interface options can be set via the in game settings menu, which by default is accessed by pressing the backtick key, usually found below the escape key. Tip: It can be useful to bind this function to the test or service switch in your cabinet!
One interface option worthy of some explanation is "smartmenu". This allows you to control the menu in a more intuitive manner using a joystick, with direct navigation in the up, down, left and right directions. As not all vector cabs have a joystick (e.g. Asteroids, Tempest), this option defaults to off and menu navigation is setup to use the rotation keys, with Hyperspace toggling between the games list and manufacturer list. If switching this option on, remember you will also need to specify the keys used to navigate between manufacturers, games and clones. If you switch smartmenu on without specifying suitable keys, the option will be switched off again as you would not be able to control the menu correctly.
New for v1.5 SmartMenu has been dropped in favour of control panel type selection within the settings page. You can select a "buttons" control panel (e.g. Asteroids), a "Joystick" control panel, or a "Spinner" control panel (e.g. Tempest). Essentially, a pair of keys is bound to the Left and Right directions, and a pair to the Up and Down directions. A Spinner control will move the cursor Up and Down the menus. Use the appropriate controls to navitage up and down the lists, and left and right to navigate between clones and manufacturers. Sensible defaults are chosen for each type of control panel based upon the keycodes specified in the cfg file. Default key values are set to use Mame key bindings.
New for v1.32 - SmartMenu Navigation can now be selected from the settings page. Default key values from the vmmstddef.h file are used (see [keys] section below), you can change these manually in the vmmenu.cfg file if you want to customise them.
[controls]
This section will be populated by the in game settings menu, which allows you to set up a mouse or spinner and reverse the axes, alter the sensitivity etc. The sensitivity value denotes how many pulses must be generated before a movement event is triggered. Mouse types can be a Spinner bound to the X-axis, a Spinner bound to the Y-axis, or a trackball which moves both axes.
[keys]
This section binds the controls to your preferred key presses. For DOS users, you can use the supplied keycode.exe to display the keycode of a key pressed. Simply change the value against the desired function. The default values and the keycodes for both Linux and DOS are listed in the vmmstddef.h file.
New for v1.3.1 - The value of the last keycode pressed is displayed at the top of the screen whilst in the settings page.
[colours]
Here is where you can define the colours and intensities of various elements of the menu. Colour values are prefixed with c_ and intensities with i_
Valid colour values are red, magenta, cyan, blue, yellow, green and white. Intensity values range from 0 to 25, dimmest to brightest.
New for v1.4.2 - The colour of the various menu items can now be configured from within the menu. The colour configuration page can be found withing settings.
VMMenu creates the game list by reading the vmmenu.ini file. This file contains a list of all the vector games supported by your version of Mame and contains information such as the manufacturer, the name of the game, the "Mame" name for the game and the name of the parent game if it is a clone of another game. The file is just a text file in the following format:
Manufacturer name|Display name|name of parent game|name of gameThere are 4 fields, delimited by the | character:
- The Manufacturer name is used to group the games together on separate pages of the menu
- The Display name is what is shown on screen
- The name of parent game is used to group clones of the same game together
- The name of the game is what gets passed back to DOS and on to mame when running a game
For example:
Atari|Asteroids (rev 2)|asteroid|asteroid
Atari|Asteroids (rev 1)|asteroid|asteroi1
Other|Asterock|asteroid|asterock
Other|Meteorites|asteroid|meteorts
As the file is plain text, you are free to customise it to your taste. For example, in the example above there are 2 clones of Asteroids by "Other" manufacturers, and these will appear on a separate page to the Atari versions of Asteroids. Should you wish to bundle all the Asteroids variants together under Atari, simply edit the manufacturer field for these 2 games, changing "Other" to "Atari":
Atari|Asteroids (rev 2)|asteroid|asteroid
Atari|Asteroids (rev 1)|asteroid|asteroi1
Atari|Asterock|asteroid|asterock
Atari|Meteorites|asteroid|meteorts
When you next start the menu, it will group all of these titles together under Atari -> Asteroids.
If you wish to remove a game from the menu, perhaps if the controls are not suitable or it does not work correctly, then you can either delete the line in question, or comment it out by placing a # character in the first column.
This example would remove "Asteroids (rev 1)" from the menu, but retain the other 3 games:
Atari|Asteroids (rev 2)|asteroid|asteroid
#Atari|Asteroids (rev 1)|asteroid|asteroi1
Atari|Asterock|asteroid|asterock
Atari|Meteorites|asteroid|meteorts
You can also edit the display name if you wish, but do not alter the clone name or parent game name or the game may not run.
New for v1.3 - You can now show or hide games from within the menu itself, simply access the show/hide games option from the settings page.
New for v1.3.2 - [Added by DanP] An autostart game can now be configured, this will run prior to the menu starting so gives a more authentic startup for arcade cabinets. The autostart game can be selected/deselected from the Show/Hide games settings page. Pressing 1P Start will toggle autostart for the selected game. The currently selected game is indicated by a spinning coin.
When a game is selected from the menu, the name of the game gets passed to the file VMM.BAT for processing. This allows us to perform some customisation if necessary, which would not be possible if the menu launched mame directly.
Examples of such customisation are:
- Rotating the display for certain games
- Selecting a different version of MAME for certain games
- Selecting different MAME options for certain games
If you look at the example VMM.BAT file provided, you will see that the display is rotated when running Barrier, Sundance and Tacscan:
::::::::::::::::::::::::::::::::::::::::::::::::::::::::::
:: Process the selected game and run the appropriate exe::
::::::::::::::::::::::::::::::::::::::::::::::::::::::::::
if %1 == barrier  goto flipxy
if %1 == sundance goto flipxy
if %1 == tacscan  goto flipxy

::::::::::::::::::::::::::::::::::::::::::::::::::::::::::
::             Default is to use Mame 0.104             ::
::::::::::::::::::::::::::::::::::::::::::::::::::::::::::
cd mame104
dvm104.exe %1 -zvg 3
cd ..
goto end

::::::::::::::::::::::::::::::::::::::::::::::::::::::::::
::  Flip X and Y axes for barrier,sundance and tacscan  ::
::::::::::::::::::::::::::::::::::::::::::::::::::::::::::
:flipxy
cd mame104
dvm104.exe %1 -zvg 3 -flipx -flipy
cd ..
goto end

:end
%1 represents the game name as passed from the menu to VMM.BAT. We test if this matches "barrier", "sundance" or "tacscan" and jump to the flipxy section if necessary, else mame is run with standard or default settings, as specified in the mame.ini file.
Consider the following configuration options and you can see how flexible the menu can be:
vmmenu.ini:
Utils|Shut Down PC|shutdown|shutdown
Custom|My Custom Vector Game|mygame|mygame
VMM.BAT:
::::::::::::::::::::::::::::::::::::::::::::::::::::::::::
:: Process the selected game and run the appropriate exe::
::::::::::::::::::::::::::::::::::::::::::::::::::::::::::
... code snippet:
if %1 == shutdown goto shutdown
if %1 == mygame goto mygame

...

... code snippet:
:: Shut down the PC
:shutdown
c:\dos\shutdown.exe
goto end

:: Run My DOS vector game
:mygame
cd c:\mygame
mygame.exe
goto end

:end
With some creativity, you can get the menu to launch pretty much anything.
In the Utils folder you can find some utilities:
- Makeini can be used to generate a template ini file for VMMenu. It will query your version of Mame and generate an entry for each vector game it finds.
- BiosKey can be used to display the keycode of a pressed key under DOS. Use this if you are customising the keyboard inputs and need the keycodes. Keycodes are also displayed in the settings page from v1.3.1
