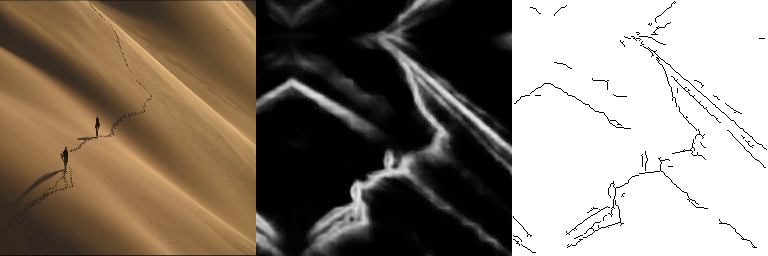
This is a pix2pix demo that learns from edge and translates this into view. A interactive application is also provided that translates edge to view.
# Clone this repo
git clone git@github.com:GordonRen/edge2view.git

# Create the conda environment from file
conda env create -f environment.yml
https://github.com/s9xie/hed
python generate_train_data.py --file Desert.mp4
Input:
fileis the name of the video file from which you want to create the data set.
Output:
- One folder
originalwill be created.
- generate edge data by following batch_hed.py and put the edge data into
hed_edge.
If you want to download my dataset, here is also the video file that I used and the generated training dataset (708 images already split into training and validation).
# Clone the repo from Christopher Hesse's pix2pix TensorFlow implementation
git clone https://github.com/affinelayer/pix2pix-tensorflow.git

# Move the original and hed_edge folder into the pix2pix-tensorflow folder
mv edge2view/hed_edge edge2view/original pix2pix-tensorflow/photos_view

# Go into the pix2pix-tensorflow folder
cd pix2pix-tensorflow/

# Reset to april version
git reset --hard d6f8e4ce00a1fd7a96a72ed17366bfcb207882c7

# Resize original images
python tools/process.py \
  --input_dir photos_view/original \
  --operation resize \
  --output_dir photos_view/original_resized

# Resize hed_edge images
python tools/process.py \
  --input_dir photos_view/hed_edge \
  --operation resize \
  --output_dir photos_view/hed_edge_resized

# Combine both resized original and hed_edge images
python tools/process.py \
  --input_dir photos_view/hed_edge_resized \
  --b_dir photos_view/original_resized \
  --operation combine \
  --output_dir photos_view/combined

# Split into train/val set
python tools/split.py \
  --dir photos_view/combined

# Train the model on the data
python pix2pix.py \
  --mode train \
  --output_dir edge2view-model \
  --max_epochs 1000 \
  --input_dir photos_view/combined/train \
  --which_direction AtoB
For more information around training, have a look at Christopher Hesse's pix2pix-tensorflow implementation.
-
First, we need to reduce the trained model so that we can use an image tensor as input:
python reduce_model.py --model-input edge2view-model --model-output edge2view-reduced-modelInput:
model-inputis the model folder to be imported.model-outputis the model (reduced) folder to be exported.
Output:
- It returns a reduced model with less weights file size than the original model.
-
Second, we freeze the reduced model to a single file.
python freeze_model.py --model-folder edge2view-reduced-modelInput:
model-folderis the model folder of the reduced model.
Output:
- It returns a frozen model file
frozen_model.pbin the model folder.
I have uploaded a pre-trained frozen model here. This model is trained on 708 images with epoch 1000.
python edge2view.py --tf-model edge2view-reduced-model/frozen_model.pb
Input:
tf-modelis the frozen model file.
Example:
Kudos to Christopher Hesse for his amazing pix2pix TensorFlow implementation and Gene Kogan for his inspirational workshop.
Inspired by Dat Tran.
See LICENSE for details.

