This code pattern shows you how to create a world class currency conversion microservice in Node.js. This code pattern is a microservice that is a part of the Bee Travels project.
This pattern showcases modern Node.js development by using modern JavaScript and popular npm libraries, which are listed in the Anatomy of this Application section at the bottom of this page.
This application was created using test-driven development(TDD) methodologies, in particular the Red-Green-Refactor or test-first approach. No code was written without first writing an associated unit test.
Read our article 5 steps of test-driven development to get the background information on the TDD approach we used to create the currency exchange microservice in this code pattern.
Code that has unit tests is regarded as more complete and accurate. The unit tests function as a means to clearly understand the application. Requirements for the application translate into tests, so examining the tests gives you an idea about what the application does, and it also shows how to use the code. For our unit tests we use Jest, a JavaScript unit-test framework testing library that works well with TDD.
- Design and create a Node.js microservice with a REST interface that has a swagger test harness where you can manually inspect, discover, and run the various API endpoints.
- Use and run this simple microservice.
- Use the code base as a reference architecture and toolchain to create your own Node.js microservices.
- Deploy and run this microservice on Kubernetes.
This flow is for the runtime of the currency conversion microservice.
Figure 1. Production flow
- Client API Consumer calls the microservice over the internet (http/s request).
- ExpressJS
web serveraccepts the REST request (e.g. GET /convertCurrency/ZAR/USD/600.66). - Code routing in Express passes the request to a service module which in turn calls the External European Currency Exchange API (http://api.exchangeratesapi.io).
- An exchange rate for ZAR is retrieved and stored. The value of 600.66 South African Rands (ZAR) is converted to US Dollars(USD).
- The ExpressJS
web serversends a response to the calling consumer with the dollar amount (in this case, $40.59 ).
- IBM Cloud Container Service: IBM Bluemix Container Service manages highly available apps inside Docker containers and Kubernetes clusters on the IBM Cloud.
- Swagger: A framework of API developer tools for the OpenAPI Specification that enables development across the entire API lifecycle.
- Container Orchestration: Automating the deployment, scaling and management of containerized applications.
- Microservices: Collections of fine-grained, loosely coupled services using a lightweight protocol to provide building blocks in modern application composition in the cloud.
- Node.js: Node.js is a JavaScript framework which has an awesome package manager called
npmthat lets you build applications with components built and supported by an active open source community. - Express: Fast, unopinionated, minimalist web framework for Node.js.
- Axios: Promise based HTTP client for the browser and Node.js.
- csvtojson: A node module is a comprehensive nodejs csv parser to convert csv to json or column arrays
- esm: The brilliantly simple, babel-less, bundle-less ECMAScript module loader.
Why JavaScript Modules?
Modules in JavaScript are really great feature in the latest version of the language. Unfortunately it's not supported in earlier versions of Node.js ( < ver 13.2.x )
So in order to use these new features you'll need a transpiler to generate plain old JavaScript for now.
we recomment
esmwhich is the world’s most advanced ECMAScript module loader. This fast, production ready, zero dependency loader is all you need to support ECMAScript modules in Node 6+.
See the release post for details!
You need to have the following installed to complete the steps in this code pattern:
For running these services locally without Docker containers, you need:
Tip: Use Node Version Manager (nvm)
nvm is a simple bash script to manage multiple active Node.js versions.
We recommend using
Node Version Manager (NVM)to control the version of Node.js that you use.
Why? The system or operating system installed Node.js version is fixed. You may need different versions of Node for other projects.
NVM allows you to choose and switch to the version of Node.js that suits your needs.
Install via command line:
curl -o- https://raw.githubusercontent.com/nvm-sh/nvm/v0.35.2/install.sh | bashLearn more about NVM and find the latest installation instructions.
- Relevant Node.js packages: Use
npm install
We use Jest as our unit test framework. Jest uses the popular describe, it, and expect syntax, as seen here: src/services/countryCurrencyCodeHandler.test.js.
Remember to use mock data so that your tests don't fail because of changing data.
This pattern includes neat developer productivity tools:
- linting and formatting NPM scripts
See package.json using the ESLint linter. You can call it by running npm run lint. You can use the prettier formatter which can be run with npm run format.
The unit tests we run in this pattern are run in the deployment pipeline as you can see here.
Follow these steps to set up and run this code pattern locally and on the cloud. The steps are described in detail below.
- Clone the repo
- Run the application locally
- Build a docker image, then run it locally
- Deploy to IBM Cloud
Clone the currencyexchange repo locally. In a terminal, run:
git clone https://github.com/IBM/TDD-NodeJS-Containers.git

cd TDD-NodeJS-Containers- Install packages with NPM by running
npm install. - Start the app by running
npm start. - Browse the API from your browser
localhost:4001.
Note: The server host can be changed as required in the server.js file, and
PORTcan be set in the.envfile.
- Make sure you are at the root of this application.
- Note your docker-hub username
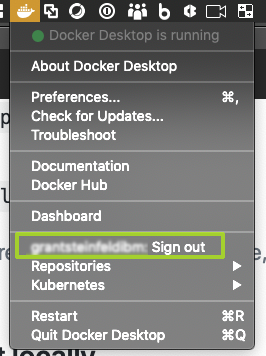
How to find your docker hub credentials
To download Docker desktop you must create a Docker hub account.
To find the username, you can click on at your Docker desktop icon (mac) toolbar
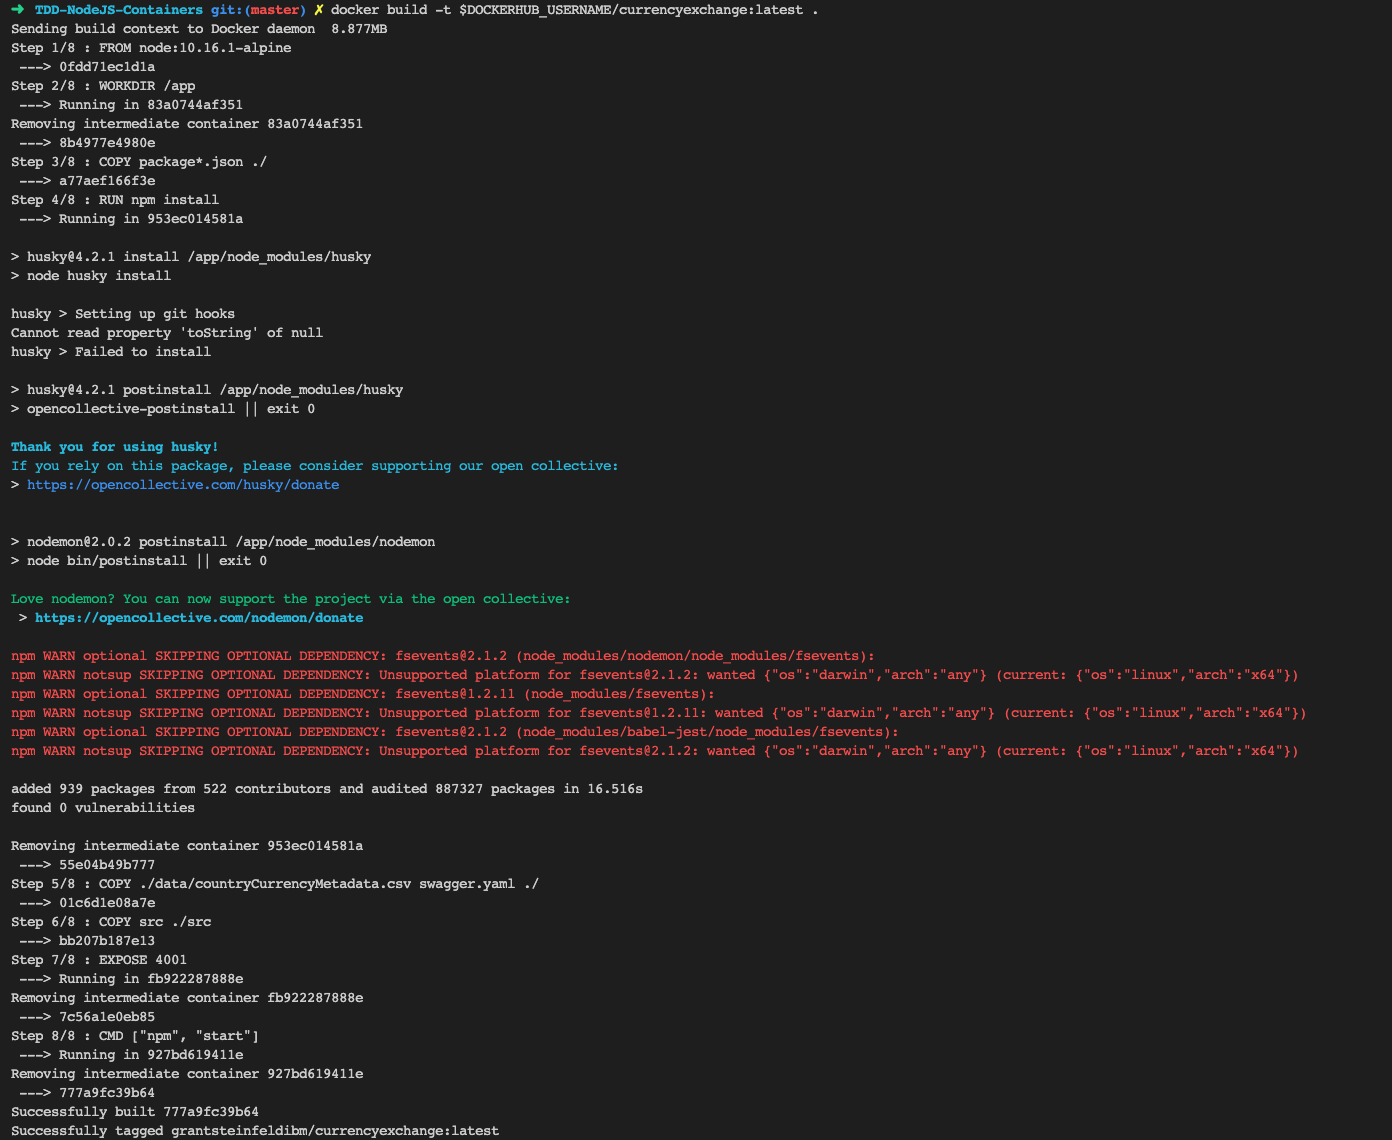
- Build the docker image by running:
export DOCKERHUB_USERNAME=<your-dockerhub-username>
docker build -t $DOCKERHUB_USERNAME/currencyexchange:v0.0.1 .Wondering if your build is current or cached?
How to clean up Docker images that may be out of date
Docker provides a single command that will clean up any resources — images, containers, volumes, and networks — that are dangling (not associated with a container):
docker system prune -aIf you still see images for currencyexchange confirm this by running:
docker images -a | grep "currencyexchange"Do you doubt that this was the latest build? Its timestamp is 12 hours ago, so it's probably not the latest. You can delete that image by running:
docker images -a | grep "currencyexchange" | awk '{print $3}' | xargs docker rmi -fThen rerun:
docker build -t $DOCKERHUB_USERNAME/currencyexchange:v0.0.1 . Find more details on Docker image management
Great! So, now lets run the image locally!
docker run -p 4001:4001 grantsteinfeldibm/currencyexchange:v0.0.1You should now see the currencyexchange microservice up and running
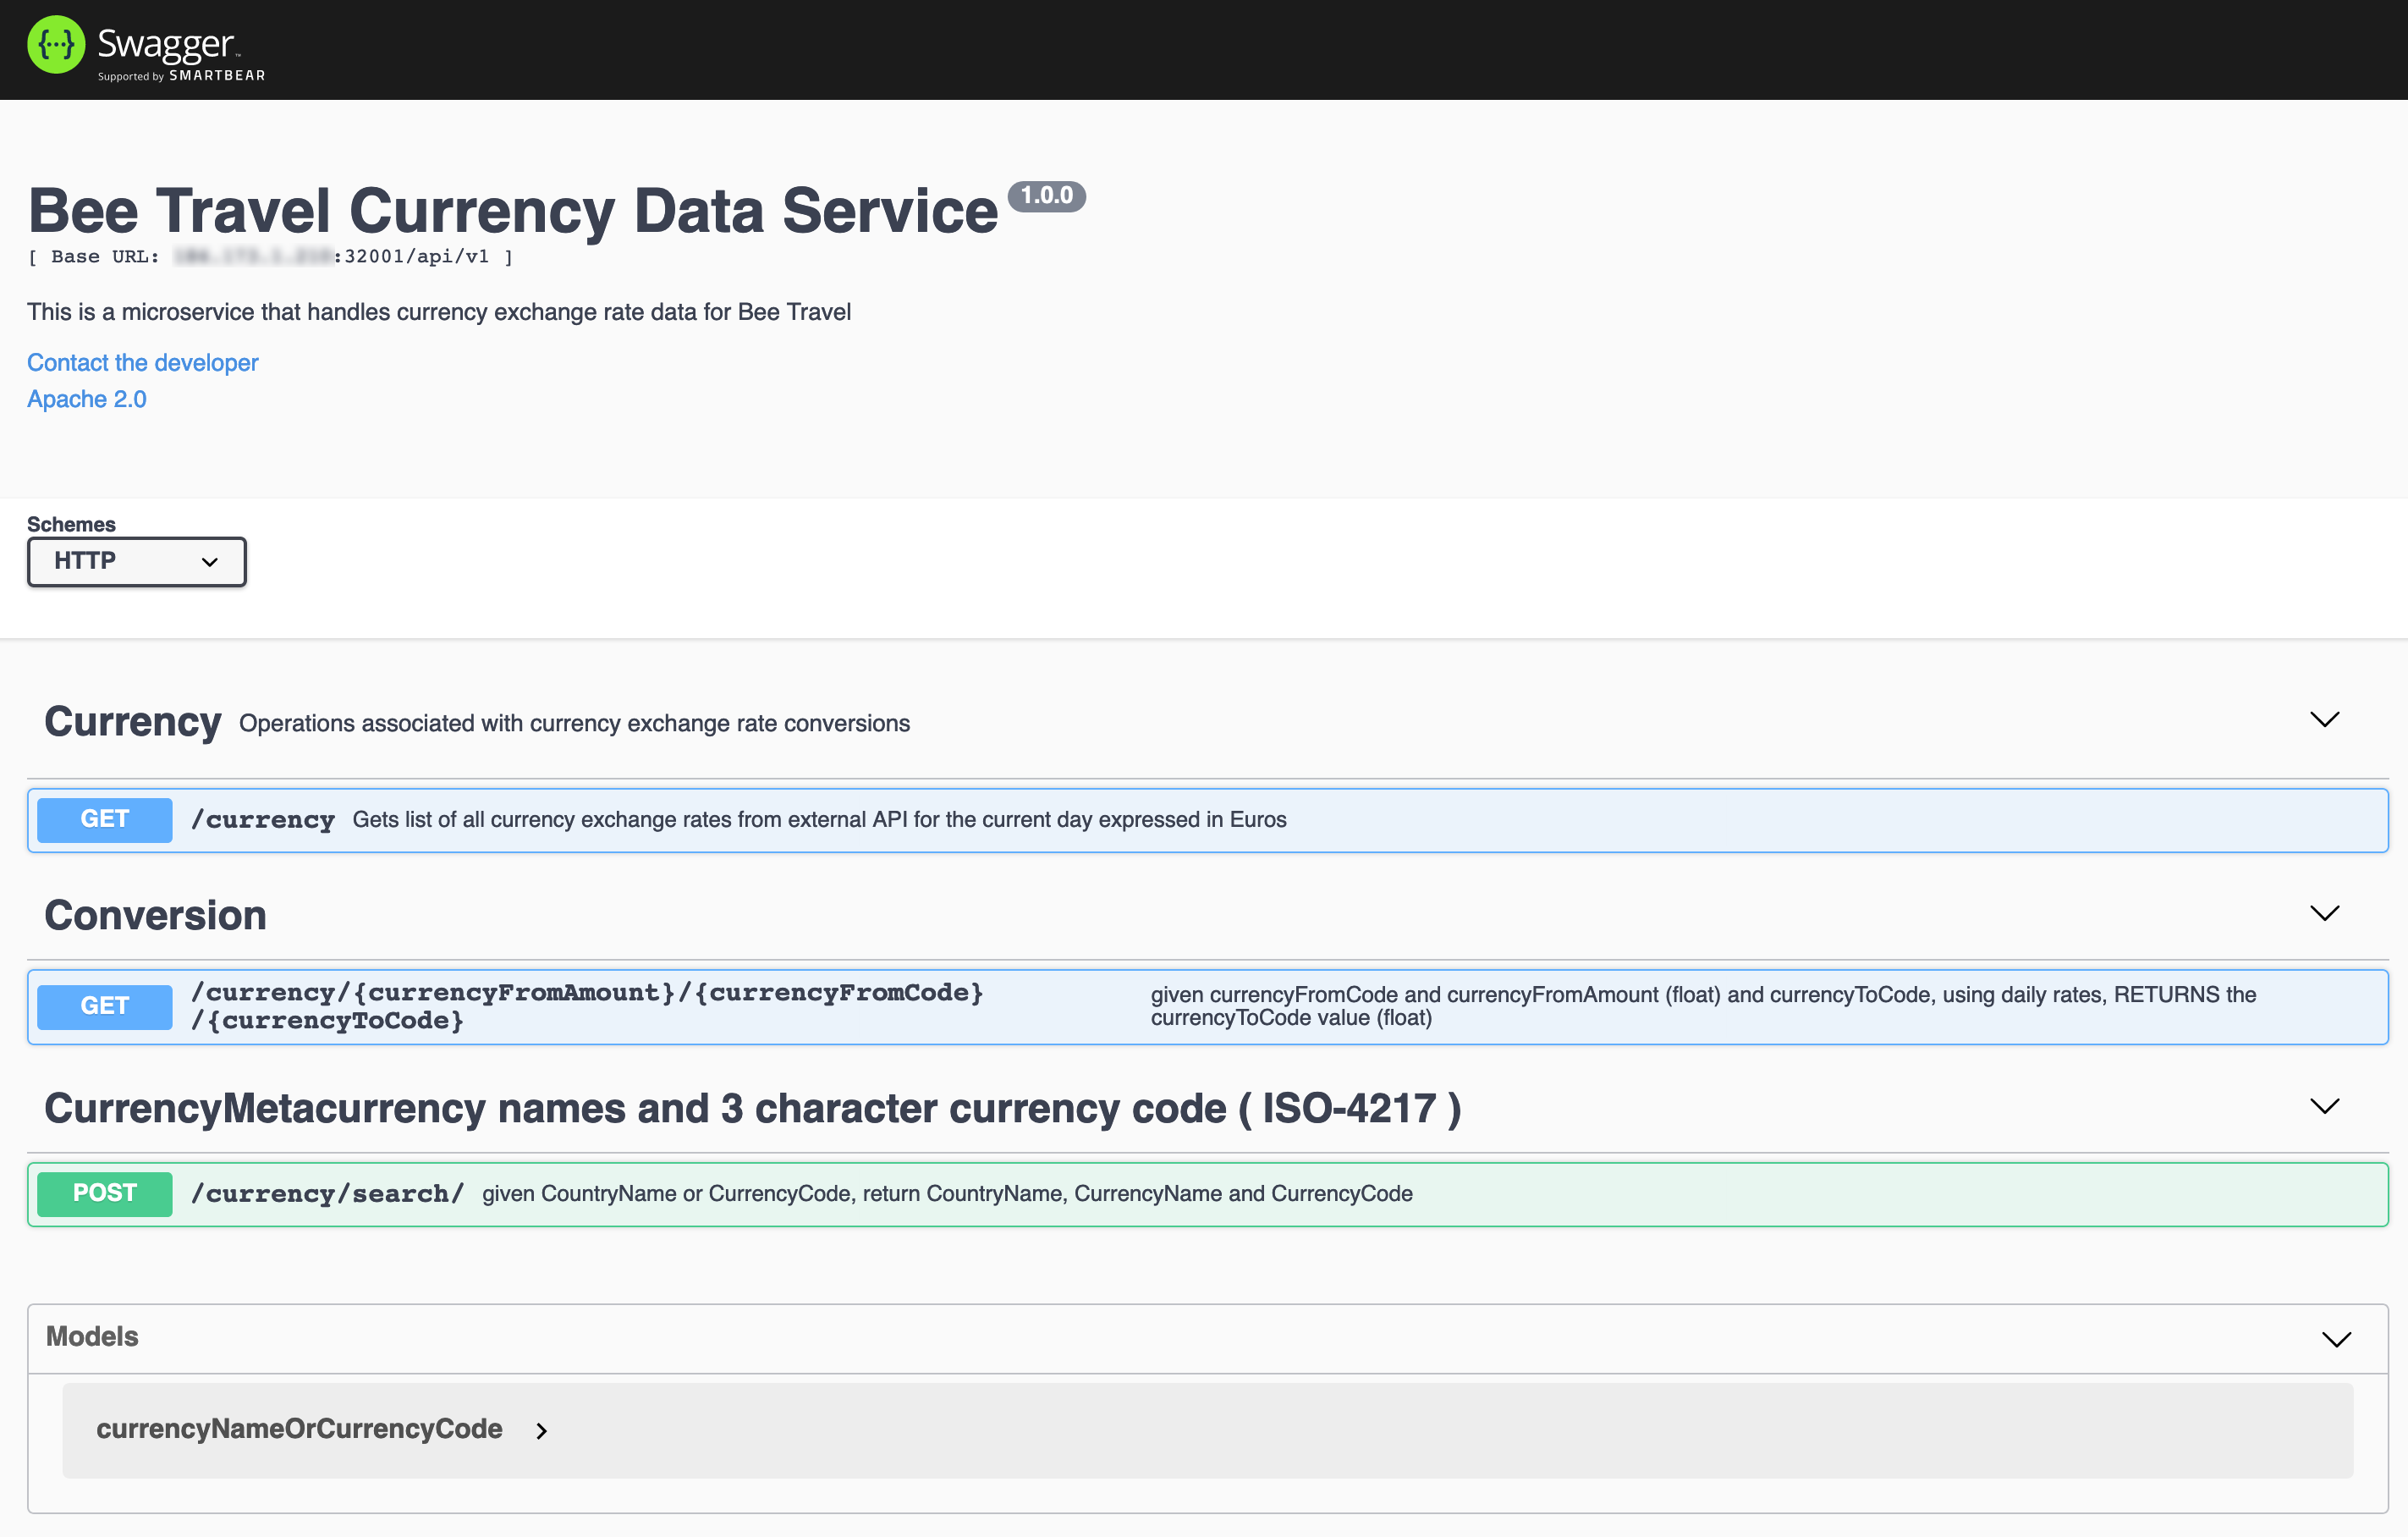
Explore the microservice with the Open API Doc (Swagger) at
http://localhost:4001 for documentation about this API's endpoints and a
try-it-outtest harness to actually run the API calls.
- To allow changes to the this microservice, create a repo on Docker Cloud where you can push the new modified containers.
NOTE: If a new repo is used for the Docker containers, the container
imagewill need to be modified to the name of the new repo used in ./deploy/currencyexchange-deploy.yaml.
export DOCKERHUB_USERNAME=<your-dockerhub-username>

docker build -t $DOCKERHUB_USERNAME/currencyexchange:v0.0.1 .

docker login

docker push $DOCKERHUB_USERNAME/currencyexchange:v0.0.1
- Provision an IBM Cloud Kubernetes Service and follow the set of instructions for creating a Container and Cluster based on your cluster type,
StandardvsLite.
- Login to the IBM Cloud using the Developer Tools CLI:
NOTE use
--ssoif you have a single sign on account, or delete for username/password login
ibmcloud login --sso- Set the Kubernetes environment to work with your cluster:
ibmcloud cs cluster-config $CLUSTER_NAMEThe output of this command will contain a KUBECONFIG environment variable that must be exported in order to set the context. Copy and paste the output in the terminal window. An example is:
export KUBECONFIG=/home/rak/.bluemix/plugins/container-service/clusters/Kate/kube-config-prod-dal10-<cluster_name>.yml- Run
bx cs workers <CLUSTER_NAME>and locate and take note of thePublic IP. This IP is used to access the currency service API.
Update the env values HOST_IP and SCHEME in ./deploy/currencyexchange-deploy.yaml
to the <PUBLIC_IP>:32001 and http.
- To deploy the services to the IBM Cloud Kubernetes Service, run:
kubectl apply -f ./deploy/currencyexchange-deploy.yaml


## Confirm the services are running - this may take a minute
kubectl get pods- Use
http://<PUBLIC_IP>:32001to access the currency exchange microservice (Swagger)
- Run
ibmcloud cs cluster-get <CLUSTER_NAME>and locate and take note of theIngress SubdomainandIngress Secret. This is the domain of the URL and credentials that are used to access the microservice on the Cloud.
Update the env values HOST_IP and SCHEME in ./deploy/currencyexchange-deploy.yaml
to the Ingress Subdomain and https.
In addition, update the host and secretName in ./deploy/currencyexchange-ingress.yaml
- To deploy the services to the IBM Cloud Kubernetes Service, run:
kubectl apply -f ./deploy/currencyexchange-deploy.yaml

## Confirm the services are running - this may take a minute
kubectl get pods

## Update protocol being used to https
kubectl apply -f ./deploy/currencyexchange-ingress.yaml- Use
https://<INGRESS_SUBDOMAIN>to access the currency exchange microservice (Swagger)
You should see the Swagger page like this.
These are the key components of this microservice.
-
Jest for
Delightfulunit testing- Use Jest
mocksto run unit tests locally without side effects. Examples of side effects include: * Calling external services (like other Web APIs) that are changed or offline; for example, the World Bank currency exchange API that our microservice wraps. * Calling external databases that are in-flux or down * Using time stamps and random ID generation that are non-deterministic, so they're not good for test data that may be generated on the fly (Mocks really shine here and provide expected reliable values that tests your business logic). - Hot code reloading (aka On page save hooks) run tests automatically on save by running
Jest -watch.
- Use Jest
-
Pino for logging
-
Code formatting
- Prettier for code formatting.
-
JavaScript syntax checking
- ESLint helps you find and fix problems in your JavaScript code.
-
Git pre-commit hooks
Every time you run
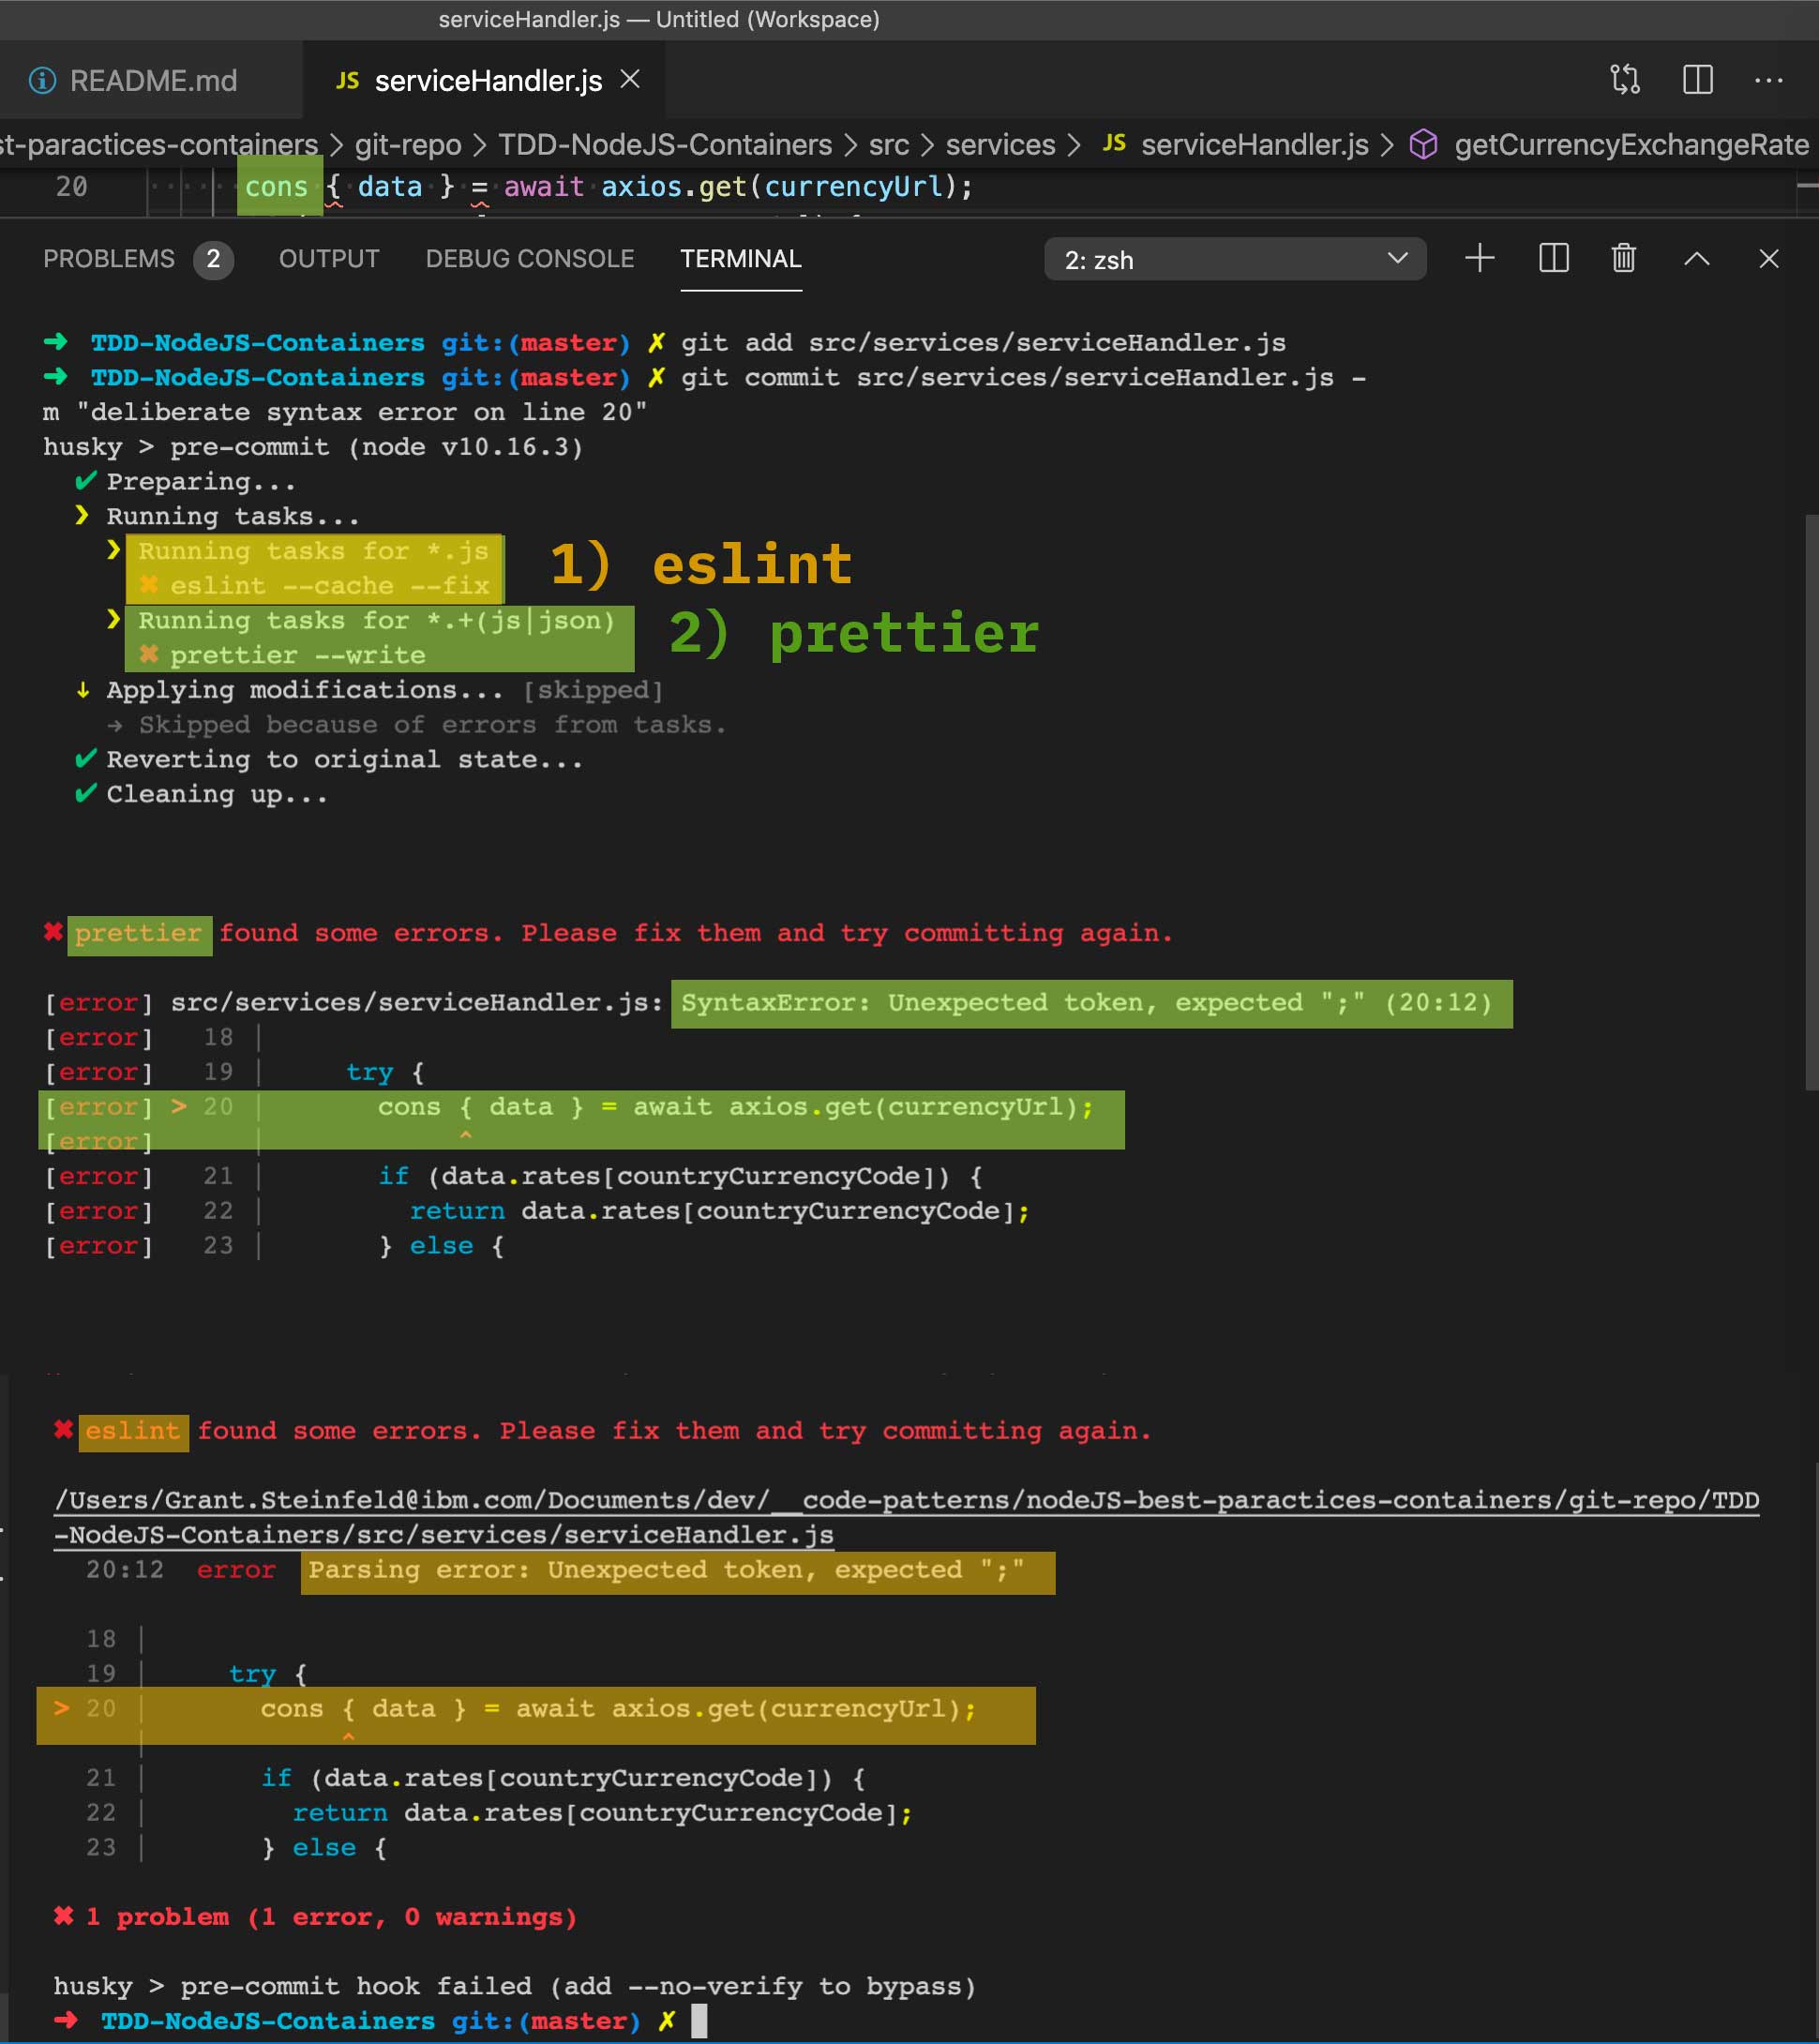
git commit ...both the linter and formatter will run. If, for example, you have extra spaces in your code likeconst planet = " Saturn ";, the formatter automatically cleans up the code and formats it correctly to beconst planet = "Saturn";. This newly formatted code is then committed and can be pushed. However, say you have a syntax error, for examplecnst planet = "Saturn";, the commit will fail as the symbolcnstis invalid. You will see informative output in your console as Figure 3 shows. Once you have manually corrected the syntax error, you can recommit it until the syntax is correct and the linter passes.
Figure 3. Syntax error caught by Git pre-commit hooks with both linter 1 (ESLint) and formatter 2 (Prettier)
This is achieved with the two npm libraries lint-staged and husky, which are installed by running npx as such:
``` sh
    npx mrm lint-staged
```
You will see the following automatically appended to the package.json file:
``` json
    "husky": {
        "hooks": {
        "pre-commit": "lint-staged"
        }
    },
    "lint-staged": {
        "*.js": "eslint --cache --fix",
        "*.+(js|json)": "prettier --write"
    }
```
-
- The brilliantly simple, babel-less, bundle-less ECMAScript module loader.
- A lightweight JavaScript Transpiler alternative to
babel - Allows you to use modern JavaScript for example:
moduleswithimportandexportrather than the olderrequires()methods to link packages
-
- Cleanup previous builds and distributions
- rimraf is The UNIX command
rm -rffor node
- rimraf is The UNIX command
- Cleanup previous builds and distributions
-
swagger- Installing the npm package
swagger-ui-expresslets you create a REST API with a well-documented test harness with almost no effort at all, giving your microservice that professional and polished look as well as a useful way to manually test the API from a swagger html test harness.
- Installing the npm package
- Using Test-Driven Development for Microservices, by Bill Doerrfeld
- Blog on colocaton of unit-tests, by Ken Dodd
This code pattern is licensed under the Apache License, Version 2. Separate third-party code objects invoked within this code pattern are licensed by their respective providers pursuant to their own separate licenses. Contributions are subject to the Developer Certificate of Origin, Version 1.1 and the Apache License, Version 2.


