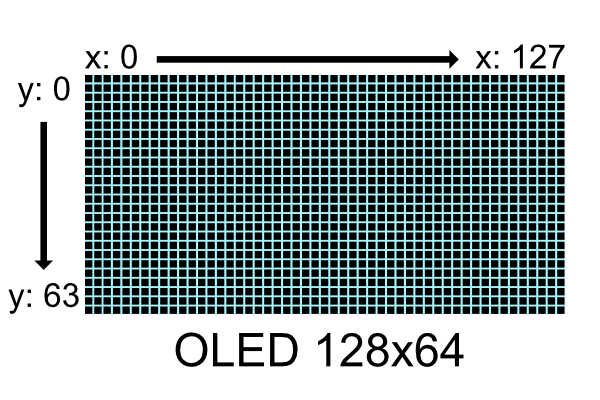
- Clone this project into your pico project
- Add this to your CMakeLists.txt
  add_subdirectory(pico-ssd1306)
  target_link_libraries(your_project_name
  pico_ssd1306
  # you will also need hardware i2c library for communication with the display
  hardware_i2c)
- Import library in your code
#include "pico-ssd1306/ssd1306.h"
i2c_init(I2C_PORT, 1000000); //Use i2c port with baud rate of 1Mhz
//Set pins for I2C operation
gpio_set_function(I2C_PIN_SDA, GPIO_FUNC_I2C);
gpio_set_function(I2C_PIN_SCL, GPIO_FUNC_I2C);
gpio_pull_up(I2C_PIN_SDA);
gpio_pull_up(I2C_PIN_SCL);

//Create a new display object
pico_ssd1306::SSD1306 display = pico_ssd1306::SSD1306(I2C_PORT, 0x3D, pico_ssd1306::Size::W128xH64);

//create a vertical line on x: 64 y:0-63
for (int y = 0; y < 64; y++){
    display.setPixel(64, y);
}
display.sendBuffer(); //Send buffer to device and show on screenYou may have noticed that this entire library is under pico_ssd1306 namespace to avoid conflicts, but if you don't have any
conflicts and don't want to write pico_ssd1306:: all the time just add
using namespace pico_ssd1306;to your file
See usage explanation for detailed information on how to use core of the lib, but in short:
- First Initialize i2c and pins for i2c communication
- Create a display object. This automatically send setup commands to the device and prepares it for operation
- Modify the buffer containing pixel data
- Send buffer to display
- Clear the buffer and repeat
same is true for 128x32 displays, then y range is 0-31
This library comes with additional modules for shape rendering and text rendering to make your life easier
#include "pico-ssd1306/shapeRenderer/ShapeRenderer.h"See: Shape Renderer readme for usage and details
#include "pico-ssd1306/textRenderer/TextRenderer.h"See: Text Renderer readme for usage and details
See examples. Many of them have their own readmes. Many things are also explained in code comments.
Documentation of all functions is here

