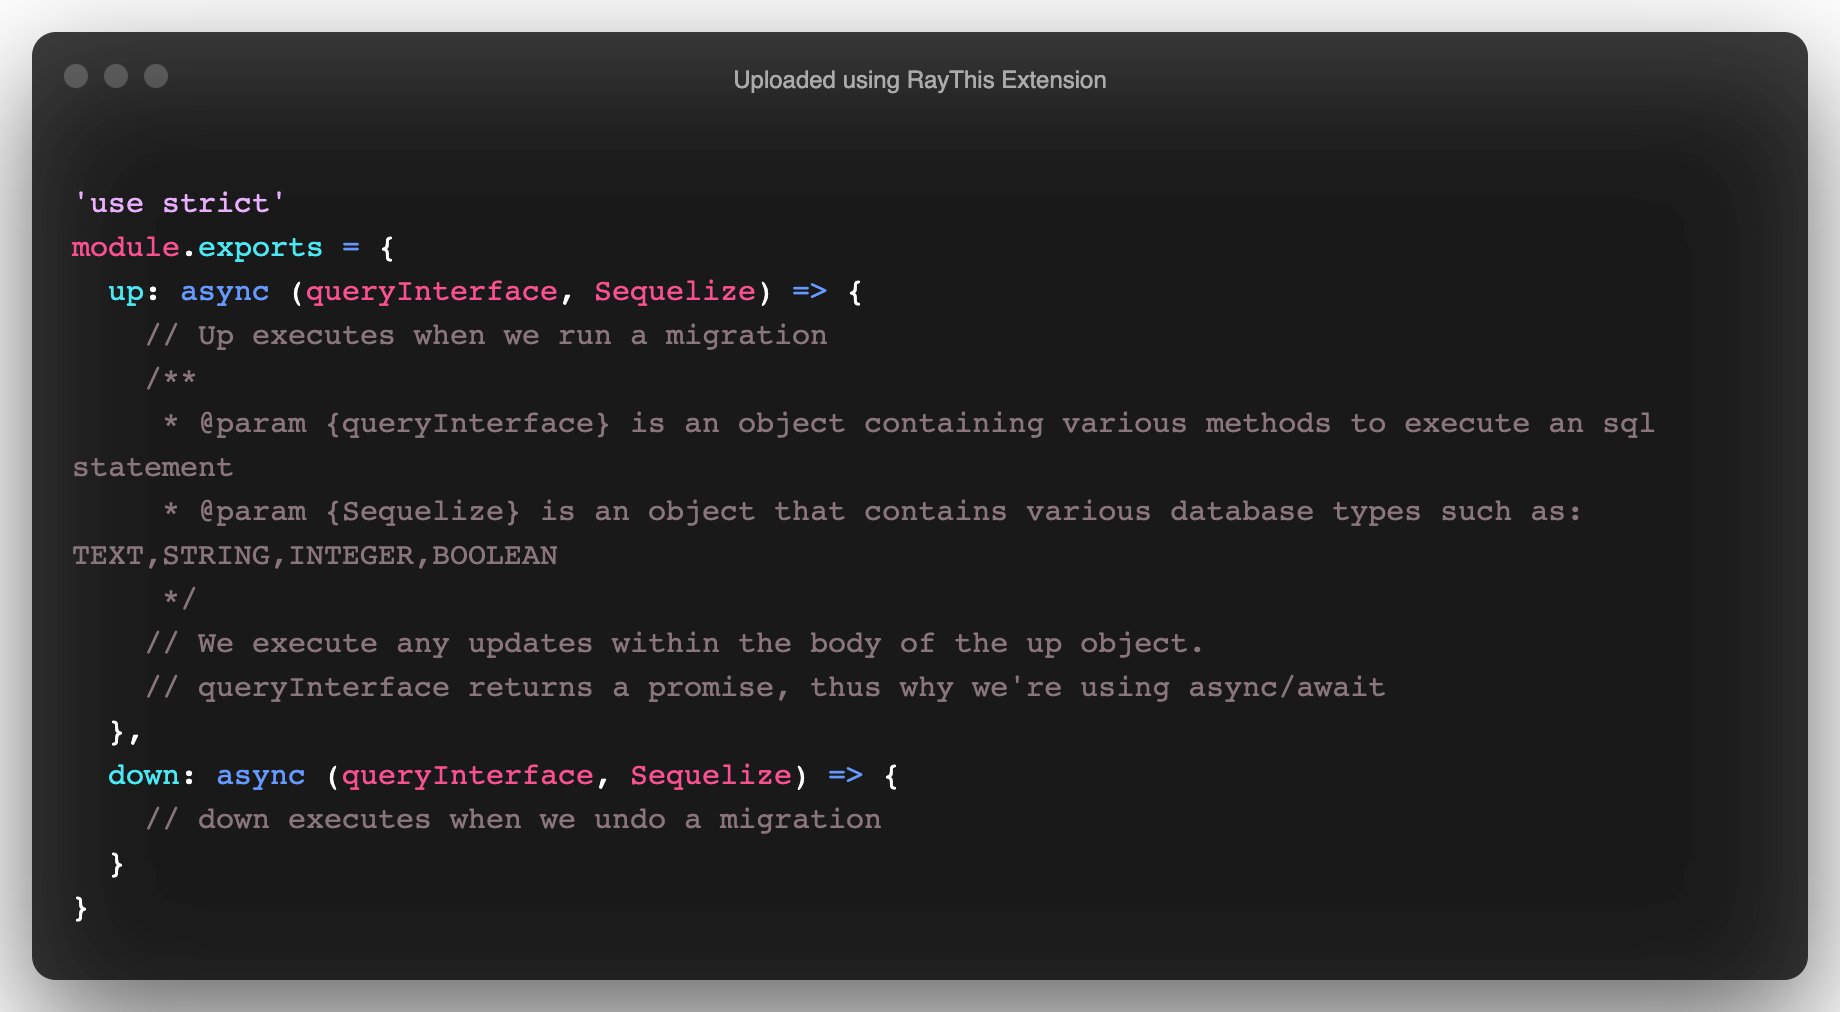
In this lesson, we'll learn how migrations are useful for tracking changes made to our database. When you build applications, keep in mind that other developers need to understand our code. Migrations help us by keeping track of every change we performed to our database so that we can maintain data integrity and easy onboarding for other contributors.
- Learn how migrations work
- Learn how migrations effect currently stored data
- Learn when to use migrations
- Fork and Clone
npm installsequelize db:createsequelize db:migrate
Take five minutes and read the Sequelize docs on migrations: Sequelize Migrations
Migrations are an important feature to have while managing a database. They allow us to add, remove or change columns or tables without destroying our stored information. Database integrity is key when you're building applications ready for public use. Every time you make an update to your database you should not lose any stored information. Like our Git Add / Commit / Push process, Migrating in Sequelize will require a few steps to get set up before we can run it
Once we finish this lesson, our User schema/model should resemble the following:
Constraints:
- email
- string
not null
- string
You have been provided with a Sequelize project to start with. As with any codebase that you'll open for the first time, it's always a great idea to take a look at the included files and folders. Let's start by taking a look at the provided User model:
models/user.js
'use strict'
const { Model } = require('sequelize')
module.exports = (sequelize, DataTypes) => {
  class User extends Model {
    /**
     * Helper method for defining associations.
     * This method is not a part of Sequelize lifecycle.
     * The `models/index` file will call this method automatically.
     */
    static associate(models) {
      // define association here
    }
  }
  User.init(
    {
      firstName: DataTypes.STRING,
      lastName: DataTypes.STRING,
      email: DataTypes.STRING,
      password: DataTypes.STRING
    },
    {
      sequelize,
      modelName: 'User',
      tableName: 'users'
    }
  )
  return User
}
You'll notice that there's a missing field in the model, username. It looks like someone made a mistake when creating our User model.
Let's take a look at the provided migration and see what happened when generating our table.
migrations/20201127061156-create-user.js
'use strict'
module.exports = {
  up: async (queryInterface, Sequelize) => {
    await queryInterface.createTable('users', {
      id: {
        allowNull: false,
        autoIncrement: true,
        primaryKey: true,
        type: Sequelize.INTEGER
      },
      firstName: {
        type: Sequelize.STRING
      },
      lastName: {
        type: Sequelize.STRING
      },
      email: {
        type: Sequelize.STRING
      },
      password: {
        type: Sequelize.STRING
      },
      createdAt: {
        allowNull: false,
        type: Sequelize.DATE
      },
      updatedAt: {
        allowNull: false,
        type: Sequelize.DATE
      }
    })
  },
  down: async (queryInterface, Sequelize) => {
    await queryInterface.dropTable('users')
  }
}
Looking at the above migration, you'll notice that a userName field was never provided. It appears someone made a mistake...
Luckily it's a simple fix! We can use Sequelize to create a new migration to make this change. Run the following command in your terminal:
sequelize migration:generate --name add-username-to-usersWant to know more about generating migrations using the Sequelize CLI? Run
sequelize migration:generate --help
Once you've run the prior command, a new migration file is created for you.
We could have just run sequelize db:migrate:undo to fix the issue, but you would run into another problem. All of the users would have been deleted from our database. In a case like this, generating a migration is always a better idea!
Let's break down how a migration works:
Sequelize provides us with some really cool methods to make updates to our database and tables. You may be familiar with one already:
With most of the provided methods, the first argument will always be the target table. The second or third arguments can be a column or fields/options.
In the case of createTable, we pass in the desired table to create and the fields we want to add to the table.
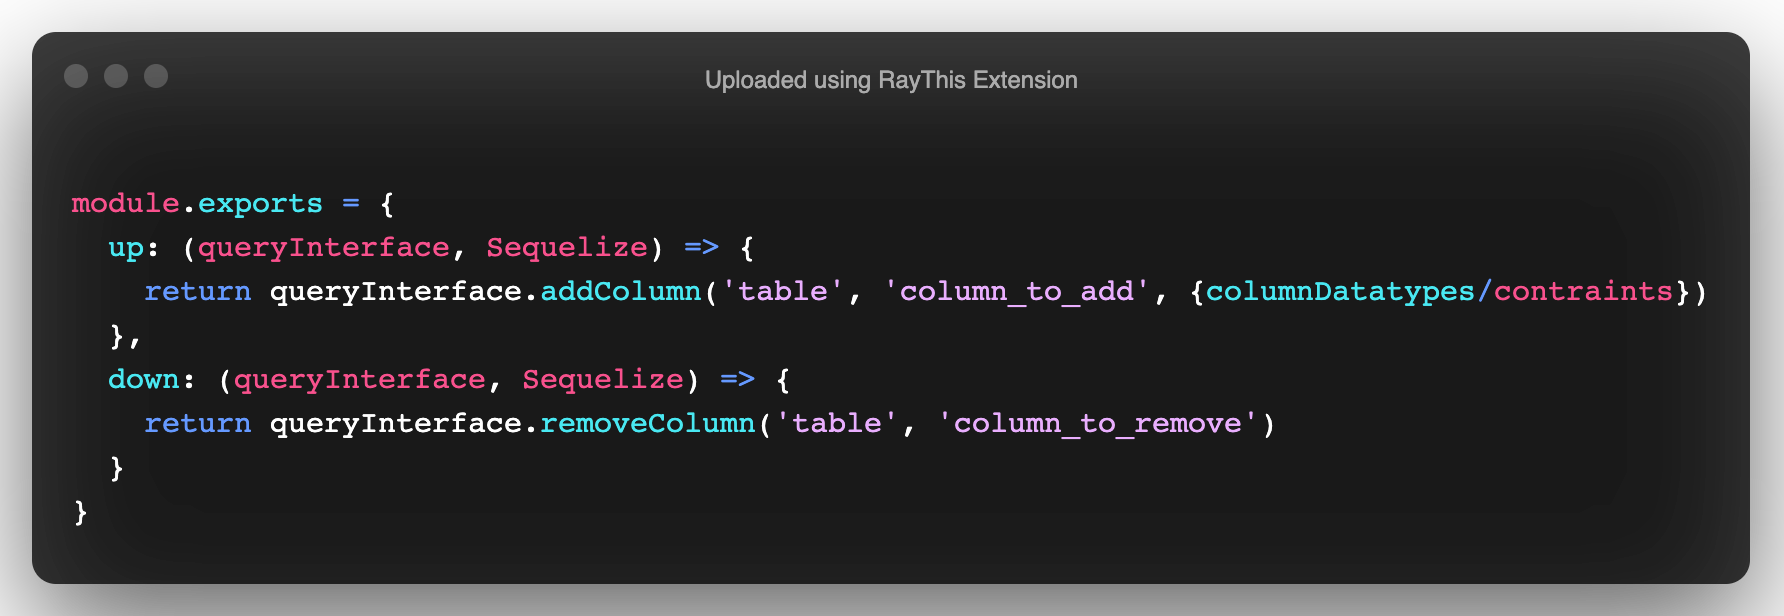
In order to fix our users table, we'll be utilizing a method called addColumn on the up transaction and removeColumn on the down transaction.
Let's update our new migration with the following:
module.exports = {
  up: (queryInterface, Sequelize) => {
    return queryInterface.addColumn('users','userName',{
      type:Sequelize.STRING
      }
    );
  },
  down: (queryInterface, Sequelize) => {
    return queryInterface.removeColumn('users', 'userName');
  }
};
Let's see how the above works:
We'll link the full list of methods in the Resources section!
Next, we need to reflect the pending change in our desired model. Update your User model with a userName field:
'use strict'
const { Model } = require('sequelize')
module.exports = (sequelize, DataTypes) => {
  class User extends Model {
    /**
     * Helper method for defining associations.
     * This method is not a part of Sequelize lifecycle.
     * The `models/index` file will call this method automatically.
     */
    static associate(models) {
      // define association here
    }
  }
  User.init(
    {
      firstName: DataTypes.STRING,
      lastName: DataTypes.STRING,
      email: DataTypes.STRING,
      password: DataTypes.STRING,
      userName: Datatypes.STRING
    },
    {
      sequelize,
      modelName: 'User',
      tableName: 'users'
    }
  )
  return User
}
Now we're ready to run the migration:
sequelize db:migrateIf you made a mistake, you can always rollback: sequelize db:migrate:undo
Let's make sure the column was added:
psql sequelize_migrations_development
SELECT * FROM users;Take a second to look at our User model and the provided Table in the Final Schema section. You'll notice that the field is supposed to be username and we called it userName. Whoops....
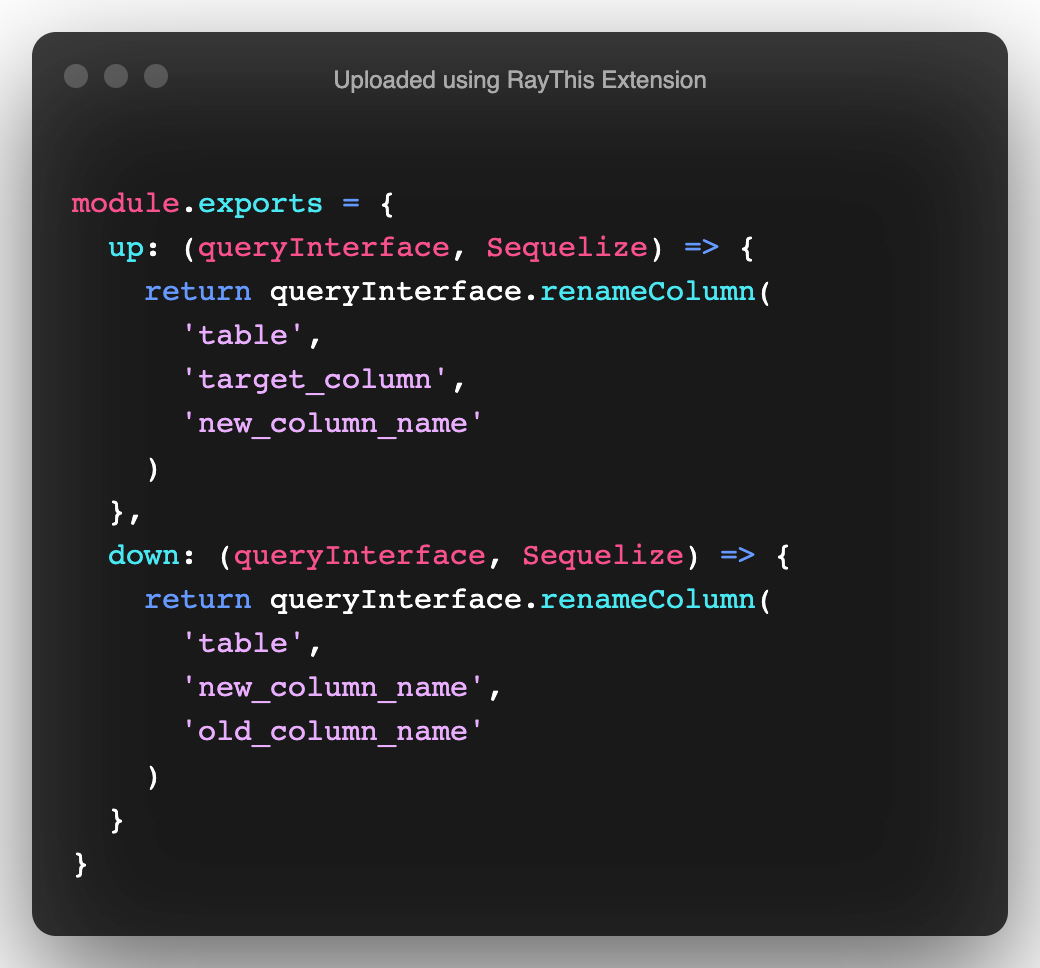
Let's fix this issue. Start by generating another migration file:
sequelize migration:generate --name rename-userName-to-usernameUpdate the migration file with the following code:
module.exports = {
  up: (queryInterface, Sequelize) => {
    return queryInterface.renameColumn('users', 'userName', 'username')
  },
  down: (queryInterface, Sequelize) => {
    return queryInterface.renameColumn('users', 'username', 'userName')
  }
}
Here's a breakdown:
Let's run this migration:
sequelize db:migrateNext we need to reflect these changes in our model. Update your User model with the following:
'use strict'
const { Model } = require('sequelize')
module.exports = (sequelize, DataTypes) => {
  class User extends Model {
    /**
     * Helper method for defining associations.
     * This method is not a part of Sequelize lifecycle.
     * The `models/index` file will call this method automatically.
     */
    static associate(models) {
      // define association here
    }
  }
  User.init(
    {
      firstName: DataTypes.STRING,
      lastName: DataTypes.STRING,
      email: DataTypes.STRING,
      password: DataTypes.STRING,
      username: Datatypes.STRING
    },
    {
      sequelize,
      modelName: 'User',
      tableName: 'users'
    }
  )
  return User
}
Make sure the change was applied:
psql sequelize_migrations_development
SELECT * FROM users;If you notice the contraints section below the Final Schema section, emails should always be required. In techinal terms, not null.
So now you have one last change you'd like to make to your database. You want to have email be required (no nulls). That means we need to create a migration to change our already existing email column to not allow nulls. Let's create a new migration to fix this issue:
sequelize migration:generate --name add-null-contraint-user-emailWe'll utilize the changeColumn method to make this change:
module.exports = {
  up: (queryInterface, Sequelize) => {
    return queryInterface.changeColumn('users', 'email', {
      type: Sequelize.STRING,
      allowNull: false
    })
  },
  down: (queryInterface, Sequelize) => {
    return queryInterface.changeColumn('users', 'email', {
      type: Sequelize.STRING,
      allowNull: true
    })
  }
}
Now we're ready to apply the changes:
sequelize db:migrateWe now have to reflect this change in our User model:
'use strict'
const { Model } = require('sequelize')
module.exports = (sequelize, DataTypes) => {
  class User extends Model {
    /**
     * Helper method for defining associations.
     * This method is not a part of Sequelize lifecycle.
     * The `models/index` file will call this method automatically.
     */
    static associate(models) {
      // define association here
    }
  }
  User.init(
    {
      firstName: DataTypes.STRING,
      lastName: DataTypes.STRING,
      email: {
        type: DataTypes.STRING,
        allowNull: false
      },
      password: DataTypes.STRING,
      username: Datatypes.STRING
    },
    {
      sequelize,
      modelName: 'User',
      tableName: 'users'
    }
  )
  return User
}
Test it out:
psql sequelize_migrations_development
INSERT INTO users VALUES (2, 'Jane', 'Dee');
The result should be null value in column "email" violates not-null constraint.
Want to successfully
INSERT? TryINSERT INTO users VALUES (Default, 'Jane', 'Dee', 'jane@dee.com', 'STRONG', now(), now(), 'janeD');
In this lesson, we learned how to use migrations to fix mistakes or update our tables without destroying data. Migrations are a written record of every change you've ever made to your database. They allow you and other developers to easily pick up a foreign codebase and understand how the database was designed in a short amount of time.


