This documentation provides step-by-step guides and examples for working with Ansible, covering various topics such as setting up the environment, practicing inventory management, configuration, playbooks, tasks, handlers, roles, and more.
- Setup Environment
- Practicing Inventory
- Practicing ansible.cfg
- Practicing Command Escalation (become)
- Practicing Playbook
- Install Nginx Task
- Practicing Tags
- Always Tag
- Practicing Variables
- Practicing Loops
- Practicing When
- Practicing Register
- Practicing Register & When
- Practicing Handler
- Practicing Template
- Roles Project
-
Install Ansible on your machine.
$ sudo apt install ansible

# Install using pip to ensure all required Python packages are installed
$ pip install ansible

# Setup Docker environment
-
Create a key to be associated with the container to SSH into it, in the /.ssh/
$ ssh-keygen -t rsa -b 2048
-
Create a Dockerfile for the image
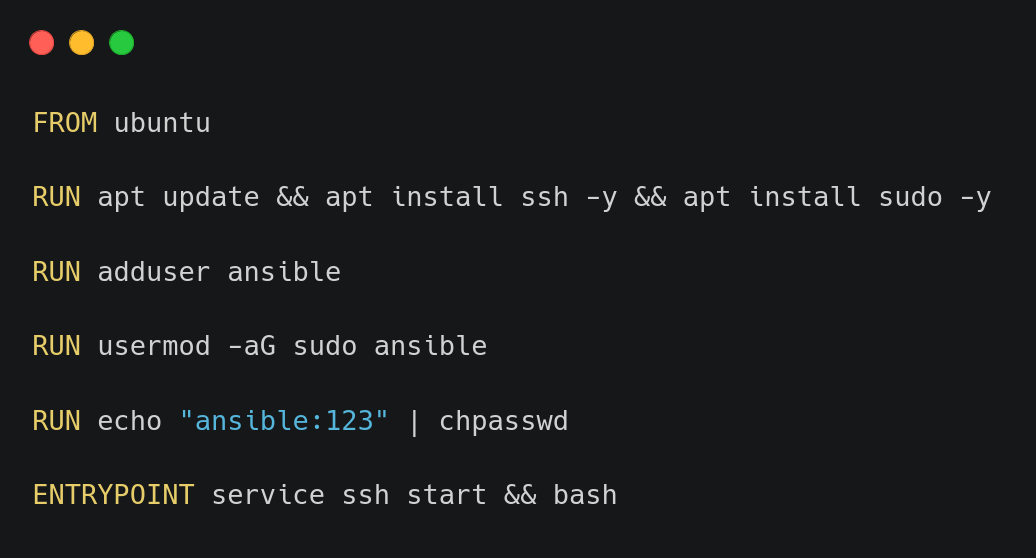
-
Build the image
$ docker build -t ansible-ubuntu-image . -
Create a container using the image
$ docker run -itd --name "lab1-server01" ansible-ubuntu-image -
Get the container IP to connect to it
$ docker inspect lab1-server01
The IP is typically
172.17.0.2. -
Move the public key to the container to activate it for SSH
$ ssh-copy-id -i /home/user/.ssh/ansible-key.pub ansible@172.17.0.2
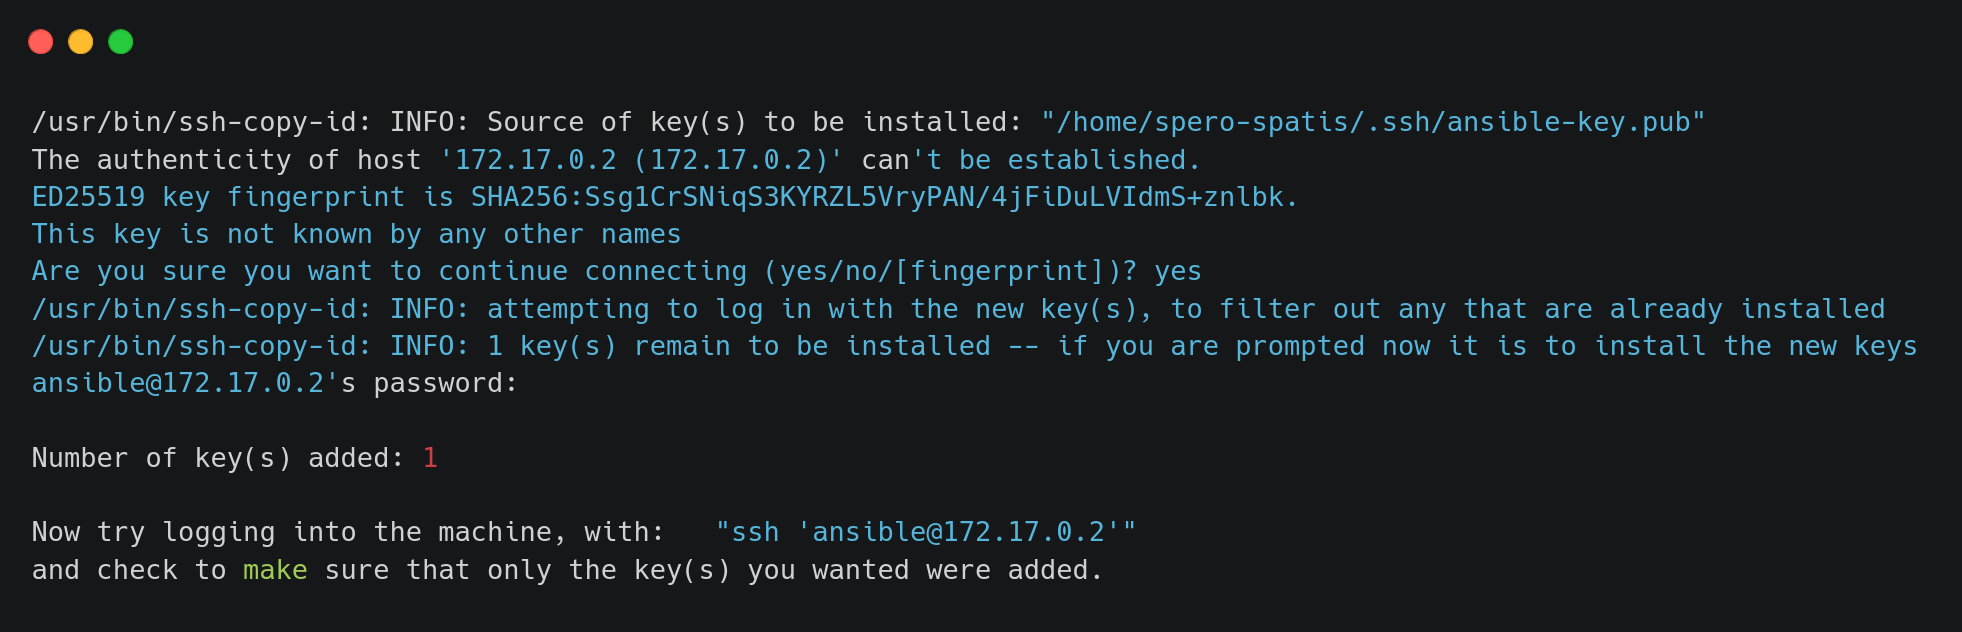
-
Now connect to the container using SSH
$ ssh ansible@172.17.0.2
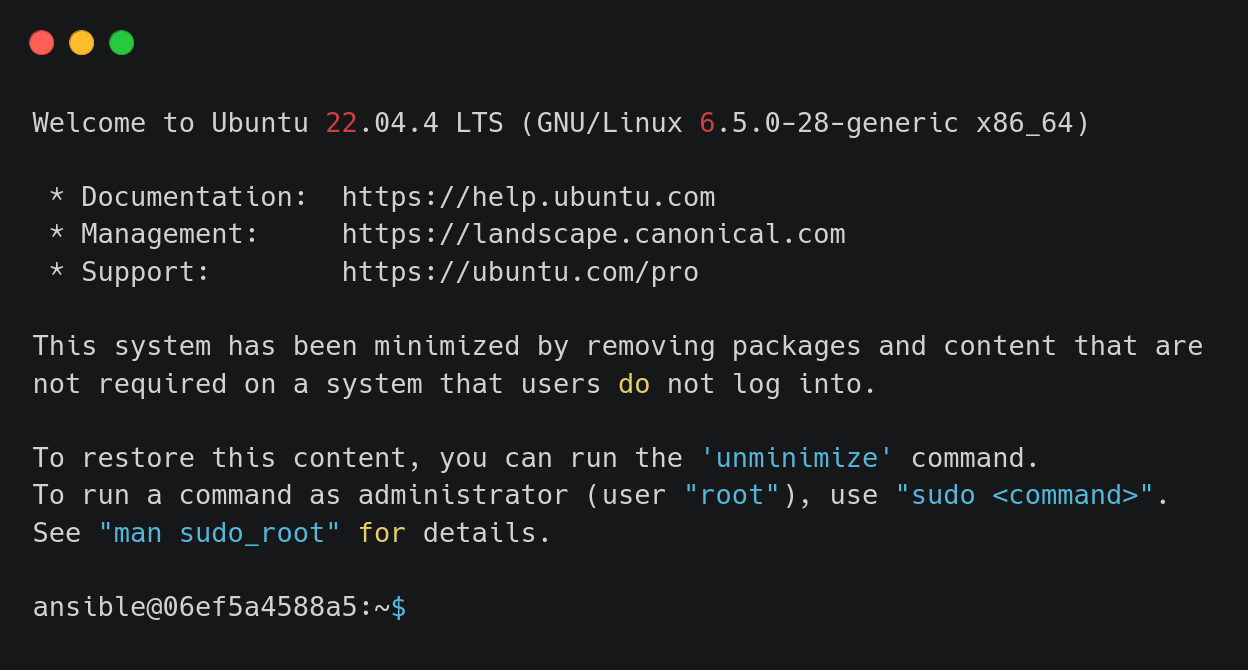


-
Create an inventory file that contains all the IPs in your environment.

-
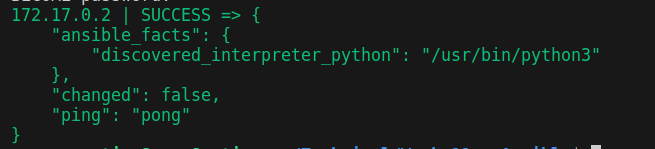
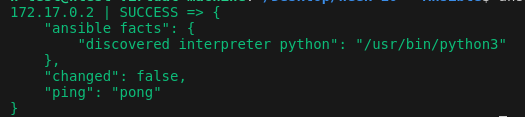
Ping all the servers using the following command.
$ ansible all -i ./inventory --private-key /home/h-test/.ssh/ansible-key -u ansible -m ping


-
Write your config file
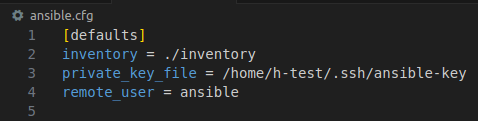
-
Now ping the web servers only for example.
$ ansible webservers -m ping


If we tried to execute a sudo command that requires a password to has it’s execution privilege. Ansible will response with an error.
$ ansible webservers -m command -a "sudo touch /etc/shadow"It will cause a runtime error.
So we need to tell ansible that you are going to need the root password, and this gets done using become
To do so, we need to activate the become and password asking either in terminal.
$ ansible webservers -m command --ask-become-pass -b -a "sudo touch /etc/shadow"or in ansible.cfg

-
Write your playbook file in .yml
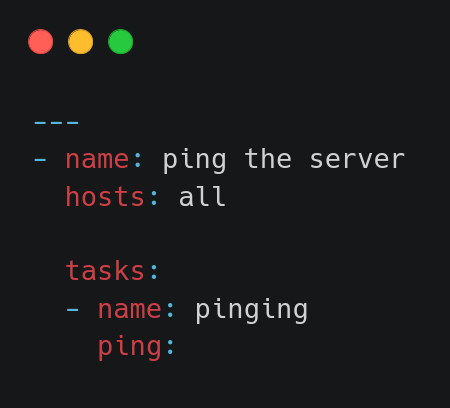
-
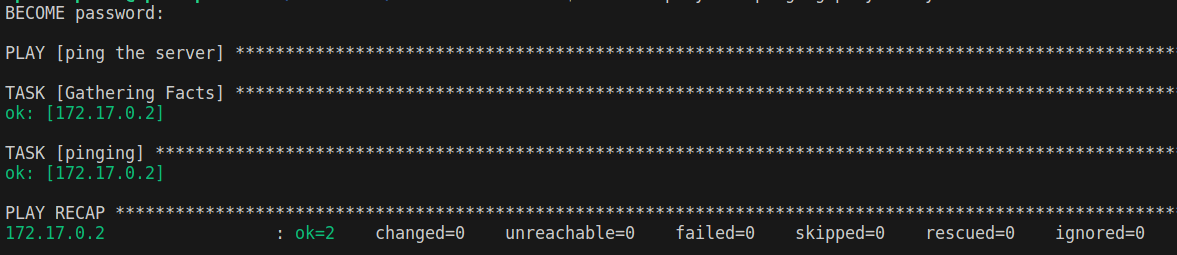
Execute the following command
$ ansible-playbook pinging-playbook.yml


📢 Task
- Update cache
- Install latest nginx
- Copy index.html from controller to server01
- Restart nginx service
- Can you see your index.html file when you hit server01 on port 80 ?
-
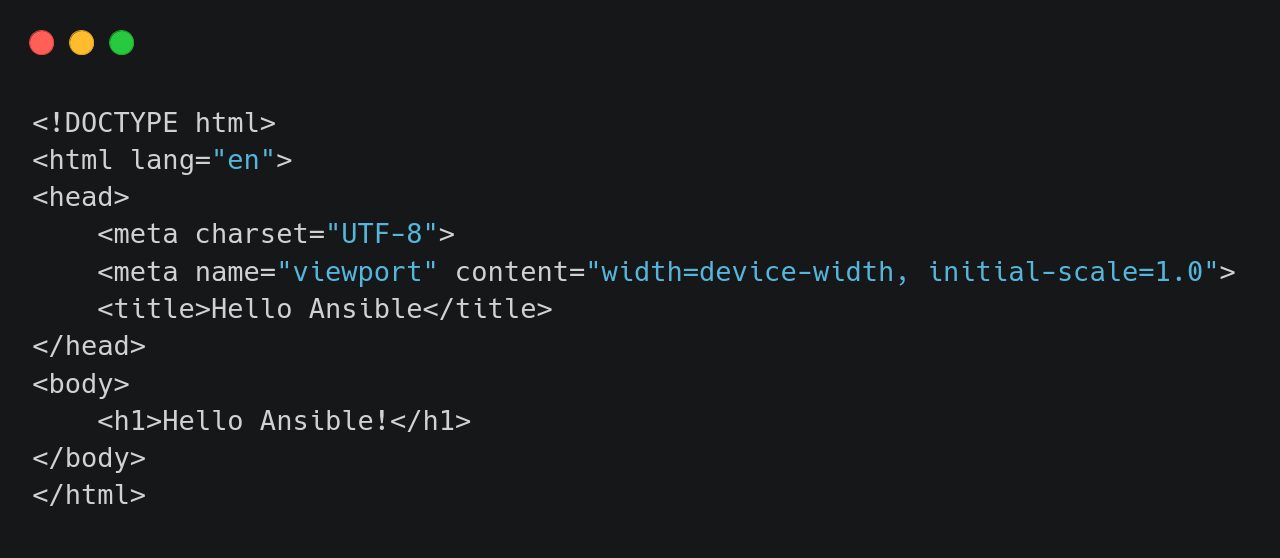
Write a simple index.html file
-
Write your playbook file

-
Execute the following command
$ ansible-playbook pinging-playbook.yml
-
Hit nginx
Expose nginx port on the host by restarting the container and modifying the container networking.


-
Write your tags-playbook file

-
Execute the following command
$ ansible-playbook tags-playbook.yml --tags install

Using always tag ensures the associated task is executed regardless.

-
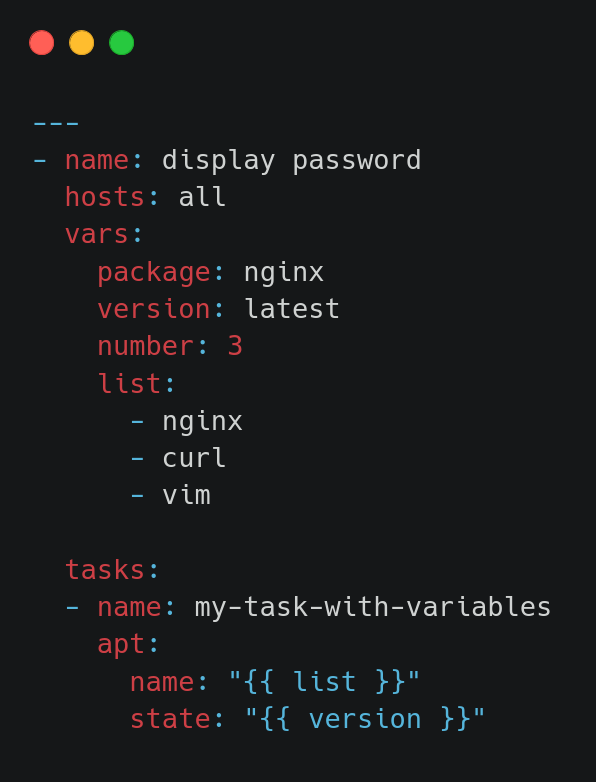
you can specify your variables in the playbook file directly, as following..
-
Or write them in a separate variables.yml file. and refer to them in the playbook file.
.png)
.png)
-
Execute the following command
$ ansible-playbook variables-playbook.yml

.png)
.png)
-
Write your loops-playbook file
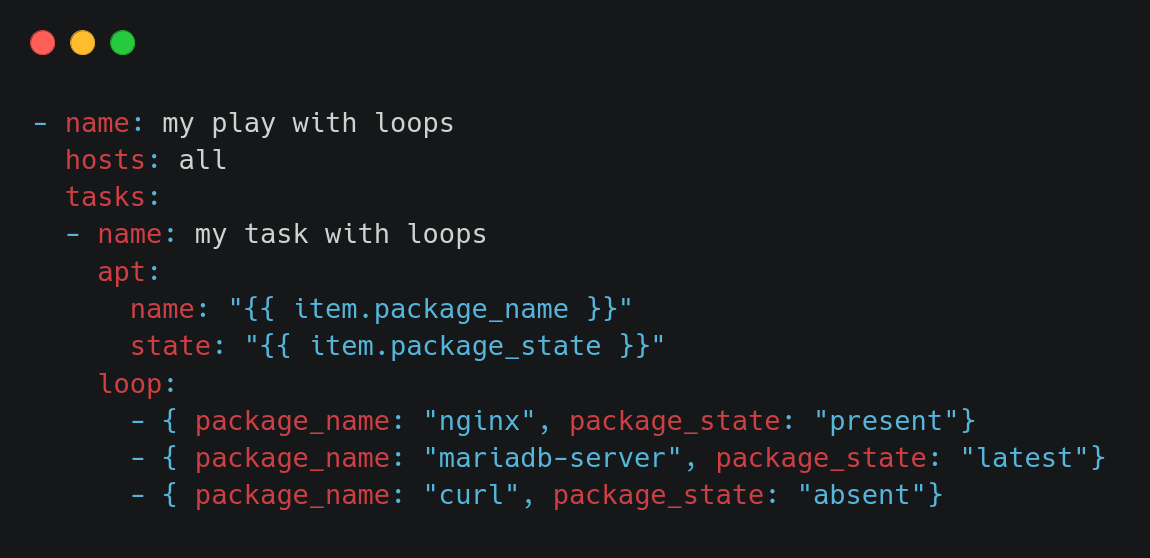
You also can add multiple attributes to the loop item, as following..
.png)
Also you can store the item values as a variables, as following..
.png)
-
Execute the following command
$ ansible-playbook loops-playbook.yml

.png)
.png)
-
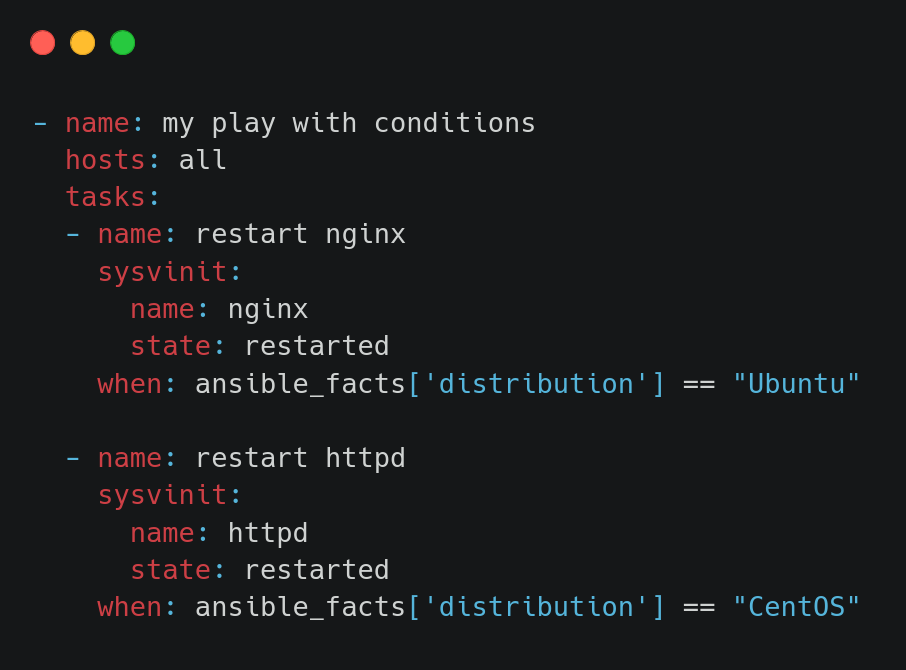
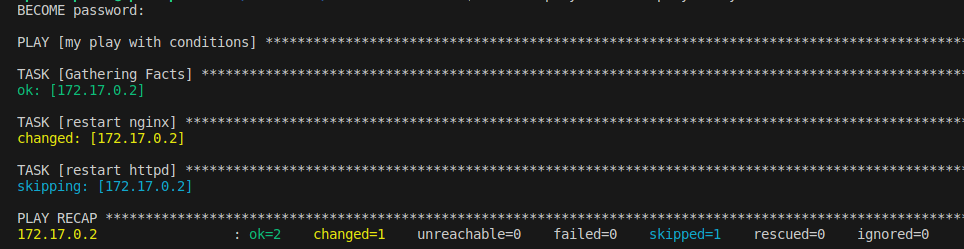
Write your when-playbook file
Execute using:
$ ansible-playbook when-playbook.yml


-
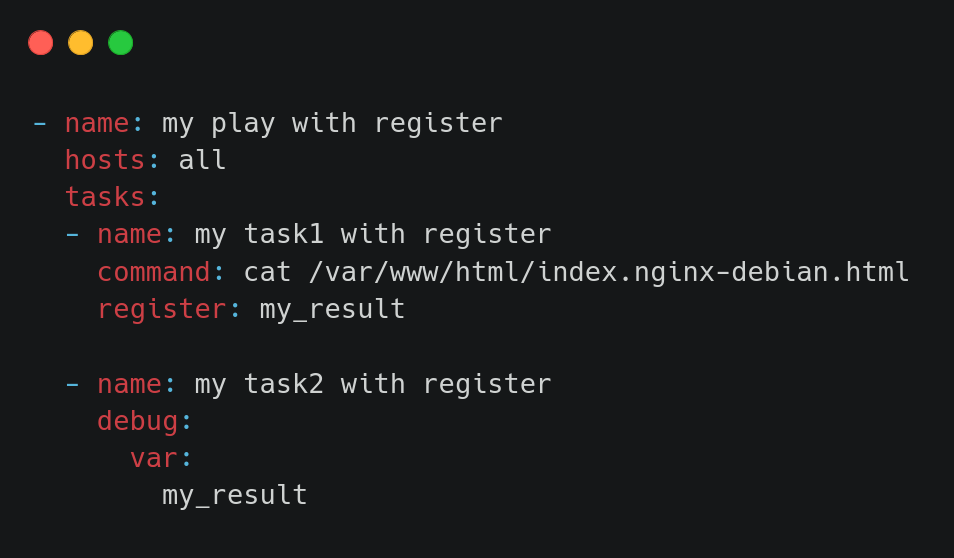
Write your register-playbook file
!
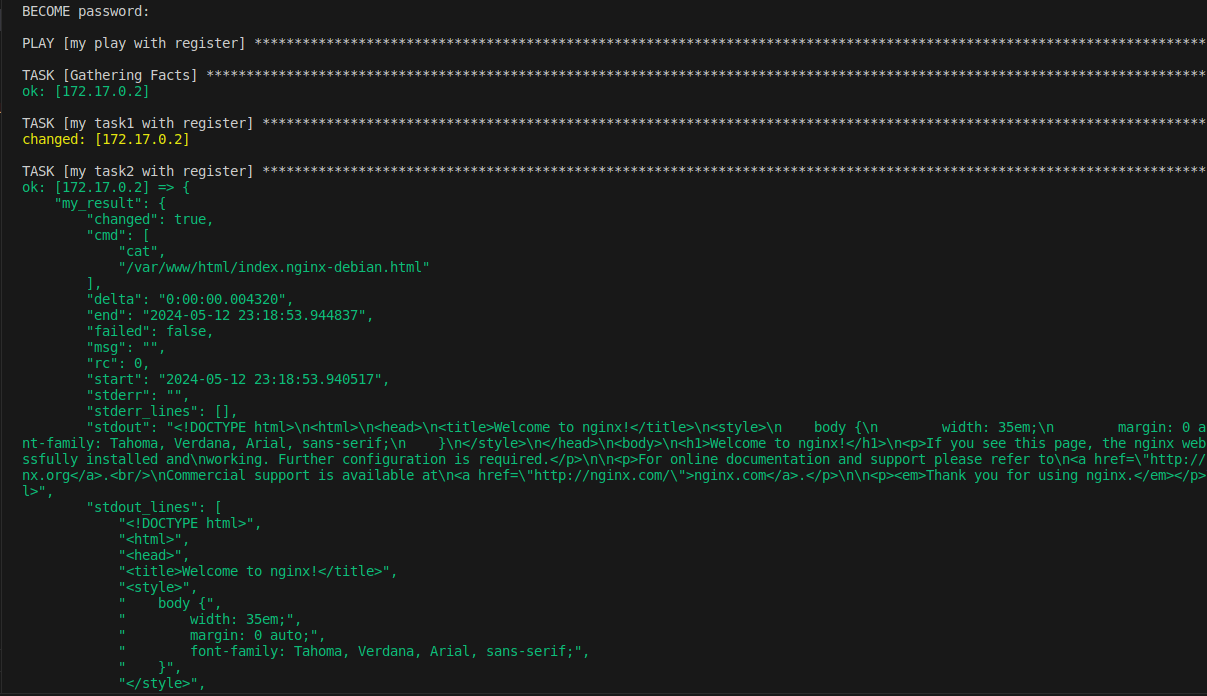
Execute using:
$ ansible-playbook register-playbook.yml


-
vars/main.yml

-
files/index01.html

-
templates/index02.html

-
tasks/main.yml

-
handlers/main.yml

-
./playbook.yml


$ ansible-playbook playbook.yml
This documentation is a comprehensive guide to using Ansible for various tasks and projects. Each section provides detailed instructions and examples for practical implementation.
For more information and detailed usage, refer to the respective sections in this document.