Enhanced security for Filament v3+ Panels.
Enhanced security features for Filament (v3) Panels. Includes a customizable My Profile page with personal info & avatar support, update password, two factor authentication, and Sanctum token management. Installs in minutes!
Features & Screenshots
My Profile - Personal info with avatar support
![]() Update password with customizable validation rules
Update password with customizable validation rules
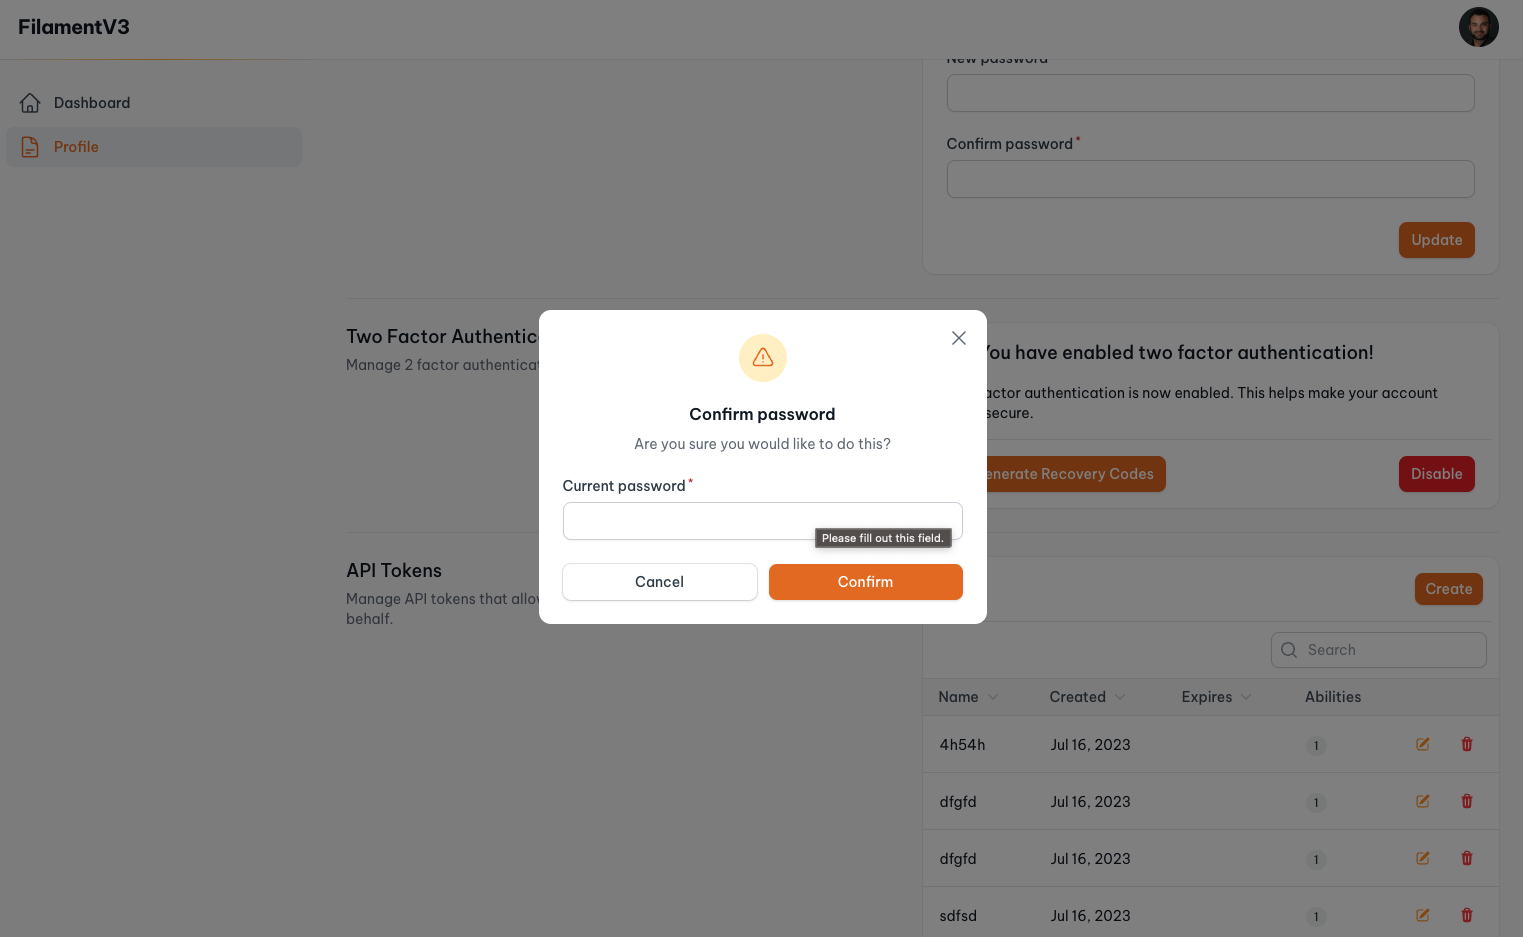
 Protected sensitive actions with a password confirmation modal Action
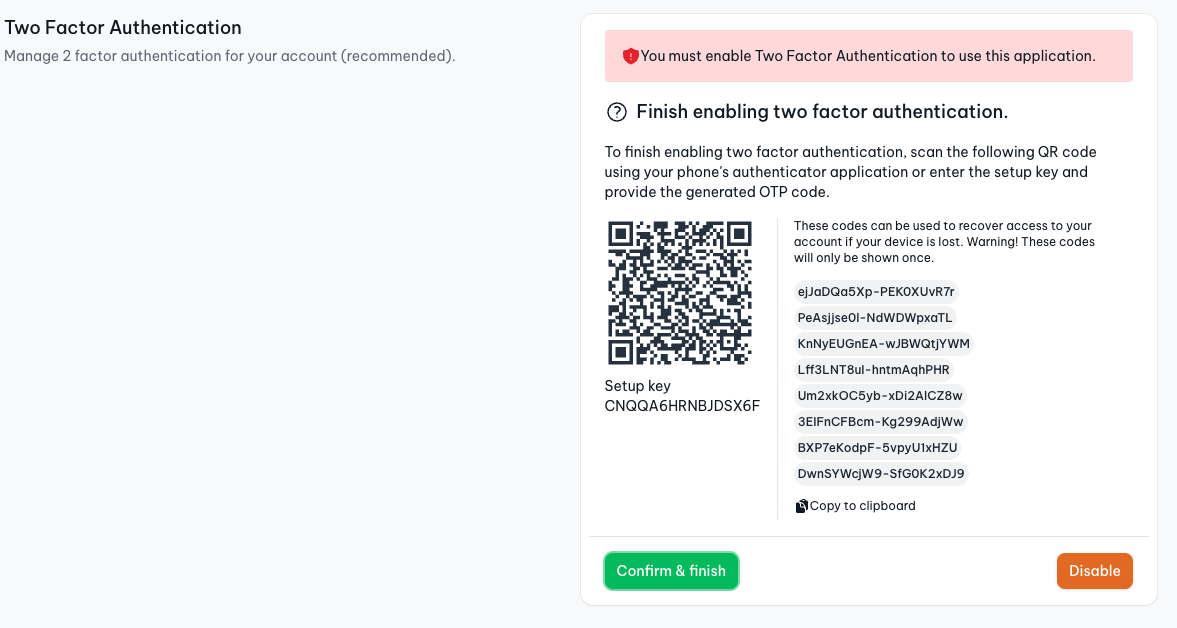
 Two factor authentication with recovery codes
 Force the user to enable two factor authentication before they can use the app
 Create and manage Sanctum personal access tokens


Installation
Install the package via composer and install:
composer require jeffgreco13/filament-breezy
php artisan breezy:install
Optionally, you can publish the views using:
php artisan vendor:publish --tag="filament-breezy-views"Usage & Configuration
You must enable Breezy by adding the class to your Filament Panel's plugin() or plugins([]) method:
use Jeffgreco13\FilamentBreezy\BreezyCore;

class CustomersPanelProvider extends PanelProvider
{
    public function panel(Panel $panel): Panel
    {
        return $panel
            ...
            ->plugin(
                BreezyCore::make()
            )
    }
}
Update the auth guard
Breezy will use the authGuard set on the Filament Panel that you create. You may update the authGuard as you please:
use Jeffgreco13\FilamentBreezy\BreezyCore;

class CustomersPanelProvider extends PanelProvider
{
    public function panel(Panel $panel): Panel
    {
        return $panel
            ...
            ->authGuard('customers')
            ->plugin(
                BreezyCore::make()
            )
    }
}
NOTE: you must ensure that the model used in your Guard extends the Authenticatable class.
My Profile
Enable the My Profile page with configuration options.
NOTE: if you are using avatars,
BreezyCore::make()
    ->myProfile(
        shouldRegisterUserMenu: true, // Sets the 'account' link in the panel User Menu (default = true)
        shouldRegisterNavigation: false, // Adds a main navigation item for the My Profile page (default = false)
        hasAvatars: false, // Enables the avatar upload form component (default = false)
        slug: 'my-profile' // Sets the slug for the profile page (default = 'my-profile')
    )
Using avatars in your Panel
The instructions for using custom avatars is found in the Filament v3 docs under Setting up user avatars.
Here is a possible implementation using the example from the docs:
use Illuminate\Support\Facades\Storage;
use Filament\Models\Contracts\HasAvatar;
use Illuminate\Foundation\Auth\User as Authenticatable;

class User extends Authenticatable implements FilamentUser, HasAvatar
{
    // ...

    public function getFilamentAvatarUrl(): ?string
    {
        return $this->avatar_url ? Storage::url($this->avatar_url) : null ;
    }
}
Customize the avatar upload component
use Filament\Forms\Components\FileUpload;

BreezyCore::make()
    ->avatarUploadComponent(fn($fileUpload) => $fileUpload->disableLabel())
    // OR, replace with your own component
    ->avatarUploadComponent(fn() => FileUpload::make('avatar_url')->disk('profile-photos'))
Add column to table
If you wish to have your own avatar, you need to create a column on the users table named avatar_url. It is reccomended that you create a new migration for it, and add the column there:
php artisan make:migration add_avatar_url_column_to_users_table
<?php

use Illuminate\Database\Migrations\Migration;
use Illuminate\Database\Schema\Blueprint;
use Illuminate\Support\Facades\Schema;

return new class extends Migration
{
    /**
     * Run the migrations.
     */
    public function up(): void
    {
        Schema::table('users', function (Blueprint $table) {
            $table->string('avatar_url')->nullable();
        });
    }

    /**
     * Reverse the migrations.
     */
    public function down(): void
    {
        Schema::table('users', function (Blueprint $table) {
            //
        });
    }
};
Customize password update
You can customize the validation rules for the update password component by passing an array of validation strings, or an instance of the Illuminate\Validation\Rules\Password class.
use Illuminate\Validation\Rules\Password;

BreezyCore::make()
    ->passwordUpdateRules(
        rules: [Password::default()->mixedCase()->uncompromised(3)], // you may pass an array of validation rules as well. (default = ['min:8'])
        requiresCurrentPassword: true, // when false, the user can update their password without entering their current password. (default = true)
        )
Create custom My Profile components
In Breezy v2, you can now create custom Livewire components for the My Profile page and append them easily.
- Create a new Livewire component in your project using:
php artisan make:livewire MyCustomComponent
- Extend the
MyProfileComponentclass included with Breezy. This class implements Actions and Forms.
use Jeffgreco13\FilamentBreezy\Livewire\MyProfileComponent;

class MyCustomComponent extends MyProfileComponent
{
    protected string $view = "livewire.my-custom-component";

    //

    public array $data;

    public function form(Form $form): Form
    {
        return $form
            ->schema([
                Forms\Components\TextInput::make('name')
                    ->required()
            ])
            ->statePath('data');
    }
}- Within your Livewire component's view, you can use Breezy's
grid-sectionblade component to match the style:
<x-filament-breezy::grid-section md=2 title="Your title" description="This is the description">
    <x-filament::card>
        <form wire:submit.prevent="submit" class="space-y-6">

            {{ $this->form }}

            <div class="text-right">
                <x-filament::button type="submit" form="submit" class="align-right">
                    Submit!
                </x-filament::button>
            </div>
        </form>
    </x-filament::card>
</x-filament-breezy::grid-section>- Finally, register your new component with Breezy:
use App\Livewire\MyCustomComponent;

BreezyCore::make()
    ->myProfileComponents([MyCustomComponent::class])
Override My Profile components
You may override the existing MyProfile components to replace them with your own:
use App\Livewire\MyCustomComponent;

BreezyCore::make()
    ->myProfileComponents([
        // 'personal_info' => ,
        'update_password' => MyCustomComponent::class, // replaces UpdatePassword component with your own.
        // 'two_factor_authentication' => ,
        // 'sanctum_tokens' =>
    ])
Sorting My Profile components
Custom MyProfile components can be sorted by setting their static $sort property. This property can be set for existing MyProfile components in any service provider:
TwoFactorAuthentication::setSort(4);A lot of the time this won't be necessary, though, as the default sort order is spaced out in steps of 10, so there should be enough numbers to place any custom components in between.
Two Factor Authentication
- Add
Jeffgreco13\FilamentBreezy\Traits\TwoFactorAuthenticatableto your Authenticatable model:
use Jeffgreco13\FilamentBreezy\Traits\TwoFactorAuthenticatable;

class User extends Authenticatable
{
    use HasApiTokens, HasFactory, Notifiable, TwoFactorAuthenticatable;
    // ...

}- Enable Two Factory Authentication using the
enableTwoFactorAuthentication()method on the Breezy plugin.
BreezyCore::make()
    ->enableTwoFactorAuthentication(
        force: false, // force the user to enable 2FA before they can use the application (default = false)
        action: CustomTwoFactorPage::class // optionally, use a custom 2FA page
)- Adjust the 2FA page
The Breezy 2FA page can be swapped for a custom implementation (see above), same as the Filament auth pages. This allows, for example, to define a custom auth layout like so:
use Jeffgreco13\FilamentBreezy\Pages\TwoFactorPage;

class CustomTwoFactorPage extends TwoFactorPage
{
    protected static string $layout = 'custom.auth.layout.view';
}
Sanctum Personal Access tokens
As of Laravel 8.x Sanctum is included with Laravel, but if you don't already have the package follow the installation instructions here.
Enable the Sanctum token management component:
BreezyCore::make()
    ->enableSanctumTokens(
        permissions: ['my','custom','permissions'] // optional, customize the permissions (default = ["create", "view", "update", "delete"])
    )
Password Confirmation Button Action
This button action will prompt the user to enter their password for sensitive actions (eg. delete). This action uses the same 'password_timeout' number of seconds found in config/auth.php.
use Jeffgreco13\FilamentBreezy\Actions\PasswordButtonAction;

PasswordButtonAction::make('secure_action')->action('doSecureAction')

// Customize the icon, action, modalHeading and anything else.
PasswordButtonAction::make('secure_action')->label('Delete')->icon('heroicon-s-shield-check')->modalHeading('Confirmation')->action(fn()=>$this->doAction())
FAQ
How the 2FA session work across multiple panels?
By default, Breezy uses the same guard as defined on your Panel. The default is 'web'. Only panels that have registered the BreezyCore plugin will have access to 2FA. If multiple panels use 2FA, and share the same guard, the User only has to enter the OTP once for the duration of the session.
How does 2FA interact with MustVerifyEmail?
When 2FA is properly configured, and the User is prompted for the OTP code before email verification.
How long does the 2FA session last?
The 2FA session is the same as the Laravel session lifetime. Once the user is logged out, or the session expires, they will need to enter the OTP code again.
Testing
composer testChangelog
Please see CHANGELOG for more information on what has changed recently.
Contributing
Please see CONTRIBUTING for details.
Security Vulnerabilities
Please review our security policy on how to report security vulnerabilities.
Credits
License
The MIT License (MIT). Please see License File for more information.


