This repository contains tooling to help with rooting 3irobotix CRL-200S-based vacuum robots such as
- Viomi V2
- viomi.vacuum.v7
- Cecotec Conga 3290
- Proscenic M6 pro
- and more
Please refer to the docs on Valetudo.cloud to find a full list of all supported models.
Warning:
Do NOT attempt to root the following robots as it will brick them.
- Cecotec Conga 3090
Additionally, be advised that rooting these can work for some but cause bricks for other units with no way of knowing if yours will work beforehand:
- viomi.vacuum.v8 (check the SSID for v8 to identify it)
- Wyze Robot Vacuum
Even more important Warning:
In general, rooting vacuum robots is a dangerous procedure that can lead to unfixable bricks.
Make sure to not attempt to root anything that you can't afford to lose.
- a linux machine with a working
adbinstall - a good micro-USB cable (with data support)
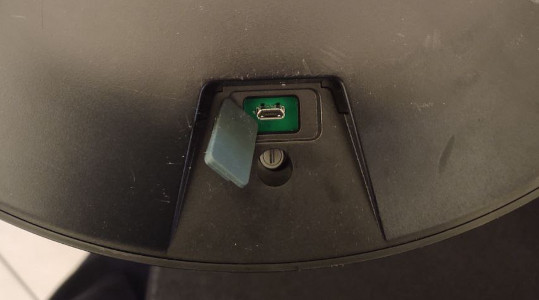
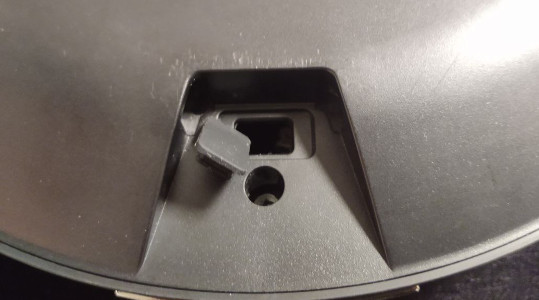
Your robot has one or even two micro USB ports, which will be used for rooting.
If your robot has a second micro USB port in the back like in the image above please make sure to use that.
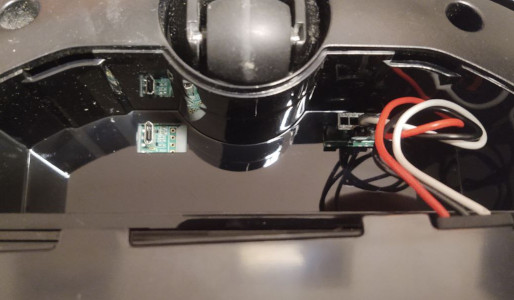
If however your robot looks like this then don't worry. There is a second micro USB port in the battery compartment, which is easily accessible without destroying any warranty seals:
Now with the USB port located, turn on the robot and wait for it to boot up.
If you're only seeing the adb device show for a fraction of a second on boot and otherwise get no devices found, then step 3.1 is for you.
If you instead are already able to get a login shell using adb shell then go to 3.2.
Some robots (notably the Viomi V7) disable ADB access right after bootup.
To fix that, please download and run the enable-adb.sh found in the root directory of this repo.
After following its instructions, you should end up with a password-less rootshell via adb shell.
If running adb shell looks like this:
$ adb shell
TinaLinux login:
then simply create a file named adb_shell with these contents:
#!/bin/sh
export ENV='/etc/adb_profile'
exec /bin/sh "$@"
chmod +x that file and then adb push ./adb_shell /bin/adb_shell.
Now, running adb shell again should present you with a password-less rootshell.
With a working ADB connection, now is the time to pull a backup of everything.
For that, simply run the following commands:
adb pull /proc/partitions

adb pull /dev/nanda
adb pull /dev/nandb
adb pull /dev/nandc
adb pull /dev/nandd
adb pull /dev/nande
adb pull /dev/nandf
adb pull /dev/nandg
adb pull /dev/nandh
adb pull /dev/nandi
If the partitions file contains even more nand partitions then also backup those!
First, head over to the dustbuilder and build a firmware package built for manual installation.
After downloading the tar.gz from the link in your email, simply push it to the robot like this:
adb push ./<rooted_firmware_filename>.tar.gz /tmp/
You will also need the latest Valetudo binary. Download it from here:
https://github.com/Hypfer/Valetudo/releases/latest/download/valetudo-armv7.upx
It is very important that the Valetudo binary is pushed to the correct location on the robot:
adb push ./valetudo-armv7.upx /mnt/UDISK/valetudo.
With that done, the last required file is the convert-robot.sh script that can be found in ths repo:
adb push ./convert-robot.sh /tmp/
To finalize the rooting procedure, connect with adb shell and then run the following commands:
cd /tmp/
sh ./convert-robot.sh
tar xzvf ./<rooted_firmware_filename>.tar.gz
sh ./install.sh
If everything went well then your robot should now be running Valetudo.
So far, we've identified a few models that have the same hardware but with a different Wi-Fi module (RTL8821CS instead of the RTL8189ES):
- Cecotec Conga 3690
- Cecotec Conga 3790
- Commodore CVR 200
If your robot happens to be one of those, you will need to do one last thing. If you have a different robot, you must skip this step.
Simply open a shell with adb shell and execute /opt/8821cs/enable_8821cs.sh.
Then, reboot and you're done
To join your Robot to your Wi-Fi network and start using Valetudo, press and hold the two buttons until the robot informs you that Wi-Fi has been reset.
Then, continue with the getting started guide.
If you never see ADB show up at all and have made sure to try with different USB cables, USB ports and also different hosts, some users reported that they had success with these instructions:
1. Long press the power key for at least 10 seconds to power off the device
2. Keep USB connected to the robot, but not to the PC
3. Press the "Home" key and do not release it.
4. Connect the USB to the PC
5. Click power key for about 10 times (on some robots: hold the power key for about 10-11 seconds)
6. Release both keys
7. Enjoy ADB
Personally, I haven't had any success with those though, so please take this with a grain of salt.
Source: rumpeltux/python-miio#1 (comment)
This tooling is based on knowledge and work by
- The initial Viomi research of @rumpeltux Rooting the Xiaomi STYJ02YM (viomi-v7) Vacuum Robot
- The viomi-root repository by @rumpeltux and community
- Conga research by the freeconga community


