In this code pattern, we walk you through the basics of creating a streaming application powered by Apache Kafka, one of the most popular open-source distributed event-streaming platforms used for creating real-time data pipeline and streaming applications.
Our application will be built using IBM Streams on IBM Cloud Pak for Data. IBM Streams provides a built-in IDE, called Streams flows, that allows developers to visually create their streaming application. The Cloud Pak for Data platform provides additional support, such as integration with multiple data sources, built-in analytics, Jupyter notebooks, and machine learning.
NOTE: The IBM Streams service is also available on IBM Cloud, and has the product name IBM Streaming Analytics.
For our Apache Kafka service, we will be using IBM Event Streams on IBM Cloud, which is a high-throughput message bus built on the Kafka platform. In the following examples, we will show it as both a source and a target of clickstream data - data that was captured from user clicks as they browsed on-line shopping websites.
IMPORTANT: It's easy to get the two IBM streaming services confused due to their similar names. The distinction is that IBM Event Streams provides the data which can then be ingested and analyzed by IBM Streams applications. Additionally, these applications are developed using Streams flows, the built-in IDE in IBM Streams.
- User creates streaming app in IBM Streams
- Streaming app uses Kafka service via IBM Event Streams to send/recieve messages
- Jupyter notebook is generated from IBM Streams app
- User executes streaming app in Jupyter notebook
- Jupyter notebook accesses Kafka service via IBM Event Stream to send/receive messages
- IBM Streams on Cloud Pak for Data: Development platform for visually creating streaming applications.
- Apache Kafka: Kafka is used for building real-time data pipelines and streaming apps. It is designed to be horizontally scalable, fault-tolerant and fast.
- Event Streams: A scalable, high-throughput message bus. Wire micro-services together using open protocols.
- Jupyter Notebook: An open source web application that allows you to create and share documents that contain live code, equations, visualizations, and explanatory text.
- Python: Python is a programming language that lets you work more quickly and integrate your systems more effectively.
NOTE: Python 3 is required for this application to run locally.
- Clone the repo
- Provison Event Streams on IBM Cloud
- Create sample Kafka console python app
- Add IBM Streams service to Cloud Pak for Data
- Create a new project in Cloud Pak for Data
- Create a Streams Flow in Cloud Pak for Data
- Create a Streams Flow with Kafka as source
- Use Streams Flows option to generate a notebook
- Run the generated Streams Flow notebook
git clone https://github.com/IBM/ibm-streams-with-kafkaTo create your IBM Event Streams service:
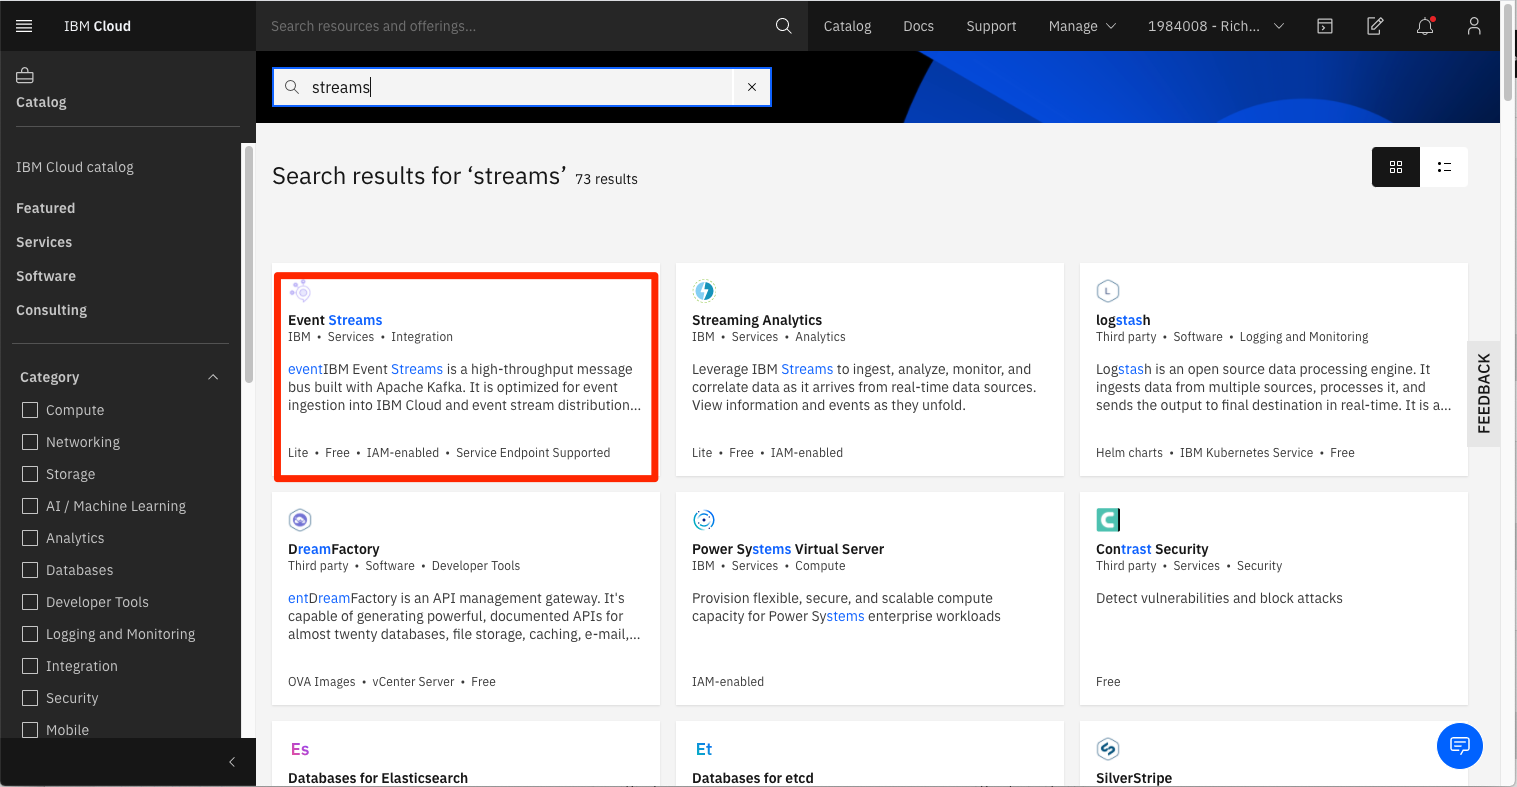
- From your IBM Cloud dashboard, click on
create resource. - Search the catalog for
streams. - Click the
Event Streamstile to launch the create panel.
From the panel, enter a unique name, a region and resource group, and a plan type (select the default lite plan). Click Create to create and enable your service.
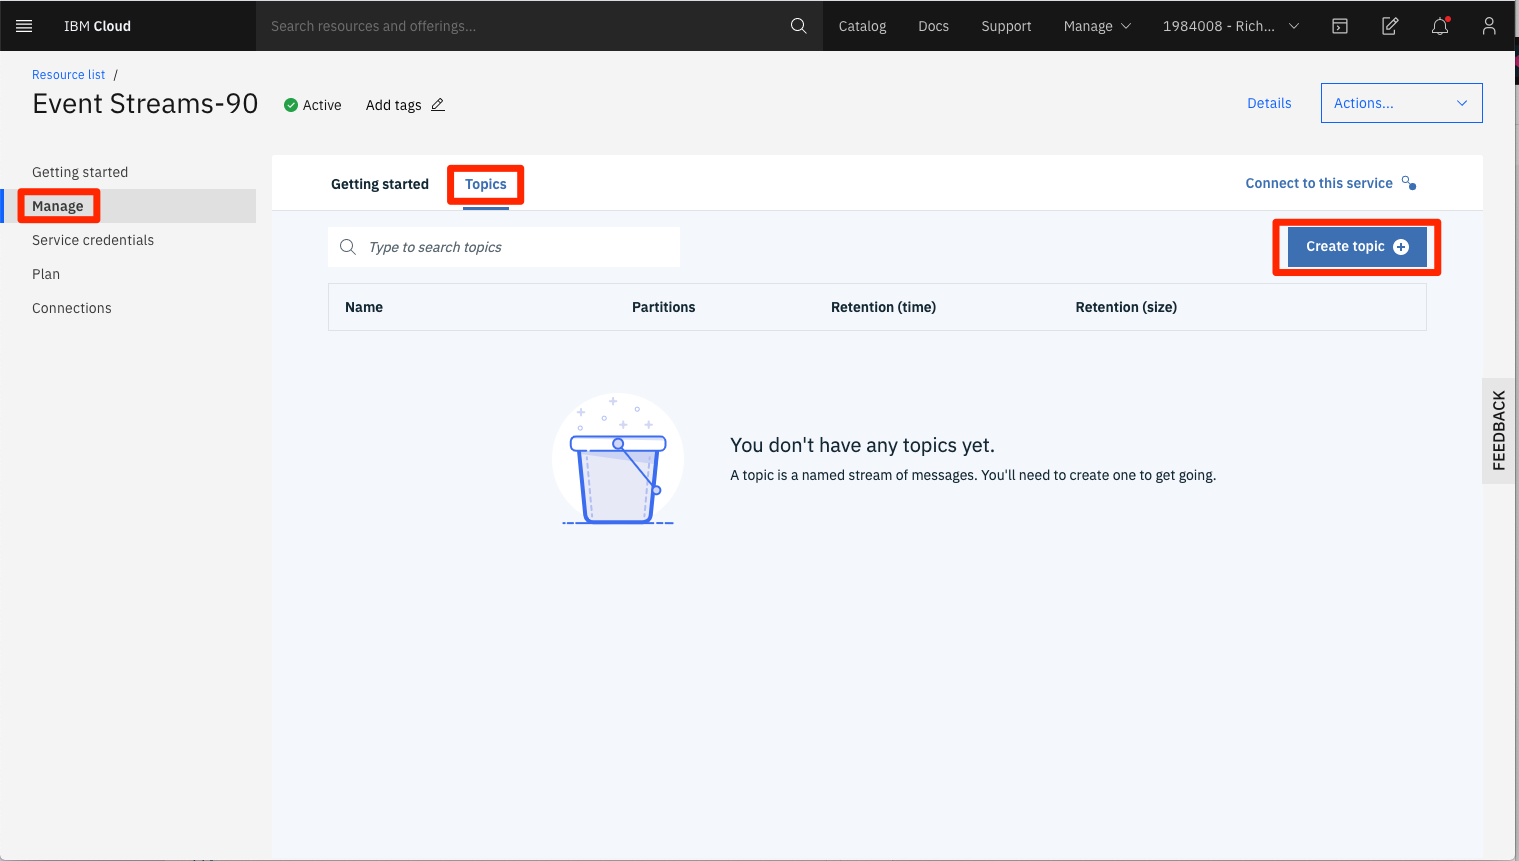
From the IBM Cloud dashboard, click on your new Event Streams service in the resource list.
From the Manage tab panel of your Event Streams service, click Topics.
From the Topics panel, click the Create topic + button.
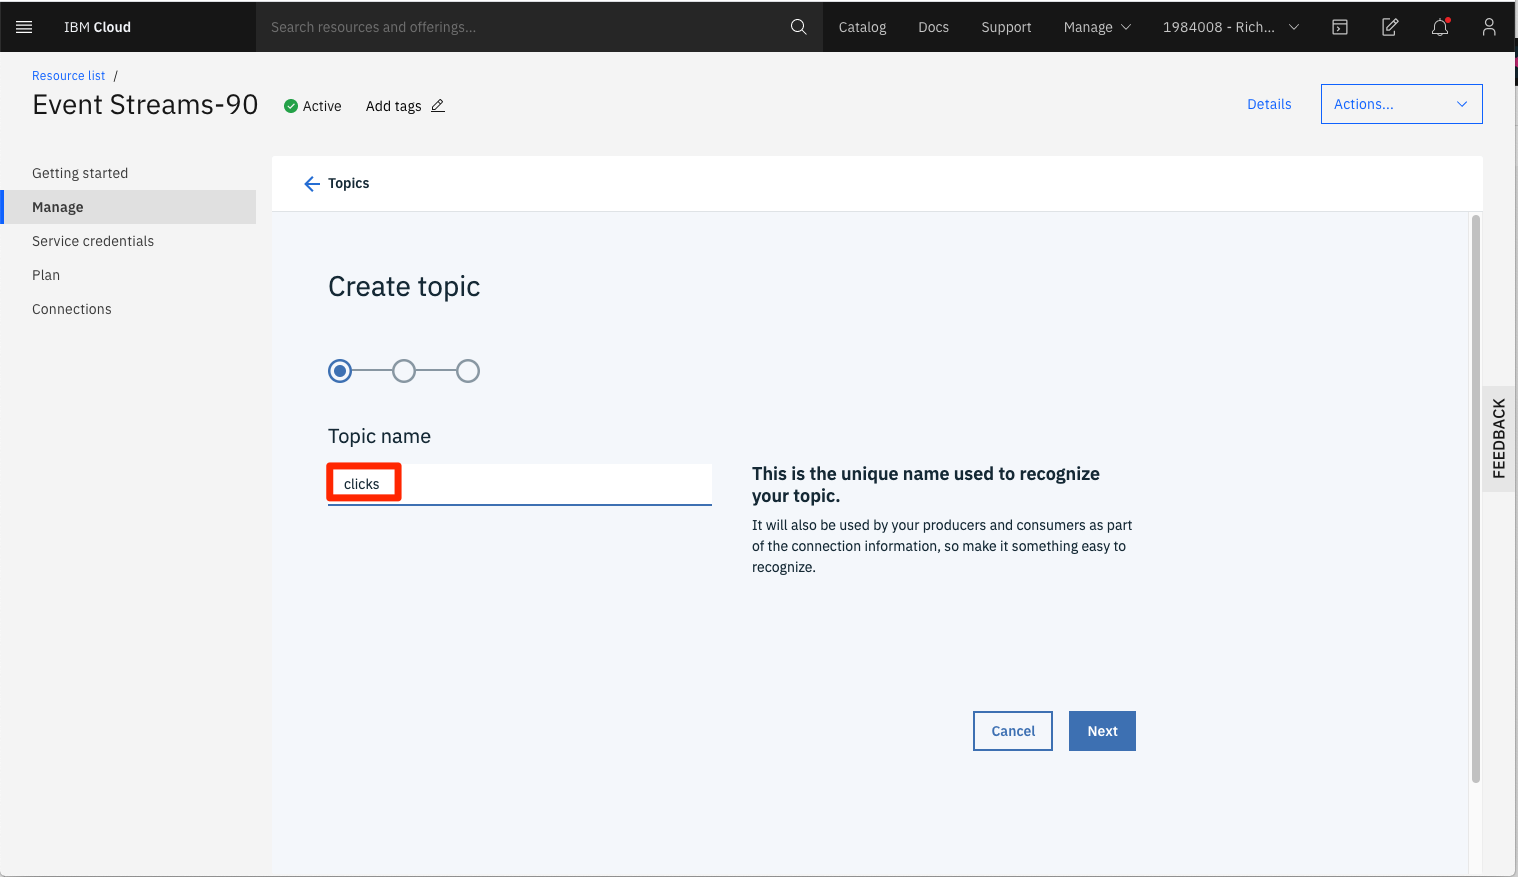
From the Create Topics panel, enter the name clicks for the topic name. Then click Next.
In the subsequent panels, accept the default values of 1 partition and 1 retention day.
NOTE: Under the
liteplan, you will only be able to create one topic.
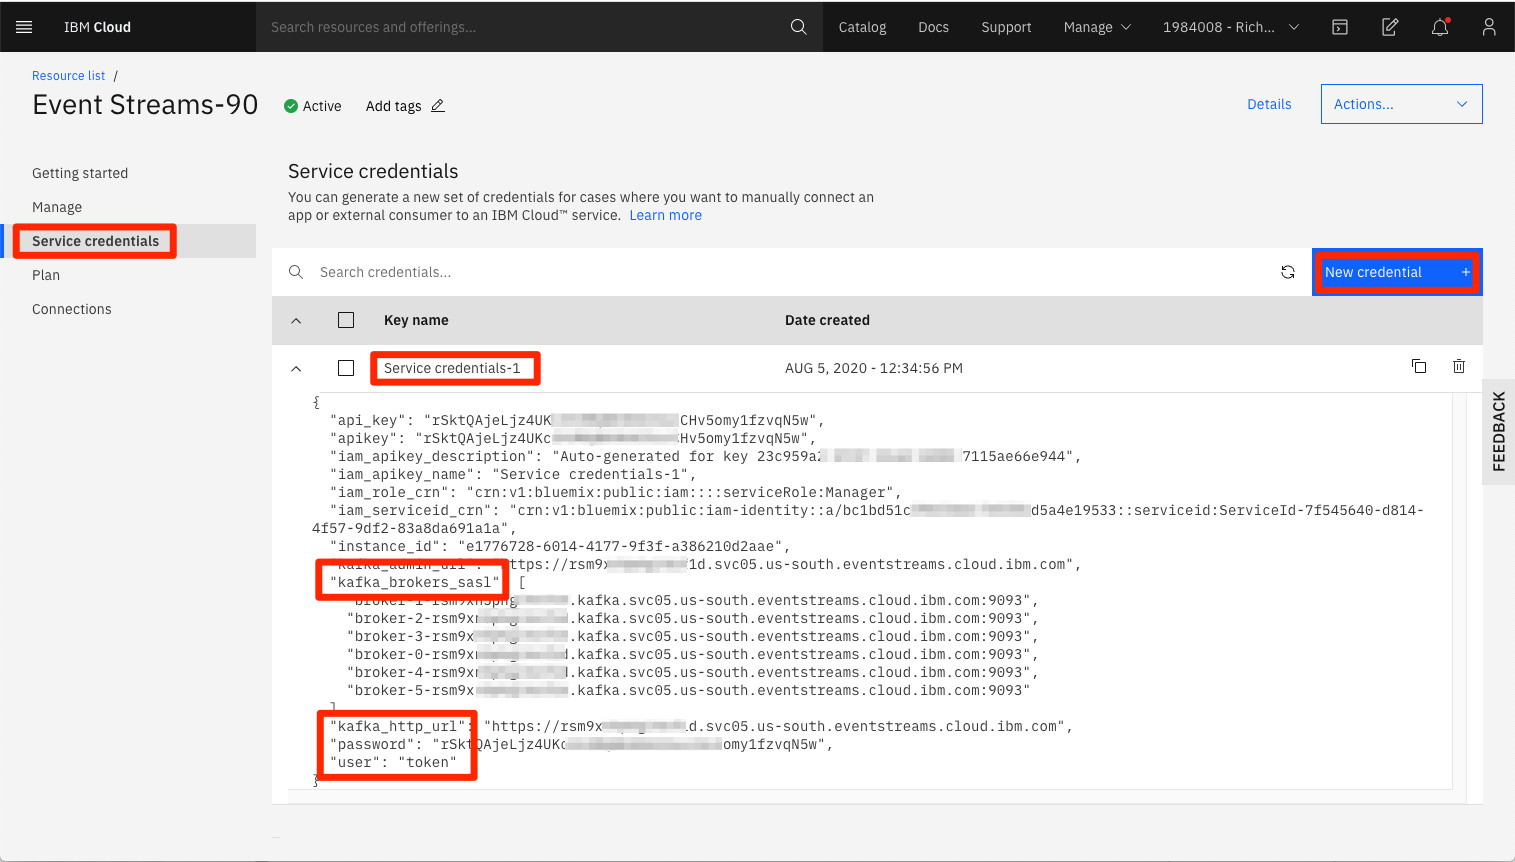
In order to remotely connect to your new Event Streams service, you will need generate service credentials.
From the Service credentials tab panel, click the New Credentials button. The credential values we will be using include:
- kafka_brokers_sasl
- kafka_http_url
- password
- user
Your Event Streams service panel provides a Getting started panel that links to a repository of sample apps you can use to send and receive Event Stream messages. The sample shows how a producer sends messages to a consumer using a topic. The same sample program is used to consume messages and produce messages.
For convenience, the python version of the sample app is included in this repo and is located in the /kafka-console-app directory. The code has also been slightly modified to work better with this code pattern.
For a full list and descriptions of the available sample Event Streams apps, visit https://github.com/ibm-messaging/event-streams-samples.
To build the sample app:
cd kafka-console
pip install -r requirements.txt
cp env.sample .env
Edit the .env file in the local directory and update the values to match the credentials you created in the previous step.
NOTE: Formatting of text in the
.envfile is very strict. When cutting/pasting thekafka_brokers_saslvalues, ensure that you remove all quote marks and internal spaces. Also, you should not have to change the defaultusernameandtopic namevalues if you followed the previous steps for setting up yourEvent Streamsservice.
The Kafka console app has 2 modes it can run in: producer or consumer. The mode is set using run-time arguments.
To run the app, use the following command:
python3 app.py -producer
# OR
python3 app.py -consumer
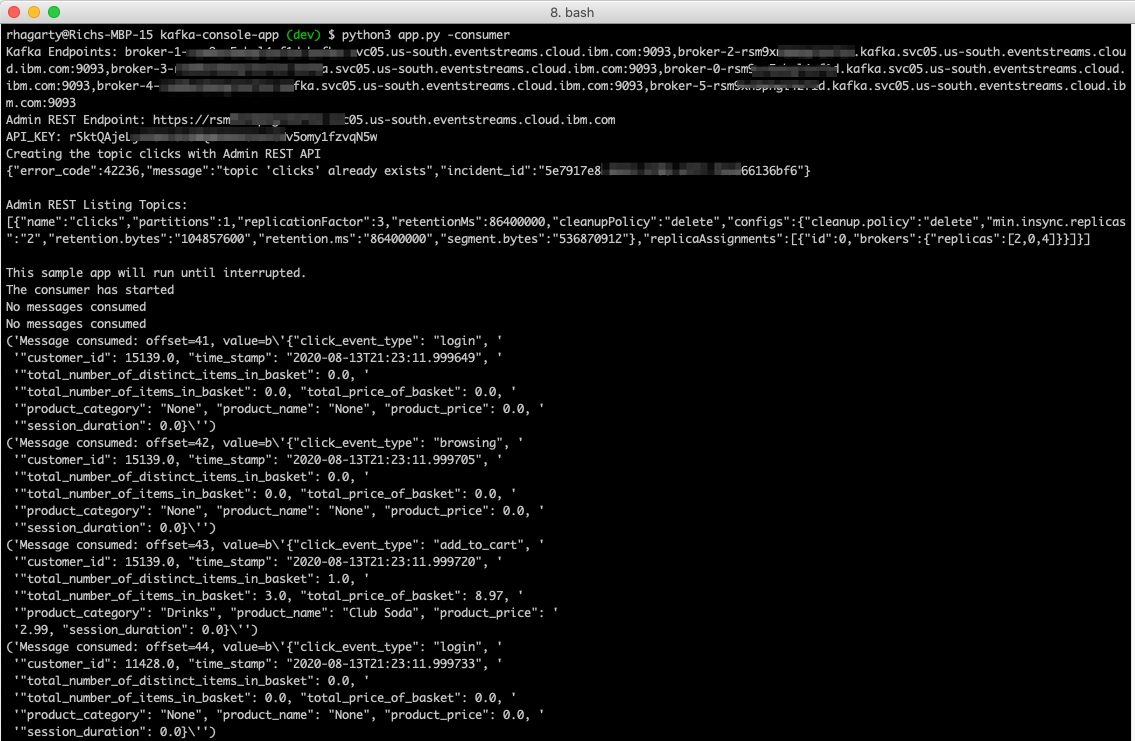
In producer mode, test messages are sent to the Kafka service with the topic name set to clicks. Each message will be printed to the console.
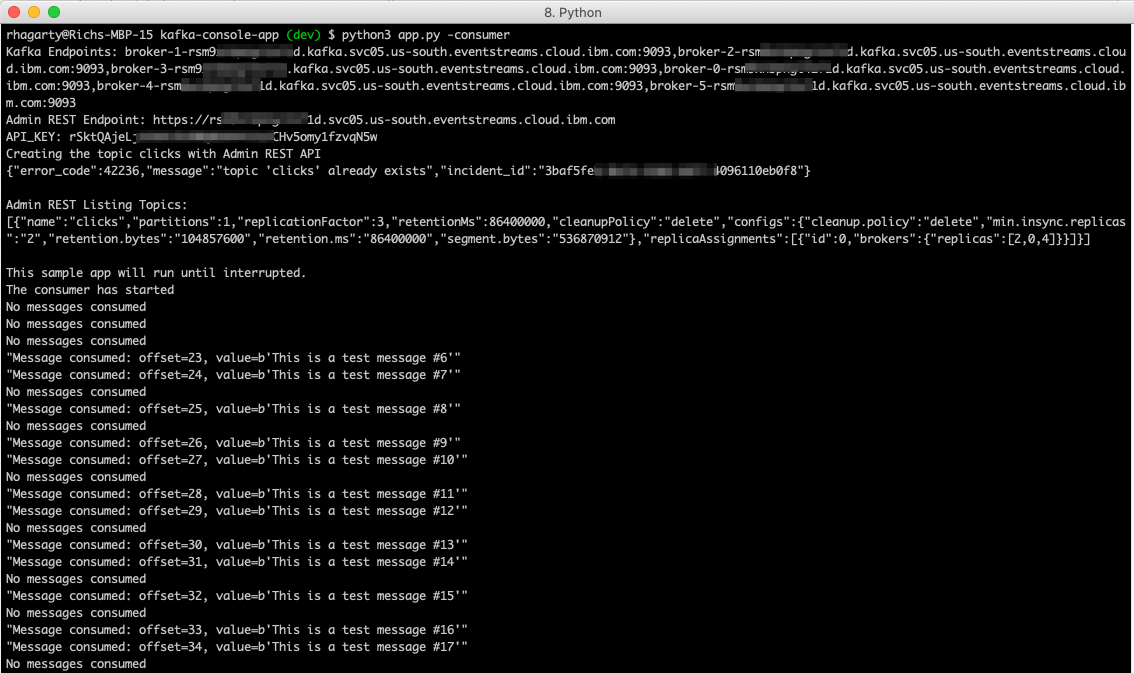
In consumer mode, a Kafka service reader is set up to listen for message where the topic name is set to clicks. Each message received will be printed to the console.
To test the app, start a producer in one terminal console, and a consumer in a separate terminal console.
Here is sample output from the consumer app:
Ensure that your administrator has added IBM Streams as a service to your Cloud Pak for Data instance, and that your user has access to the service.
Once you login to your Cloud Pak for Data instance, click on the (☰) menu icon in the top left corner of your screen and click My Instances.
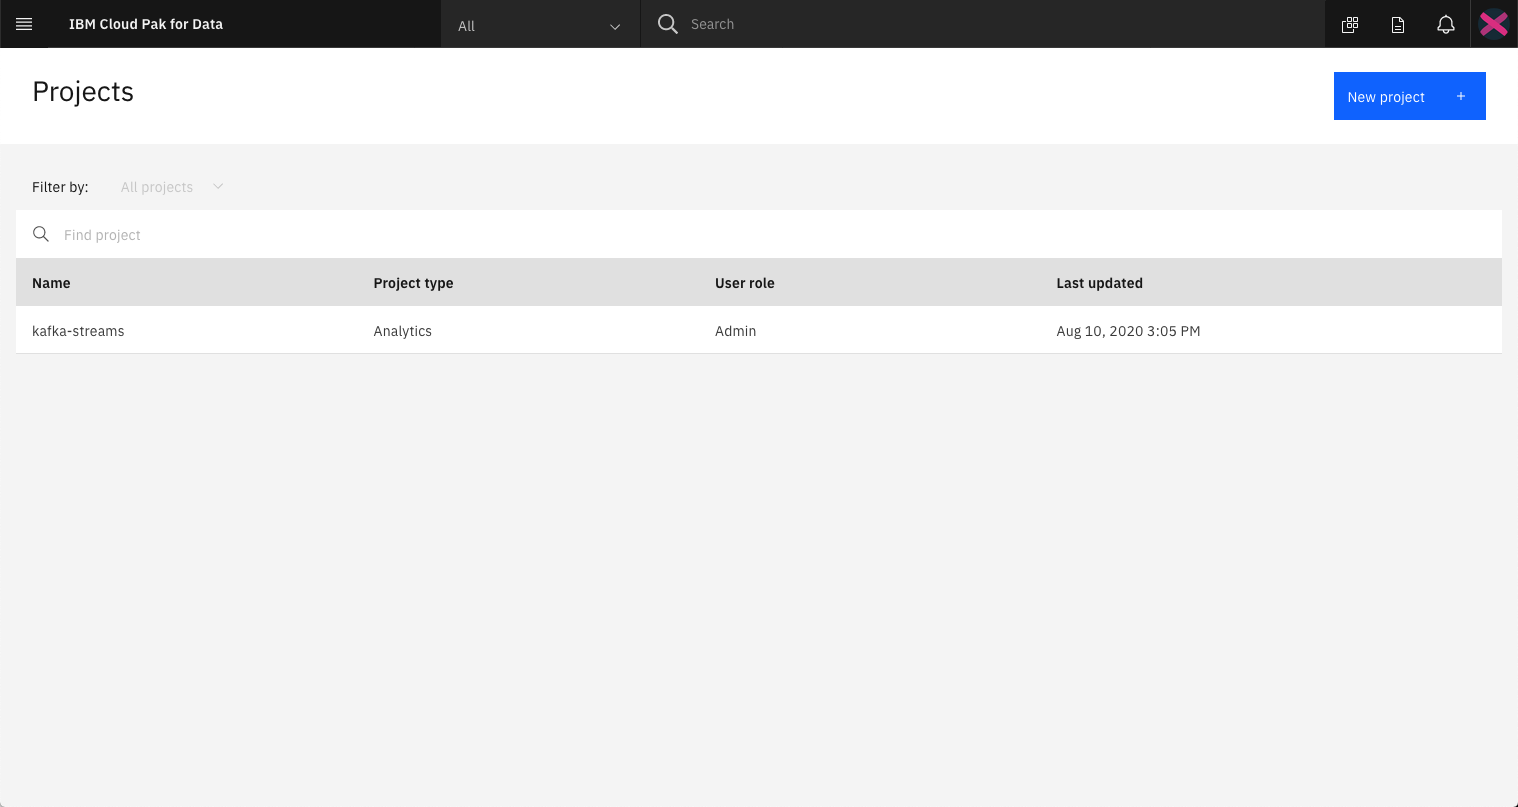
Once you login to your Cloud Pak for Data instance, click on the (☰) menu icon in the top left corner of your screen and click Projects.
From the Project list, click on New Project. Then select Create an empty project, and enter a unique name for your project. Click on Create to complete your project creation.
From your Cloud Pak for Data project list panel, click on the project you created in the previous step.
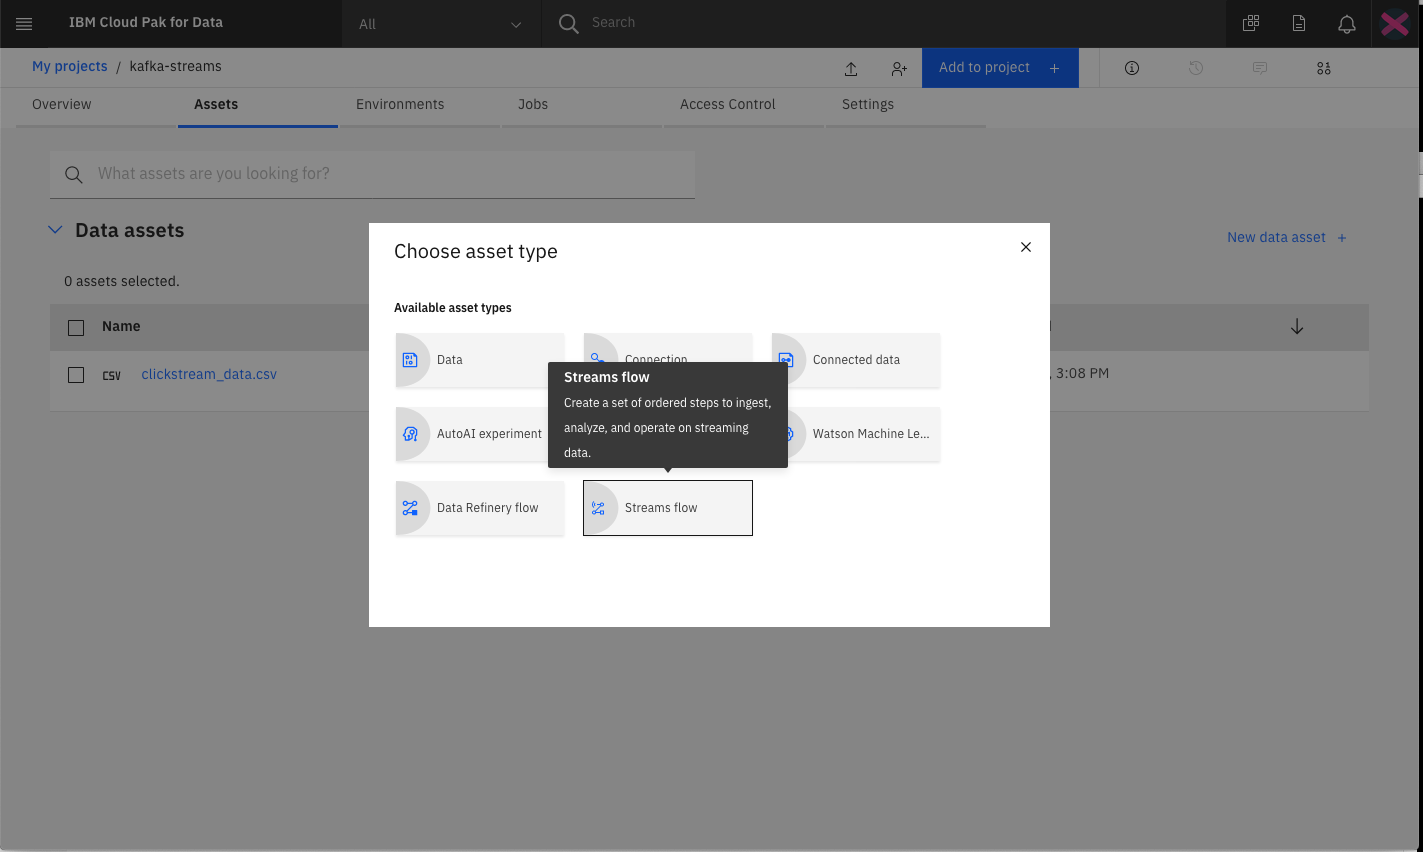
From the project panel, click the Add to project + button. Choose the Streams flow tile from the list of options.
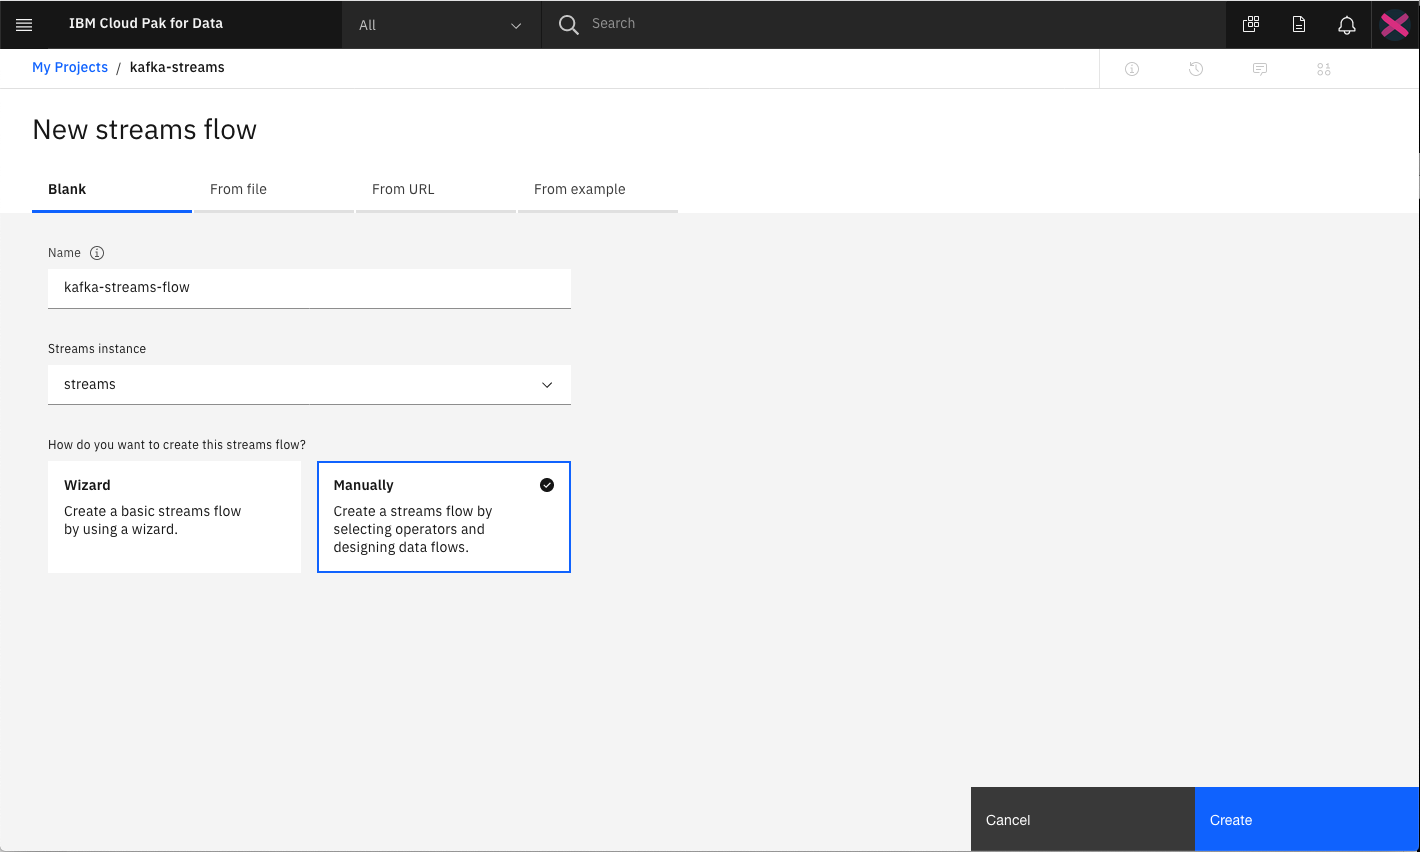
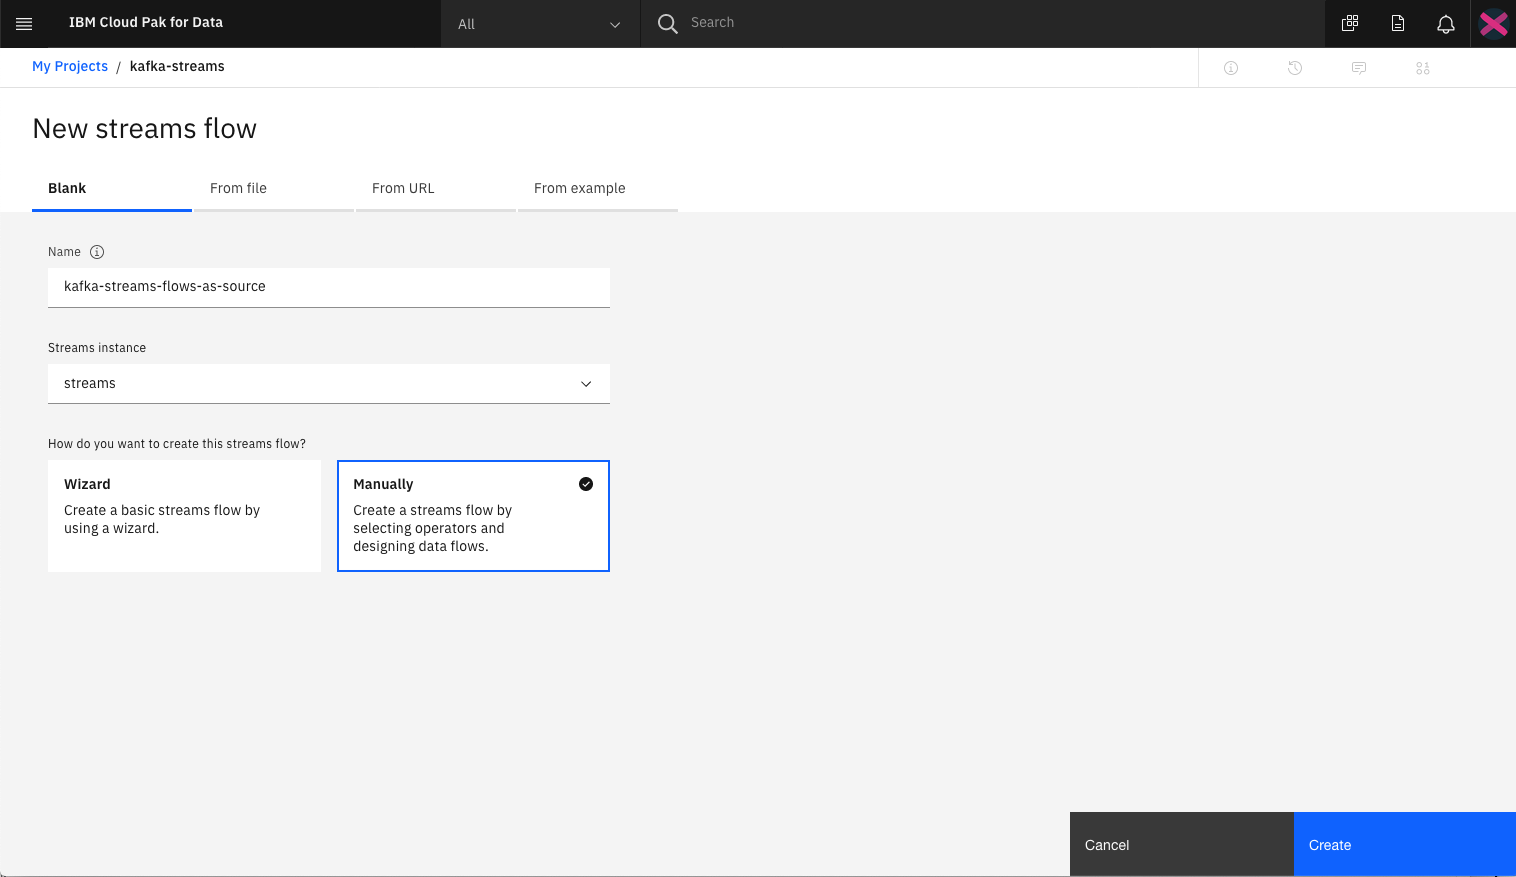
Provide a unique name for the flow, and select the create Manually option. Then click Create to create the flow.
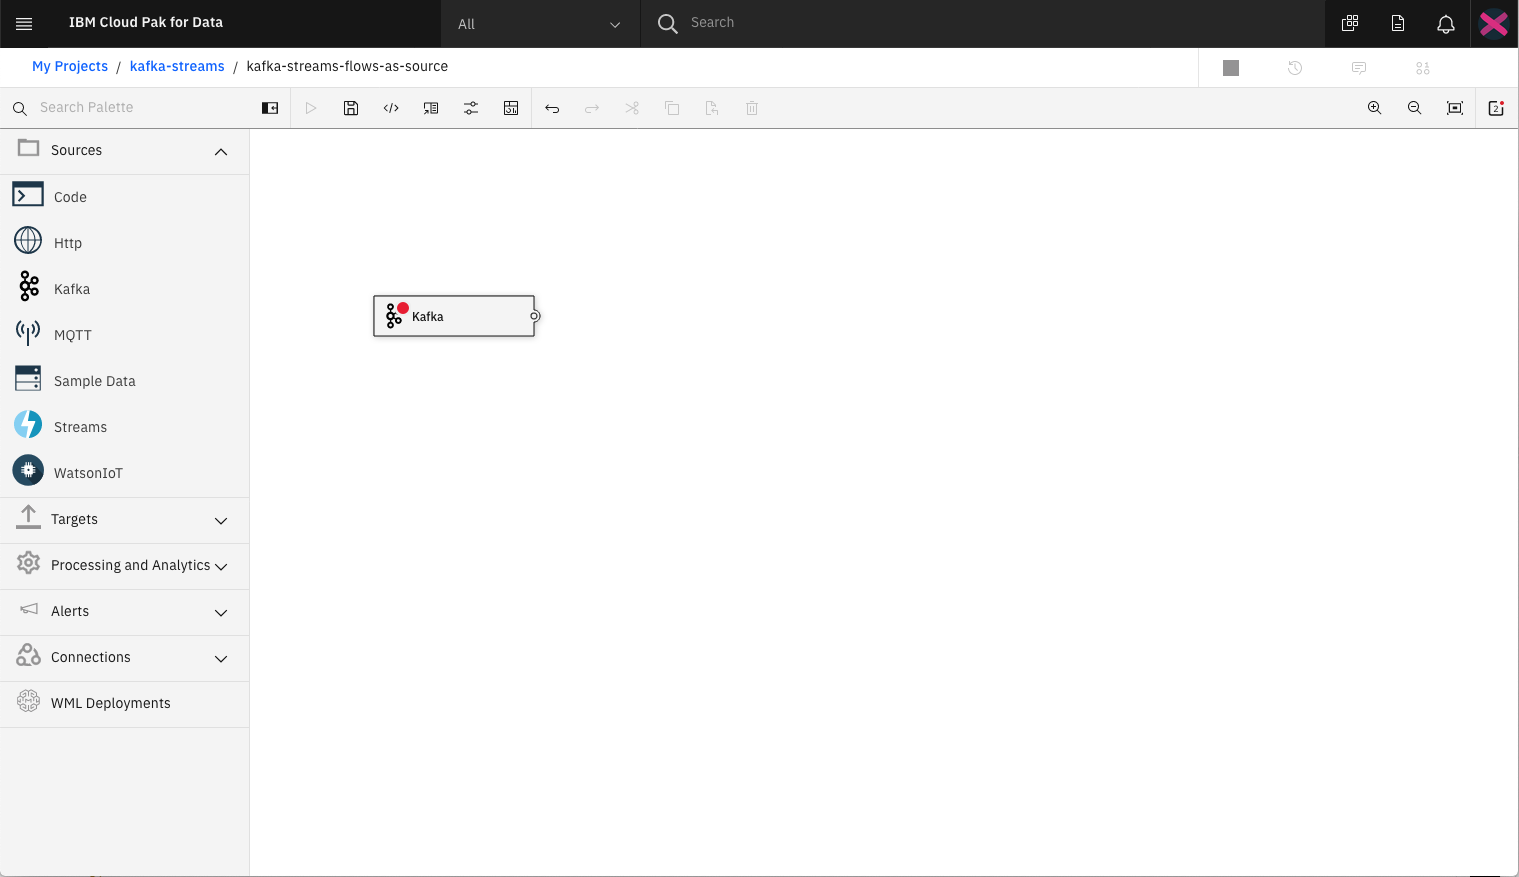
Once created, it will be displayed in the Streams flow editor.
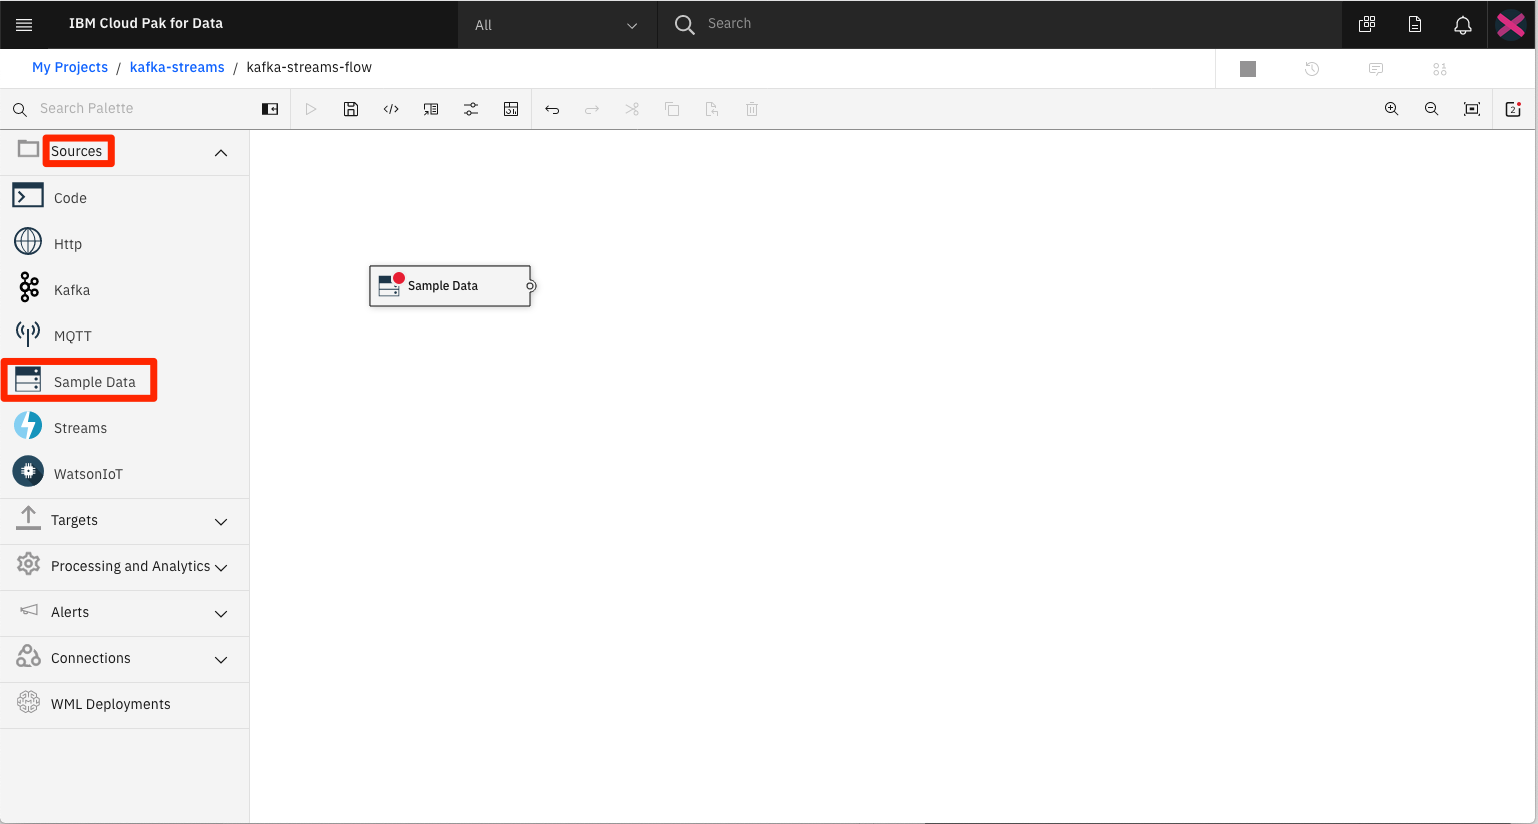
On the left are the operators that can drag-n-dropped onto the editor canvas. The operators are divided into type. For the purpose of this code pattern, we will only focus on Sources and Targets.
In the main icon bar at the top, you will see the options to run and save the flow.
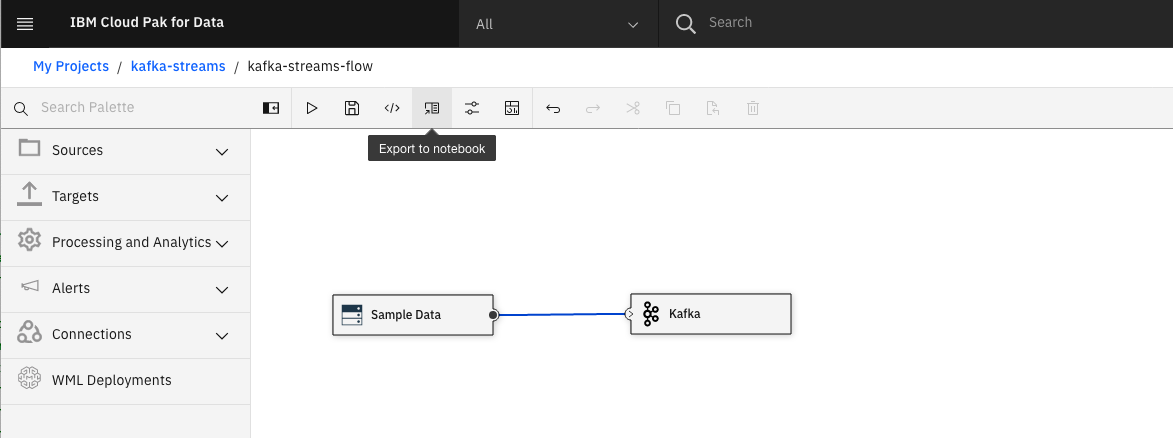
For our first experiement, let create a flow where sample data is streamed into a Kafka operator.
From the Sources list, select and drag the Sample Data operator onto the canvas.
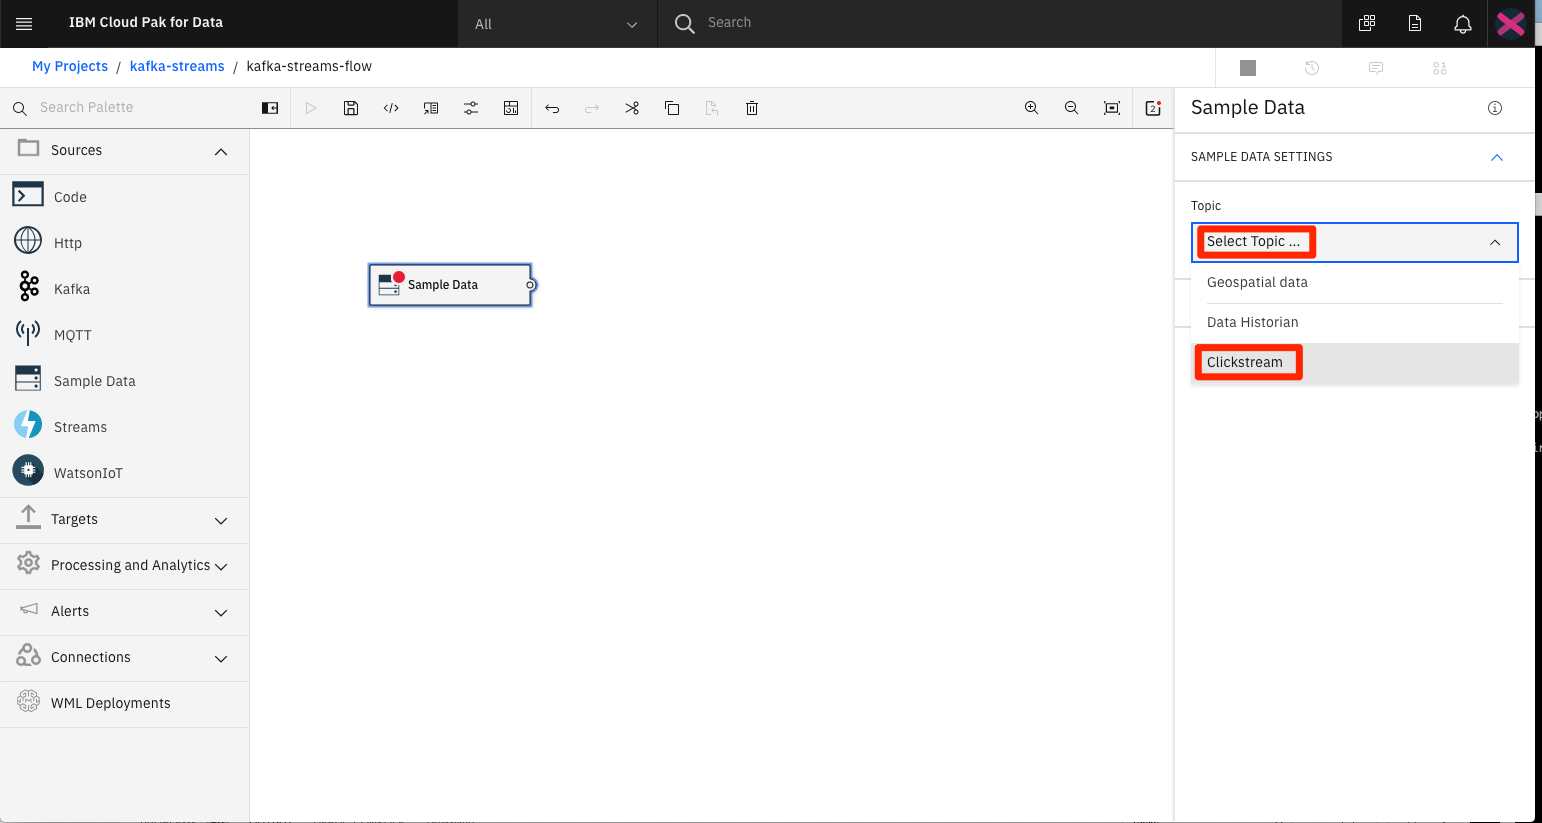
Click on the canvas object to see its associated properties. From the list of available data types in the Topic drop-down list, select Clickstream.
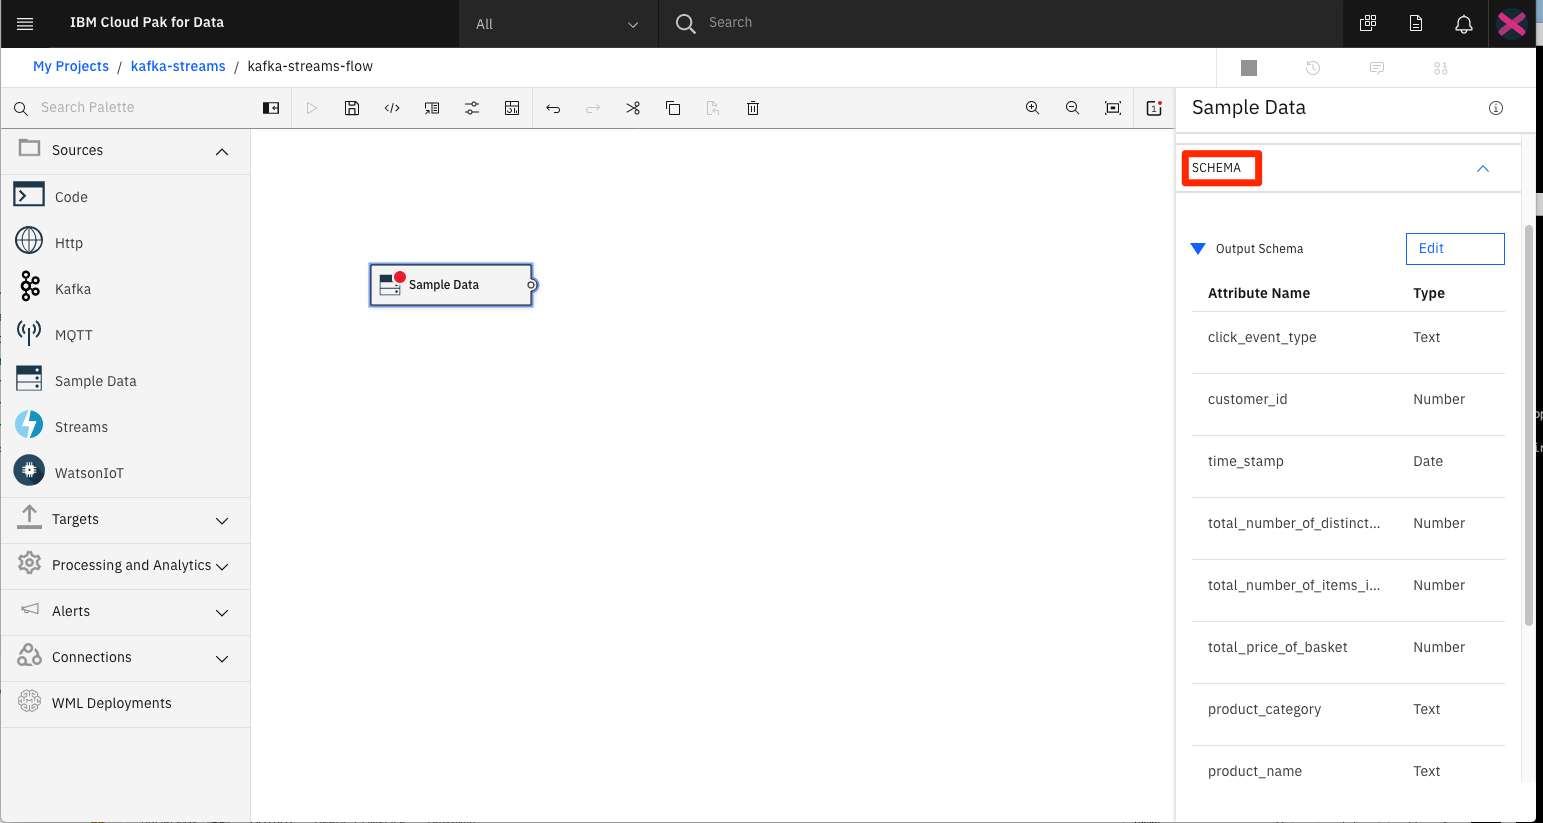
If you expand the output schema, you can see all the attributes of the sample data.
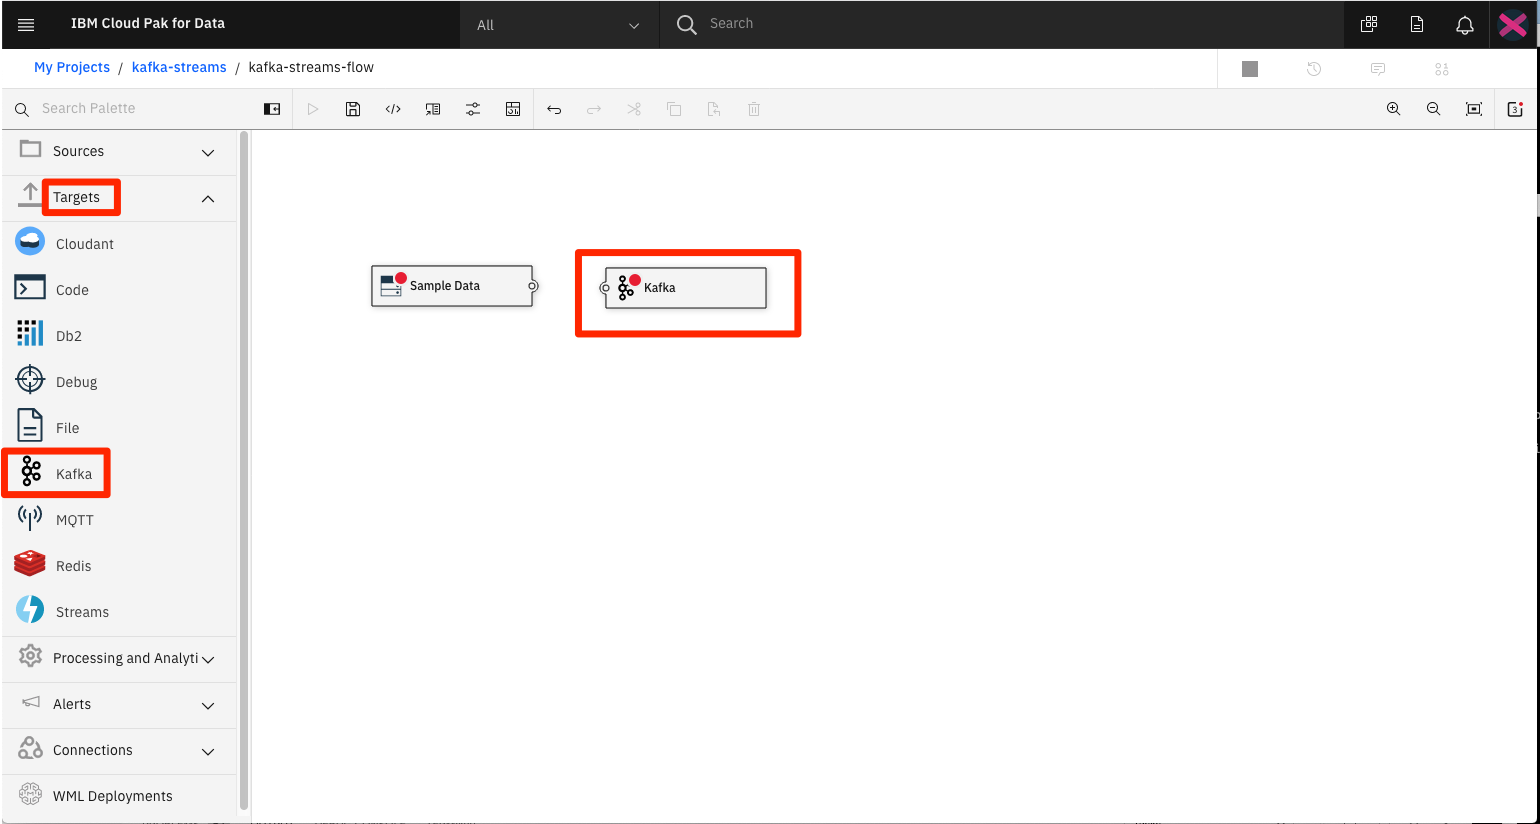
From the Targets list, select and drag the Kafka operator onto the canvas.
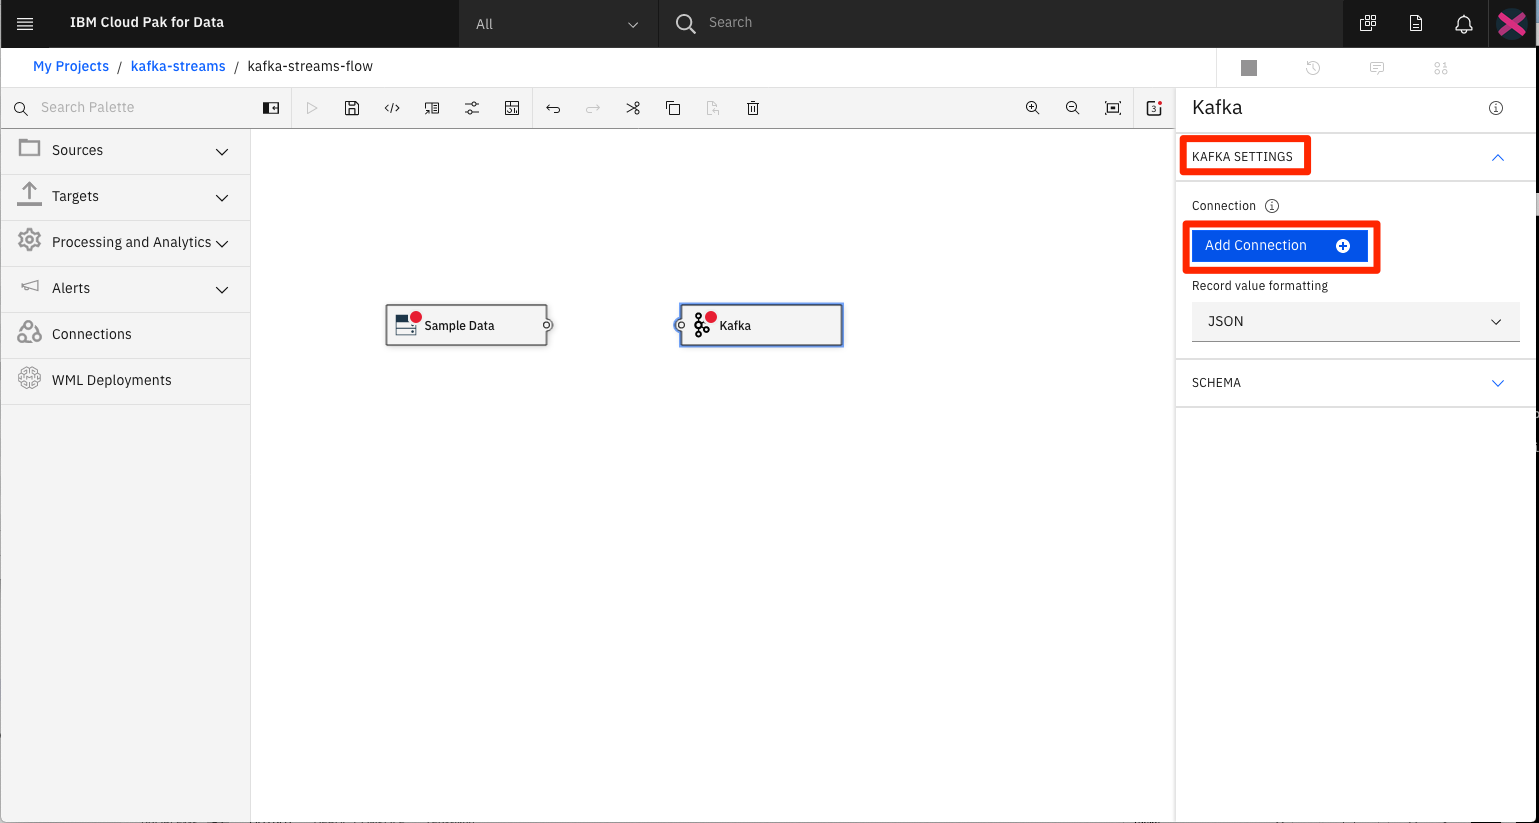
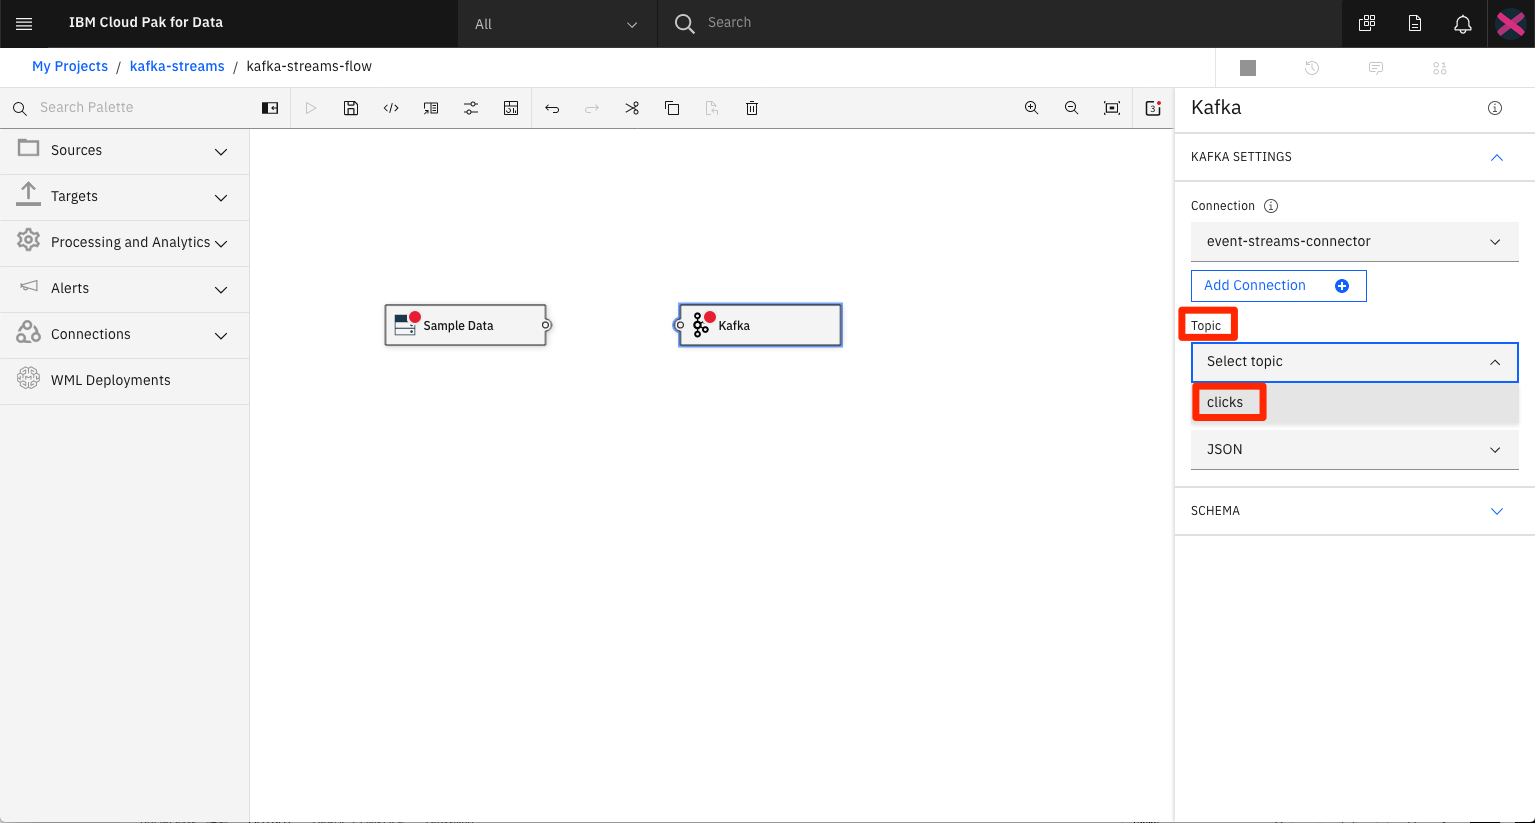
Click on the canvas object to see its associated properties. The Connection property is used to tie the operator to an actual Kafka service.
To create a connection to the Event Streams service we created in an earlier step, click the Add Connection + button.
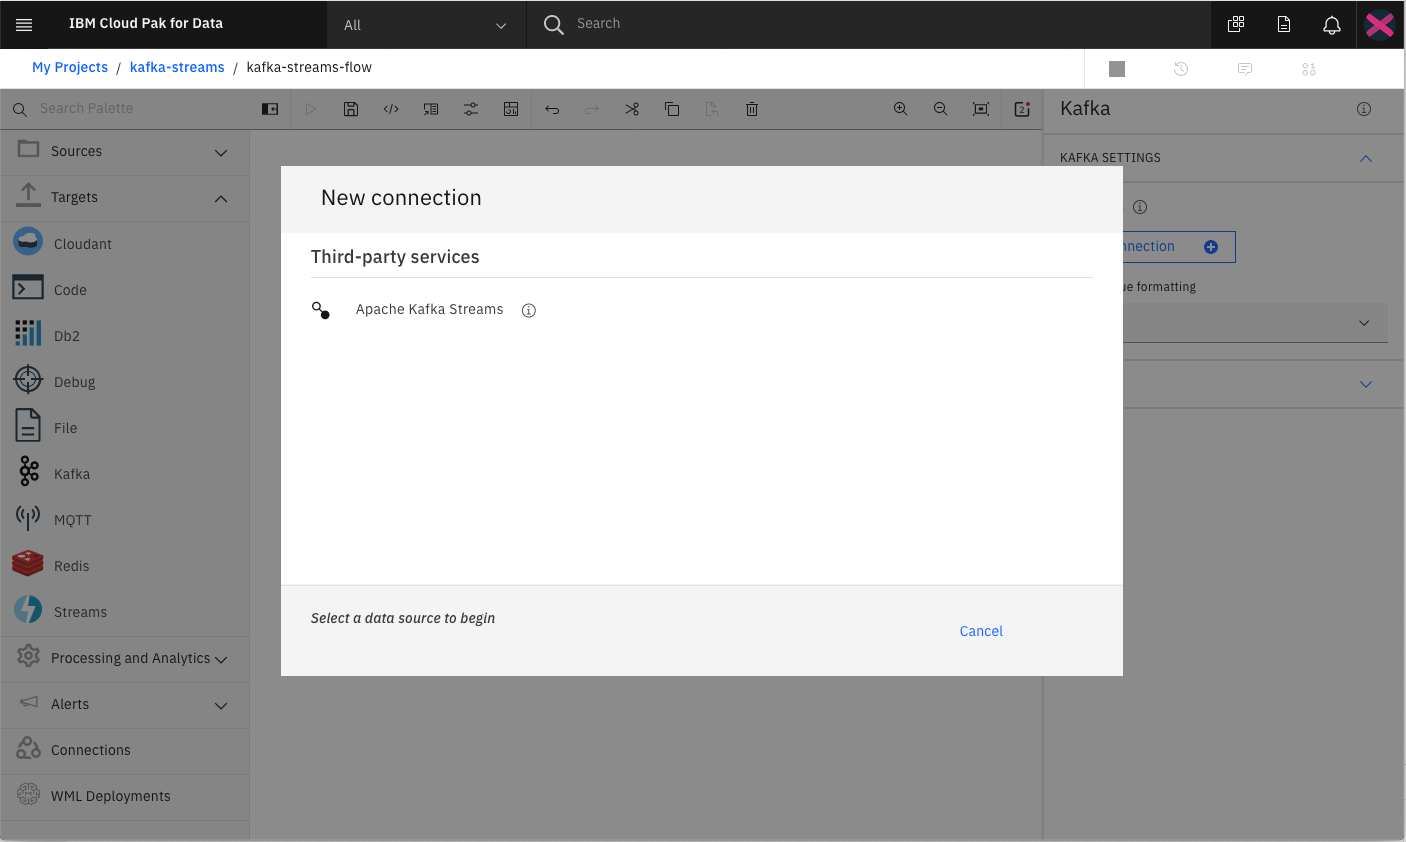
Select the Apache Kafka Streams option.
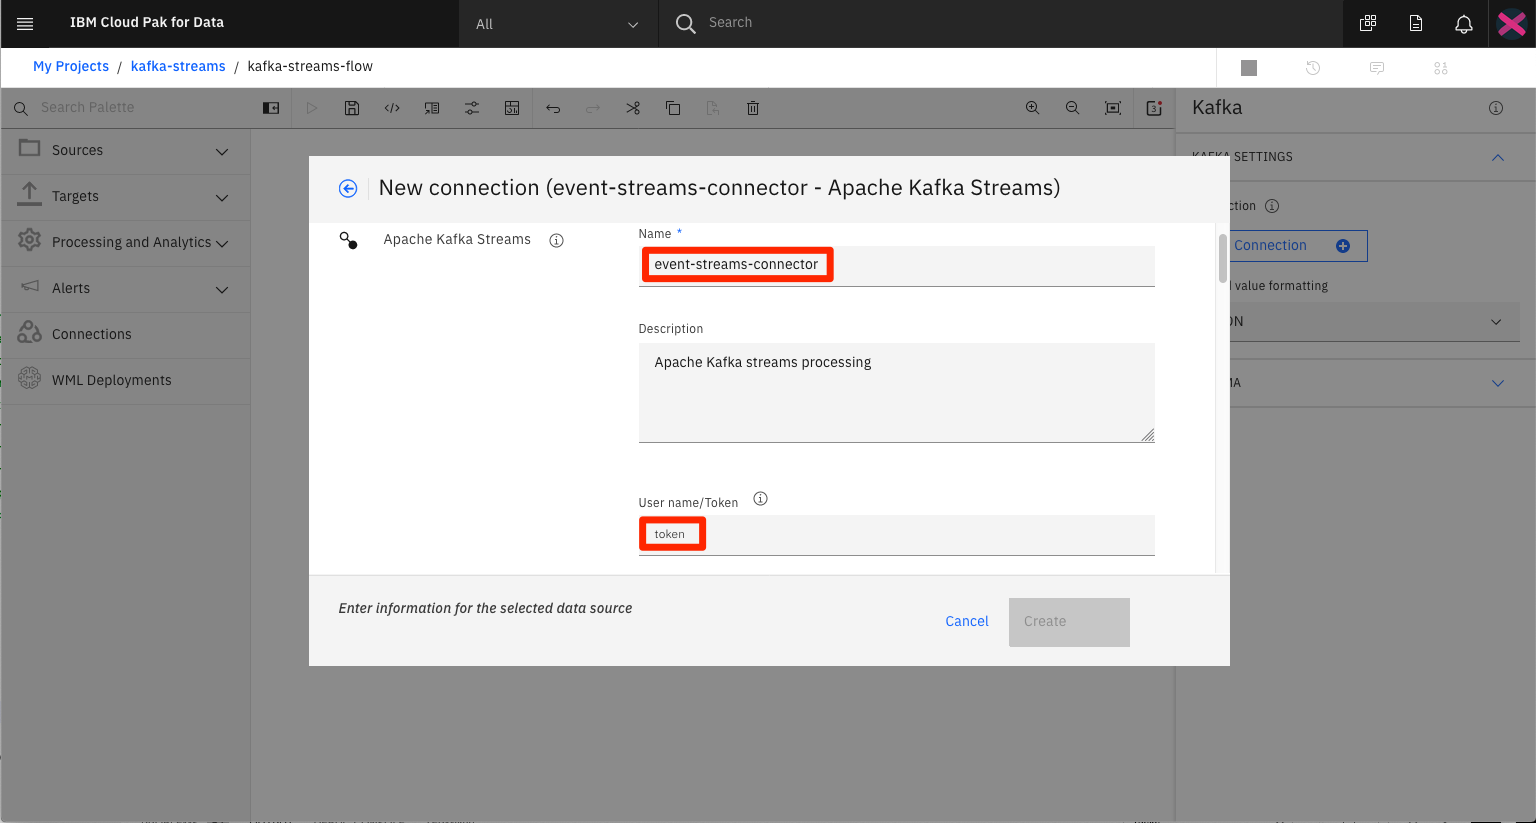
From the pop-up dialog, provide a unique name for the connection. Then enter the User name/Token value. In most cases this will token.
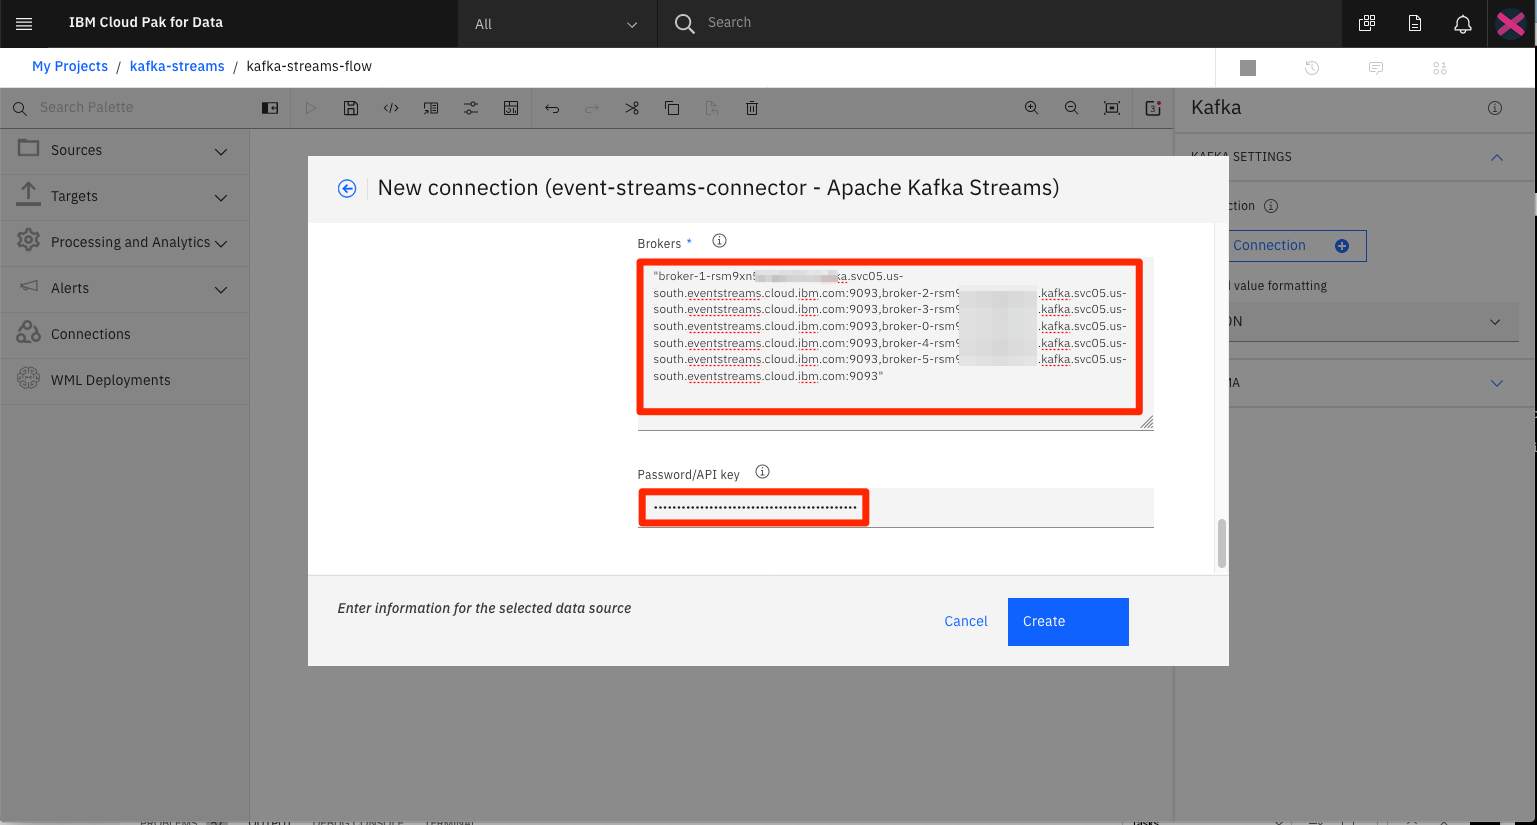
All of the other fields you can leave as is, except for the Brokers and Password/API key fields. For these values, use the credentials that were described in a prevous step.
NOTE: The correct format must be used for both values. Use quotes around the full set of brokers, and use a comma to separate each broker. For password, do not use any quotes.
Click Create to complete the connection.
To ensure that the connection was successfully configured, you should see a topic list box displayed, and one of the options should be the topic clicks.
If clicks is not listed, edit the configuration to verify your field values.
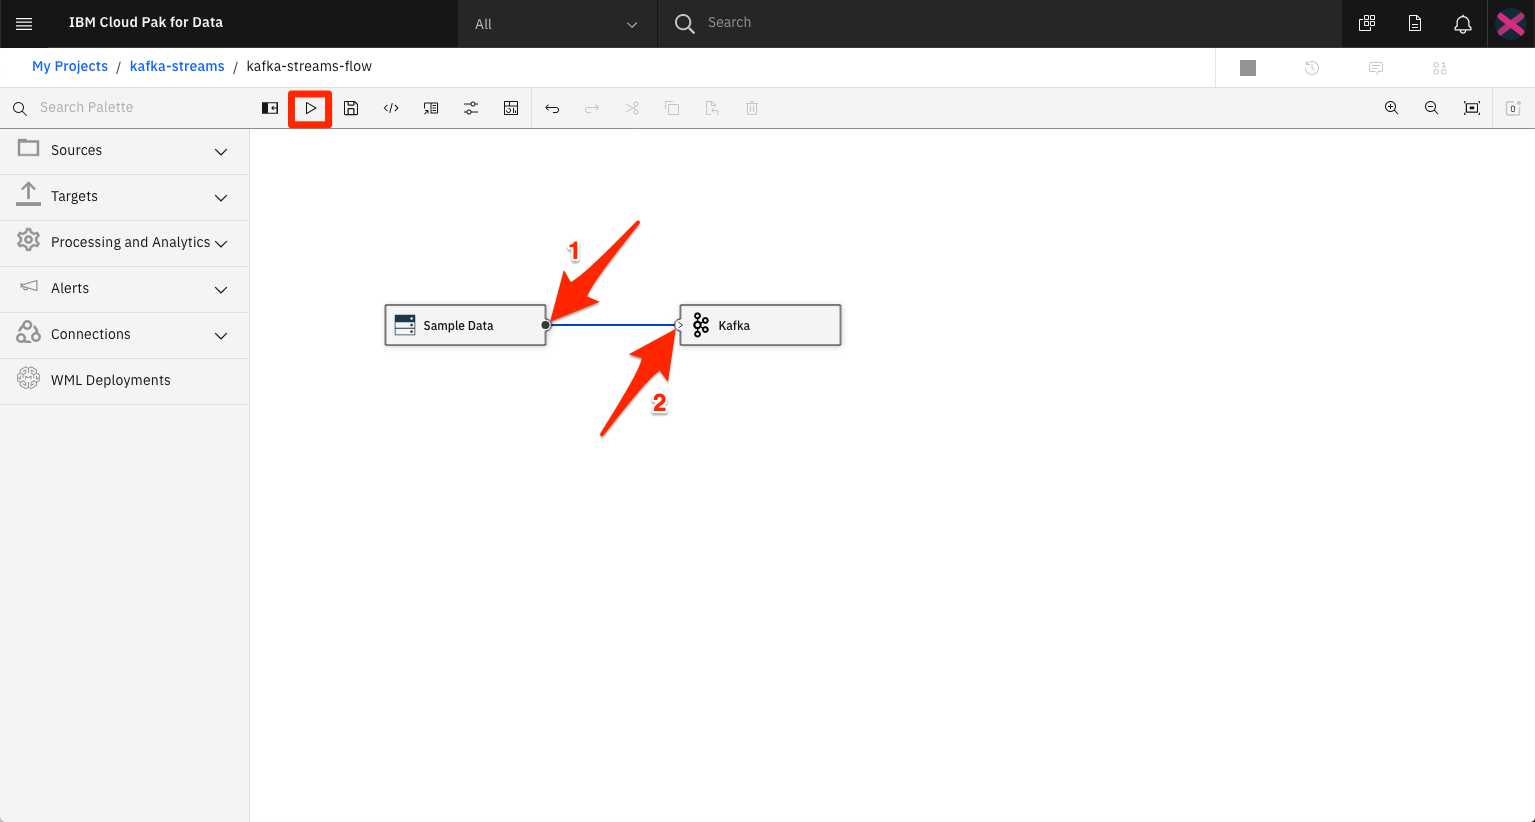
To connect the operators, click on the right-hand circle icon located in the source opertor, and drap your mouse to the target operator. This should result in a line graph connecting the two objects.
This connection should also eliminate any errors that were previosly listed for the objects (red circle displayed in the object - clicking on this object will list the errors).
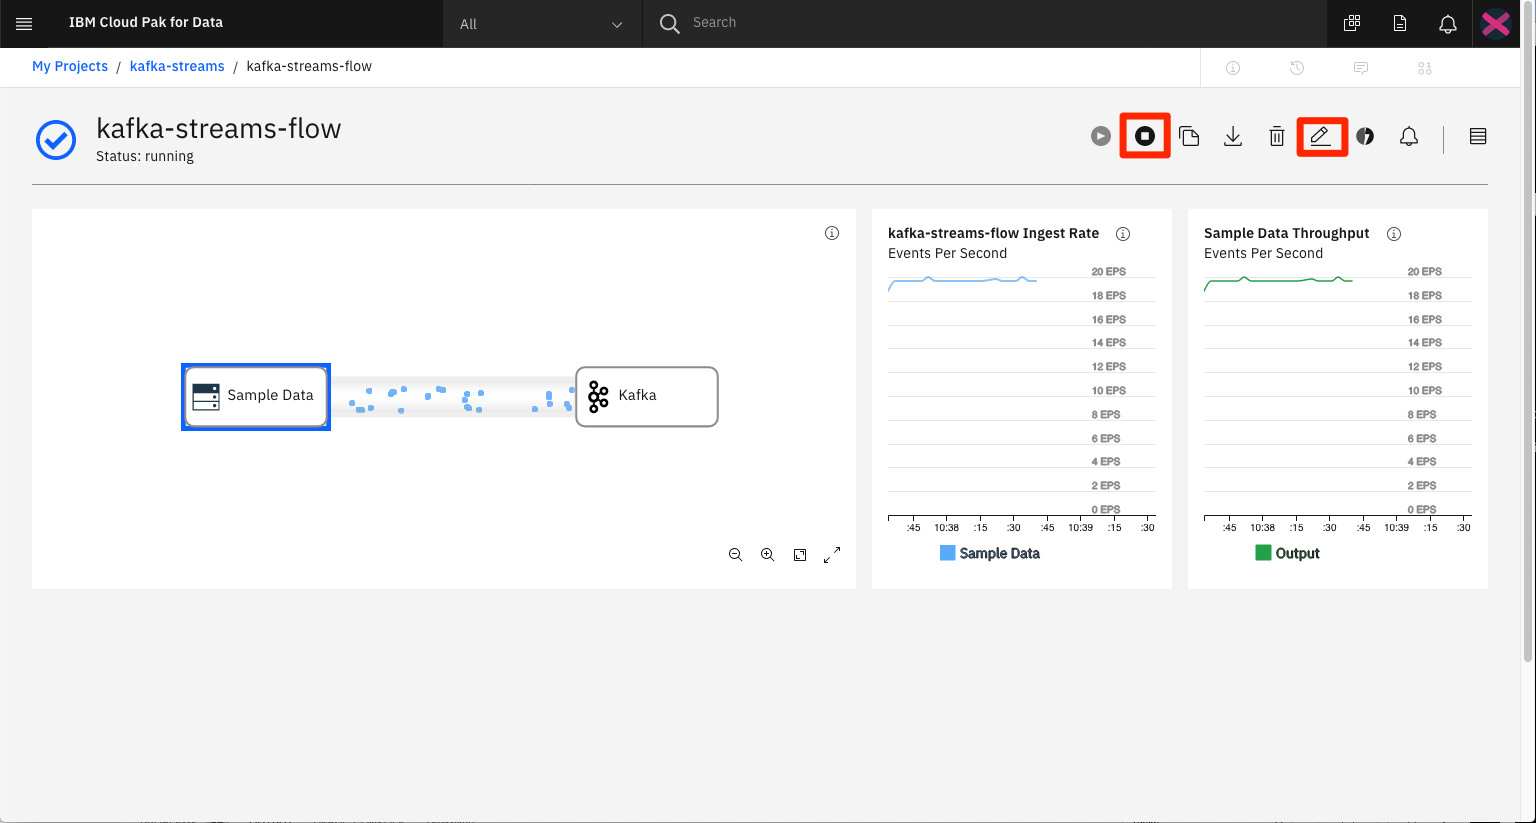
Click the Save and run icon to start your flow. This will result in a new panel being displayed that shows real-time metrics.
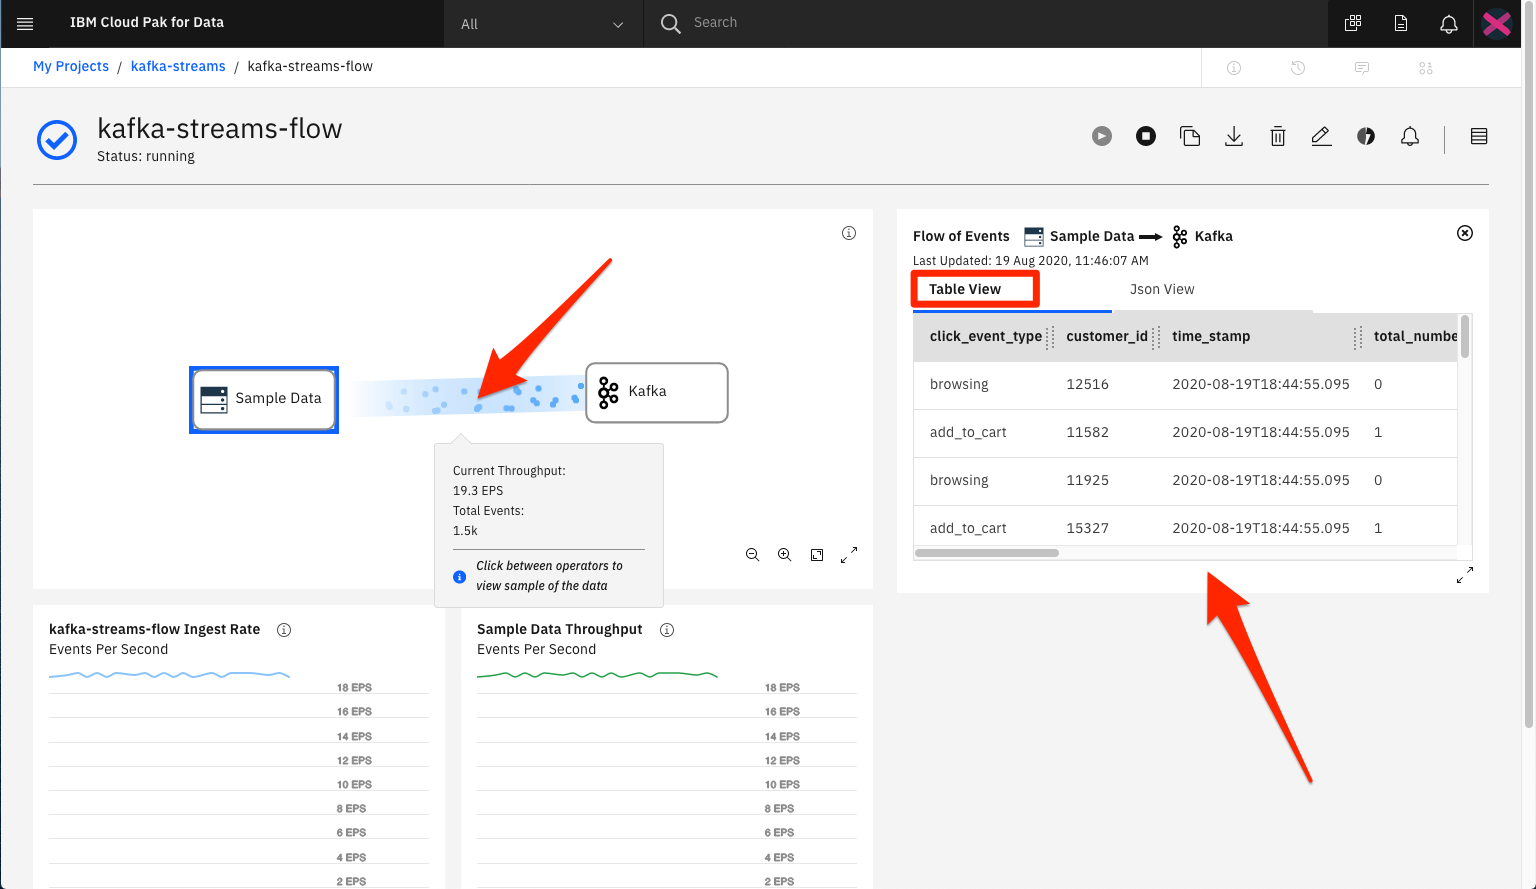
What is displayed is a live data stream. If you click on the stream between any two operator nodes, you can see the actual data - in a table view or in JSON format.
Use the Stop icon to stop the flow, and the Pencil icon to return to the flow editor.
NOTE: This is a very basic IBM Stream flow. A more realistic streaming app would include additonal operators to filter and modify the stream between nodes.
Run the Kafka sample app in consumer mode to view the messages from the sample clickstream data.
Now that we are familiar with the Streams Flow editor, let's create a new flow that uses Kafka as the source, instead of a target.
We start by adding a new Streams Flow to our project.
From the Sources list, select and drag the Kafka operator onto the canvas.
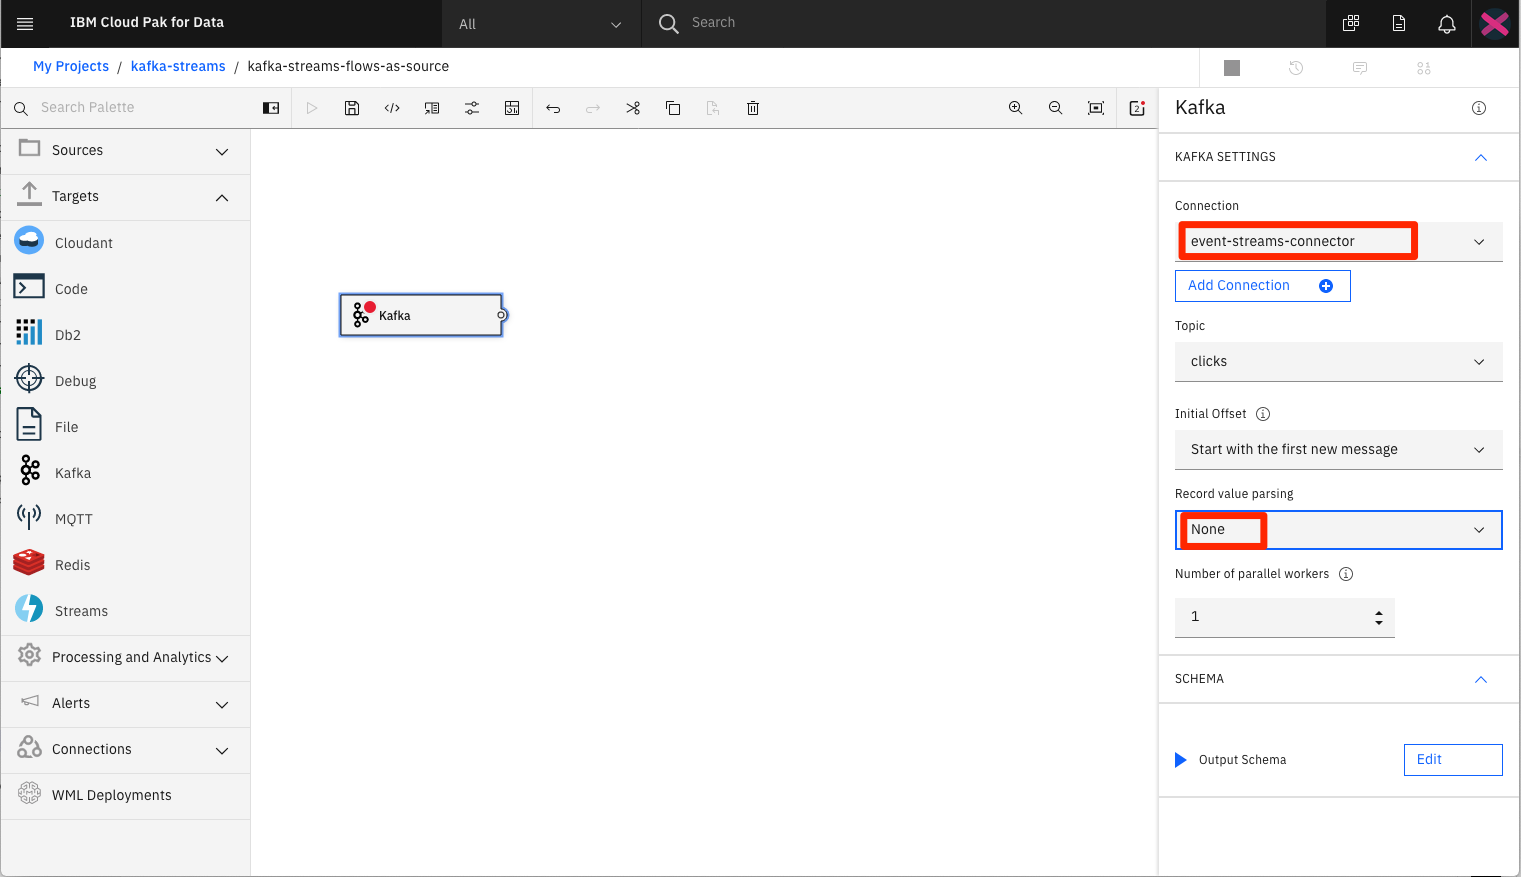
From the properties menu, select the Connection that we created earlier. Also set Record value parsing to None.
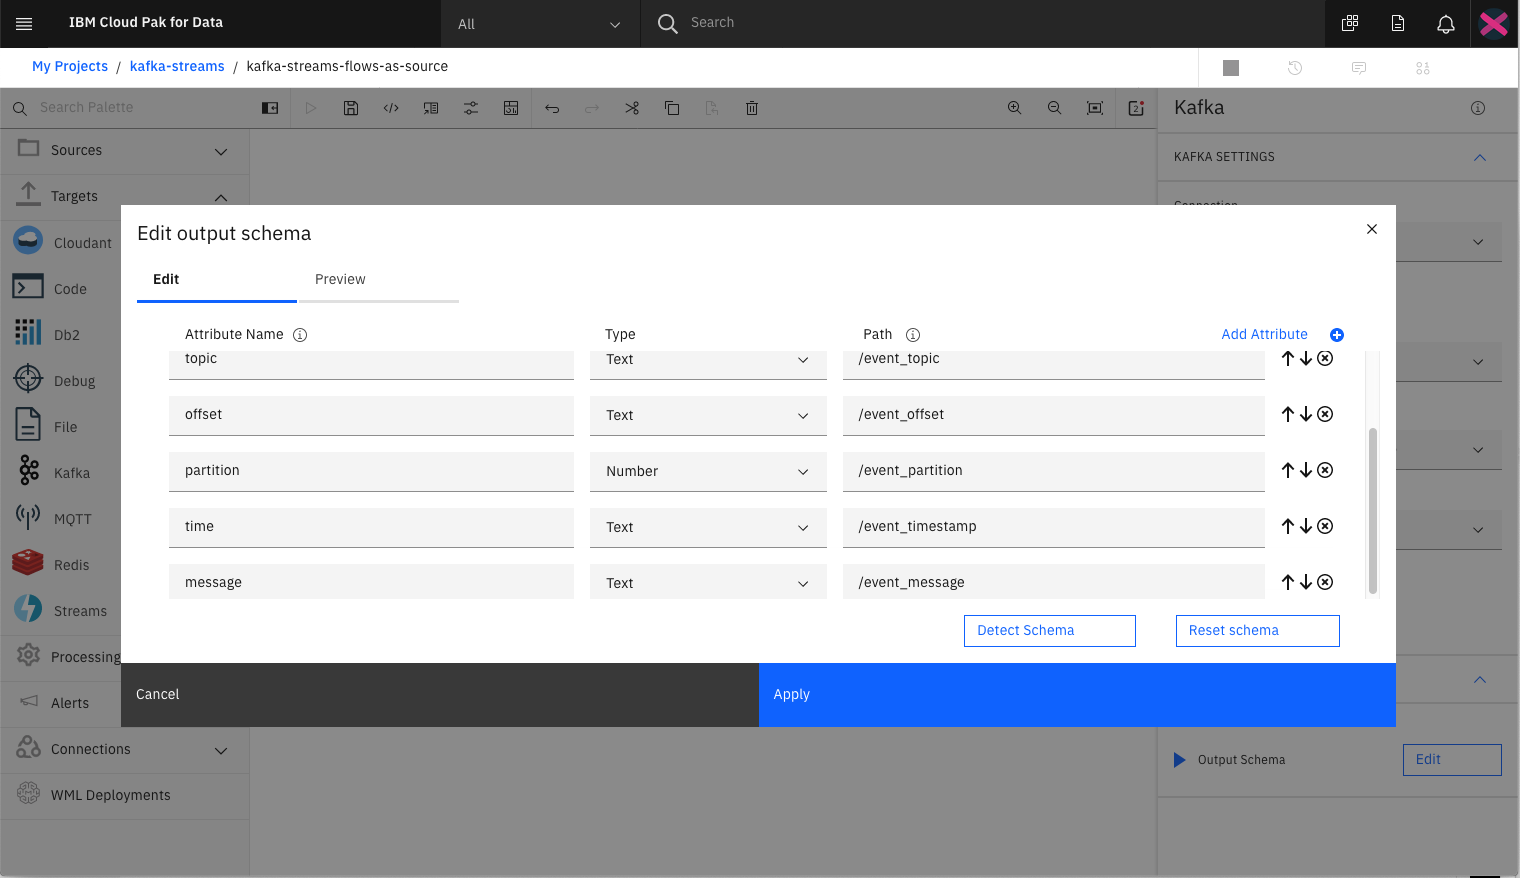
For the Output Schema we will need to set the attributes to match the format of our messages. Click the Edit button to bring the settings dialog.
Enter the following values:
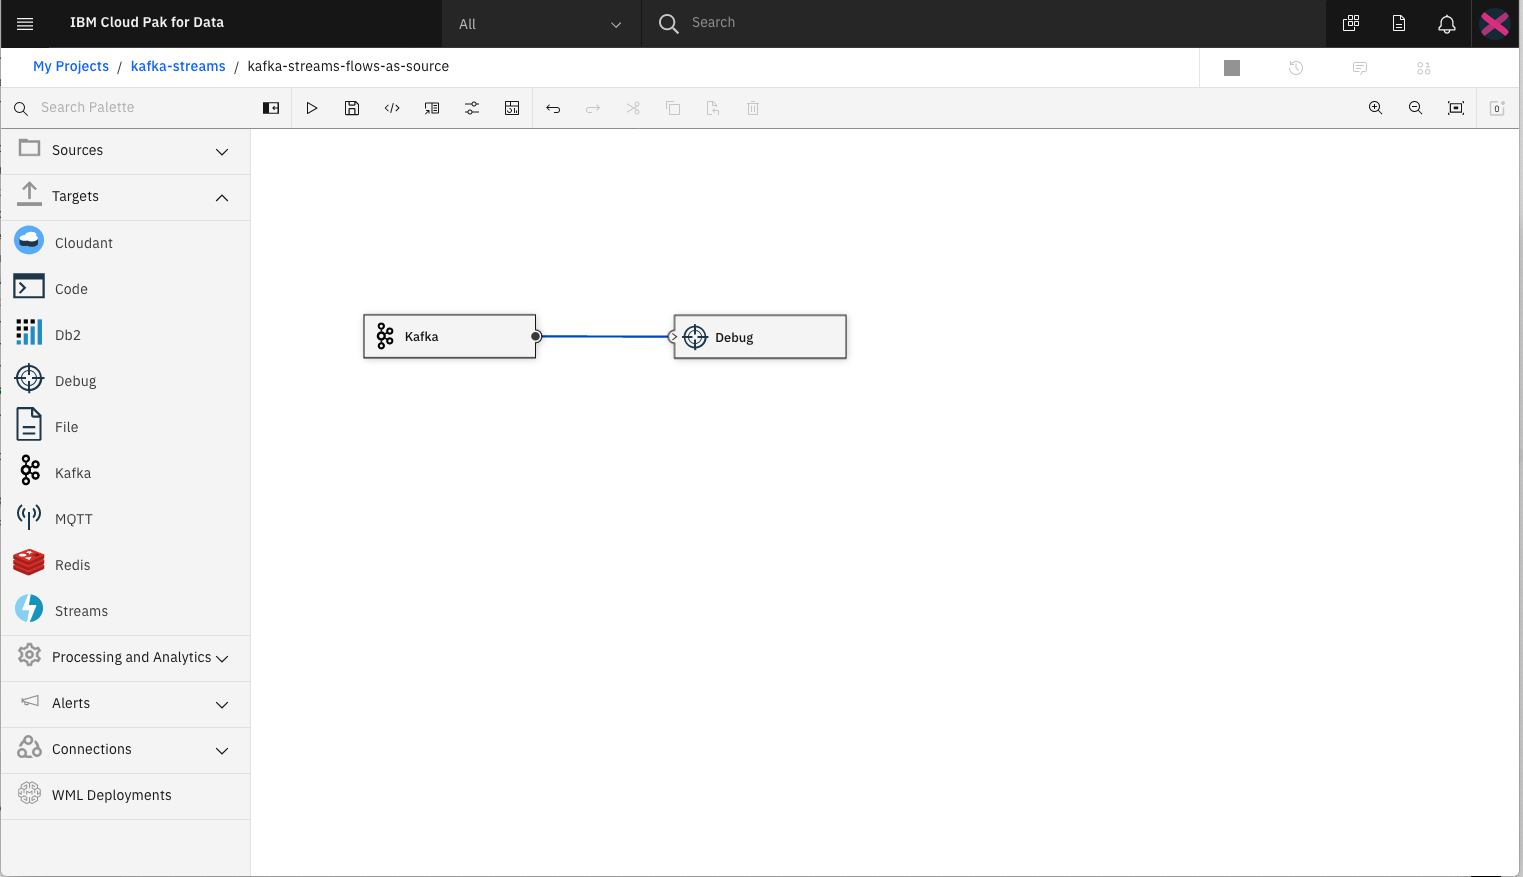
For simplicity, we will assign a Debug operator as the target of our Kafka stream messages.
From the Targets list, select and drag the Debug operator onto the canvas, and then connect the two object together.
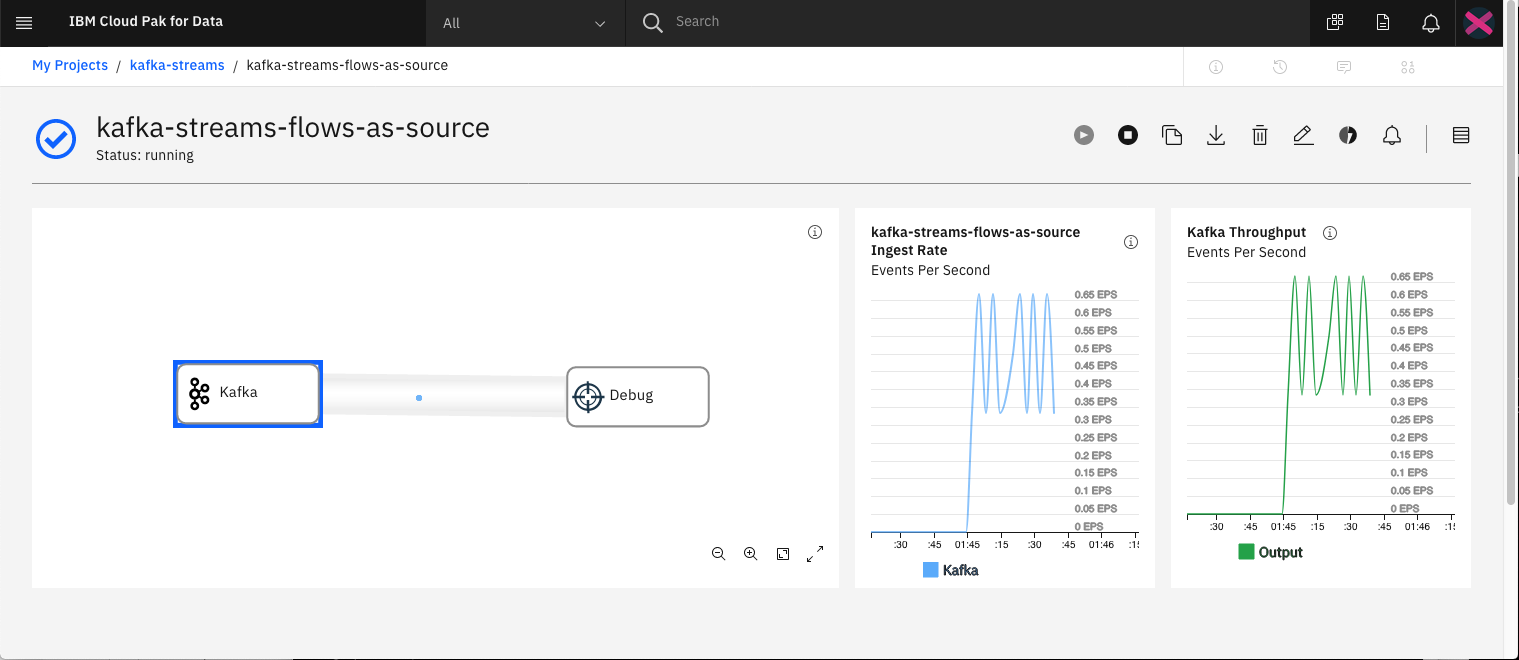
Click the run button to start the flow.
You should notice that no messages are being sent. This is to be expected since the Kafka stream is empty. To solve this problem, we need to run our sample app to generate some messages.
Run the Kafka sample app in producer mode to send messages to our stream. The real-time metrics of our flow panel should detect that messages are now flowing.
Once we have confirmed our Streams flows apps are working correctly, we can use the Export to Notebook feature to generate a Jupyter Notebook. The notebook will contain the python code to complete the same task - create a connection to the IBM Streams instance, create a source and target operator, then submit the job to run the stream.
From the flow editor of one of the previous created Streams flows, click the Export to Notebook icon.
This action will result in a new notebook being added to your Cloud Pak for Data project (the name will be the same as the flow), and the notebook being displayed in edit/run mode.
If you are not familiar with notebooks, here is some background info:
When a notebook is run, each code cell in the notebook is executed, in order, from top to bottom.
Each code cell is selectable and is preceded by a tag in the left margin. The tag format is displayed as
[x]:. Depending on the state of the notebook, the x can be:
- A blank, which indicates that the cell has never been run
- A number, which represents the relative order that this code step was run
- An *, which indicates that the cell is running
There are several ways to run the code cells in your notebook:
- One cell at a time. Select the cell, and then press Play in the toolbar.
- Batch mode, in sequential order. From the Cell menu, there are several options available. For example, you can Run All cells in your notebook, or you can Run All Below, which starts running from the first cell under the currently selected cell, and then continues running all of the cells that follow.
- At a scheduled time. Press the Schedule button that is located in the upper-right section of your notebook page. Here, you can schedule your notebook to be run once at some future time or repeatedly at your specified interval.
For our notebook, run the cells one by one, and observe how each of the operators is gererated and tied into a `Streams flow'.
NOTE: For convenience, both streams notebooks are stored in this repo in the
/notebooksdirectory. A version with output can be found for each in thewith-outputsubdirectory.
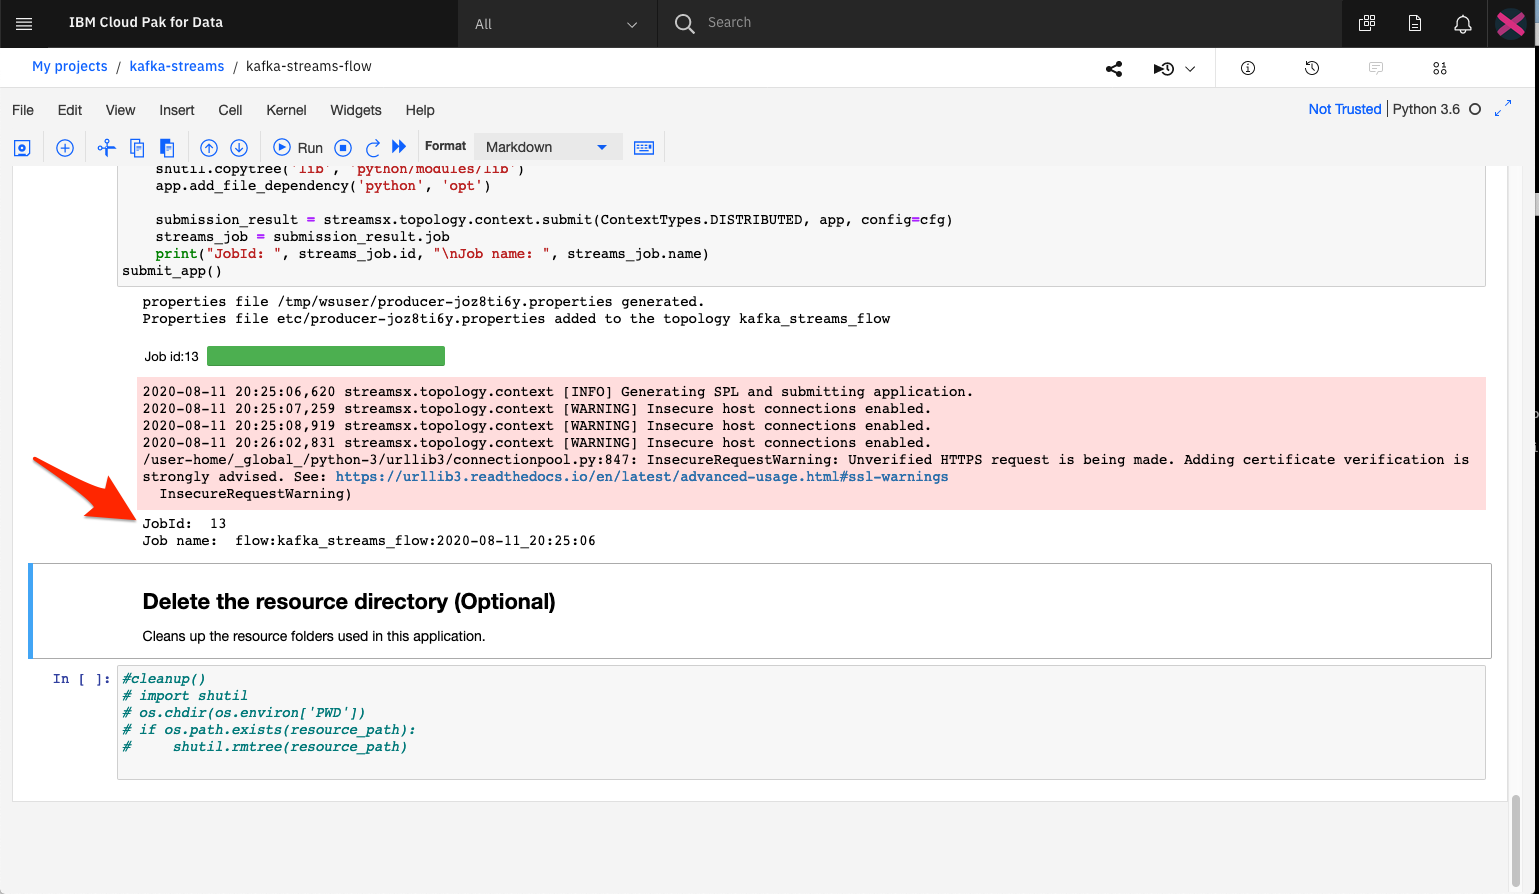
If no errors occur, the flow is submitted to the IBM Streams instance. If successful, a Job number will printed.
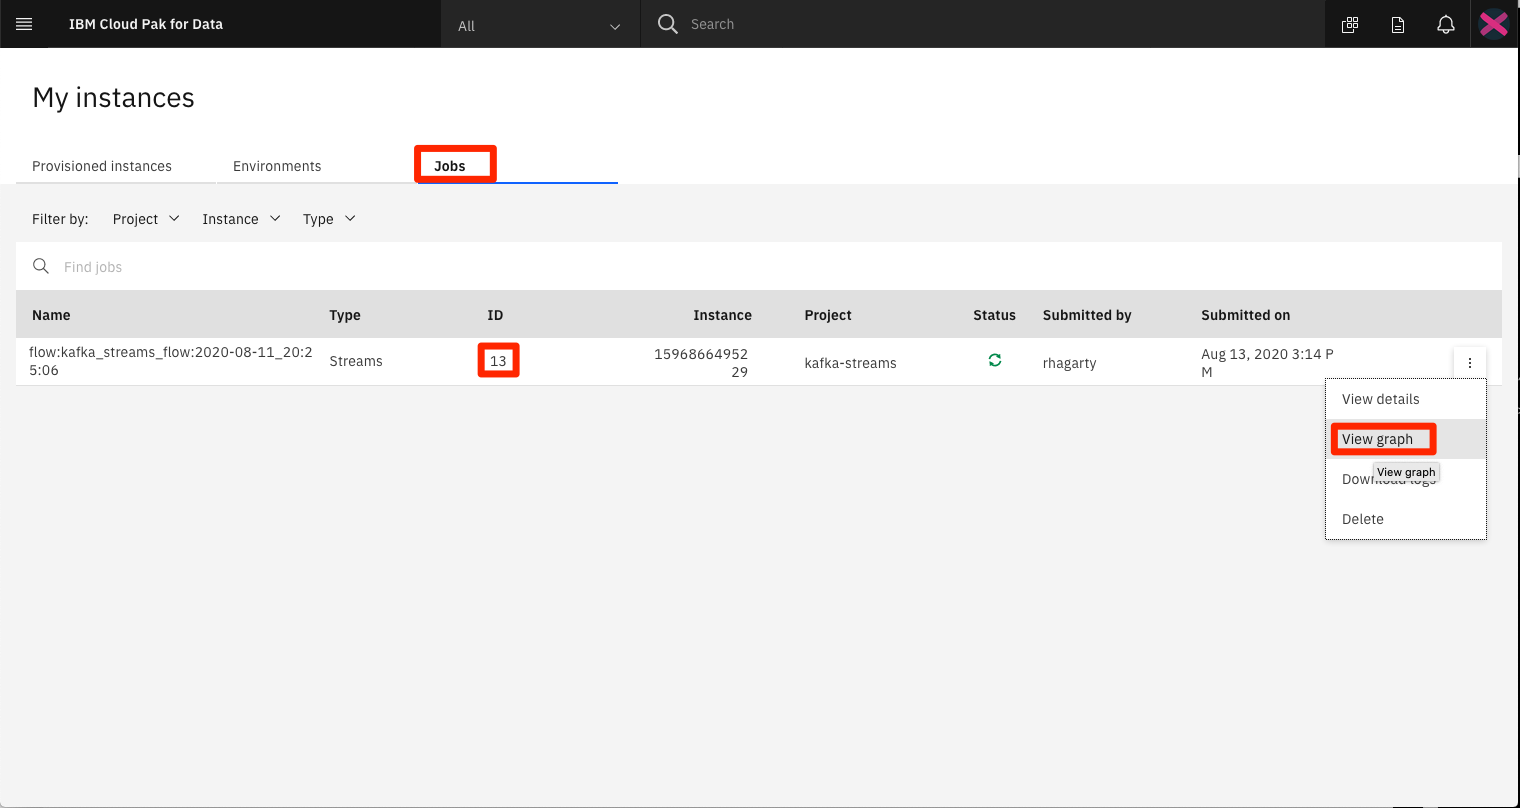
This job should show up in the list of jobs associated with our IBM Streams instance.
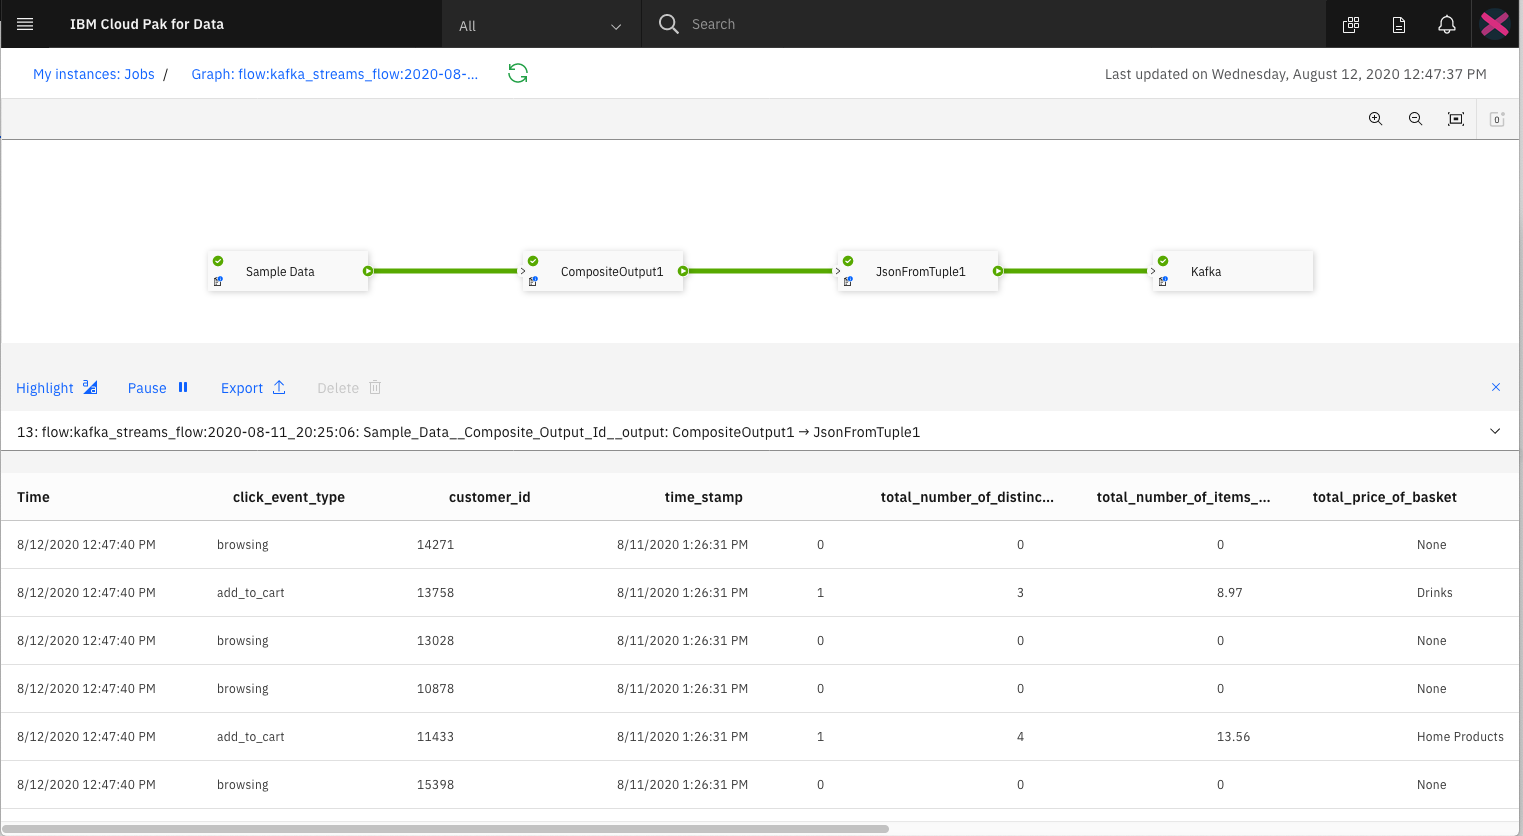
Click the View Graph option in the action menu to see the actually messages streaming in real-time.
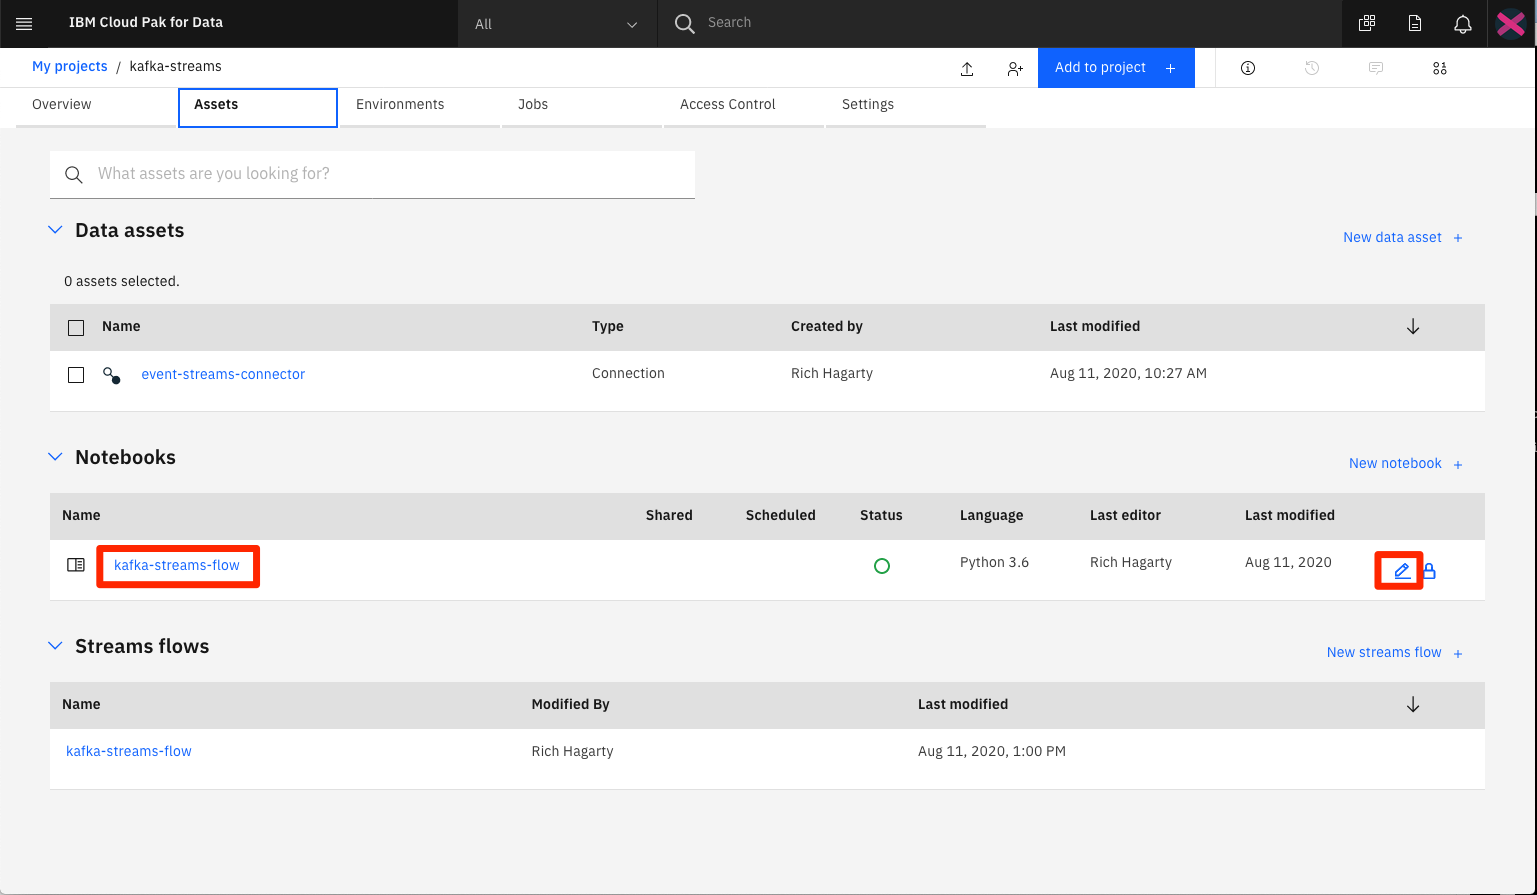
As noted earlier, the notebook will be added to the asset list for our Cloud Pak for Data project. To re-run or edit the notebook, click the pencil icon.
This code pattern is licensed under the Apache Software License, Version 2. Separate third party code objects invoked within this code pattern are licensed by their respective providers pursuant to their own separate licenses. Contributions are subject to the Developer Certificate of Origin, Version 1.1 (DCO) and the Apache Software License, Version 2.

