The Python API streamsx allows developers to build streaming applications that are executed using IBM Streams, a service that runs on IBM Cloud Pak for Data. The Cloud Pak for Data platform provides additional support, such as integration with multiple data sources, built-in analytics, Jupyter notebooks, and machine learning. Scalability is increased by distributing processes across multiple computing resources.
NOTE: The IBM Streams service is also available on IBM Cloud, and has the product name IBM Streaming Analytics.
In this code pattern, we will create a Jupyter notebook that contains Python code that utilizes the streamsx API to build a streaming application. The application will process a stream of data containing mouse click events from users as they browse a shopping web site.
Note that the streamsx package comes with additional adapters for external systems, such as Kafka, databases, and geospatial analytics, but we will just focus on the core service.
The notebook will cover all of the steps to building a simple IBM Streams application. This includes:
- Create a
Toplogyobject that will contain the stream. - Define the
Sourceof our data. In this example, we are using click stream data generated from a shopping website. - Add the data source to a stream.
- Create a
Filterso that we only see clicks associated with adding items to a shopping cart. - Create a function that computes the running total cost of the items for each customer. The function is executed every second.
- Results are printed out with the customer ID and the cost of the items in the cart.
- Create a
Viewobject so that we can see the results of our stream application. - Use the
Publishfunction so that other applications can use our stream.
The application is started by submitting the topology, which will then create a running job. The streams job can then be assigned a View object that can be used to see the output in real-time.
- User runs Jupyter Notebook in IBM Cloud Pak for Data
- Clickstream data is inserted into streaming app
- Streaming app using the
streamsxPython API is executed in the IBM Streams service - User can optionally access the IBM Streams service job to view events
- IBM Streams on Cloud Pak for Data: Development platform for visually creating streaming applications.
- Jupyter Notebook: An open source web application that allows you to create and share documents that contain live code, equations, visualizations, and explanatory text.
- Python: Python is a programming language that lets you work more quickly and integrate your systems more effectively.
- Clone the repo
- Add IBM Streams service to Cloud Pak for Data
- Create a new project in Cloud Pak for Data
- Add a data asset to your project
- Add a notebook to your project
- Run the notebook
- View job status in Streams service panel
- Cancel the job
git clone https://github.com/IBM/ibm-streams-with-python-apiEnsure that your administrator has added IBM Streams as a service to your Cloud Pak for Data instance, and that your user has access to the service.
Once you login to your Cloud Pak for Data instance, click on the (☰) menu icon in the top left corner of your screen and click My Instances.
Once you login to your Cloud Pak for Data instance, click on the (☰) menu icon in the top left corner of your screen and click Projects.
From the Project list, click on New Project. Then select Create an empty project, and enter a unique name for your project. Click on Create to complete your project creation.
Upon a successful project creation, you are taken to the project Overview tab. Take note of the Assets tab which we will be using to associate our project with any external assets (datasets and notebooks).
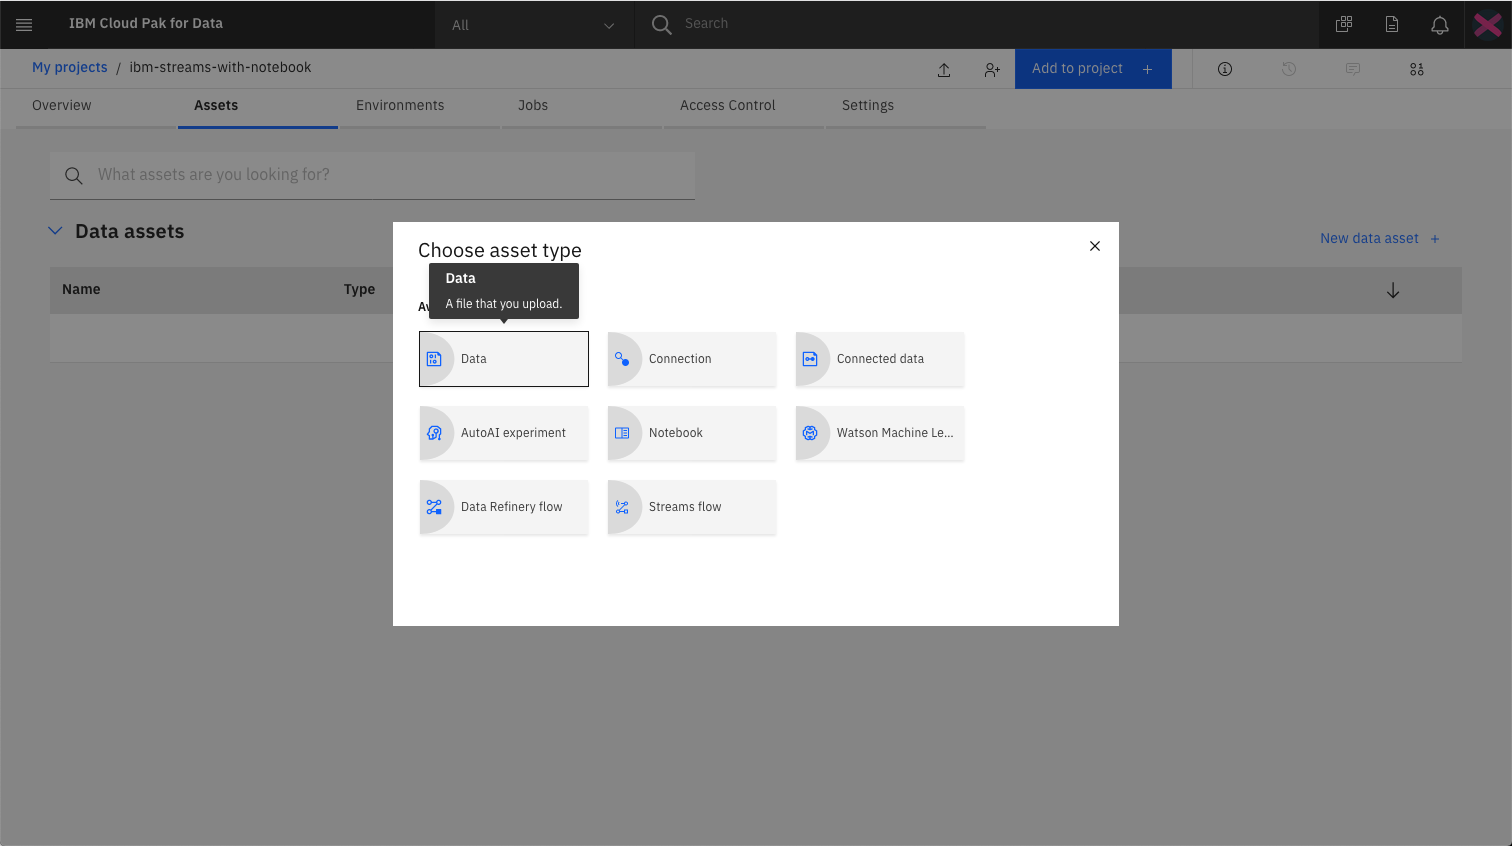
From the project Assets tab, click Add to project + on the top right and choose the Data asset type.
Using the Data panel on the right, selecte the Load tab and click on the browse link to select the clickstream.csv data file located in the local data directory.
TIP: Once added, the data file will appear in the
Data assetssection of theAssetstab.
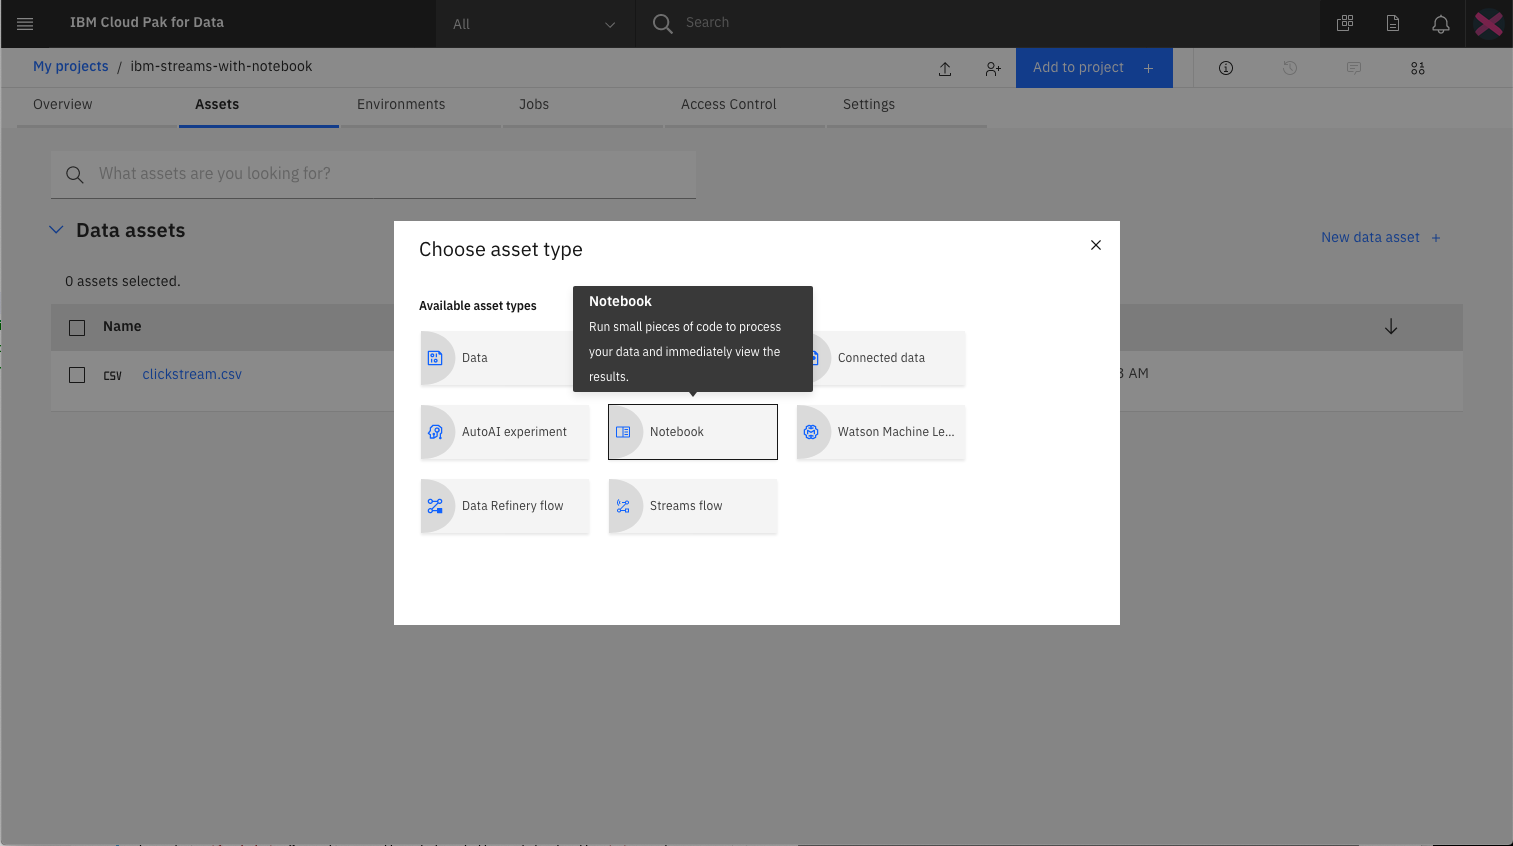
From the project Assets tab, click Add to project + on the top right and choose the Notebook asset type.
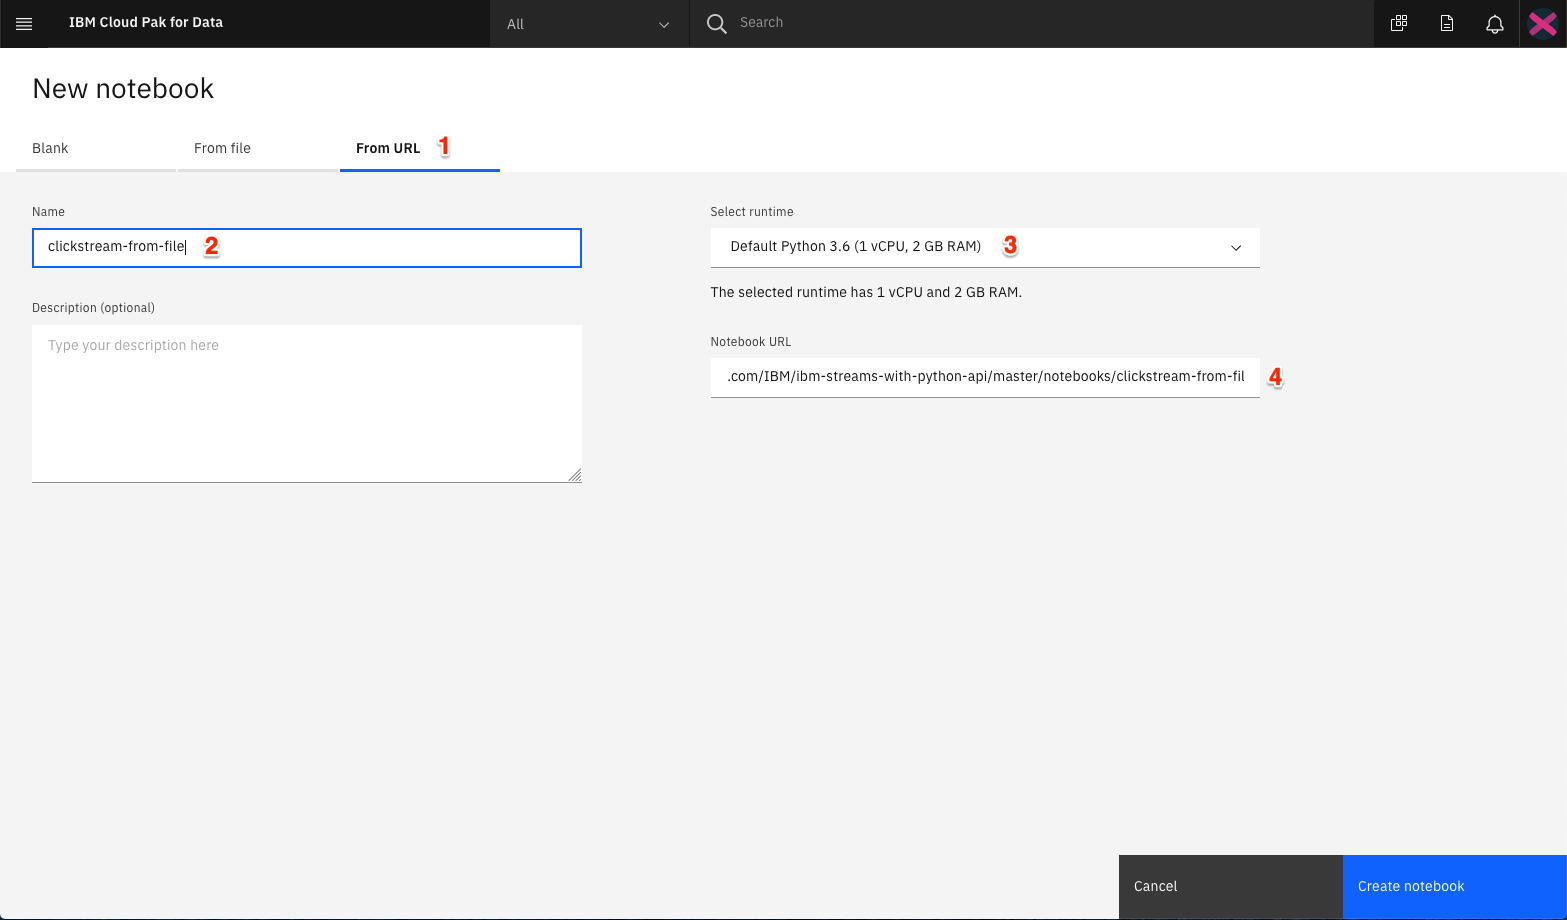
Fill in the following information:
- Select the
From URLtab. [1] - Enter a
Namefor the notebook and optionally a description. [2] - For
Select runtimeselect theDefault Python 3.6option. [3] - Under
Notebook URLprovide the following url [4]:
https://raw.githubusercontent.com/IBM/ibm-streams-with-python-api/master/notebooks/clickstream-from-file.ipynbClick the Create button.
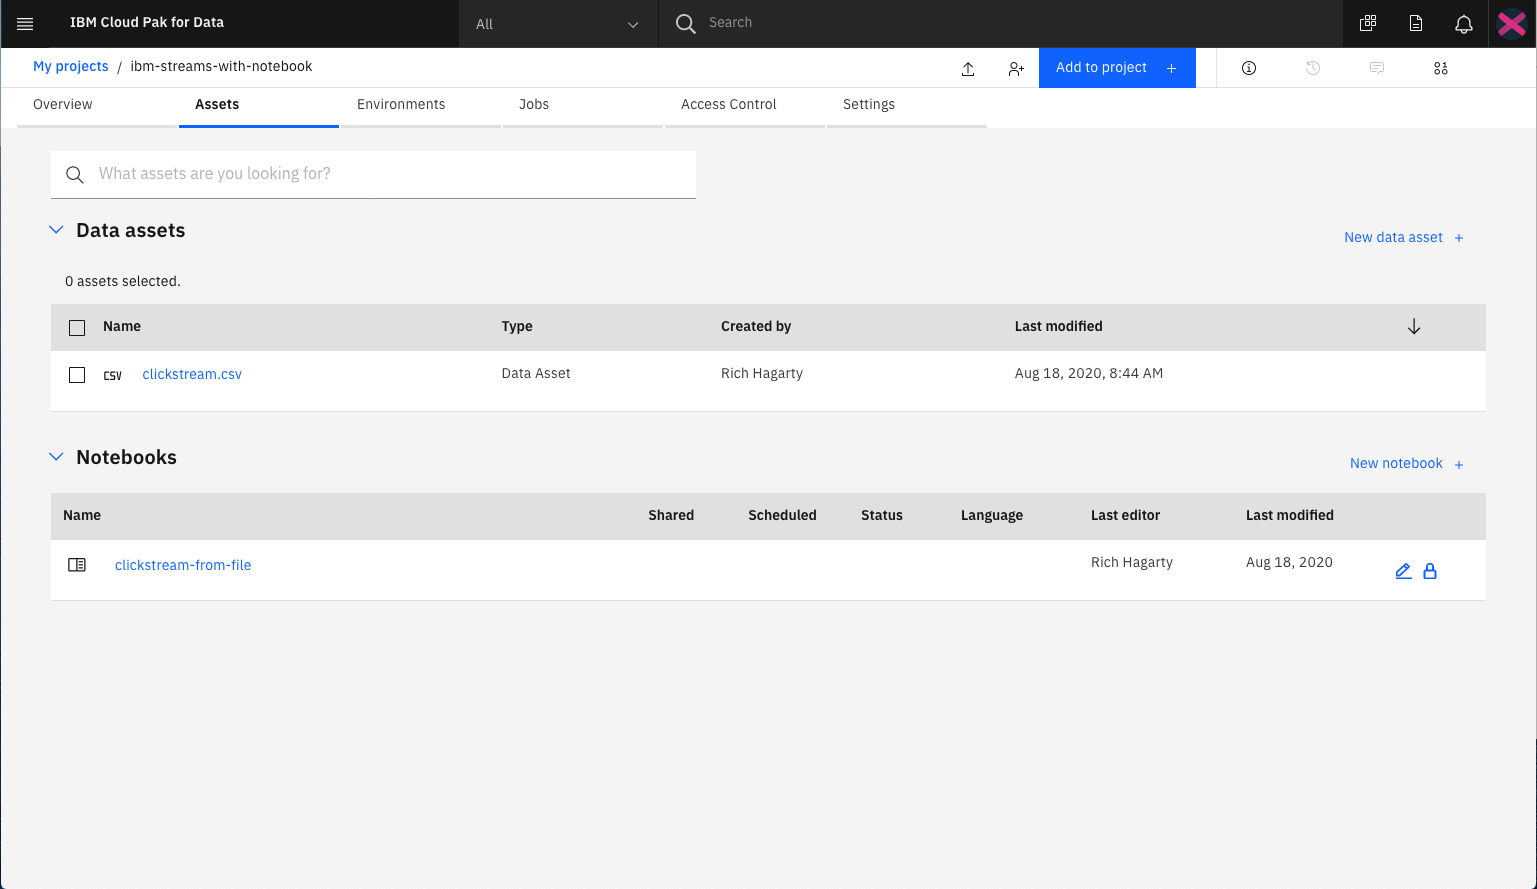
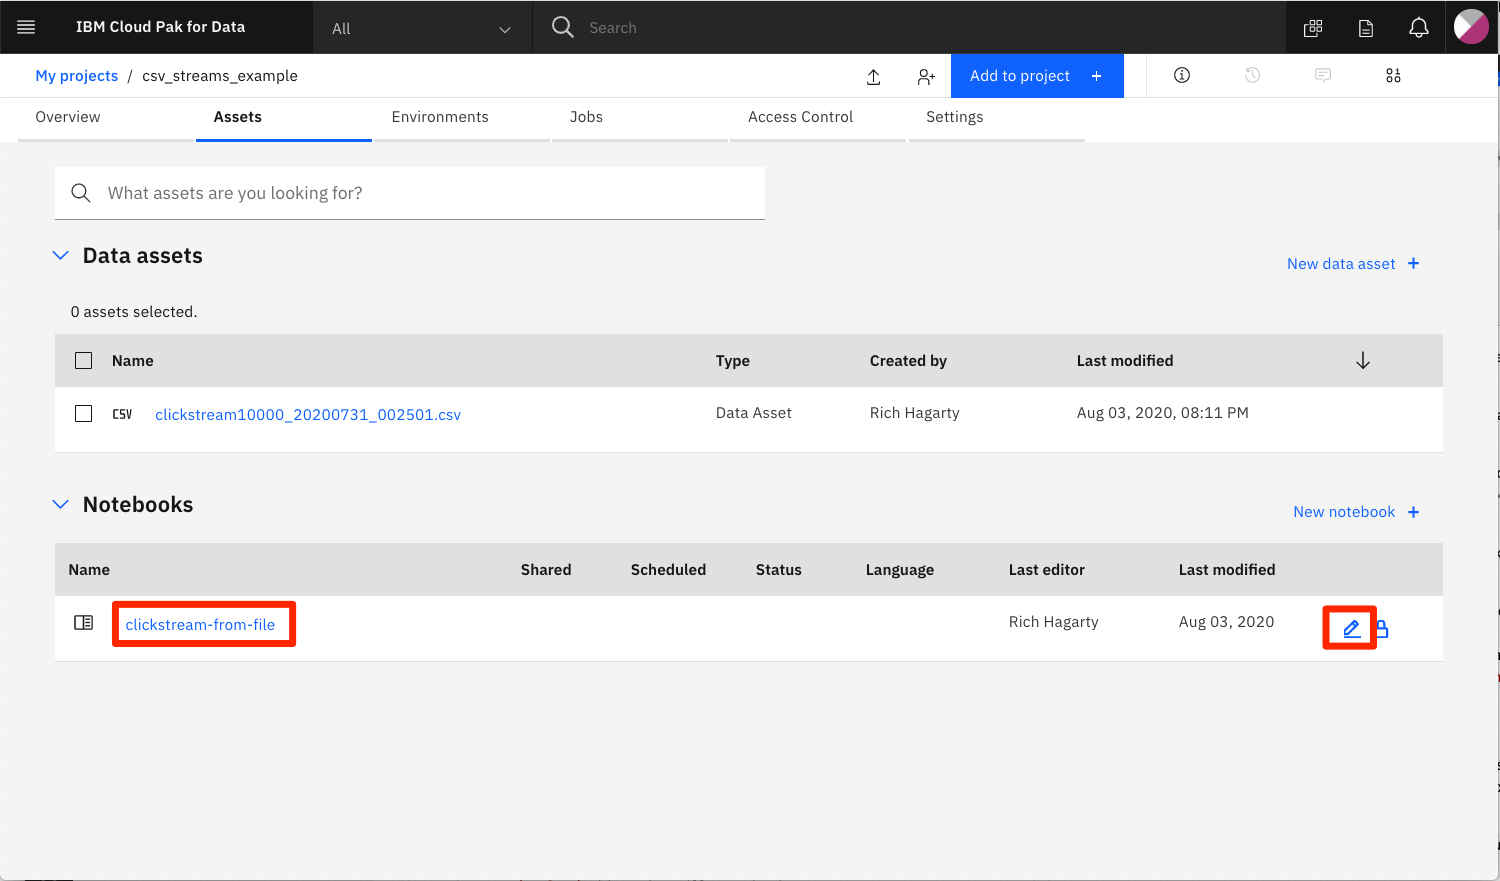
Your project should now contain two assets.
After creation, the notebook will automatically be loaded into the notebook runtime environment. You can re-run the notebook at any time by clicking on the pencil edit icon displayed in right-hand column of the notebook row.
When a notebook is executed, what is actually happening is that each code cell in the notebook is executed, in order, from top to bottom.
Each code cell is selectable and is preceded by a tag in the left margin. The tag format is In [x]:. Depending on the state of the notebook, the x can be:
- A blank, this indicates that the cell has never been executed.
- A number, this number represents the relative order this code step was executed.
- A
*, this indicates that the cell is currently executing.
There are several ways to execute the code cells in your notebook:
- One cell at a time.
- Select the cell, and then press the
Playbutton in the toolbar.
- Select the cell, and then press the
- Batch mode, in sequential order.
- From the
Cellmenu bar, there are several options available. For example, you canRun Allcells in your notebook, or you canRun All Below, that will start executing from the first cell under the currently selected cell, and then continue executing all cells that follow.
- From the
- At a scheduled time.
- Press the
Schedulebutton located in the top right section of your notebook panel. Here you can schedule your notebook to be executed once at some future time, or repeatedly at your specified interval.
- Press the
NOTE: An example version of the notebook (shown with output cells) can be found in the
notebooks/with-outputfolder of this repo.
The comments in each of the notebook cells helps explain what action is occuring, but let's highlight some of the more important steps.
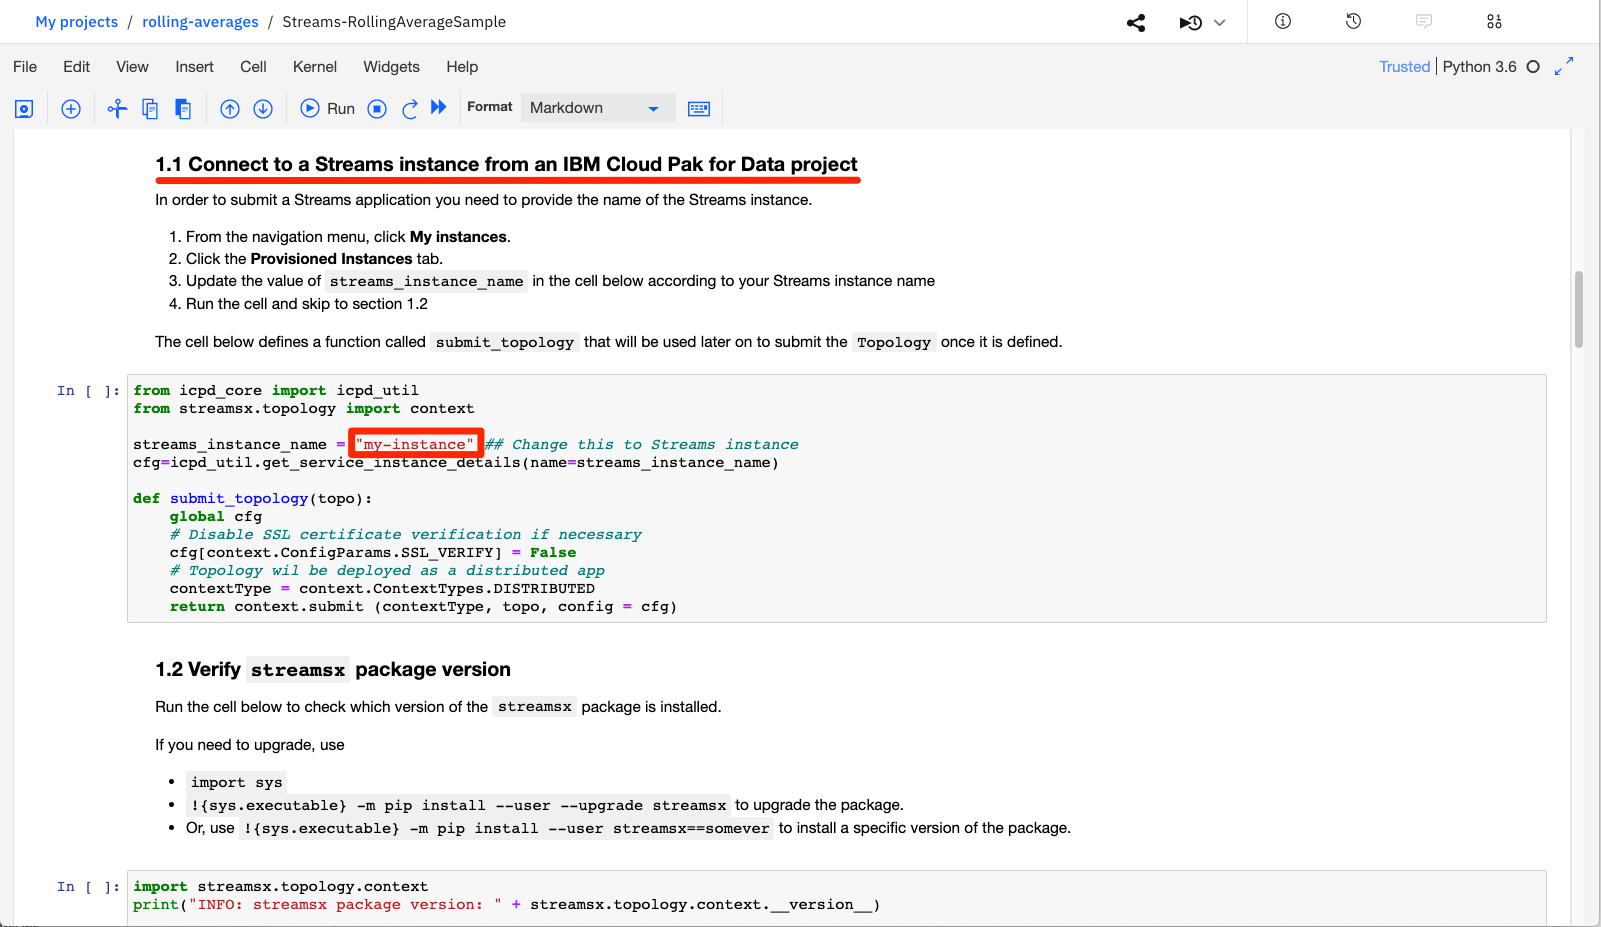
In Section 1.1, change "my-instance" to the name of your IBM Streams service.
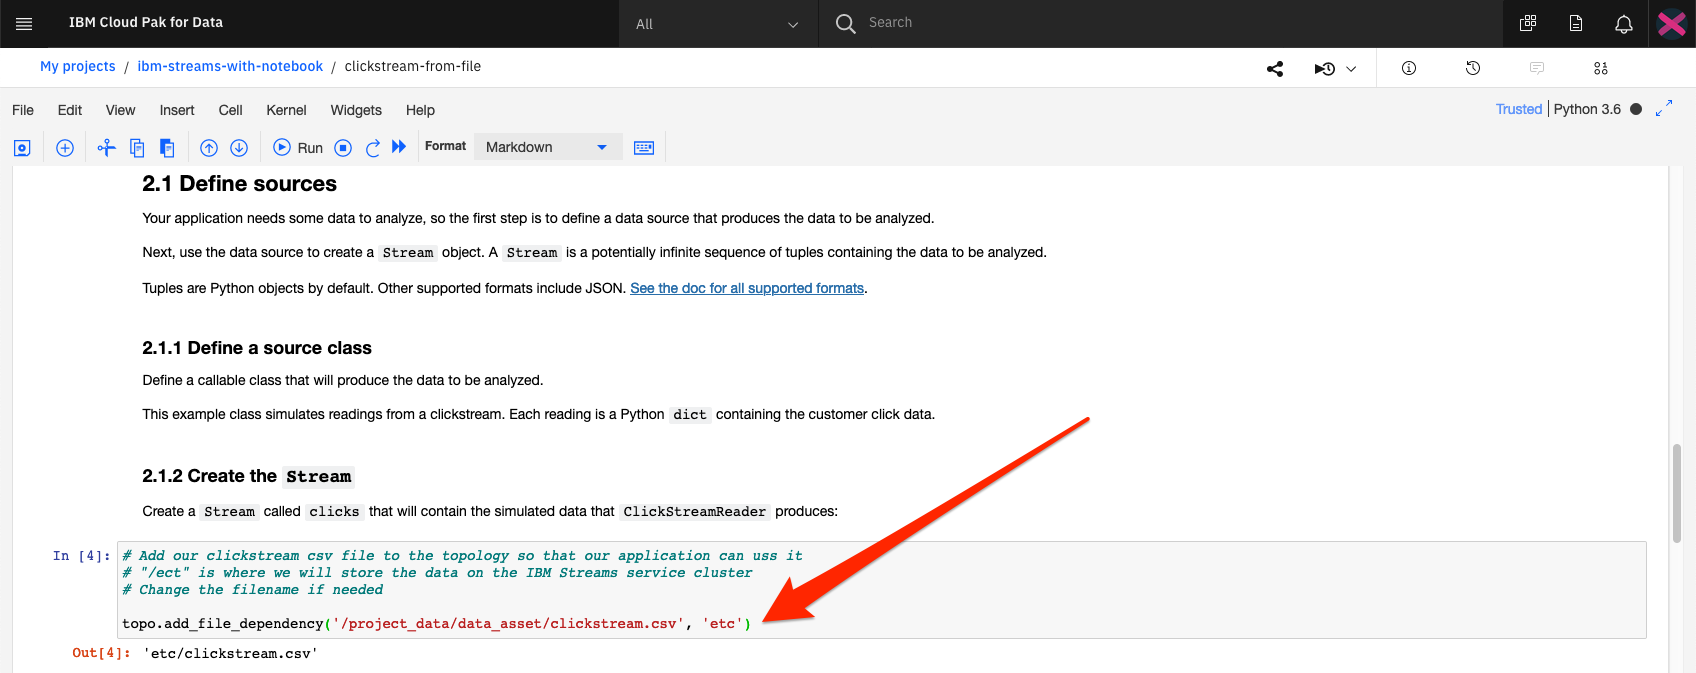
In Section 2.1.2 we import our project data asset to the topolgy so that it is available when the stream application is run.
Ensure that the file name matches your project data asset name.
The notebook covers all of the steps to building a simple streams application. This includes:
- Create a
Topologyobject that will contain the stream. - Define the incoming data source. In this example, we are using click stream data generated from a shopping website.
- Use the incoming data to create a source
Stream. - Filter the data on the
Streamso that we only see clicks associated with adding items to a shopping cart. - Create a function that computes the running total cost of the items for each customer for the last 30 seconds. The function is executed every second.
- Results are printed out with the customer ID and the cost of the items in the cart.
- Create a
Viewobject so that we can see the results of our streams application. - Use the
Publishfunction so that other applications can use our stream.
The application is started by submitting the Topology, which will then create a running job. Once the job is running, you can use the View object created earlier to see the running totals as they are calculated.
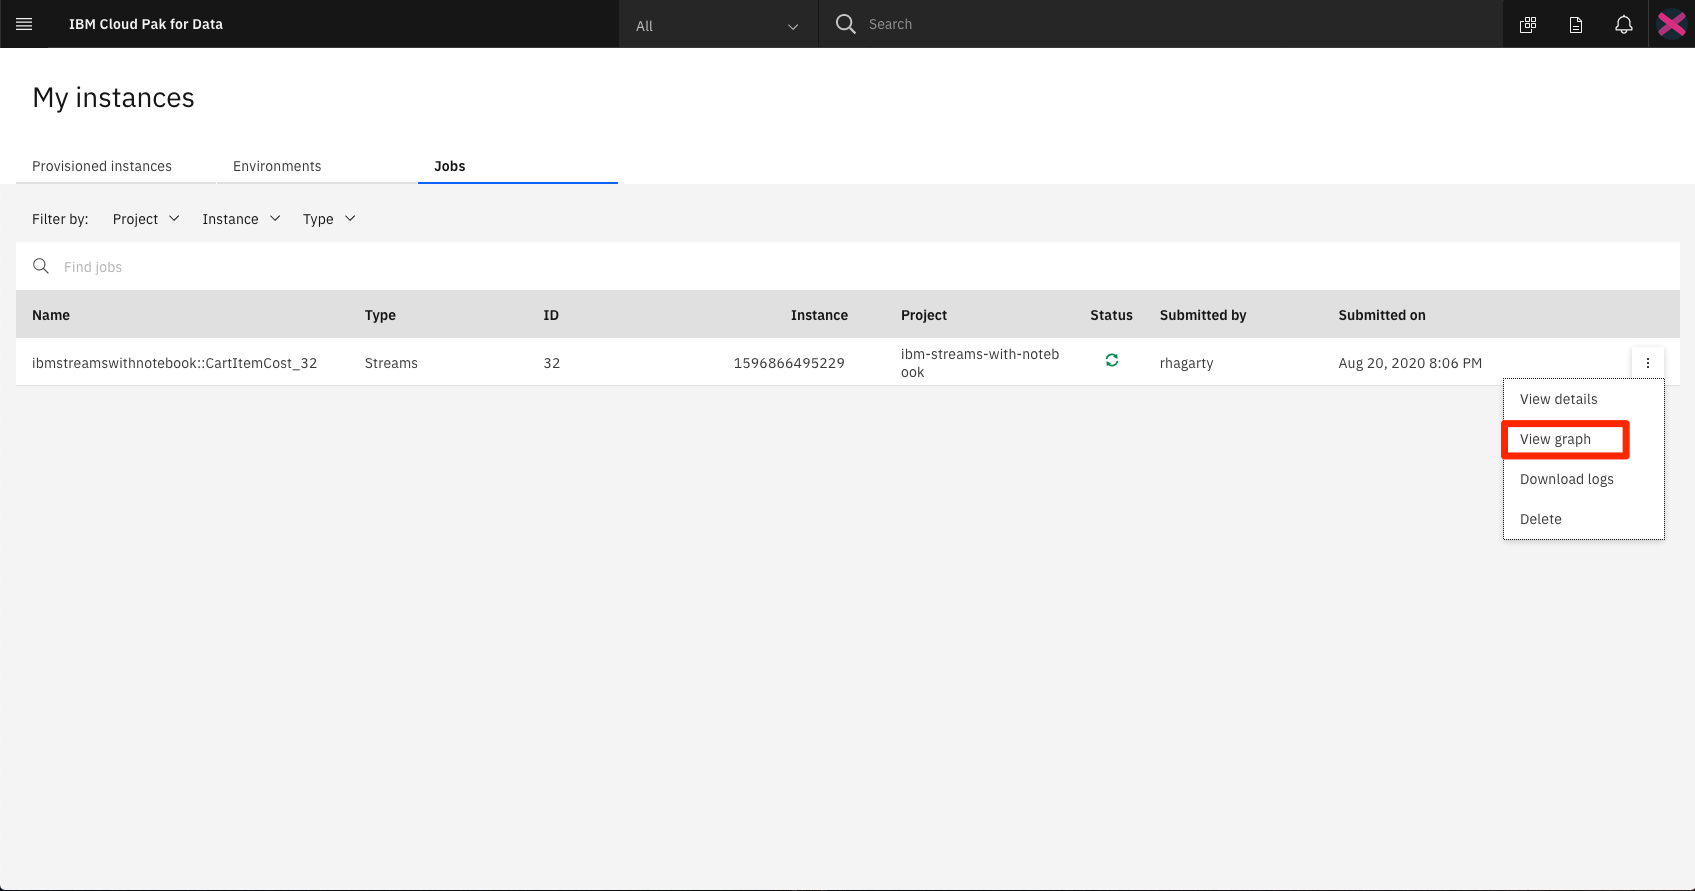
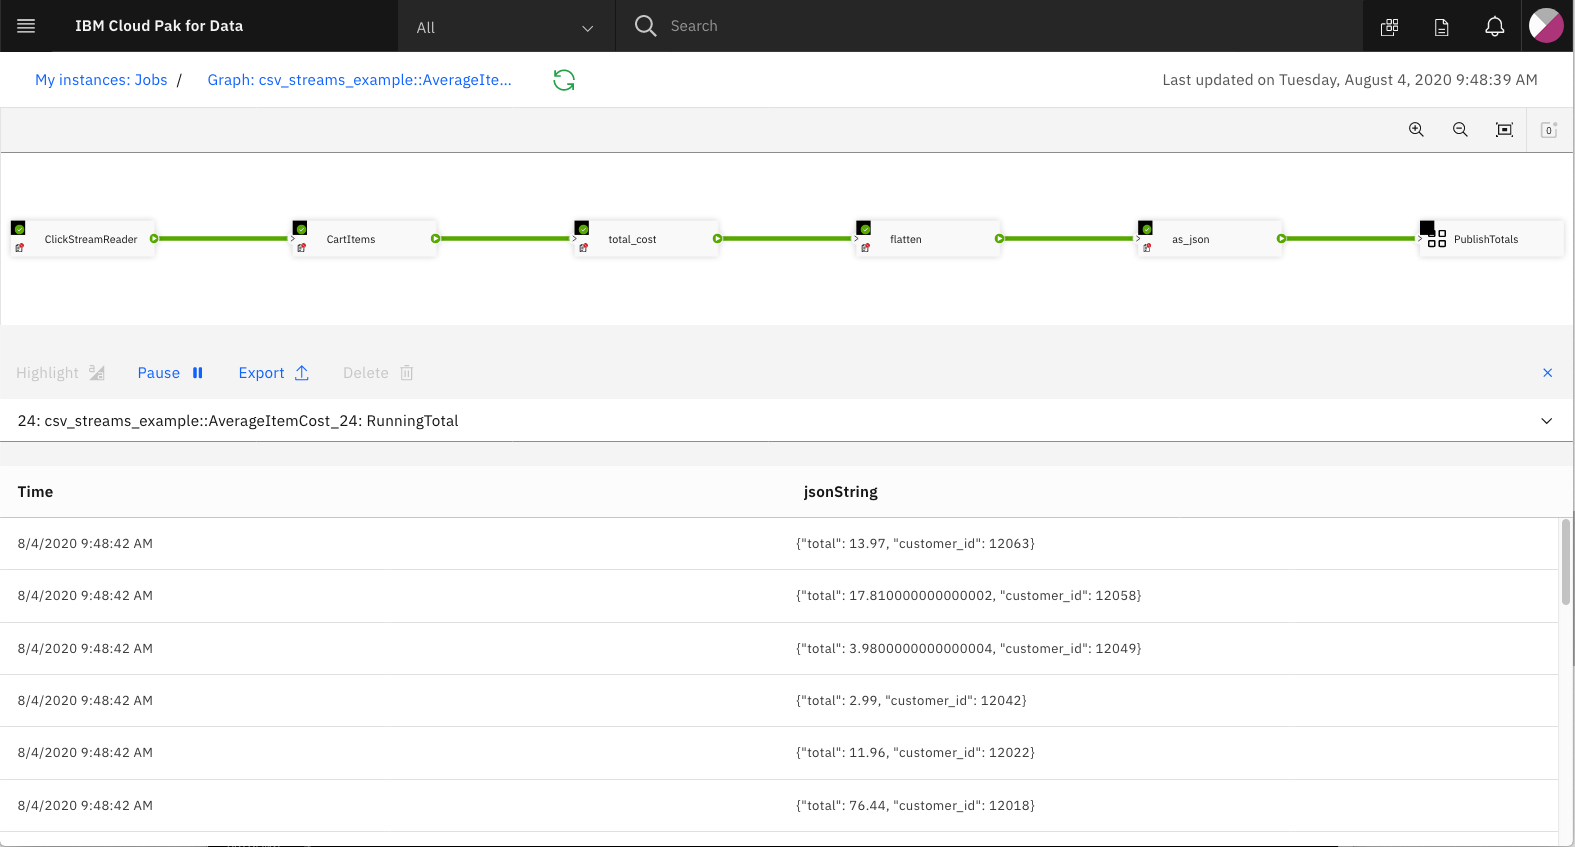
From the IBM Cloud Pak for Data main menu, click on My Instances and then the Jobs tab.
Find your job based on name, or use the JobId printed in your notebook when you submitted the topology.
Select View graph from the context menu action for the running job.
In Section 5 of the notebook, a button is created which you can click to cancel the job.
This code pattern is licensed under the Apache Software License, Version 2. Separate third party code objects invoked within this code pattern are licensed by their respective providers pursuant to their own separate licenses. Contributions are subject to the Developer Certificate of Origin, Version 1.1 (DCO) and the Apache Software License, Version 2.


