In this workshop you will learn how to build and deploy your own AI Models.
For the workshop we will be using AutoAI, a graphical tool that analyses your dataset and discovers data transformations, algorithms, and parameter settings that work best for your problem setting.
Using AutoAI, you can build and deploy a machine learning model with sophisticated training features and no coding.
We will use some public datasets to build and deploy two different model pipelines, and analyse each of these models.
-
https://ibm.biz/BdfKeq Use this link to sign up for an IBM Cloud account
-
When you are signed up click
Create Resourceat the top of the Resources page. You can find the resources under the hamburger menu at the top left:
- Search for Watson Studio and click on the tile:
- Select the Lite plan and click
Create. - Go back to the Resources list and click on your Watson Studio service and then click
Get Started.
- You should now be in Watson Studio.
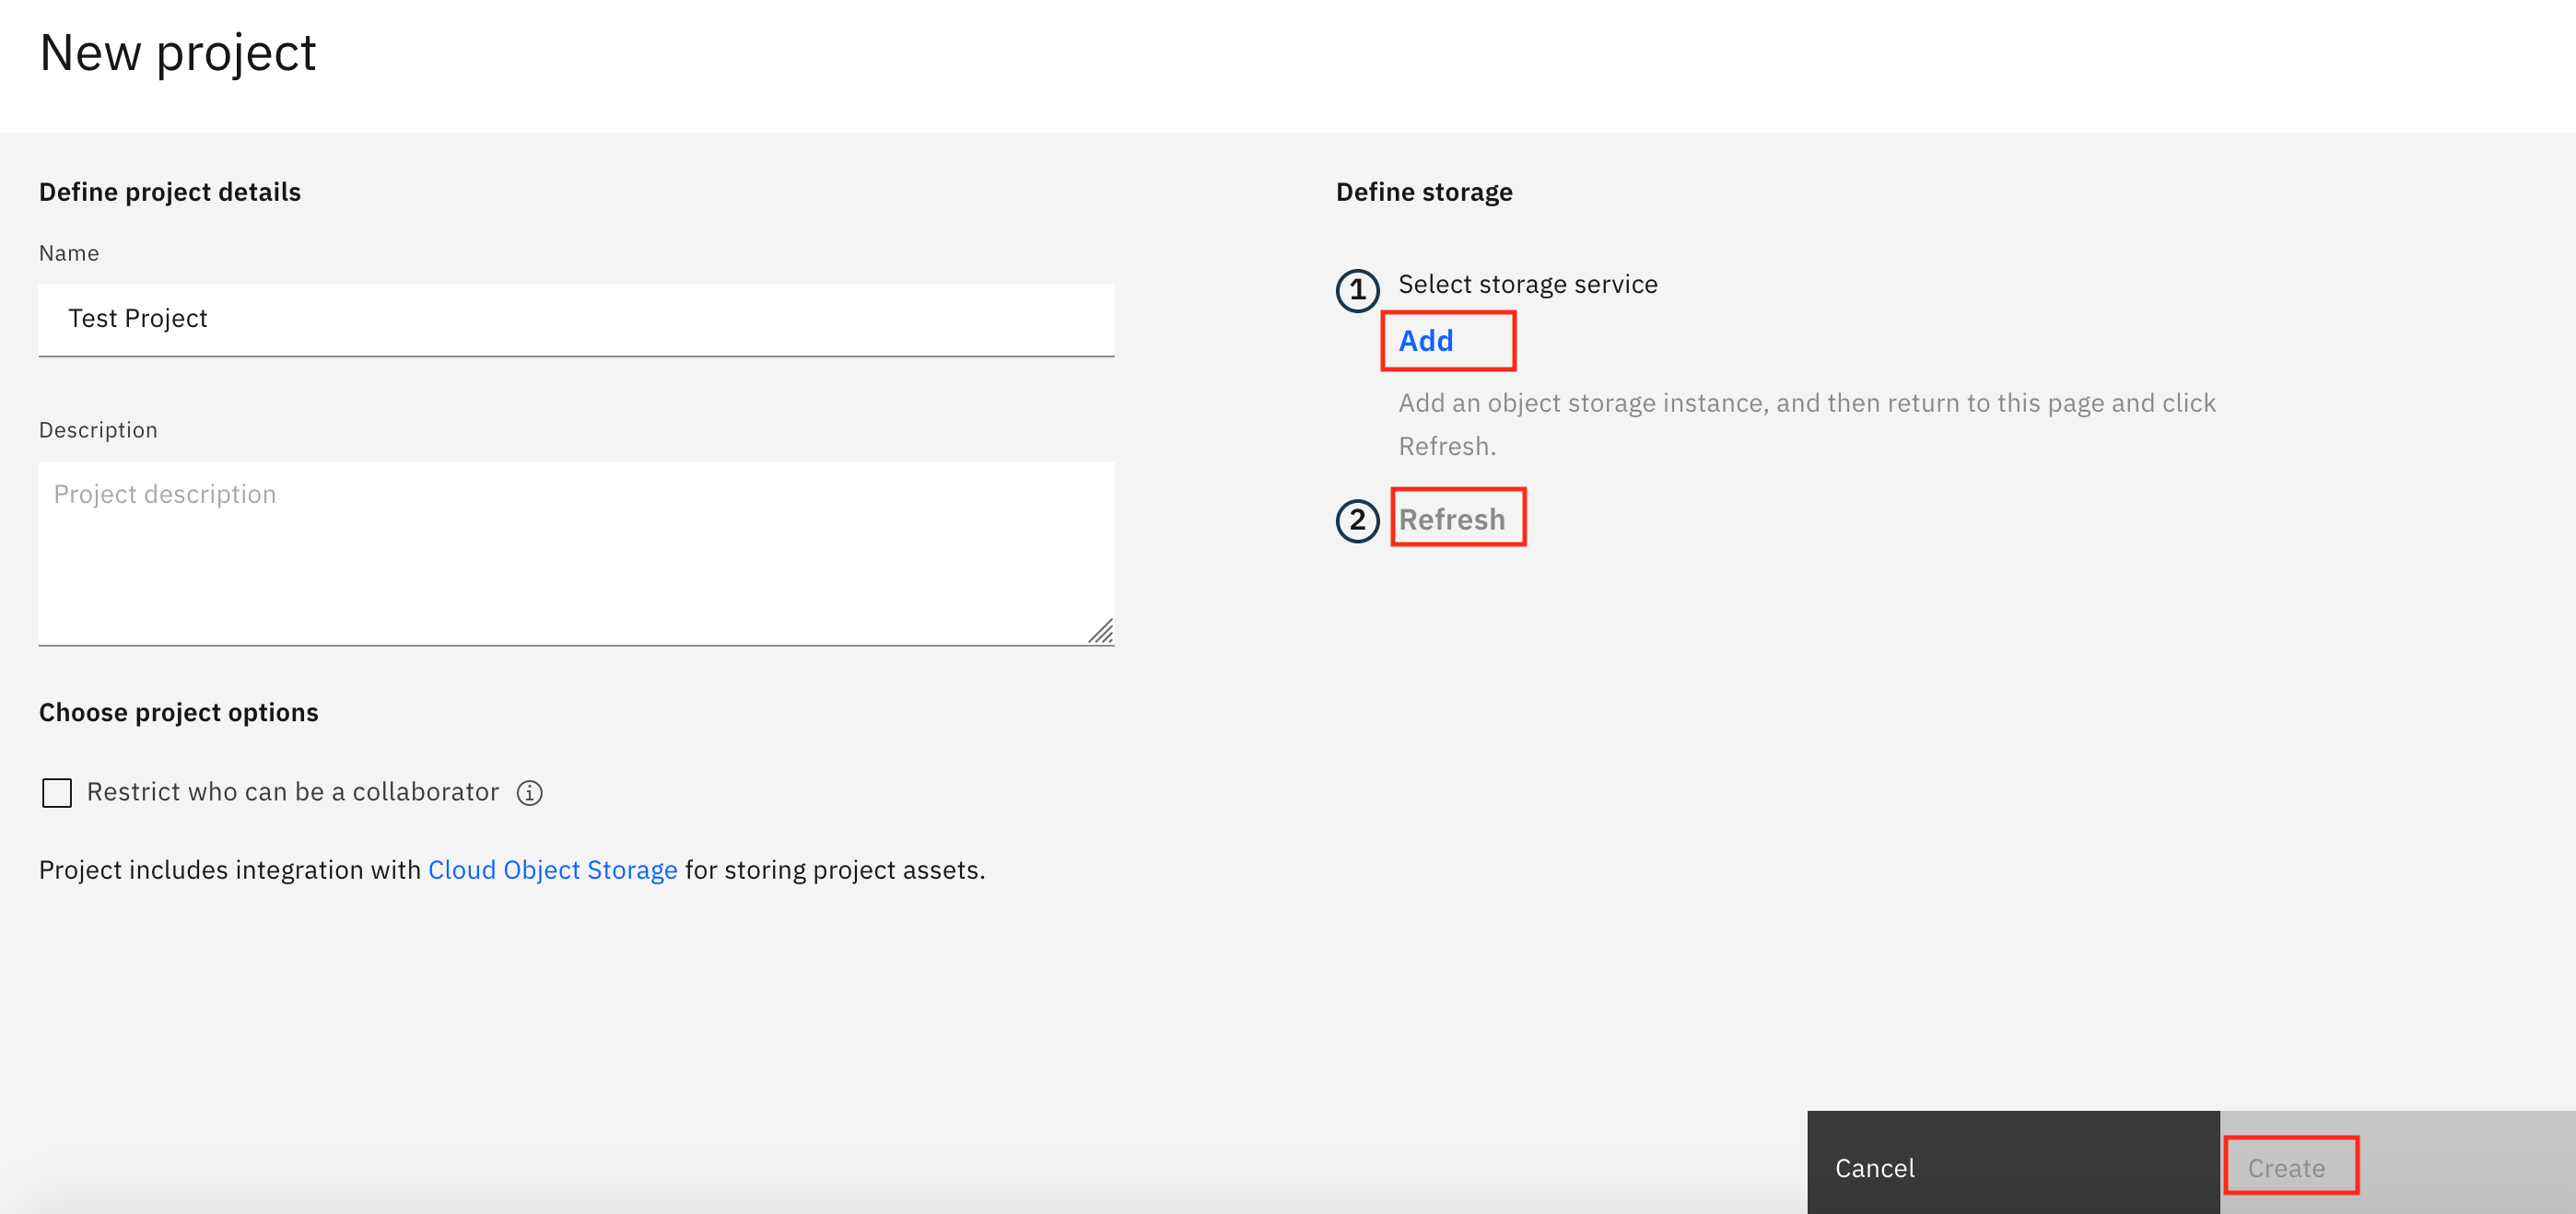
- Create a new project by clicking on
Get StartedandNew Project, orCreate Project
- Give your Project a name.
- Select an Object Storage from the drop-down menu or create a new one for free. This is used to store the notebooks and data. Do not forget to click refresh when returning to the Project page.
- click
Create.
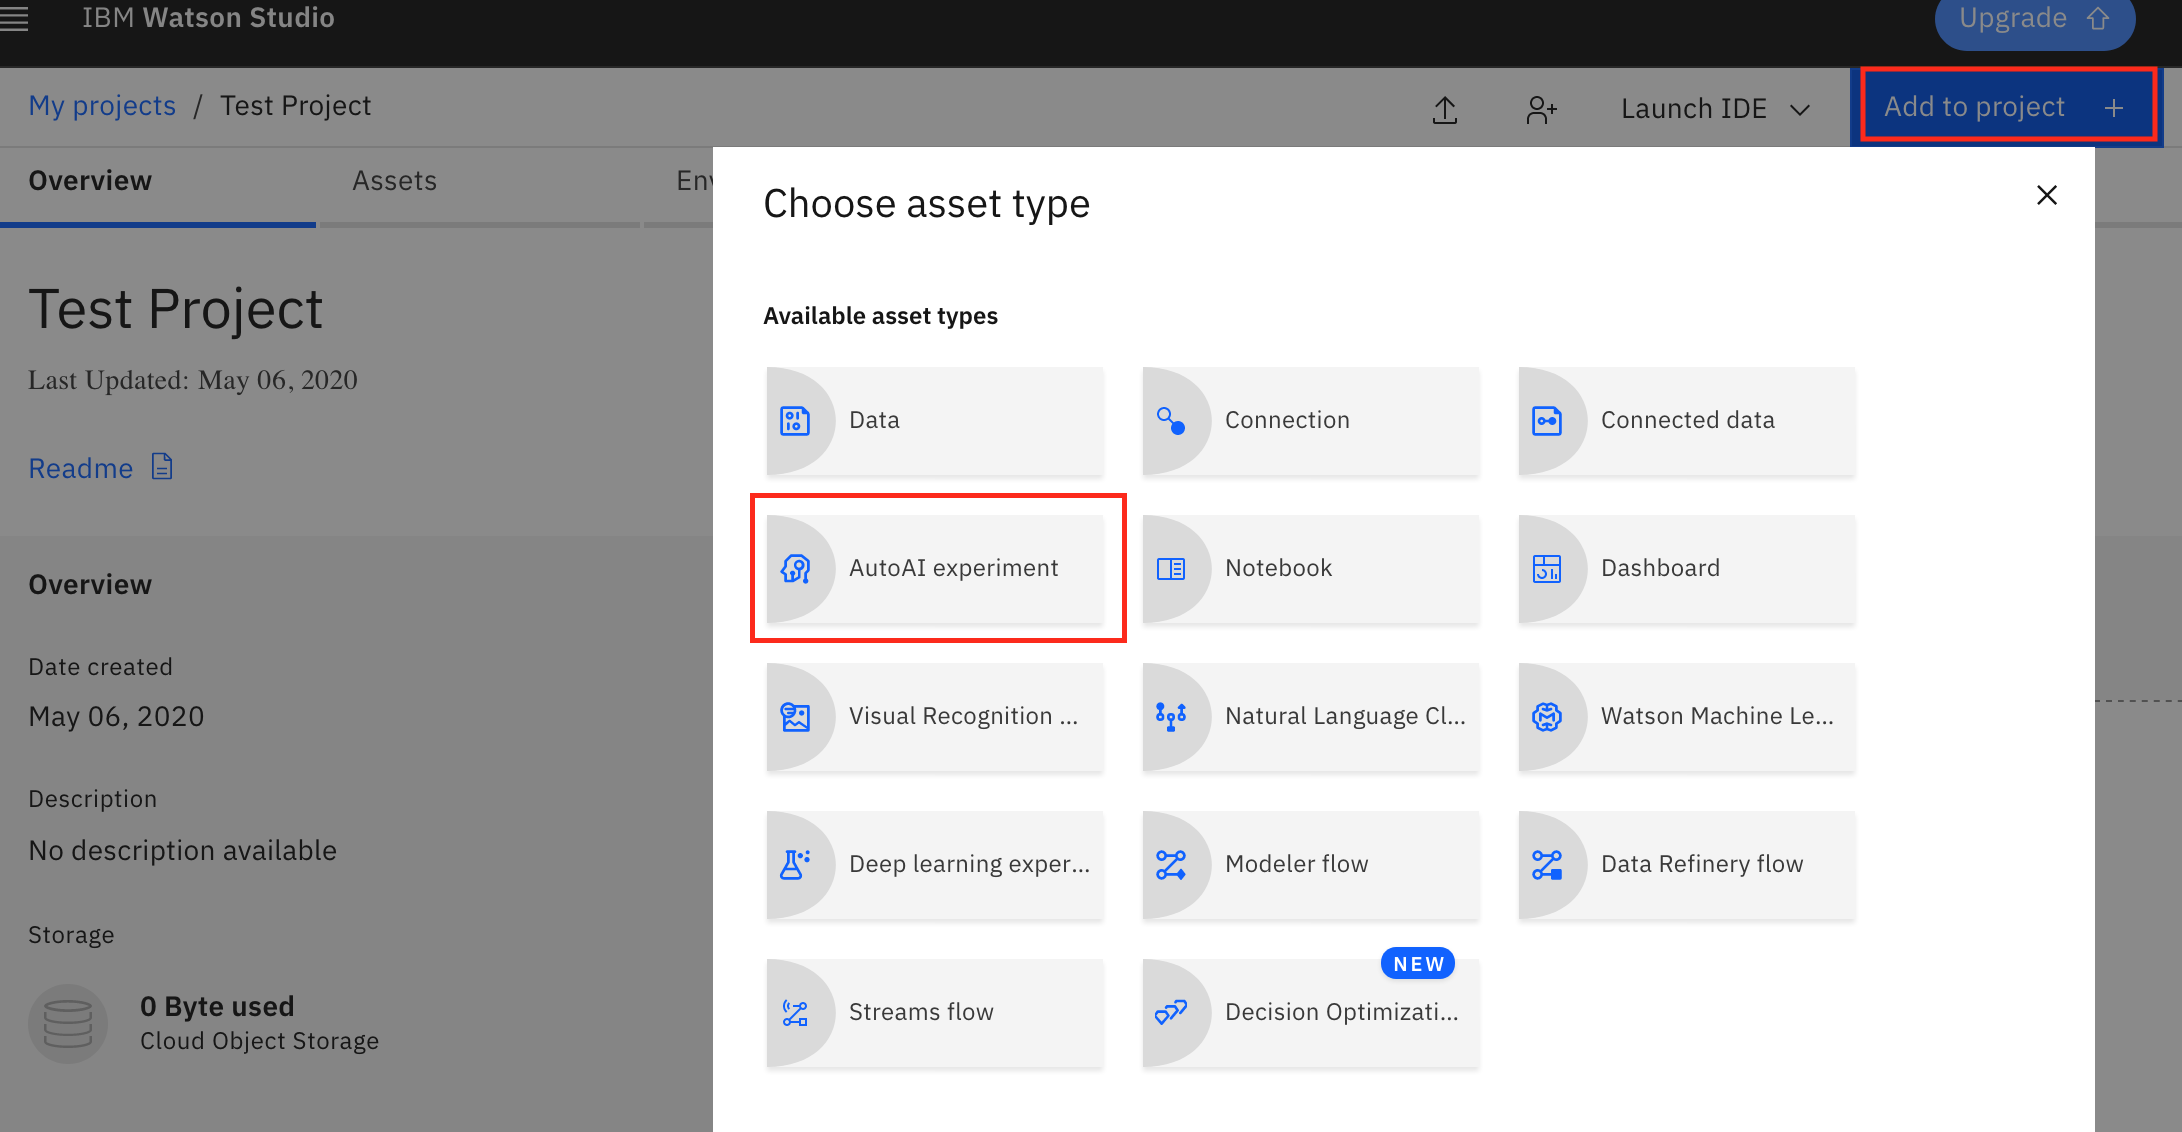
Once you are in the Project Dashboard, click on "Add to Project" on the top right and select AutoAI Experiment
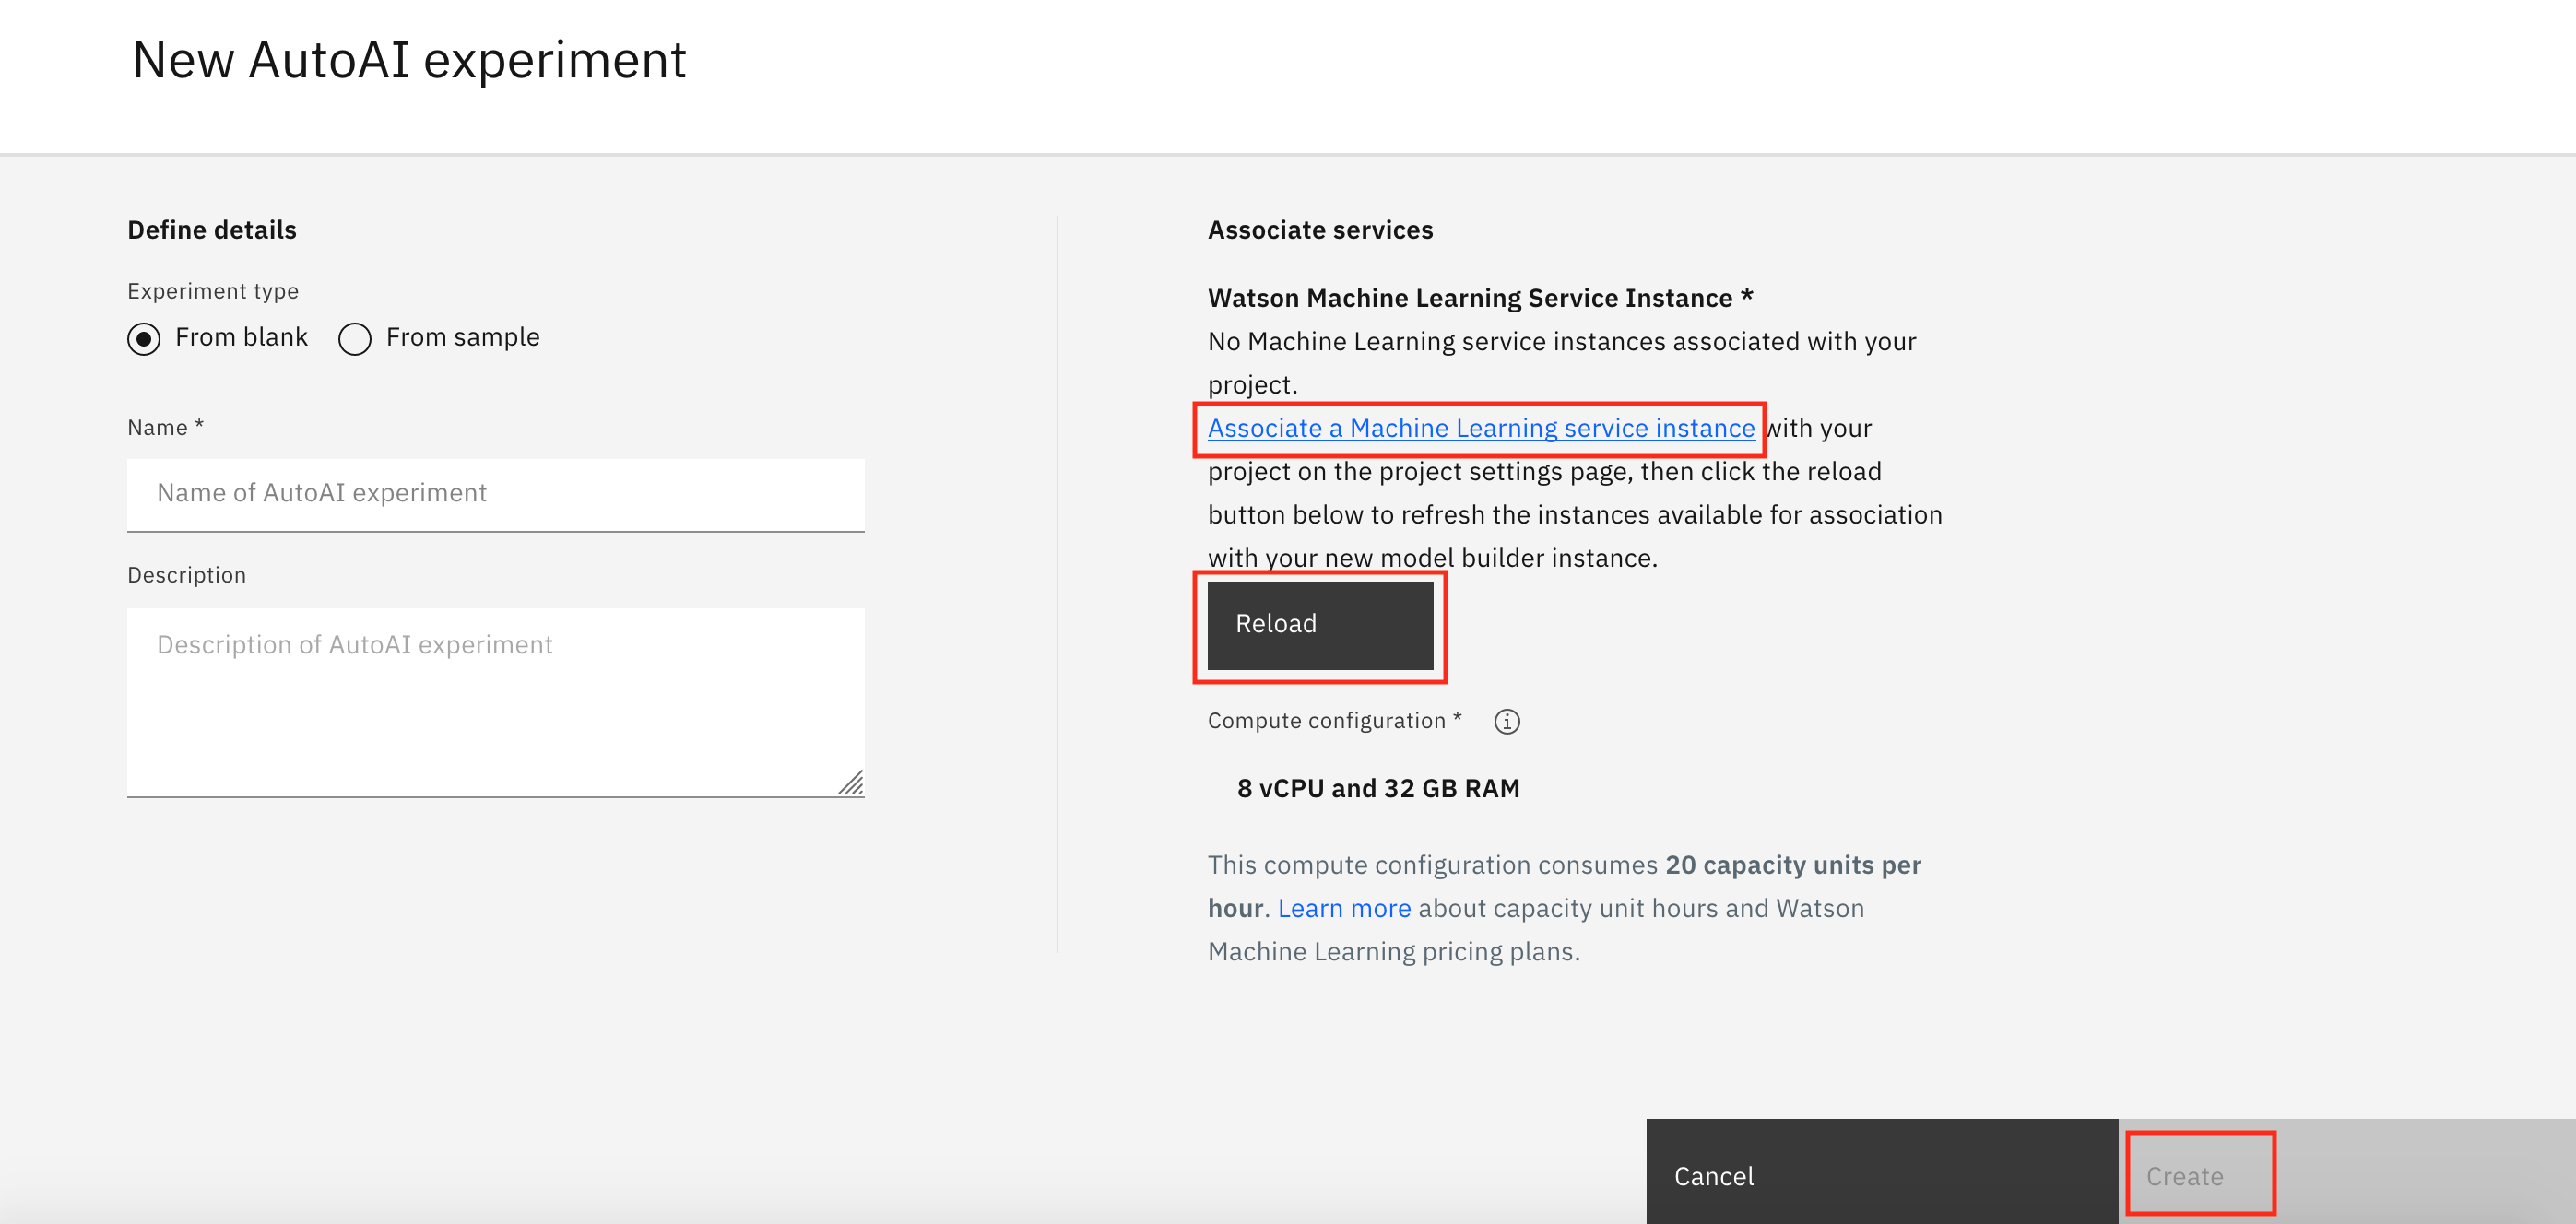
- Give your Auto AI experiment a unique name
- Associate a Watson Machine Learning service, if you have already created one this will apear in the dropdown or you can create a new one.
- Once this is done, click the "Reload" button for your Machine Learning service to appear
- Your machine learning service will appear under "Associated services"
- Click Create
-
In this workshop we will be analysing two Datasets
-
One to create a Classification model and the other to create a Regression Model
-
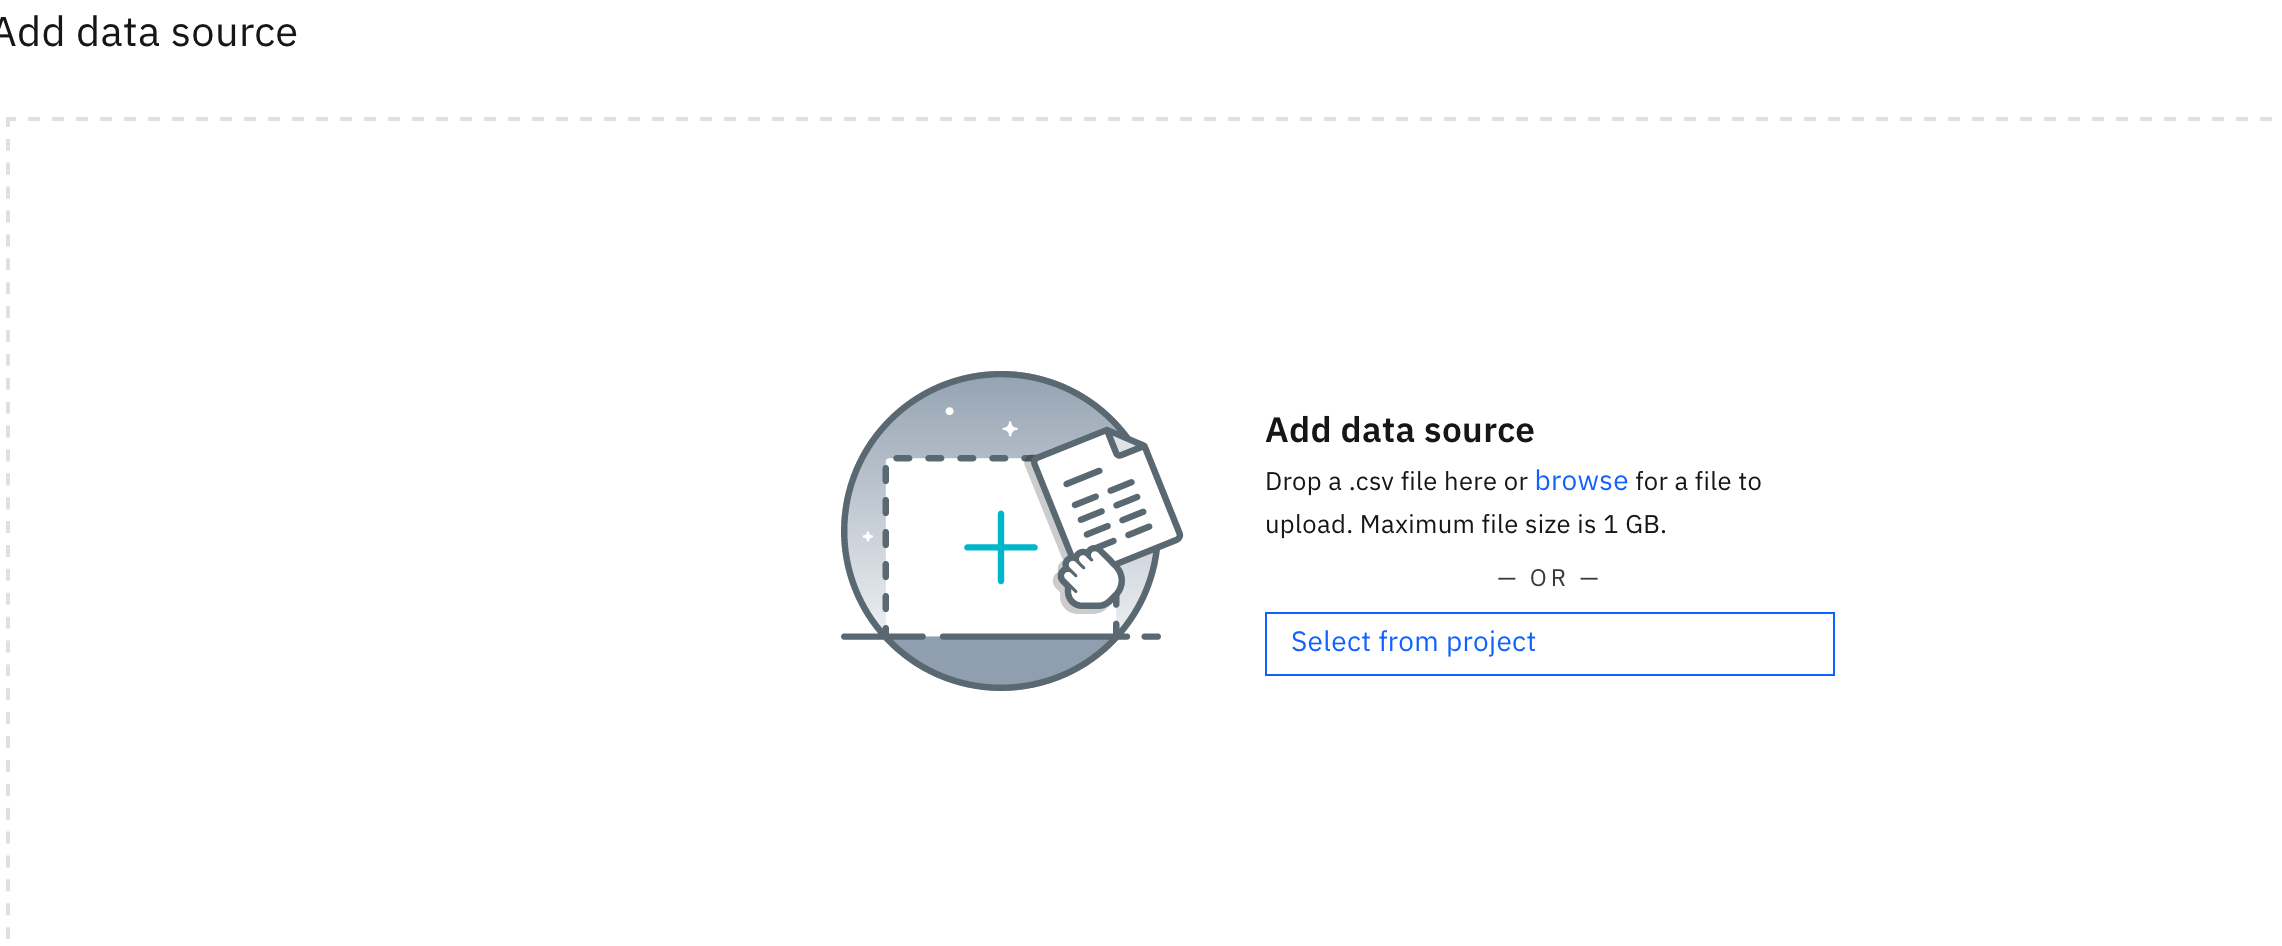
Browse and add your Data source
-
Datasets for this workshop have been acquired from :
https://www.kaggle.com/noordeen/insurance-premium-prediction
https://github.com/IBM/predictive-model-on-watson-ml (with minor changes to original data)
https://www.kaggle.com/vikrishnan/boston-house-prices (with minor changes to original data)
We will now work through the different aspects of configuring our AutoAI experiment and discuss the Classification Models that are created.
-
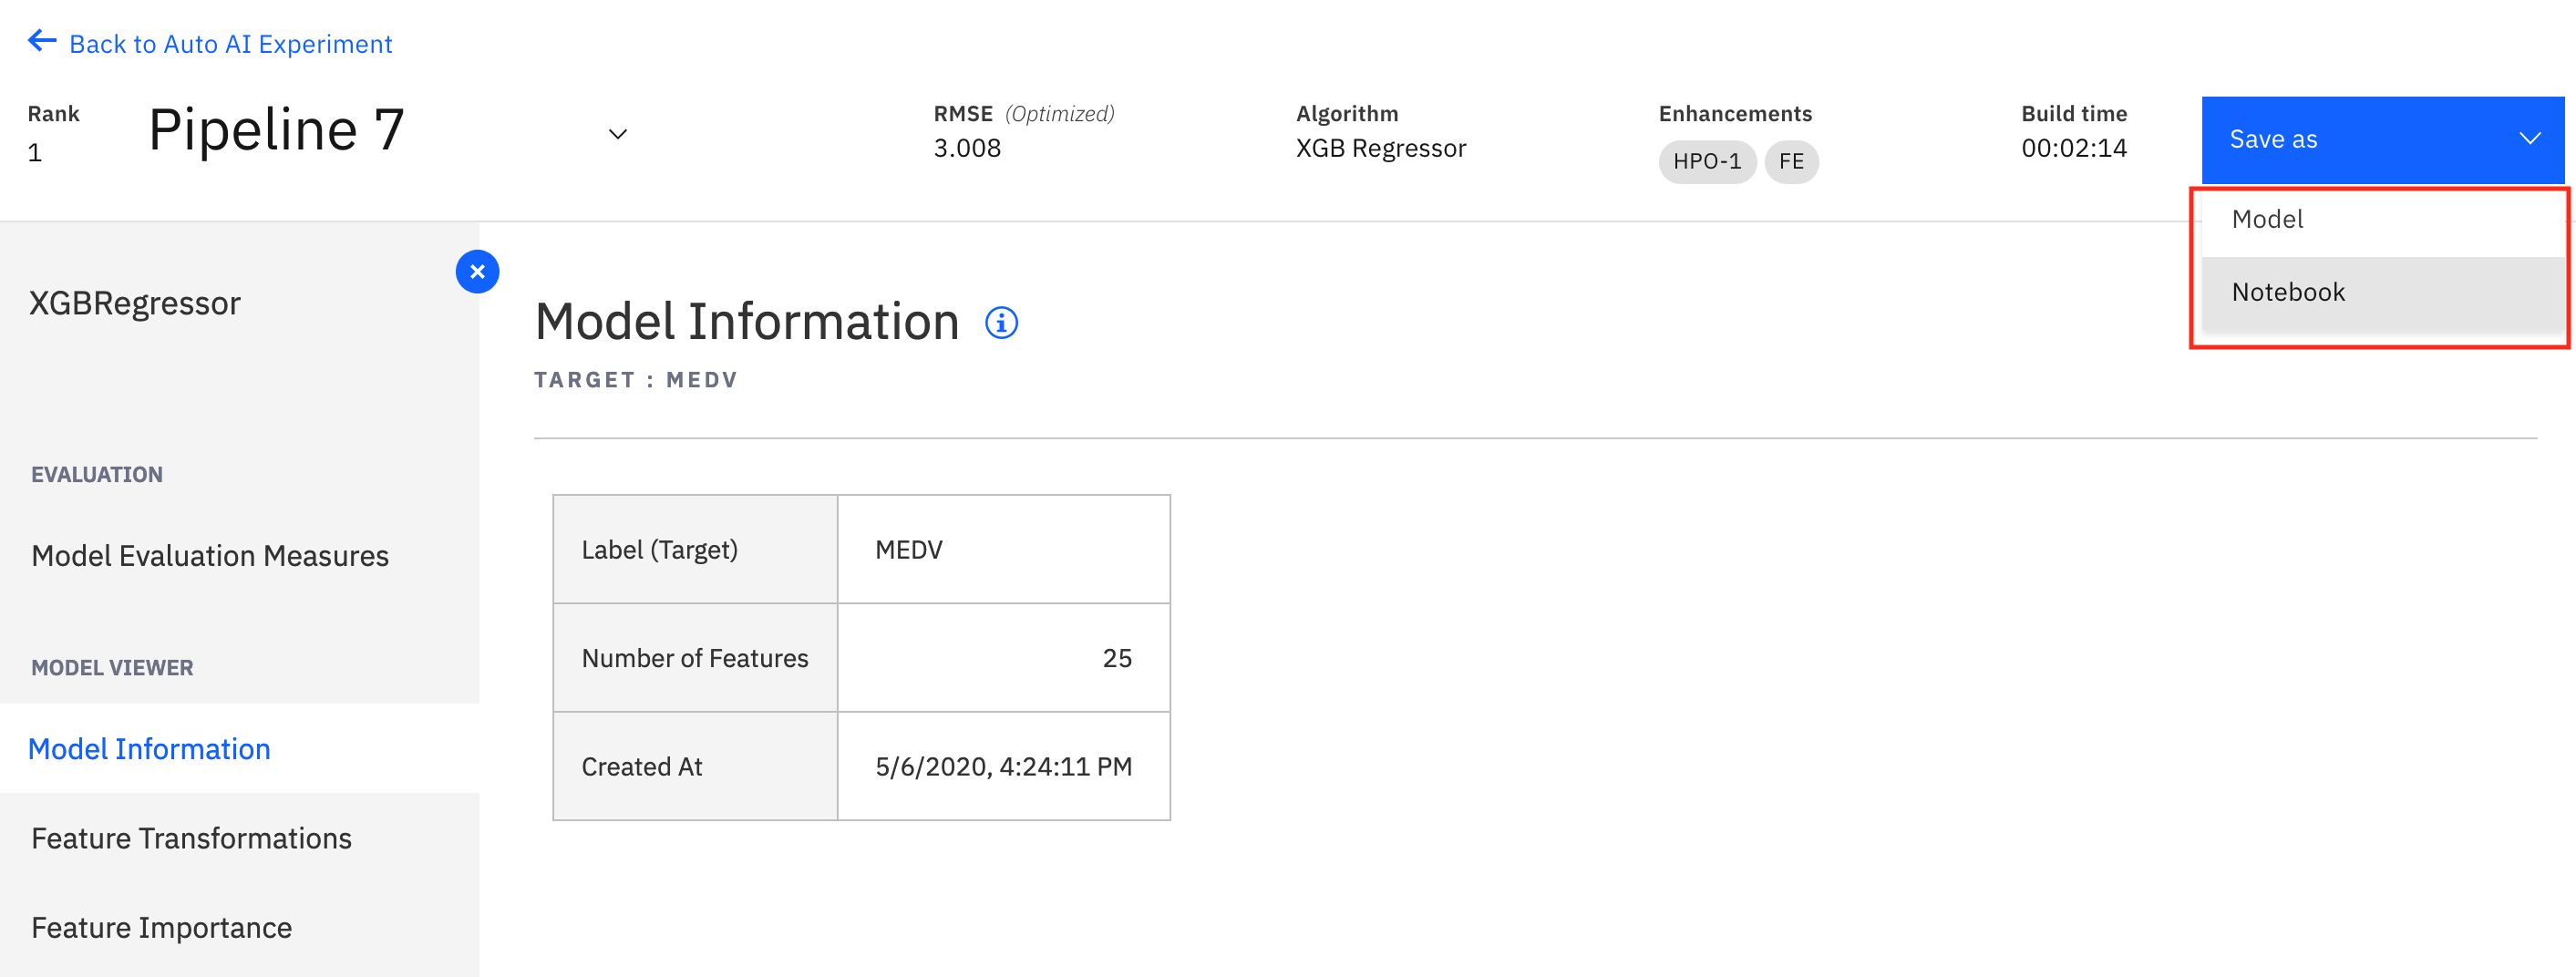
Once you select your final model pipeline. You can choose to Save it as a notebook or an ML model.
-
Choose your option and Click Save
-
Once your model is saved you will see a popup to View in Project or you can access the saved model from the Assets tab.
-
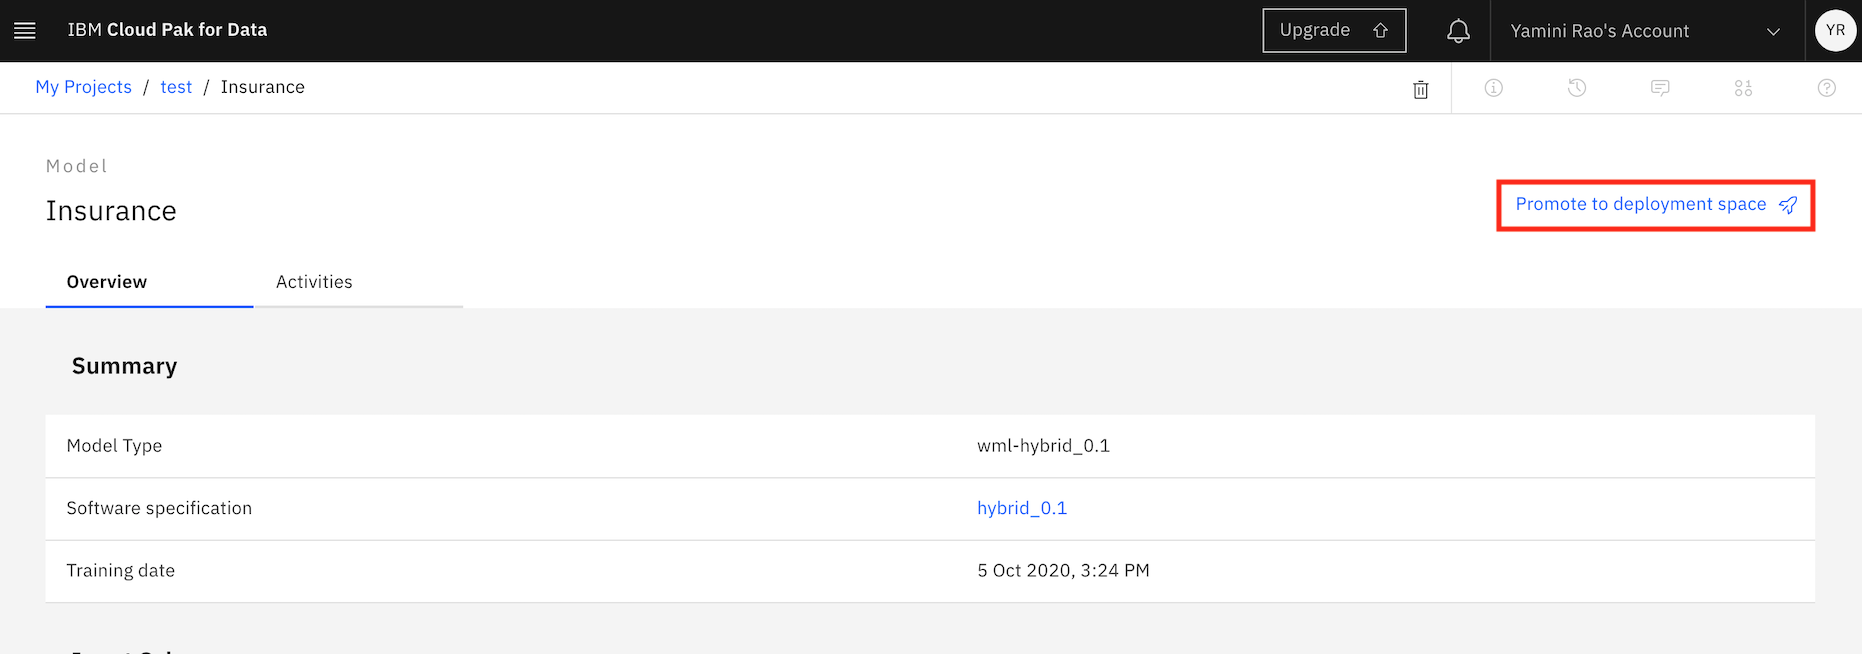
Click on the saved model and Promote to a deployment space
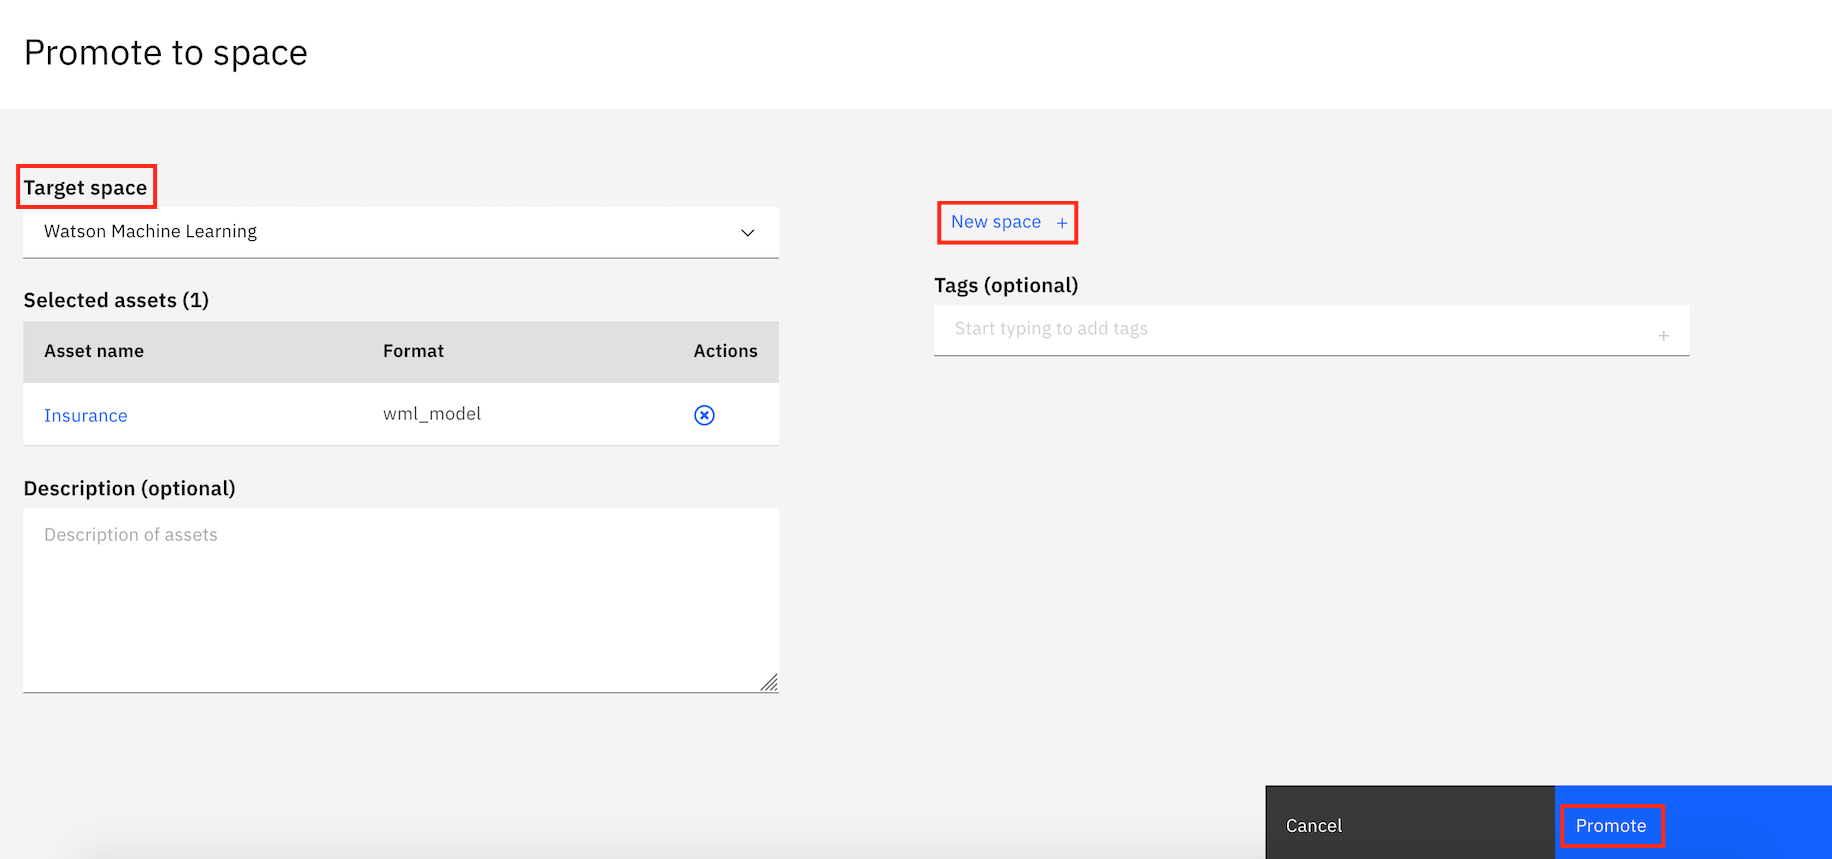
- Select the target deployment space you want to use for this deployment. If you do not have one yet, you can create a new space.
-
Access the deployment space from the left navigation pane.
-
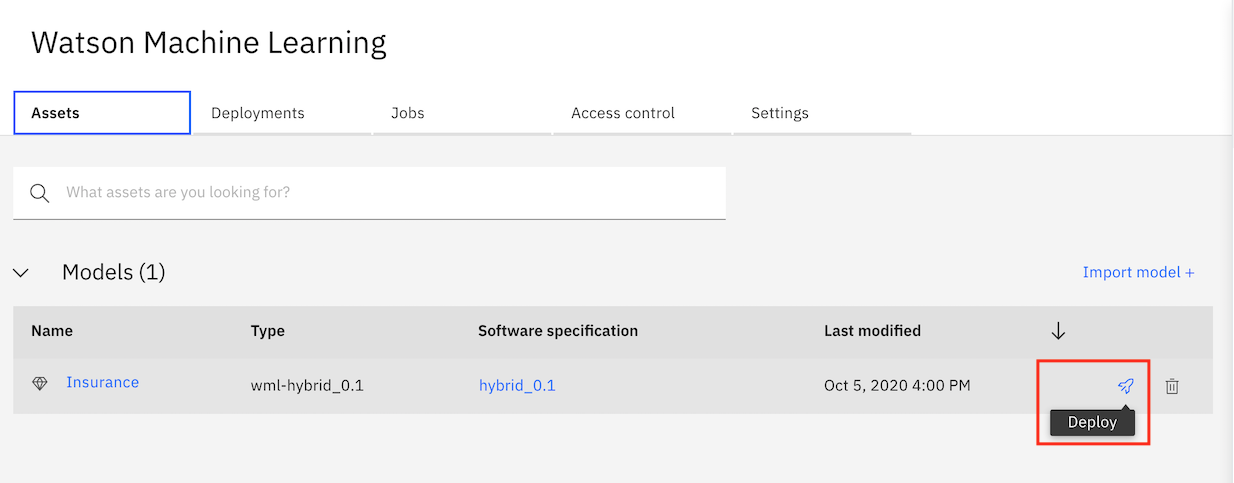
In your Deployment Space, Choose the model you want to deploy from the Assets tab and click the deploy icon as shown
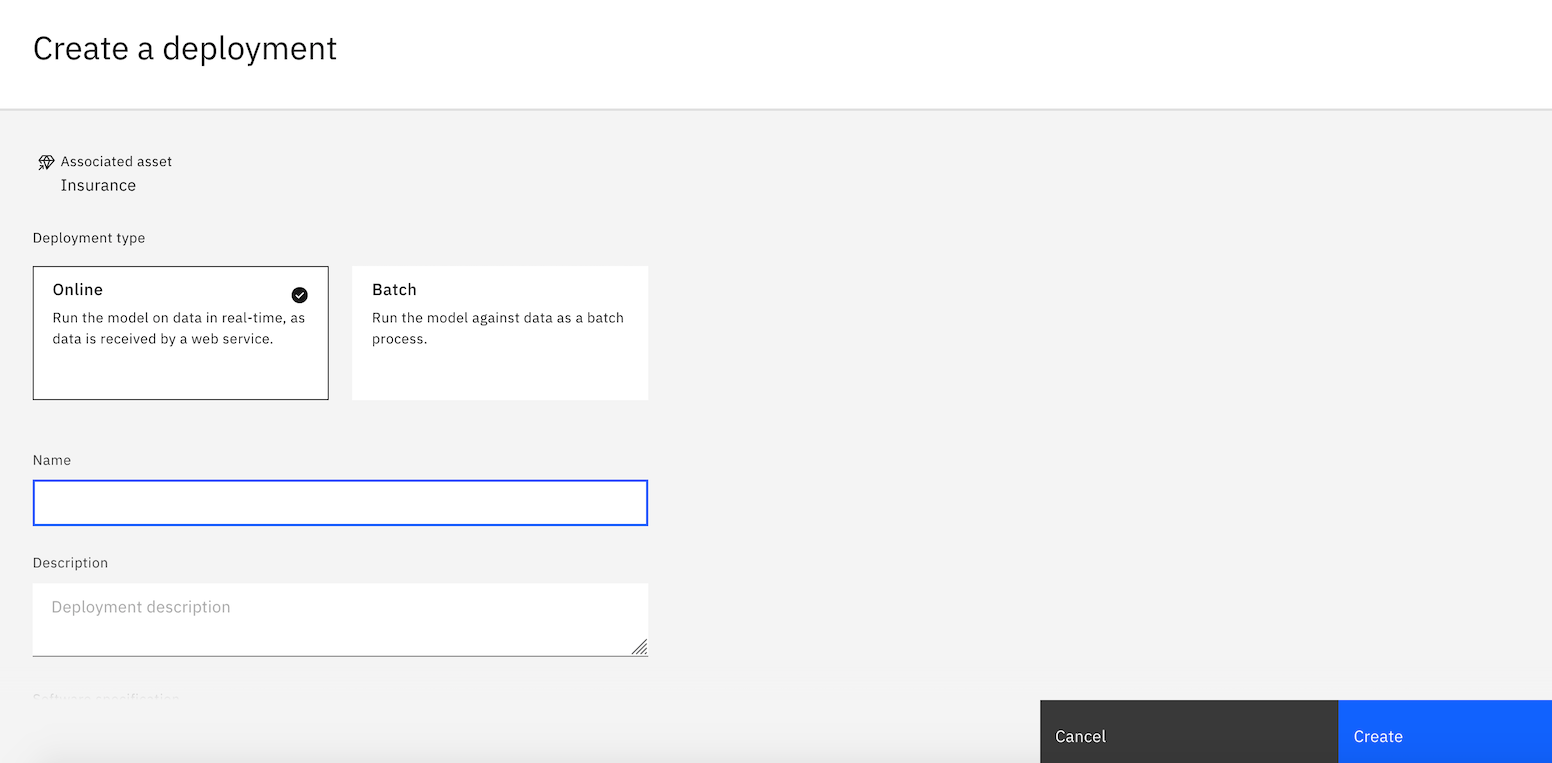
- Choose your Deployment type and create your Deployment.
Once your model is successuly deployed, you can access the API reference to make API calls or Test your model by providing input using a form or in a JSON format


