Fancy Warp Pack Template
Resource pack template for my Fancy Warp Menu mod
How to Create Your Own Pack
- Create a new repository using the button above and checkout to your IDE. Alternatively, you can download this template using the
<> Codebutton above. - Choose a Resource Pack Template
Custom Layout Pack Template
Use this template to create a custom layout with custom button positions and/or button textures.
- The template is located in
Resource Packs/Custom Layout Pack. This folder contains the folders and files you'll need to create your pack. - Set up your text editor to use the layout.schema.json schema to provide hints and autocomplete. Here are some links to instructions for common text editors:
If you don't have any of these text editors, you can look at the contents of `layout.schema.json` or see [layout.json](Resource%20Packs/Custom%20Layout%20Pack/assets/fancywarpmenu/data/layout.json) for an example. - Edit the options in layout.json to your liking.
- Add your textures at the texture paths you configured above.
- Change the pack description in
pack.mcmetaand the name of theCustom Layout Packfolder to your liking.
Translation Test Pack Template
Use this template to check how your translations appear in the mod.
- The template is located in
Resource Packs/Translation Test Pack. This folder contains the folders and files you'll need to create your pack. - Go to the Crowdin project and open the translation editor.
- Click the
≡icon in the top left. Then clickDownloadto download your translations. - Copy the downloaded file to
Translation Test Pack/assets/fancywarpmenu/lang - Copy the
Translation Test Packfolder to your Minecraft resource packs folder and apply the resource pack. - Change your Minecraft language to the language you are working on in Crowdin
- Your translations should now show in the Fancy Warp Menu. Check that they appear correctly.
Testing Your Resource Pack
- Enable the developer mode in the mod's settings at
Fancy Warp Menu > Settings Button (bottom right) > Developer Settings > Enable Developer Features. - Enable the
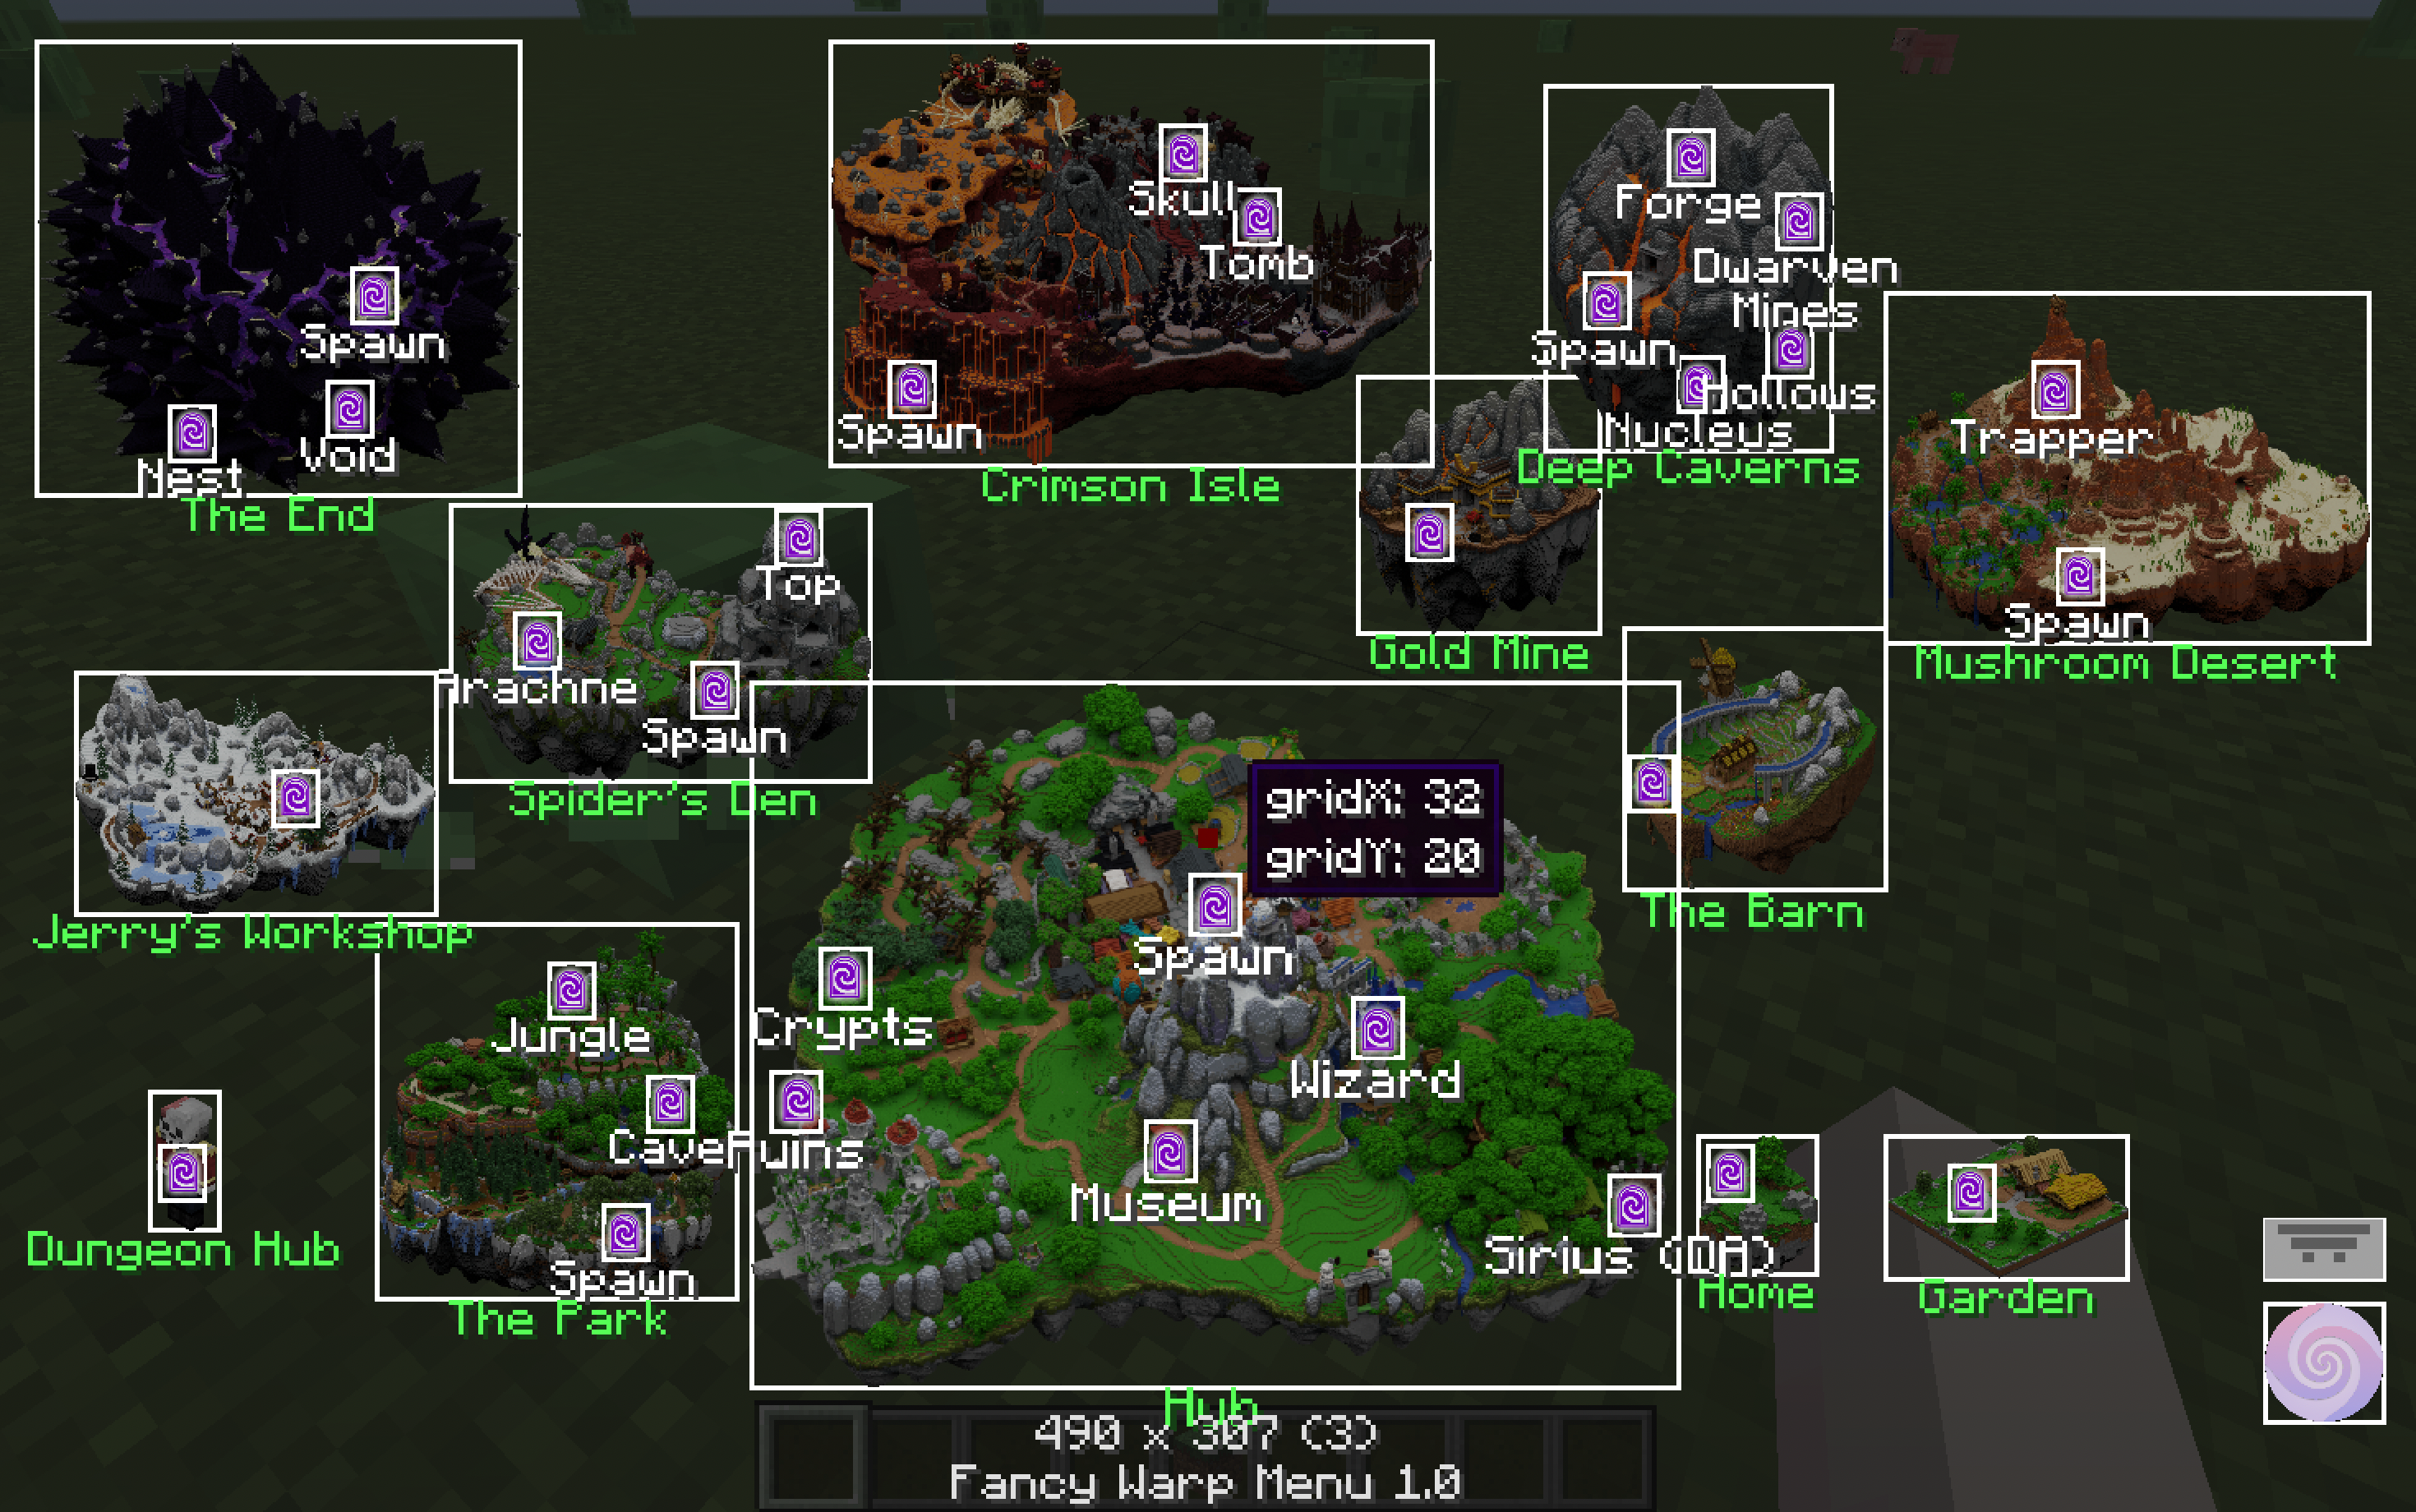
Show Debug OverlayandDraw Button Borderssettings in the Developer Settings section. These add borders around the buttons and a text box by your cursor showing the grid points your mouse is hovering over. These will help you position your textures. You cna toggle the debug overlay by pressingTABin the Fancy Warp Menu and toggle the button borders by pressingB. - Go on SkyBlock or enable the
Skip SkyBlock Checkssetting in the mod and go to a single player world. - Copy your resource pack folder (e.g.
Custom Layout Pack) to Minecraft's resource pack folder. - Apply your resource pack following the same process for applying a regular Minecraft resource pack.
- Open the Fancy Warp Menu (If you're in single player you'll need to use the hotkey). You should now see your custom layout in the Fancy Warp Menu.
- Check if your textures have loaded and are displayed correctly. If they didn't load, close the warp menu and there should be a message in chat telling you what went wrong.
- Edit the files in your resource pack as required.
- Press the
Rkey to reloadlayout.jsonorSHIFT + Rto reloadlayout.jsonand textures. The game will freeze for a few seconds as the textures load. - Check the results and repeat the process until you are satisfied.
 A screenshot of the Fancy Warp Menu Debug Overlay with button borders enabled