Many people struggle with their memory as technology take over their day to day lives. Our mission is to improve your memory by making a TODO-app that hides your reminders. Don't forget important reminders, let your app forget for you. By using incentives and known methods for improving ones memory, we aim to combine the effects of mind training apps with the practicality of TODO-apps.
- You will need the Expo to run this project:
To get started scan the QR-code with your Expo app
Or go to the following link: https://expo.io/@skugge/it2810-webutvikling-h18-prosjekt-3-gruppe--57
Loading directly from Expo only works on Android devices, to get it running on iOS do the following:
- Install expo-cli
foo@bar:~$ npm install -g expo-cli- Clone the project
foo@bar:~$ git clone https://github.com/IT2810/it2810-webutvikling-h18-prosjekt-3-gruppe--57.git- Run npm install (in project directory)
foo@it2810-webutvikling-h18-prosjekt-3-gruppe--57:~$ npm install- Run expo-cli
foo@it2810-webutvikling-h18-prosjekt-3-gruppe--57:~$ expo start- Scan QR code with the Expo app
We require permissions for the following:
- Camera - For acceess to camera
- Files - For saving images to device
- Notifications - For giving you notifications when reminder is unlocked
- Location - For displaying location hint, and mapping completed reminders
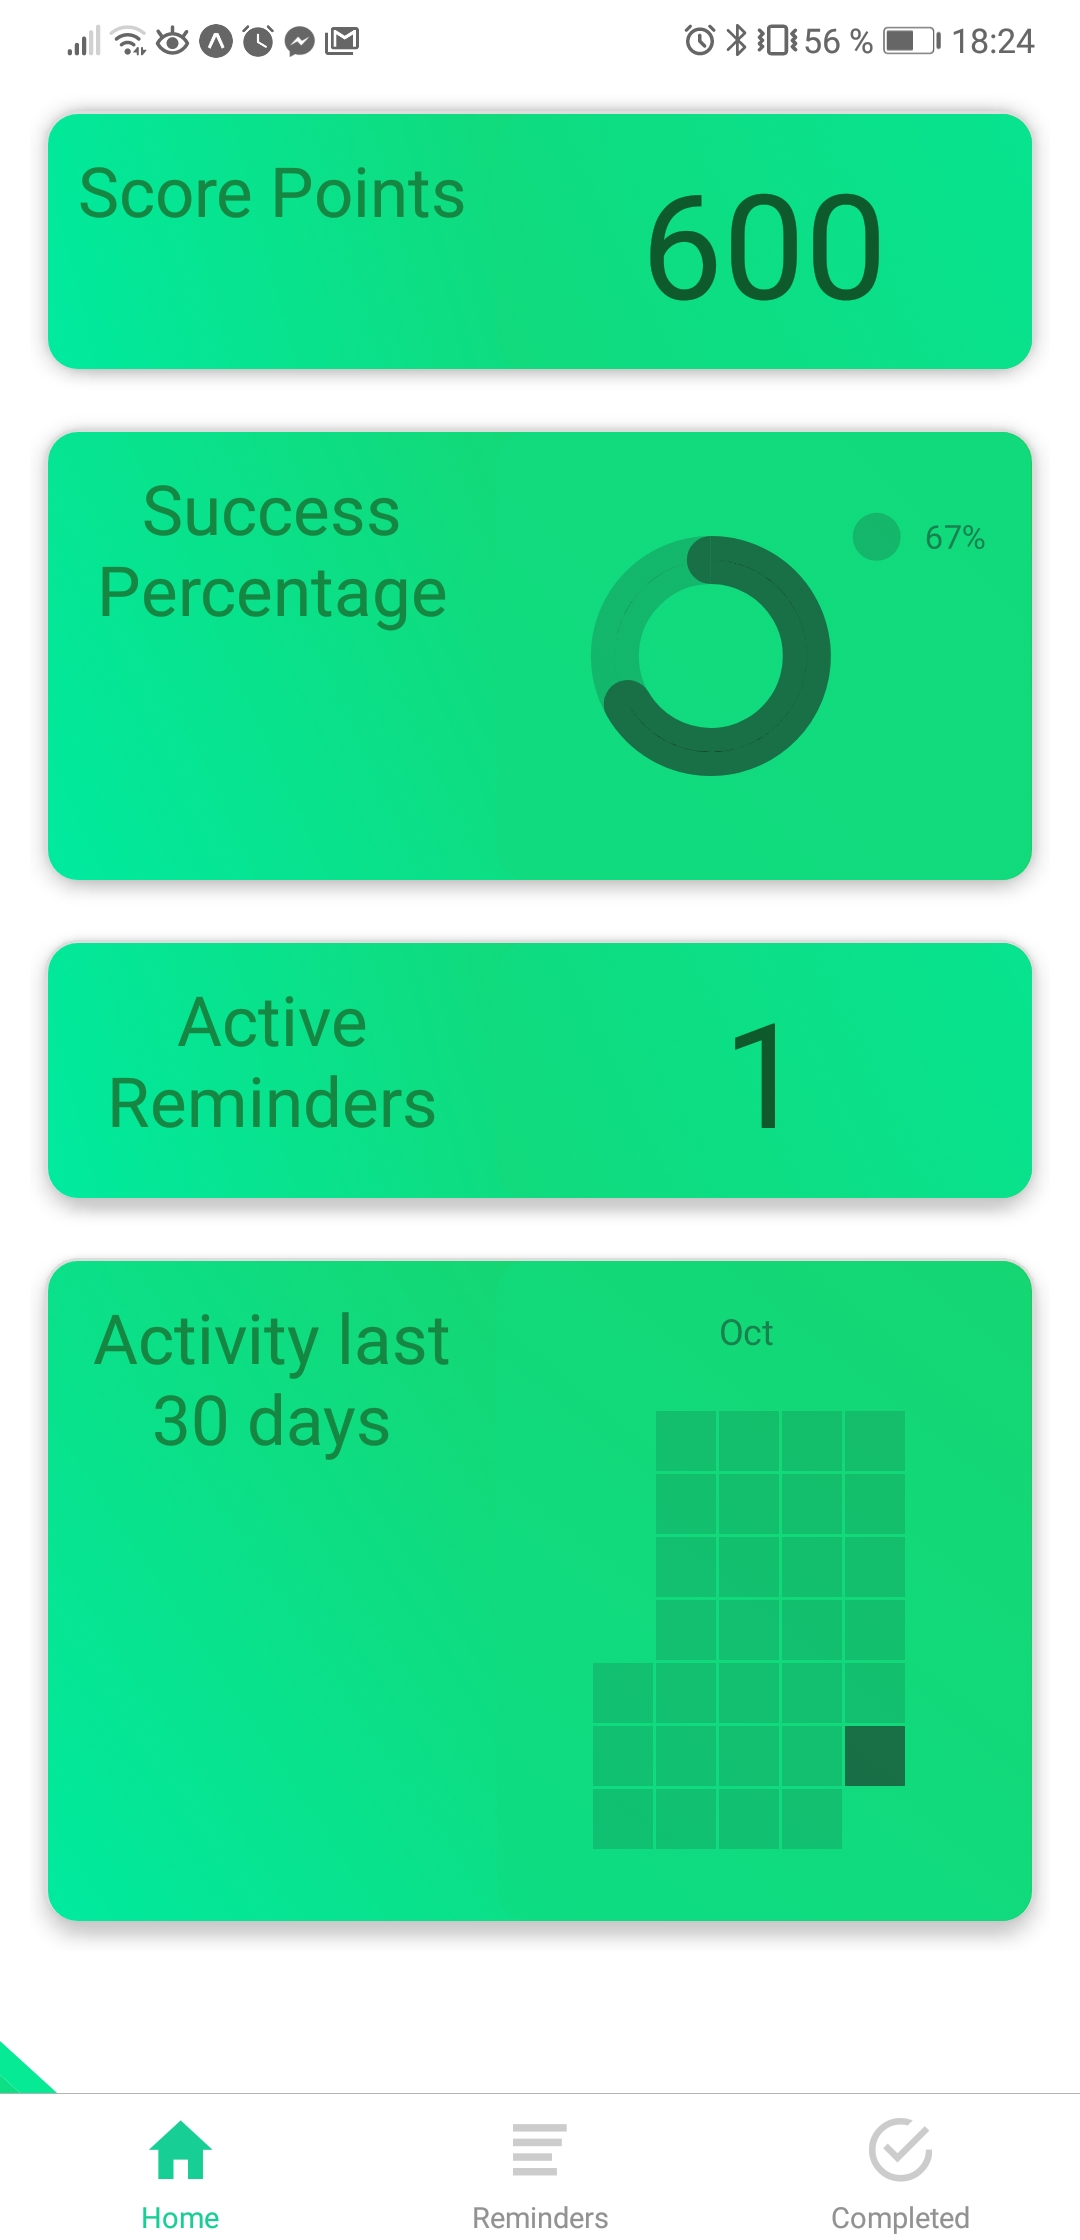
The homescreen keeps you up to date on how well you're doing. It shows you a cummulative score, number of active reminders, success percentage, as well as monthly activity.
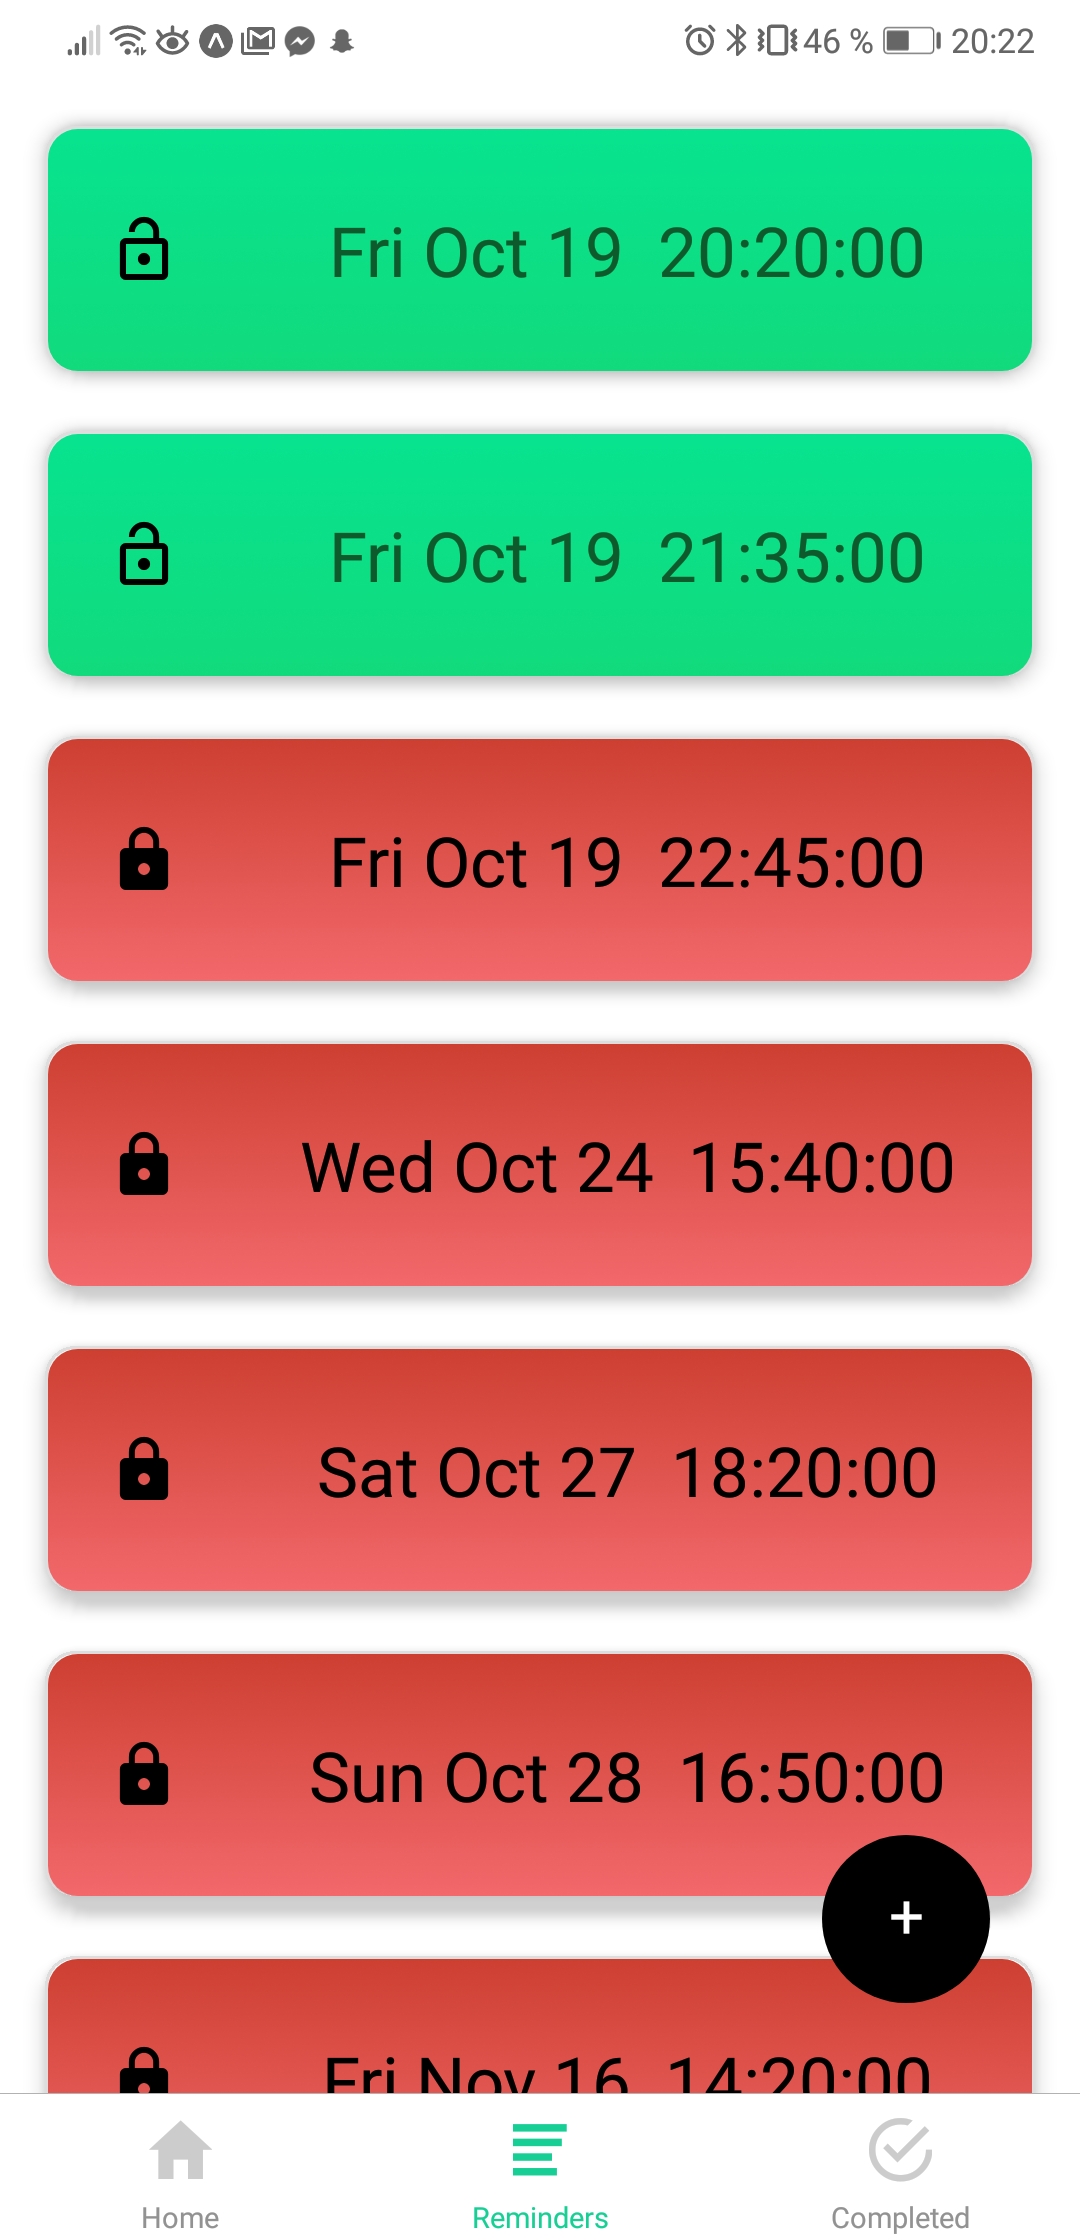
The reminder-tab displays all active reminders sorted by date. Unlocked reminders are green, locked reminders are red. Activating a locked reminder will result in a penalty. Pressing a reminder will open the inspect-modal where you can make your guess and use hints(if necessary). Pressing the button will open a modal for creating a new reminder.
The completed-tab shows all completed reminders, successful reminders are green, failed reminders are red. By pressing the button you will be able to see every reminder plotted on a map.
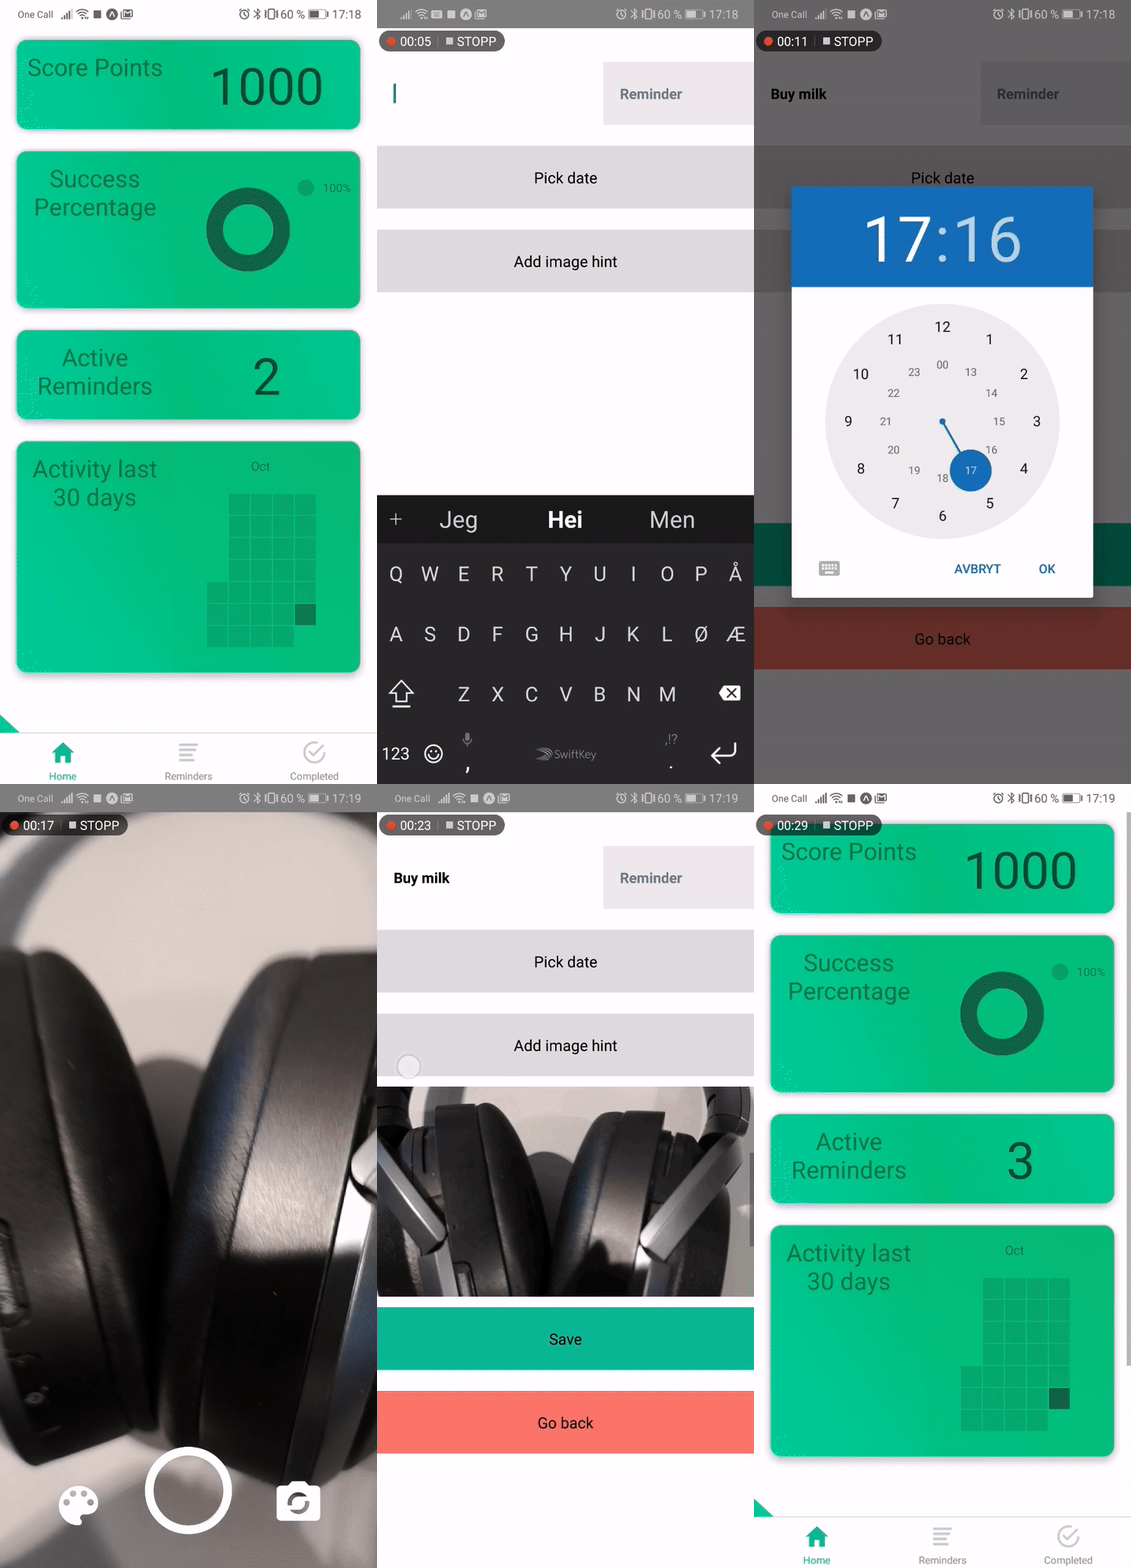
To create a reminder go to reminders-tab and press the black button. Then press the reminder-field and type what you want to remember. Press 'pick date', select a date from the calendar and time from the clock. (Optional) If you want a image hint, press 'Add image hint' and press the circle to take a picture. You can change reminder, date, and image as much as you want, when pressing save the latest values will be saved.
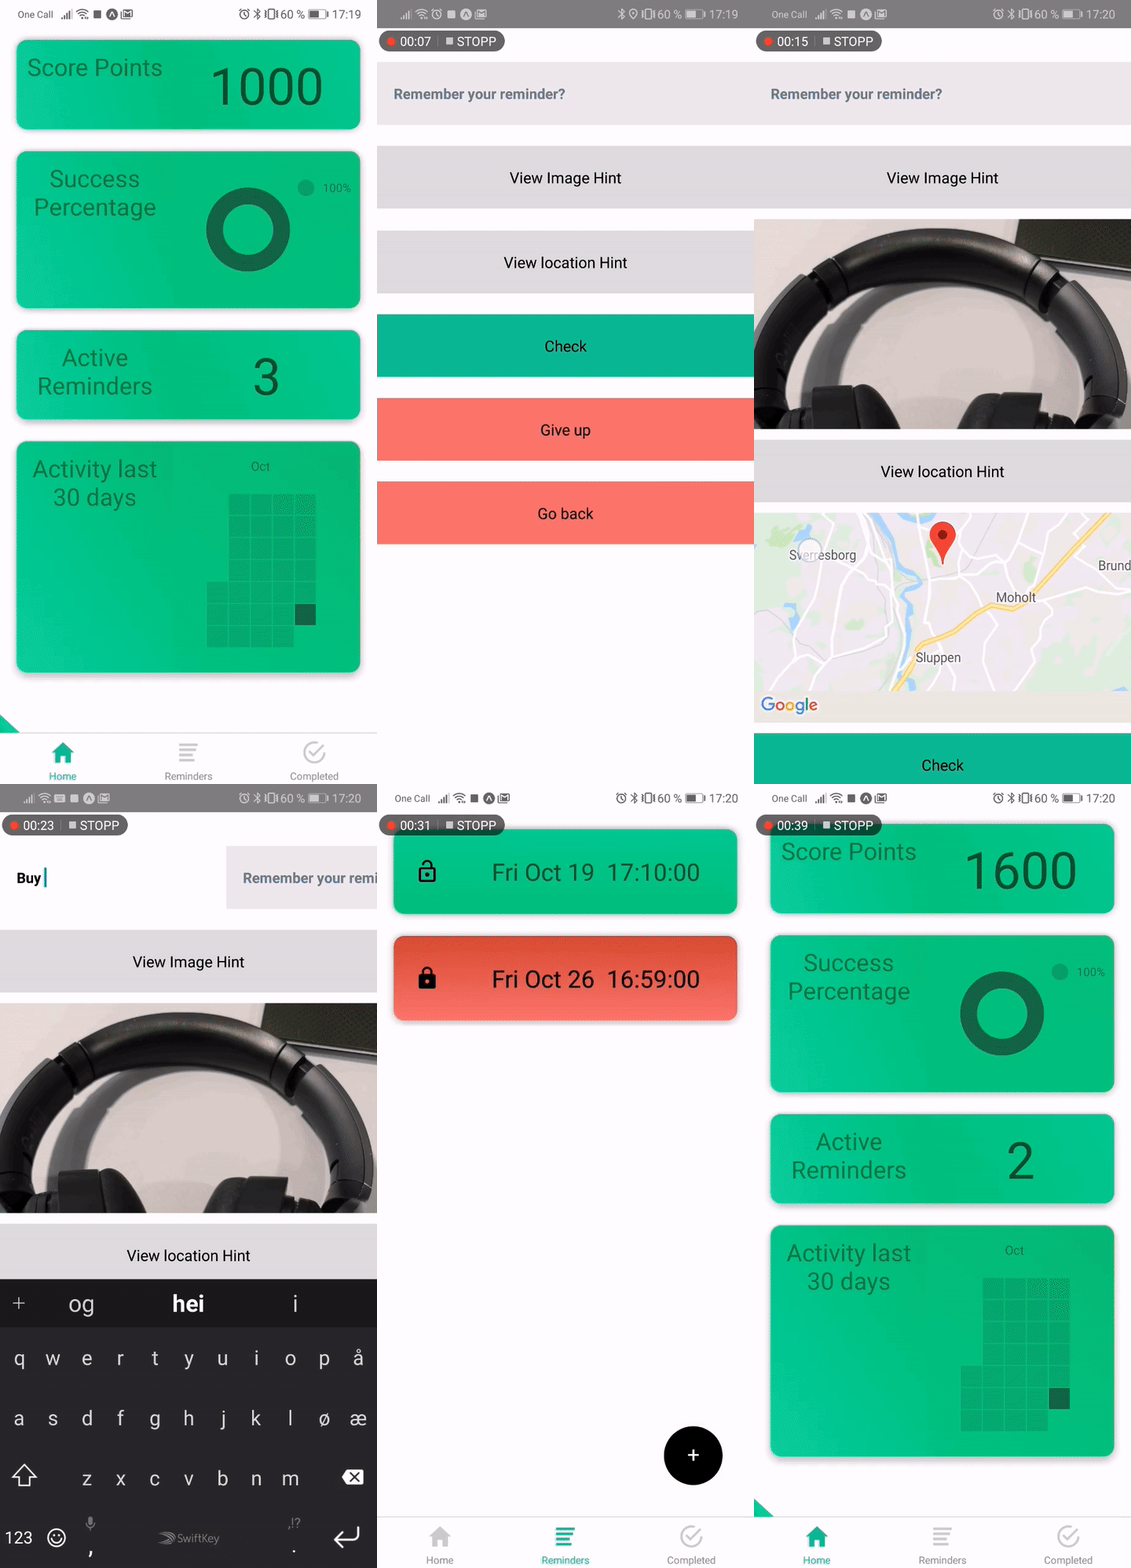
To check if you remember you reminder go to reminders-tab and press the reminder you want. If the reminder is locked an overlay will pop up, by continuing you will lose 500 points. Once inside, press the reminder-field and type in your guess. If you need help you can view a image-hint and/or a location-hint, both of these will affect your score. Check your guess by pressing 'check', incorrect attempts will affect your score.
The project is split into following directories
componentsContains utility classes likeUtility.js,Score.js,Cam.js, andStorage.js
as well as modals.screensHas all the main screensassetsFonts and imagesnavigationContains navigation filesconstantsFor constants such as window dimensions and main colors.stylesContains styles for all components.__tests__Contains all of the tests.
-
AsyncStorage
AsyncStorage is a persistent storage system in React Native that provide the ability to store data asynchronously. This means data can be recovered between sessions. We used an abstraction on top of asyncStorage to put all logic towards storage in one place, this is located in
components/Storage.js. When the user starts the app for the first time a user-object is created, this contains a score, and arrays of reminder-objects.{ "id": "9ef14208-3446-4fca-bbd9-d891b9b0c7aa", "score": 1000, "reminders": [ ], "successful": [ ], "failed": [ ], }Reminder-objects are created by the user.
getItemandsetItemare abstracted functions which are used by the other functions incomponents/Storage.jsto store and retrieve these objects. The other functions simply manipulate the objects.{ "id": "42f8198b-56c0-4ded-90ac-e07b6b79f077", "reminder": "Buy milk", "attempts": 0, "date": "Fri Oct 19 14:30:00 ", "dateMilliseconds": 1539952200000, "img": "file:///storage/emulated/0/DCIM/fe110000-7ba2-470a-8ae2-2d2112c0b6b5.jpg", "location": { "latitude": 63.4154103, "latitudeDelta": 0.04, "longitude": 10.4047432, "longitudeDelta": 0.05, }, "locked": false, "imgHint": false, "mapHint": false, "notification": null, } -
Expo
-
Camera
Expo provides a camera component which renders a preview for the device's front and rear camera. Abstracted in
Cam.jswhich adds styling and callback funtions.
   snap = async () => {
     if (this.camera) {
         const { uri } = await this.camera.takePictureAsync({skipProcessing:true});
         return uri;
     }
   };
   <View style={{ flex: 1 }}>
       <Camera style={styles.container} type={this.state.type} ref={ref => this.camera = ref}
         whiteBalance=  {this.state.mode}>
                     <View style={styles.content}>
                         <MaterialCommunityIcons
                             onPress={() => {
                                 this.setState({
                                     mode: whiteList[index++ % whiteList.length]
                                 });
                             }}
                             name="palette" style={{ color: 'white', fontWeight: 'bold', fontSize: 50 }}>
                         </MaterialCommunityIcons>
                         <MaterialCommunityIcons
                             onPress={() => {
                                 this.snap().then((res) => {
                                     this.props.setPicture(res);
                                     this.props.hide(); //return after taking picture
                                 })
                             }}
                             name="circle-outline"
                             style={styles.mainButton}>
                         </MaterialCommunityIcons>
                         <MaterialCommunityIcons
                             onPress={() => {
                                 this.setState({
                                     type: this.state.type === Camera.Constants.Type.back ?
                                         Camera.Constants.Type.front :
                                         Camera.Constants.Type.back
                                 })
                             }}
                             name="camera-party-mode" style={styles.sideButtons}>
                         </MaterialCommunityIcons>
                     </View>
         </Camera>
    </View>
-
MediaLibrary
For creating assets from picture taken with camera and saving them in phone storage.
import {MediaLibrary} from 'expo';
const assetImg = await MediaLibrary.createAssetAsync(img.uri);
-
ImageManipulator
We used ImageManipulator to compress the images taken by the camera, we did this instead of compressing directly with the camera to shorten the time from the picture was taken to the camera closed.
import {ImageManipulator} from 'expo';
const img = await ImageManipulator.manipulate(uri, [], { compress: 0.2 });
-
Location
import {Location} from 'expo';
const location = await Location.getCurrentPositionAsync({ enableHighAccuracy: true });
-
MapView
We use MapView to dislay location hint, as well as mapping completed reminders.
import {MapView} from 'expo';
import {Marker} from 'react-native-maps';
<MapView
    style={{ flex: 1, width: layout.window.width, height: layout.window.height-10 }}
    region={this.state.reminders.length > 0 ? this.state.reminders[0].location : {
    latitude: 63.413, longitude: 10.406, latitudeDelta: 0, longitudeDelta: 0.4}}
    >
    {
      this.state.reminders.map(reminder => (
        reminder.location ?
        <Marker
          key={reminder.id}
          title={reminder.reminder}
          description={reminder.date}
          coordinate={reminder.location}
        /> : <View key={reminder.id}/>
      ))
     }
</MapView>
-
Notifications
 import {Notifications} from 'expo';
 const localNotification = {
         title: "Hello",
         body: "You have scheduled a reminder for " + date,
         ios: { sound: true },
         android: {
             sound: true,
             priority: "high", sticky: false, vibrate: true
         }
     };
 notificationID = await Notifications.scheduleLocalNotificationAsync(localNotification, { time: when });
-
For a complete list of all technologies used see sources
Our test where written in Jest as the task stated. We didn't start testing early enough so we ended up testing the most critical parts. We focused on testing the logical base which includes most of the Storage and Score functions, and not snapshots as we did not consider them as useful as the app was extensively tested manually in development. As some of the function in the logical base where depending on location and the camera solution these function were excluded. This could also have been tested by inserting mock-functions, but mocking the entire logic in the test just to gain coverage wouldn't make for good testing and as such would have been a waste of time. We endet at a 60% coverage. If we had abit more time we would have snapshot-tested the screens and state insert shallowrender-tested the components for detecting visual bugs.
To run the tests simply run the following command:
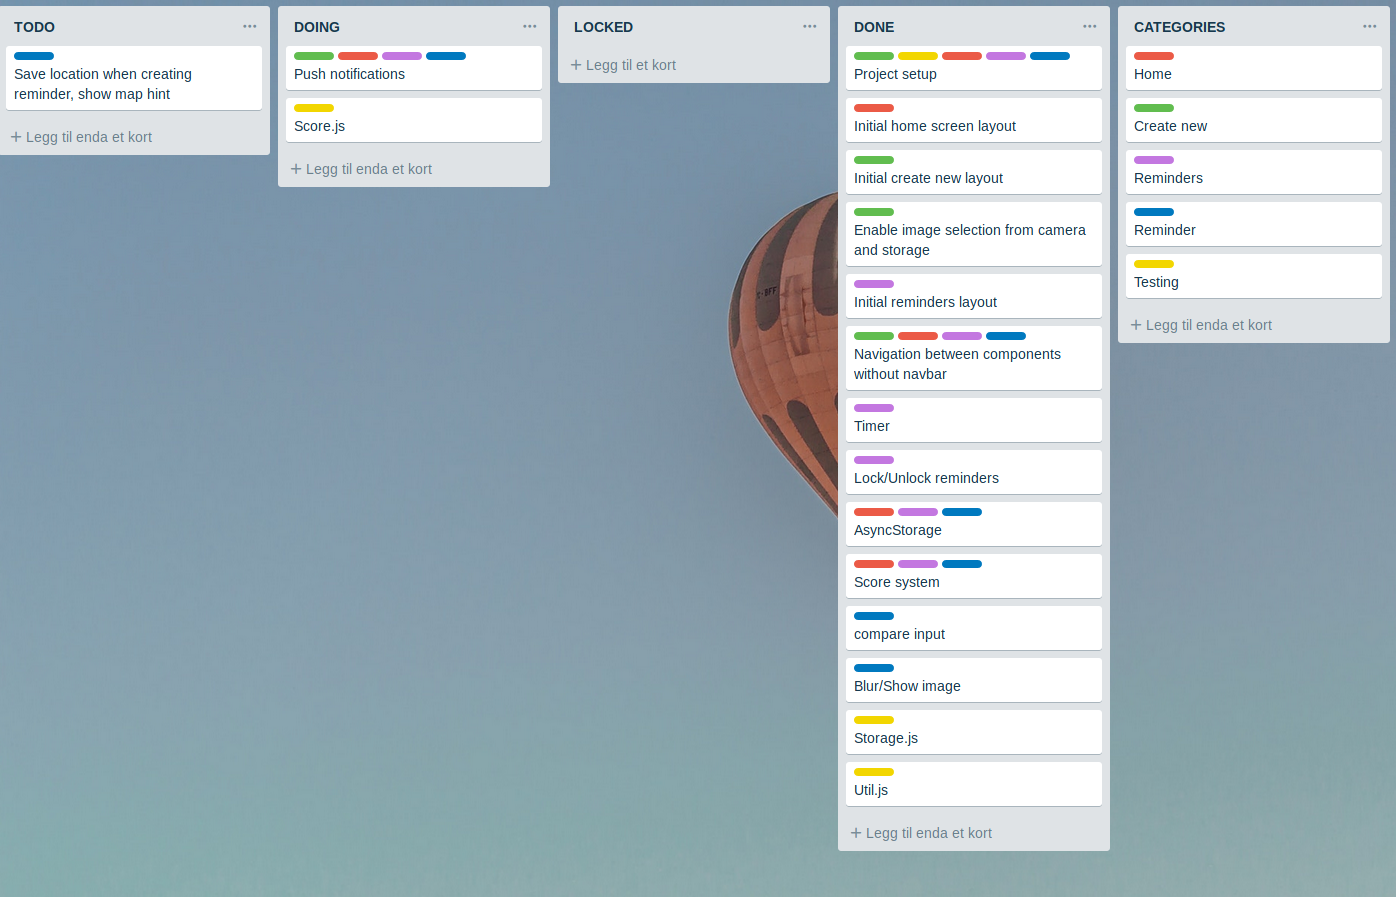
foo@it2810-webutvikling-h18-prosjekt-3-gruppe--57:~$ npm testWe used Github as our main platform during development. We decided early to decompose the project into issues and use these to define the workflow. As such we limited the total amount of issues as they were used more for guiding than anything else. We further decomposed the issues into smaller tasks that we added as we went in Trello. This made it easy to tell what was currently locked and what we could and should work on. We used two seperate branches early in development as the group members worked on separate parts of the project. As the project went on and the work converged we decieded to merge the two branch into the master branch as we by that time practically worked side by side.
On some devices the camera will only display a black screen, a workaround is to go back and then open the camera again. We have not been able to test on Apple devices during development and can therefore not guarantee that it will work as intended on these devices.


