| Details | |
|---|---|
| Target OS: | Ubuntu* 16.04 LTS |
| Programming Language: | C++* |
| Time to Complete: | 45 min |
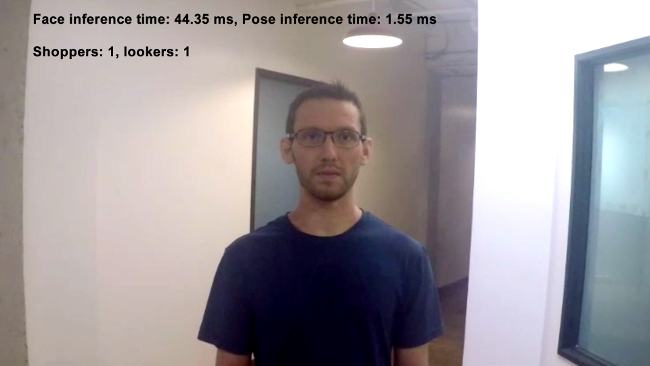
This shopper gaze monitor application is one of a series of reference implementations for Computer Vision (CV) using the OpenVINO™ toolkit. This application is designed for a retail shelf mounted camera system that counts the the number of passers-by that look toward the display vs. the number of people that pass by the display without looking. It is intended to provide real-world marketing statistics for in-store shelf-space advertising.
- 6th Generation Intel® Core™ processor with Intel® Iris® Pro graphics and Intel® HD Graphics
- Ubuntu* 16.04 LTS Note: You must be running kernel version 4.7+ to use this software. We recommend using a 4.14+ kernel to use this software. Run the following command to determine your kernel version:
uname -a
- OpenCL™ Runtime Package
- OpenVINO™ toolkit
Refer to https://software.intel.com/en-us/articles/OpenVINO-Install-Linux for more information about how to install and setup the OpenVINO™ toolkit.
You will need the OpenCL™ Runtime package if you plan to run inference on the GPU as shown by the instructions below. It is not mandatory for CPU inference.
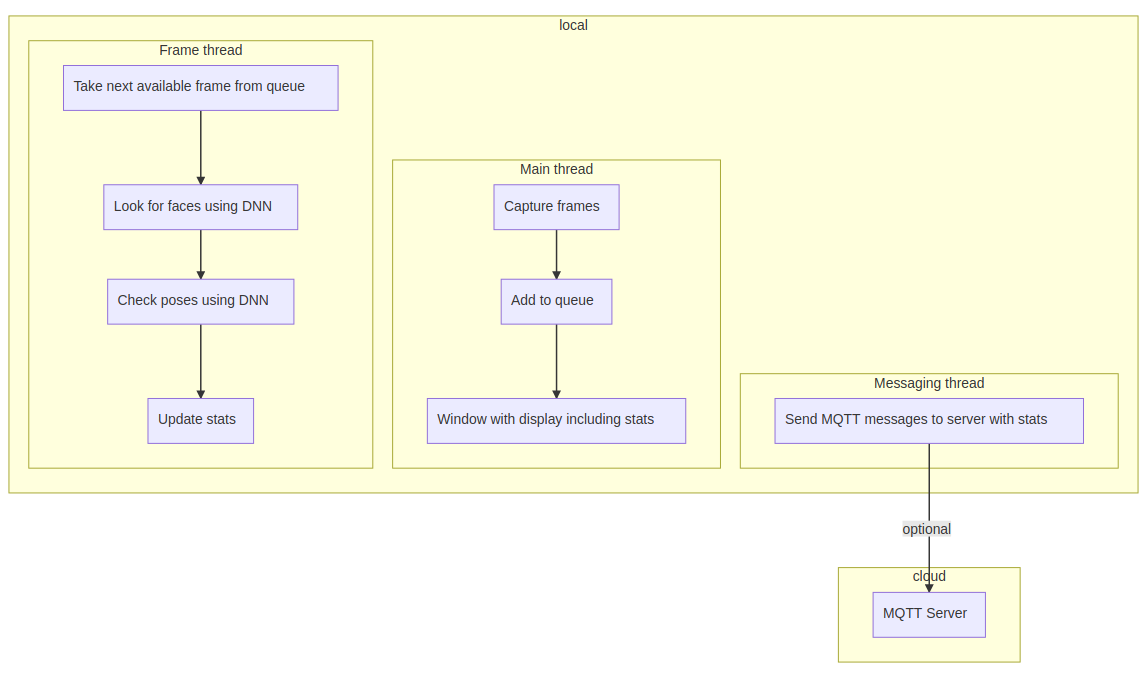
The application uses a video source, such as a camera, to grab frames, and then uses 2 different Deep Neural Networks (DNNs) to process the data. The first network looks for faces, and then if successful is counted as a "shopper"
A second neural network is then used to determine the head pose detection for each detected face. If the person's head is facing towards the camera, it is counted as a "looker".
The data can then optionally be sent to a MQTT machine to machine messaging server, as part of a retail data analytics system.
The DNN models used are Intel® optimized models that are part of the OpenVINO™ toolkit.
You can find them here:
- /opt/intel/computer_vision_sdk/deployment_tools/intel_models/face-detection-adas-0001
- /opt/intel/computer_vision_sdk/deployment_tools/intel_models/head-pose-estimation-adas-0001
The program creates three threads for concurrency:
- main thread that performs the video i/o
- worker thread that processes video frames using the deep neural networks
- worker thread that publishes any MQTT messages
You must configure the environment to use the OpenVINO™ toolkit one time per session by running the following command:
source /opt/intel/computer_vision_sdk/bin/setupvars.sh
Start by changing the current directory to wherever you have git cloned the application code. For example:
cd shopper-gaze-monitor-cpp
If you do not yet have a build directory create one:
mkdir build
Then change to that directory:
cd build
Now run the following commands:
cmake ..
make
Once the commands are finished, you should have built the monitor application executable.
To see a list of the various options:
./monitor -h
To run the application with the needed models using the webcam:
./monitor -m=/opt/intel/computer_vision_sdk/deployment_tools/intel_models/face-detection-adas-0001/FP32/face-detection-adas-0001.bin -c=/opt/intel/computer_vision_sdk/deployment_tools/intel_models/face-detection-adas-0001/FP32/face-detection-adas-0001.xml -pm=/opt/intel/computer_vision_sdk/deployment_tools/intel_models/head-pose-estimation-adas-0001/FP32/head-pose-estimation-adas-0001.bin -pc=/opt/intel/computer_vision_sdk/deployment_tools/intel_models/head-pose-estimation-adas-0001/FP32/head-pose-estimation-adas-0001.xml
This application can take advantage of the hardware acceleration in the OpenVINO toolkit by using the -b and -t parameters.
For example, to use the OpenVINO™ toolkit backend with the GPU in 32-bit mode:
./monitor -m=/opt/intel/computer_vision_sdk/deployment_tools/intel_models/face-detection-adas-0001/FP32/face-detection-adas-0001.bin -c=/opt/intel/computer_vision_sdk/deployment_tools/intel_models/face-detection-adas-0001/FP32/face-detection-adas-0001.xml -pm=/opt/intel/computer_vision_sdk/deployment_tools/intel_models/head-pose-estimation-adas-0001/FP32/head-pose-estimation-adas-0001.bin -pc=/opt/intel/computer_vision_sdk/deployment_tools/intel_models/head-pose-estimation-adas-0001/FP32/head-pose-estimation-adas-0001.xml -b=2 -t=1
To run the code using 16-bit floats, you have to both set the -t flag to use the GPU in 16-bit mode, as well as use the FP16 version of the Intel® models:
./monitor -m=/opt/intel/computer_vision_sdk/deployment_tools/intel_models/face-detection-adas-0001/FP16/face-detection-adas-0001.bin -c=/opt/intel/computer_vision_sdk/deployment_tools/intel_models/face-detection-adas-0001/FP16/face-detection-adas-0001.xml -pm=/opt/intel/computer_vision_sdk/deployment_tools/intel_models/head-pose-estimation-adas-0001/FP16/head-pose-estimation-adas-0001.bin -pc=/opt/intel/computer_vision_sdk/deployment_tools/intel_models/head-pose-estimation-adas-0001/FP16/head-pose-estimation-adas-0001.xml -b=2 -t=2
There are several videos available to use as sample videos to show the capabilities of this application. You can download them by running these commands from the shopper-gaze-monitor directory:
mkdir resources
cd resources
wget https://github.com/intel-iot-devkit/sample-videos/raw/master/face-demographics-walking-and-pause.mp4
wget https://github.com/intel-iot-devkit/sample-videos/raw/master/face-demographics-walking.mp4
cd ..
To then execute the code using one of these sample videos, run the following commands from the shopper-gaze-monitor directory:
cd build
./monitor -m=/opt/intel/computer_vision_sdk/deployment_tools/intel_models/face-detection-adas-0001/FP32/face-detection-adas-0001.bin -c=/opt/intel/computer_vision_sdk/deployment_tools/intel_models/face-detection-adas-0001/FP32/face-detection-adas-0001.xml -pm=/opt/intel/computer_vision_sdk/deployment_tools/intel_models/head-pose-estimation-adas-0001/FP32/head-pose-estimation-adas-0001.bin -pc=/opt/intel/computer_vision_sdk/deployment_tools/intel_models/head-pose-estimation-adas-0001/FP32/head-pose-estimation-adas-0001.xml -i=../resources/face-demographics-walking-and-pause.mp4
If you wish to use a MQTT server to publish data, you should set the following environment variables before running the program:
export MQTT_SERVER=localhost:1883
export MQTT_CLIENT_ID=cvservice
Change the MQTT_SERVER to a value that matches the MQTT server you are connecting to.
You should change the MQTT_CLIENT_ID to a unique value for each monitoring station, so you can track the data for individual locations. For example:
export MQTT_CLIENT_ID=shelf1337

