


Run YOLOv10 object detection models.
We strongly recommend using a virtual environment. If you're not sure where to start, we offer a tutorial here.
pip install ikomiafrom ikomia.dataprocess.workflow import Workflow
from ikomia.utils.displayIO import display
# Init your workflow
wf = Workflow()
# Add algorithm
algo = wf.add_task(name="infer_yolo_v10", auto_connect=True)
# Run on your image
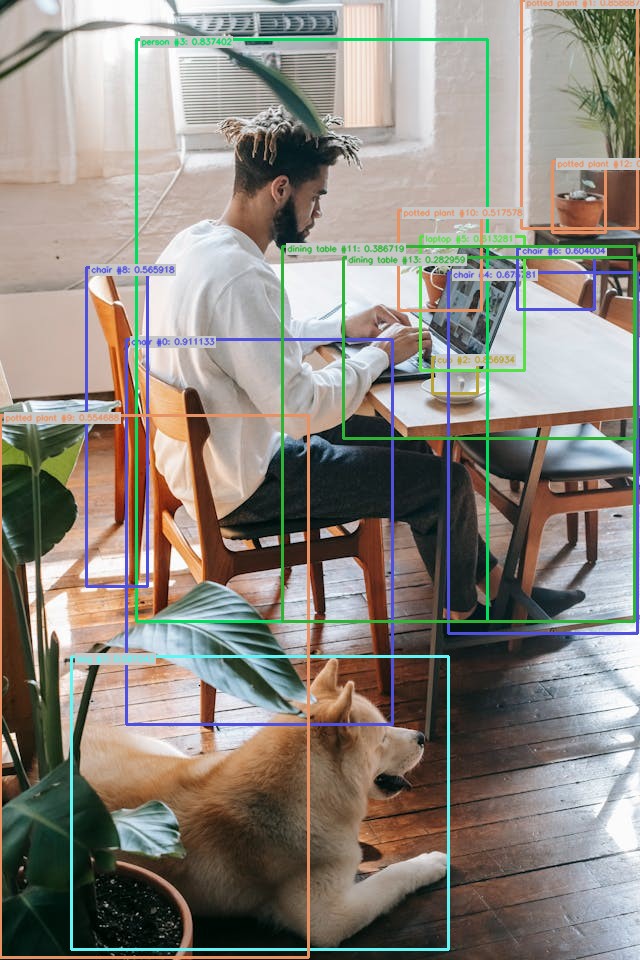
wf.run_on(url="https://images.pexels.com/photos/5749076/pexels-photo-5749076.jpeg?cs=srgb&dl=pexels-zen-chung-5749076.jpg&fm=jpg&w=640&h=960")
# Inpect your result
display(algo.get_image_with_graphics())Ikomia Studio offers a friendly UI with the same features as the API.
- If you haven't started using Ikomia Studio yet, download and install it from this page.
- For additional guidance on getting started with Ikomia Studio, check out this blog post.
- model_name (str) - default 'yolov10m': Name of the YOLOv10 pre-trained model. Other model available:
- yolov10n
- yolov10s
- yolov10b
- yolov10l
- yolov10x
- input_size (int) - default '640': Size of the input image.
- conf_thres (float) default '0.25': Box threshold for the prediction [0,1].
- iou_thres (float) - default '0.7': Intersection over Union, degree of overlap between two boxes [0,1].
- cuda (bool): If True, CUDA-based inference (GPU). If False, run on CPU.
- model_weight_file (str, optional): Path to model weights file .pt.
Parameters should be in strings format when added to the dictionary.
from ikomia.dataprocess.workflow import Workflow
from ikomia.utils.displayIO import display

# Init your workflow
wf = Workflow()

# Add algorithm
algo = wf.add_task(name="infer_yolo_v10", auto_connect=True)

algo.set_parameters({
    "model_name": "yolov10m",
    "conf_thres": "0.5",
    "input_size": "640",
    "iou_thres": "0.5",
    "cuda": "True"
})

# Run on your image
wf.run_on(url="https://images.pexels.com/photos/5749076/pexels-photo-5749076.jpeg?cs=srgb&dl=pexels-zen-chung-5749076.jpg&fm=jpg&w=640&h=960")

# Inpect your result
display(algo.get_image_with_graphics())Every algorithm produces specific outputs, yet they can be explored them the same way using the Ikomia API. For a more in-depth understanding of managing algorithm outputs, please refer to the documentation.
from ikomia.dataprocess.workflow import Workflow

# Init your workflow
wf = Workflow()

# Add algorithm
algo = wf.add_task(name="infer_yolo_v10", auto_connect=True)

# Run on your image
wf.run_on(url="https://images.pexels.com/photos/5749076/pexels-photo-5749076.jpeg?cs=srgb&dl=pexels-zen-chung-5749076.jpg&fm=jpg&w=640&h=960")

# Iterate over outputs
for output in algo.get_outputs():
    # Print information
    print(output)
    # Export it to JSON
    output.to_json()