This is UE4 wrapper for Google's Cloud Text-to-Speech and syncronous Cloud Speech-to-Text speech recognition.
Plugin was battle tested in several commercial simulator projects. It is small, lean and simple to use.
- UE4 Google Speech Kit
- Table of contents
- Engine preparation
- Cloud preparation
- Speech synthesis
- Speech recognition
- Utilities
- Supported platforms
- Migration guide
- Links
To make microphone work, you need to add following lines to DefaultEngine.ini of the project.
[Voice]
bEnabled=true
To not loose pauses in between words, you probably want to check silence detection treshold voice.SilenceDetectionThreshold, value 0.01 is good.
This also goes to DefaultEngine.ini.
[SystemSettings]
voice.SilenceDetectionThreshold=0.01
Starting from Engine version 4.25 also put
voice.MicNoiseGateThreshold=0.01
Another voice related variables worth playing with
voice.MicNoiseGateThreshold
voice.MicInputGain
voice.MicStereoBias
voice.MicNoiseAttackTime
voice.MicNoiseReleaseTime
voice.MicStereoBias
voice.SilenceDetectionAttackTime
voice.SilenceDetectionReleaseTime
To find available settings type voice. in editor console, and autocompletion widget will pop up.
Console variables can be modified in runtime like this
To debug your microphone input you can convert output sound buffer to unreal sound wave and play it.
Above values may differ depending on actual microphone characteristics.
- Go to google cloud and create payment account.
- Enable Cloud Speech-to-Text API and Cloud Text-to-Speech API.
- Create credentials to access your enabled APIs. See instructions here.
-
There are two ways how you can use your credentials in project.
-
4.1 By using environment variables. Create environment variable
GOOGLE_API_KEYwith created key as value. -
4.2 By assigning key directly in blueprints. This can be called anywhere.
By default you need to set api key from nodes. To use environment variable, you need to set
Use Env Variabletotrue. -
ADVICE: Pay attention to security and encrypt your assets before packaging.
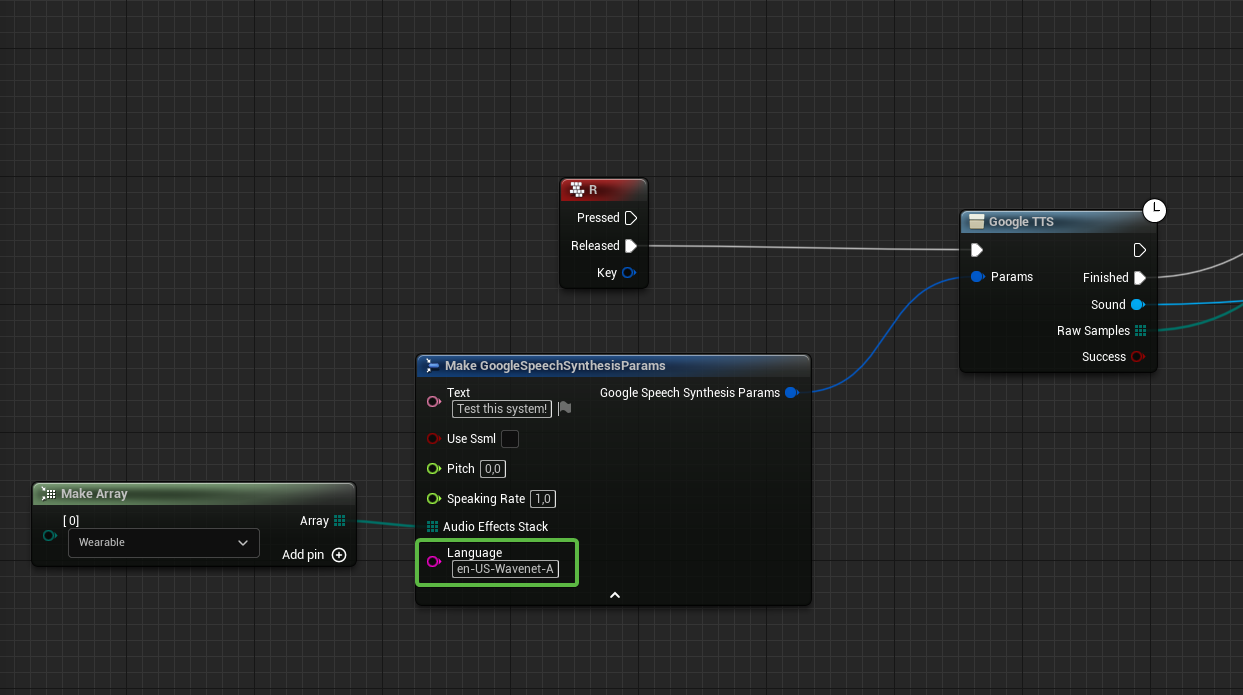
You need to supply text to async node, as well as voice variant, speech speed, pitch value and optionally audio effects. As output you will get sound wave object which can be played by engine.
Consists of two parts. Voice capture, and sending request. There are two ways how you can capture your voice, depending on your needs.
No actions needed
- In Xcode, select you project
- Go to
Infotab - Expand
Custom macOS Application Target Propertiessection - Hit
+, and addPrivacy - Microphone Usage Descriptionstring key, set any value you want, for example "GoogleSpeechKitMicAccess"
Call this somewhere on begin play
- Give microphone access (android.permission.RECORD_AUDIO)

- Give disk read access (android.permission.READ_EXTERNAL_STORAGE)

- Give disk write access (android.permission.WRITE_EXTERNAL_STORAGE)

Windows only method (deprecated)
Use provided MicrophoneCapture actor component as shown below. Next, construct recognition parameters and pass them to Google STT async node.
-
Create SoundMix.
-
Create sound class
- Right click in content browser -
Sounds > Classes > Sound Class - Open it, and set our submix that we created in previous step as sound class default submix
- Right click in content browser -
-
Go to your actor, and add AudioCapture component in components tab
-
Disable "Auto Activate" option on AudioCapture
-
Now we can drop some nodes. In order to start and stop recording, we use
ActivateandDeactivatenodes with previously added AudioCapture component as a target. When audio capture is activated, we can start recording output to our submix -
When audio capture is deactivated, we finish recording output to
Wav File! This is important! Give your wav file a name (e.g. "stt_sample"),Pathcan be absolute, or relative (to the /Saved/BouncedWavFiles folder)
-
Then, after small delay, we can read saved file back as byte samples, ready to be fed to
Google STTnode. Delay is needed since "Finish Recording Output" node writes sound to disk, file write operation takes some time, if we will proceed immediately, ReadWaveFile node will fail
Here is the whole setup
There is another STT node - Google STT Variants node. Which, instead of returning result with highest confidence, returns an array of variants.
Probably, you will need to process recognised voice in your app, to increase recognition chances use CompareStrings node. Below call will return 0.666 value,
so we can treat those strings equal since they are simmilar on 66%. Utilizes Levenstein distance algorithm
You can pass microphone name to microphone capture component. To get list of available microphones, use following setup
Windows, Mac and Android.
EGoogleTTSLanguage was removed. You need to pass voice name as string (Voice name column).
WARNING: Since synthesys parameters has changed, TTS cache is no longer valid! Make sure you remove TTS cache if exists. Editor/Game can freeze if old cache wll be loaded. So make sure to remove
PROJECT_ROOT/Saved/GoogleTTSCachefolder. Or invokeWipeTTSCachenode before GoogleTTS node is executed!
The reason for this is that the number of languages has exceeded 256, and we can't put this amount into 8 bit enums (This is Unreal's limitation)


