Table of Contents
This is an example of how you may give instructions on setting up your project locally. To get a local copy up and running follow these simple example steps.
- How to install Qt
- Clone the repo
git clone https://github.com/IlyasKadi/Signal-and-Slots.git
This exercise follows up to add interactive functionality to the calculator widgets written in the previous homework. The goal is to use Signals and Slots to simulate a basic calculator behavior. The supported operations are*, +, -, /.
Calculator
.Header
class Calculator : public QWidget
{
    Q_OBJECT
public:
    Calculator(QWidget *parent = nullptr);
    ~Calculator();
 // Add you custom slots here
protected:
    void createWidgets();        //Function to create the widgets
    void placeWidget();         // Function to place the widgets
    void makeConnexions();      // Create all the connectivity
//events
protected:
    void keyPressEvent(QKeyEvent *e)override;     //Override the keypress events

private:
    double * left= new double{0};          //left operand
    double * right=nullptr;         // right operand
    QString *operation=nullptr;  // Pointer on the current operation

public slots:
   void newDigit();
   void changeOperation();
   void showresults();
   void resetall();

private:
    QGridLayout *buttonsLayout; // layout for the buttons
    QVBoxLayout *layout;        //main layout for the button
    QVector<QPushButton*> digits;  //Vector for the digits
    QPushButton *enter;            // enter button
    QPushButton *reset;            // reset button
    QVector<QPushButton*> operations; //operation buttons
    QLCDNumber *disp;             // Where to display the numbers

};
NOTE: We initialize left by 0 so if you perform an operation before adding the left, it will be assigined by default (0).
- We will add the connections of the digits, operatoins, enter_buttons, and the reset_button.
void Calculator::makeConnexions()
{
     //Connecting the digits
     for(int i=0; i <10; i++)
         connect(digits[i], &QPushButton::clicked,
                 this, &Calculator::newDigit);

     //Connecting the operations
     for(int i=0; i <4; i++)
         connect(operations[i], &QPushButton::clicked,
                 this, &Calculator::changeOperation);

     //Connecting the enter_button
     connect(enter, &QPushButton::clicked,
             this, &Calculator::showresults);

     //Connecting the reset_button
     connect(reset, &QPushButton::clicked,
             this, &Calculator::resetall);
}- Now, we will implement the newDigit slot to show the digit in the LCDNumber.
We should clarify two points to clearly understand the implementation:
-
Which number, should be constructing
leftorrightThe response to this question is easy, If we have an operation, then we already have our left operand and we should focus on the right.
-
How to add digit to an existing number.
Suppose we are working on left = 43. What should happen if we clicked the digit 2. Simply we should move all digit by one digit (x10) and then add the 2. Programmatically speeaking this could done by :
*left = (*left) * 10 + digit
void Calculator::newDigit( )
{
    //getting the sender
    auto button = dynamic_cast<QPushButton*>(sender());

    //getting the value
    int value = button->text().toInt();

    //Check if we have an operation defined
    if(operation)
    {
        //check if we have a value or not
        if(!right)
            right = new int{value};
        else
            *right = 10 * (*right) + value;

        disp->display(*right);

    }
    else
    {
        if(!left)
            left = new int{value};
        else
            *left = 10 * (*left) + value;

        disp->display(*left);
    }
}Now we will move on the operation of the four buttons. We will the same mechanism using the sender method. Hence we will define a single slot to handle the click on the operations buttons:
public slots:
    void changeOperation();  //Slot to handle the click on operations
    void newDigit();
This slot will simply execute the following operations:
- Get the identity of the sender button.
- Store the clicked operation.
- Reset the display to 0
void Calculator::changeOperation()
{
    //Getting the sender button
    auto button = dynamic_cast<QPushButton*>(sender());

    //Storing the operation
    operation = new QString{button->text()};

    //Initiating the right button
    right = new int{0};

    //reseting the display
    disp->display(0);
}- We named the function for enter button
showresults(), where all the four operations are made
NOTE: for the division if you divid any number by 0 it will gives an ERROR (Err) in the LCDnumber.
void Calculator::showresults()
{
    //getting the sender
    auto button = dynamic_cast<QPushButton*>(sender());

    //getting the value
    enter = new QPushButton{button};

     if(operation== QString{"+"})
    {
        disp->display(*left + *right);
        *left=*left + *right;
        *right=0;

    }
    else if(operation== QString{"-"})
    {
        disp->display(*left - *right);
        *left=*left - *right;
         *right=0;
    }
    else if(operation== QString{"/"})
    {
         if(*right==0)
         {
             disp->display("err");
         }
         else
         {
             disp->display(*left / *right);
             *left=*left / *right;
              *right=0;
         }
    }
    else if(operation== QString{"*"})
    {
        disp->display(*left * *right);
        *left=*left * *right;
         *right=0;
    }
}We named the function for AC button resetall(), where we reset the pointers right and operation to nullptr and left to 0 and 0 as a display for the LCDnum.
- Adding the reset button (C).
void Calculator::resetall()
{
    auto button = dynamic_cast<QPushButton*>(sender());

    //getting the value
    reset = new QPushButton{button};

    //resetting the pointers
    *left=0;
    right=nullptr;
    operation=nullptr;

    //display when resetting(0)
    disp->display(0);
}- Adding the three or more operand such as (24 * 23 + 23)!
-
NOTE: Each time when you perform an operation left will take the result (as a memory) check out the
showresults()function
    {
        disp->display(*left (op) *right);
        //left as memo
        *left=*left (op) *right;
        *right=0;

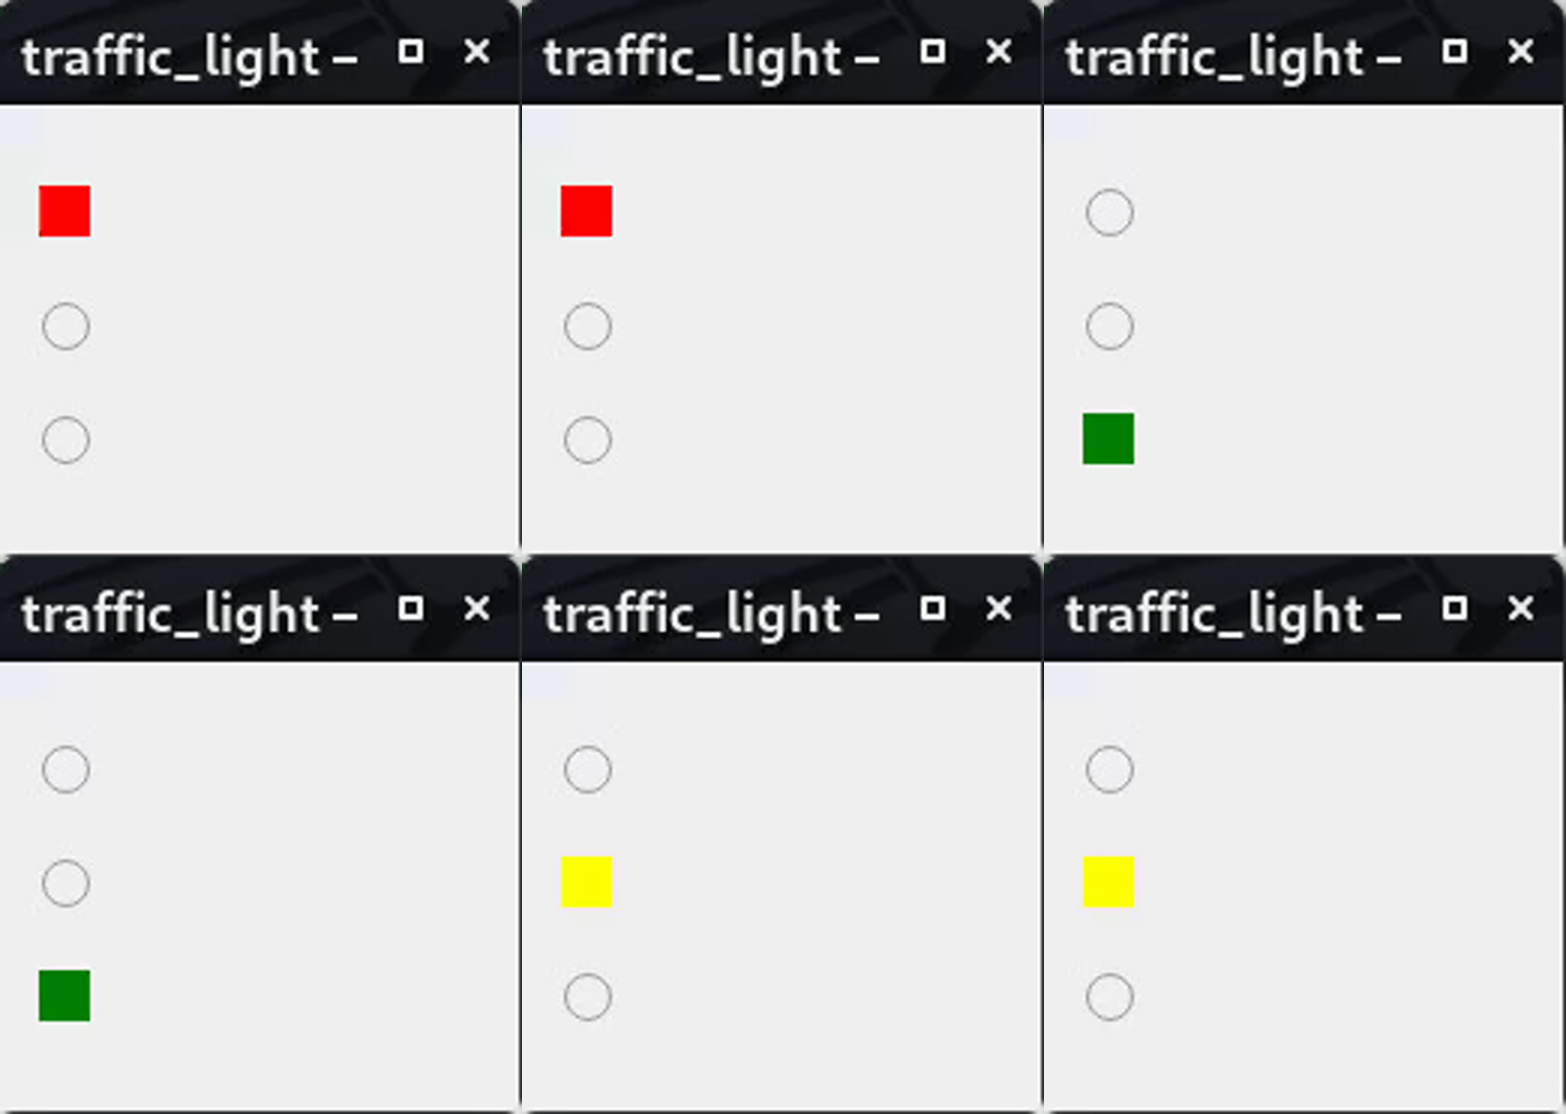
}In this exercise, we will use the QTimer to simulate a traffic light.
image Simulating Traffic Light using Radio Buttons
-
Download the starter code TrafficLight.zip
-
Investigate the code in order to underhand each component of the
TrafficLightclass. -
let's add some functions in order to :
a. change each 3 seconds in the following order: Red -> Green -> Yellow
b. change to yellow each 4 seconds, to green each 1 seconds, to red each 2 seconds
c. set lights by keyboard.
.Header
class TrafficLight: public QWidget{
  Q_OBJECT

public:

  TrafficLight(QWidget * parent = nullptr);
  void timerEvent(QTimerEvent *e) override;
  void keyPressEvent(QKeyEvent *event) override;

protected:
     void createWidgets();
     void placeWidgets();


private:
  int index=0;
  int times[3]={4,1,2};
  int currentTime;
  QVector<QRadioButton*> lights ;
  QRadioButton * redlight;
  QRadioButton * yellowlight;
  QRadioButton * greenlight;

};
a.
void TrafficLight::placeWidgets()
{

  // Placing the widgets
  auto layout = new QVBoxLayout;

  layout->addWidget(redlight);
  layout->addWidget(yellowlight);
  layout->addWidget(greenlight);

  lights.append(redlight);
  lights.append(greenlight);
  lights.append(yellowlight);

  setLayout(layout);
  startTimer(3000);

    index=0;

}
void TrafficLight::timerEvent(QTimerEvent *e)
{
//TURN RED ...   TURN YELLOW ...  TURN GREE ...
    index= (index + 1 )%3;
    lights[index]->toggle();
}
b.
void TrafficLight::timerEvent(QTimerEvent *e)
{

//TURN RED ....  TURN YELLOW .    TURN GREE ..
    currentTime++;

    if(redlight->isChecked()&& currentTime==4)
    {
        yellowlight->toggle();
        currentTime=0;
    }
    if(yellowlight->isChecked()&& currentTime==1)
    {
        greenlight->toggle();
        currentTime=0;
    }
    if(greenlight->isChecked()&& currentTime==2)
    {
        redlight->toggle();
        currentTime=0;
    }


}
c.
void TrafficLight::keyPressEvent(QKeyEvent *event)
{

// PRESS R for (red)

    if(event->key()==Qt::Key_R)
    {
        index=0;
        redlight->toggle();
    }


//PRESS Y for (yellow)

    if(event->key()==Qt::Key_Y)
     {
            index=1;
            yellowlight->toggle();
     }


//PRESS G for (green)
     if(event->key()==Qt::Key_G)
     {
         index=1;
         greenlight->toggle();
     }
}.Header
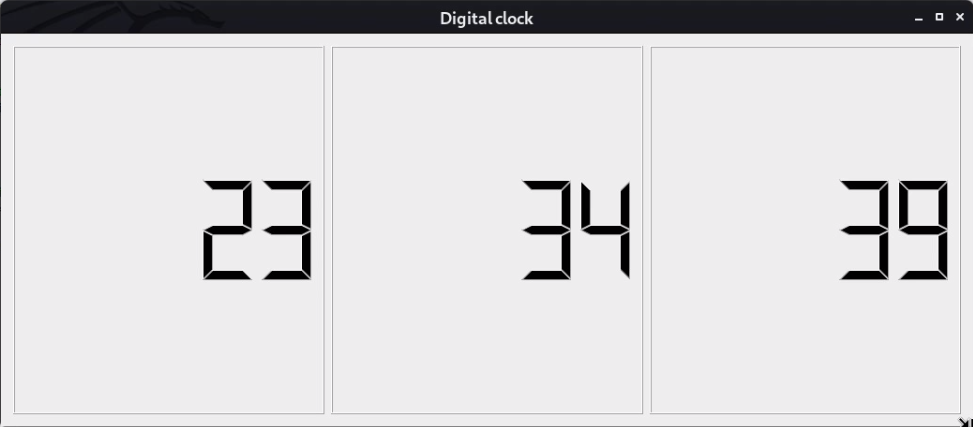
class Digitalclock : public QWidget
{
    Q_OBJECT
public:
    explicit Digitalclock(QWidget *parent = nullptr);
    void timerEvent(QTimerEvent*e) override ;

protected:
    void createwidgets();
    void placewidgets();

private:
    QLCDNumber *hour;
    QLCDNumber *minutes;
    QLCDNumber *seconds;
    QHBoxLayout *digiclock;
};
.cpp
Digitalclock::Digitalclock(QWidget *parent) : QWidget(parent)
{
     createwidgets();
     placewidgets();
     setWindowTitle("Digital clock");
     startTimer(1000);
}
void Digitalclock:: createwidgets()
{
    hour    = new QLCDNumber;
    minutes = new QLCDNumber;
    seconds = new QLCDNumber;
    digiclock = new QHBoxLayout;
}
void Digitalclock ::placewidgets()
{
    setLayout(digiclock);
    digiclock->addWidget(hour);
    digiclock->addWidget(minutes);
    digiclock->addWidget(seconds);
}
void Digitalclock::timerEvent(QTimerEvent *e)
{
    auto T = QTime::currentTime();
    hour->display(T.hour());
    minutes->display(T.minute());
    seconds->display(T.second());
}Good job, You will be able to enhance your calculator once we present the notion of stacks in the Data Structures course.
Our Team - AIT EL KADI Ilyas - AZIZ Oussama
Project Link: Signal-and-Slots
Encadré par : Mr.BELCAID-Anass


