- Deploy server to heroku
- Deploy database to MongoDB Atlas
- Deploy react app to either Netlify or Heroku
This repo is set up assuming that your apps are stuctured the same way we've done them in class.
Sign up for an Atlas account HERE.
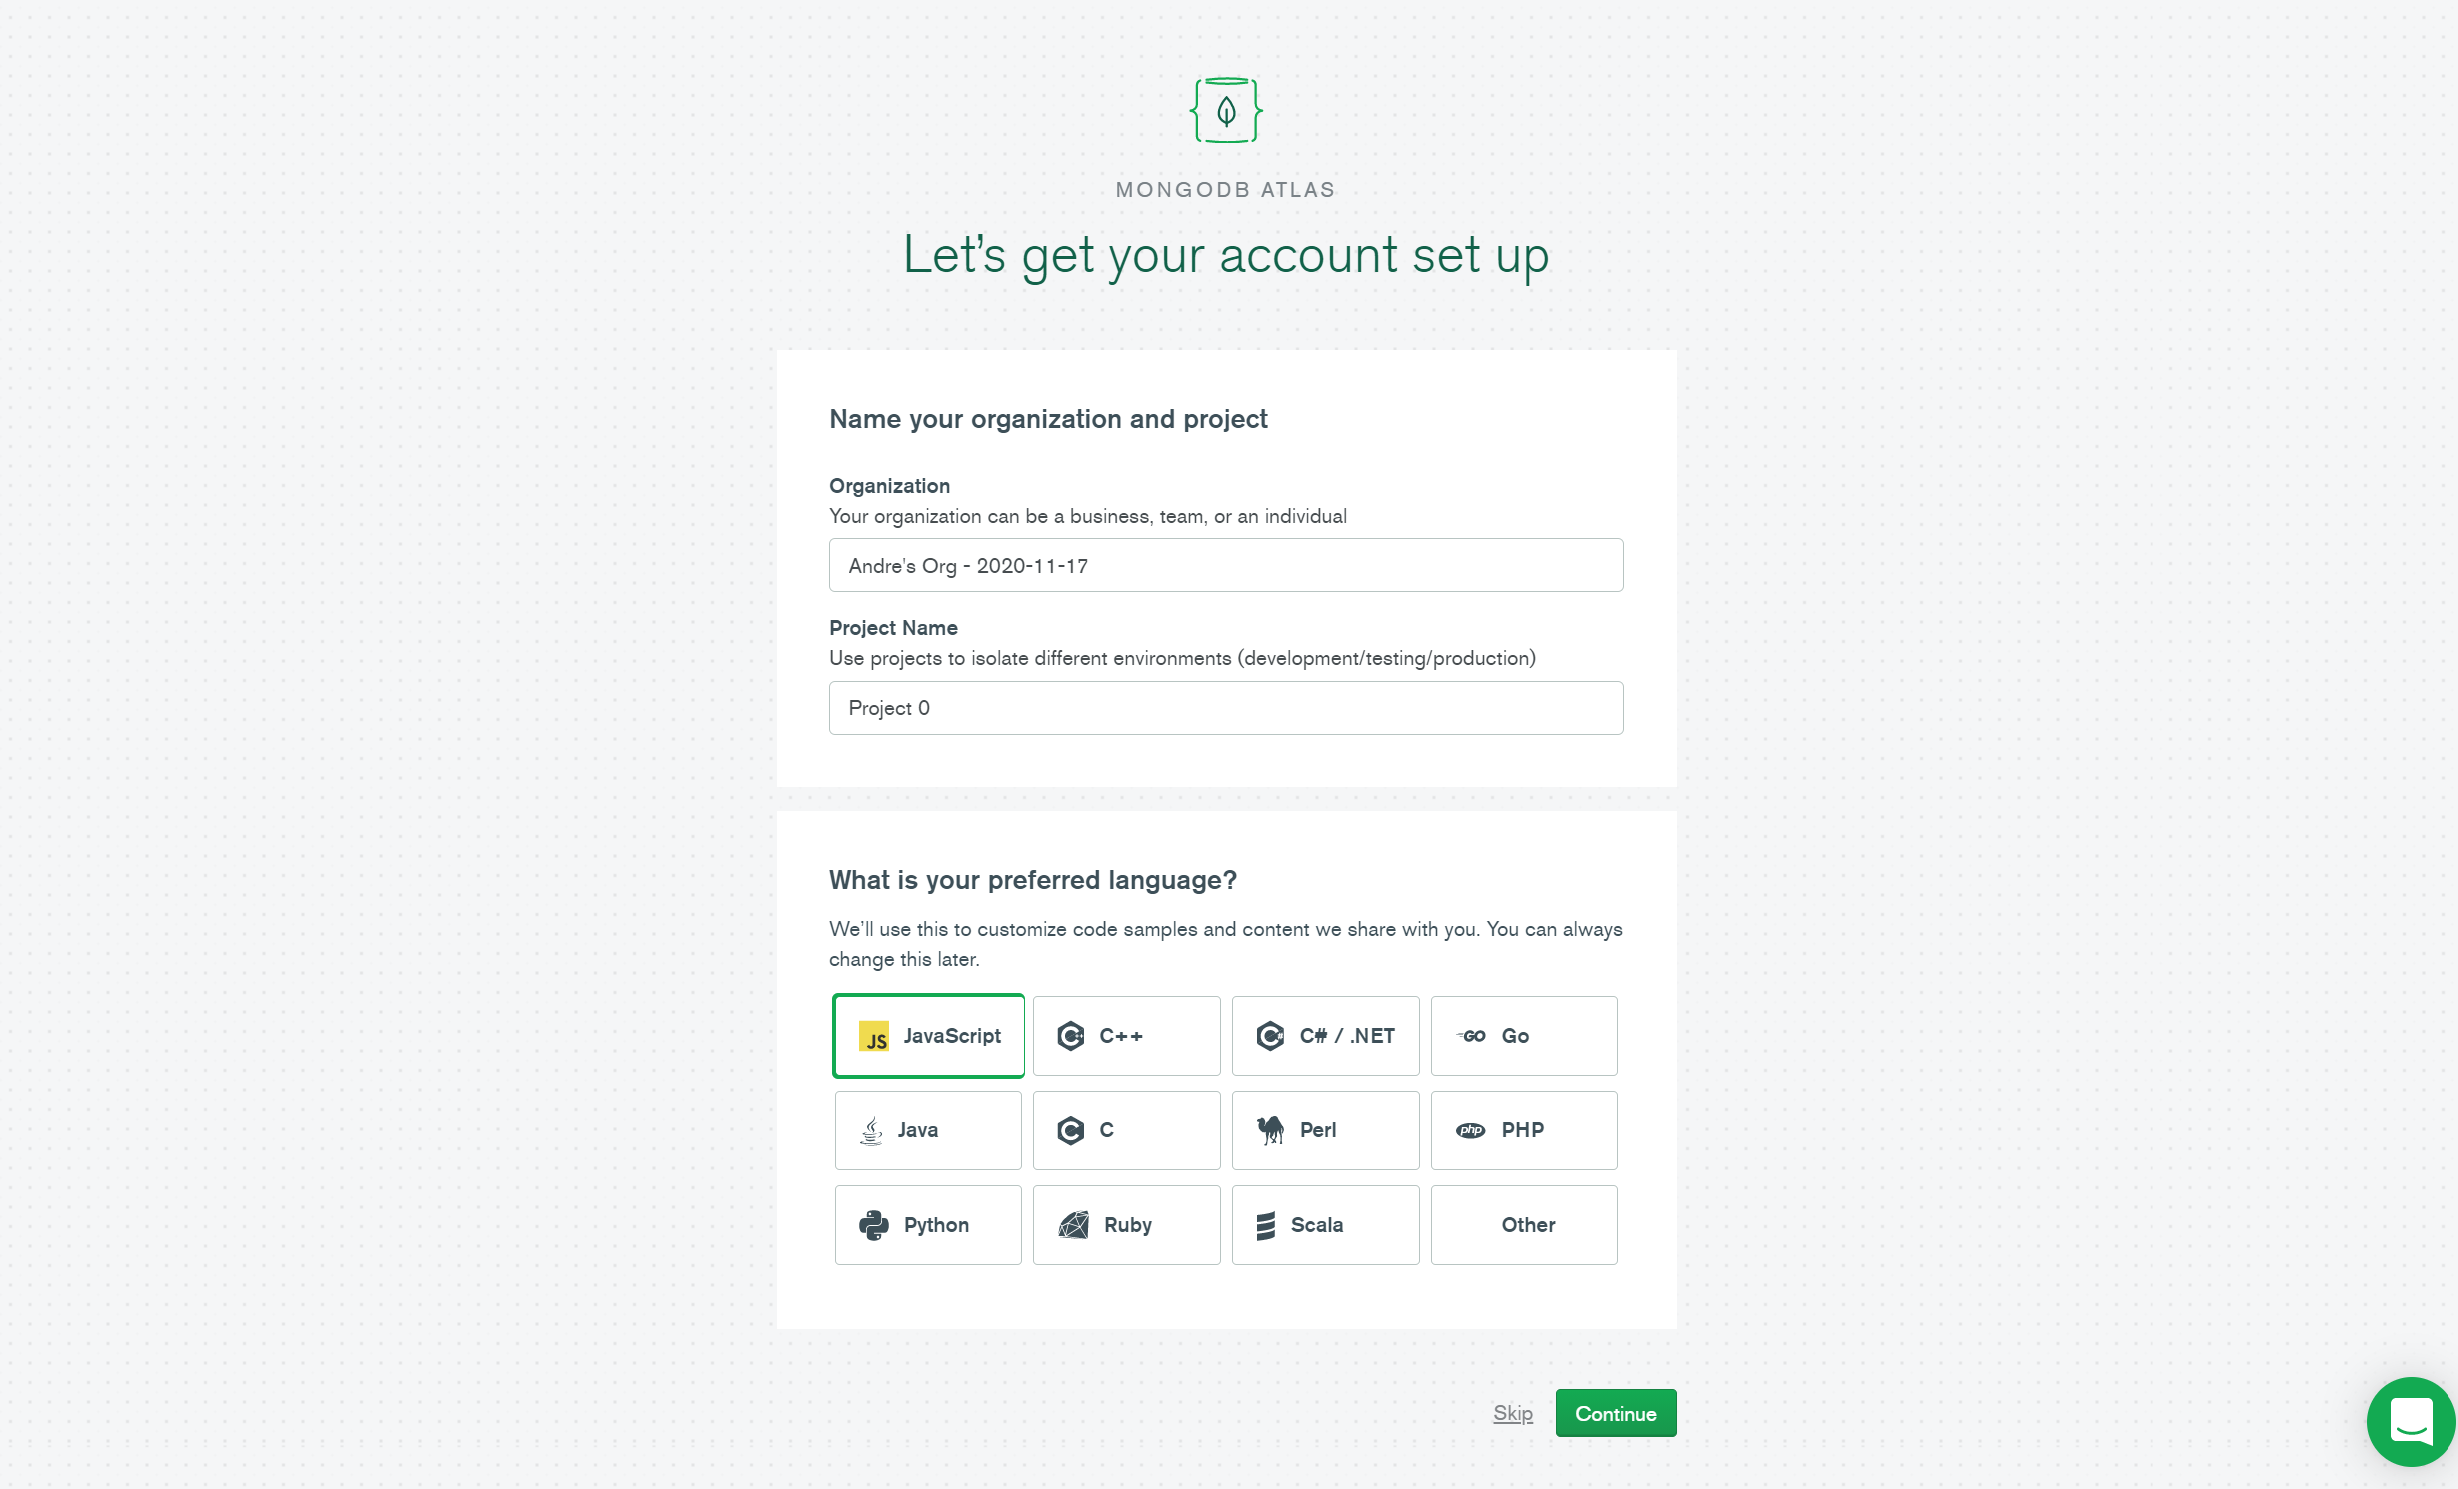
Once you've created your account and signed in, set up your account:
-
Give Your Organization a name.
-
Create a project name.
-
Select your preferred language,
javascriptshould be your preferred.
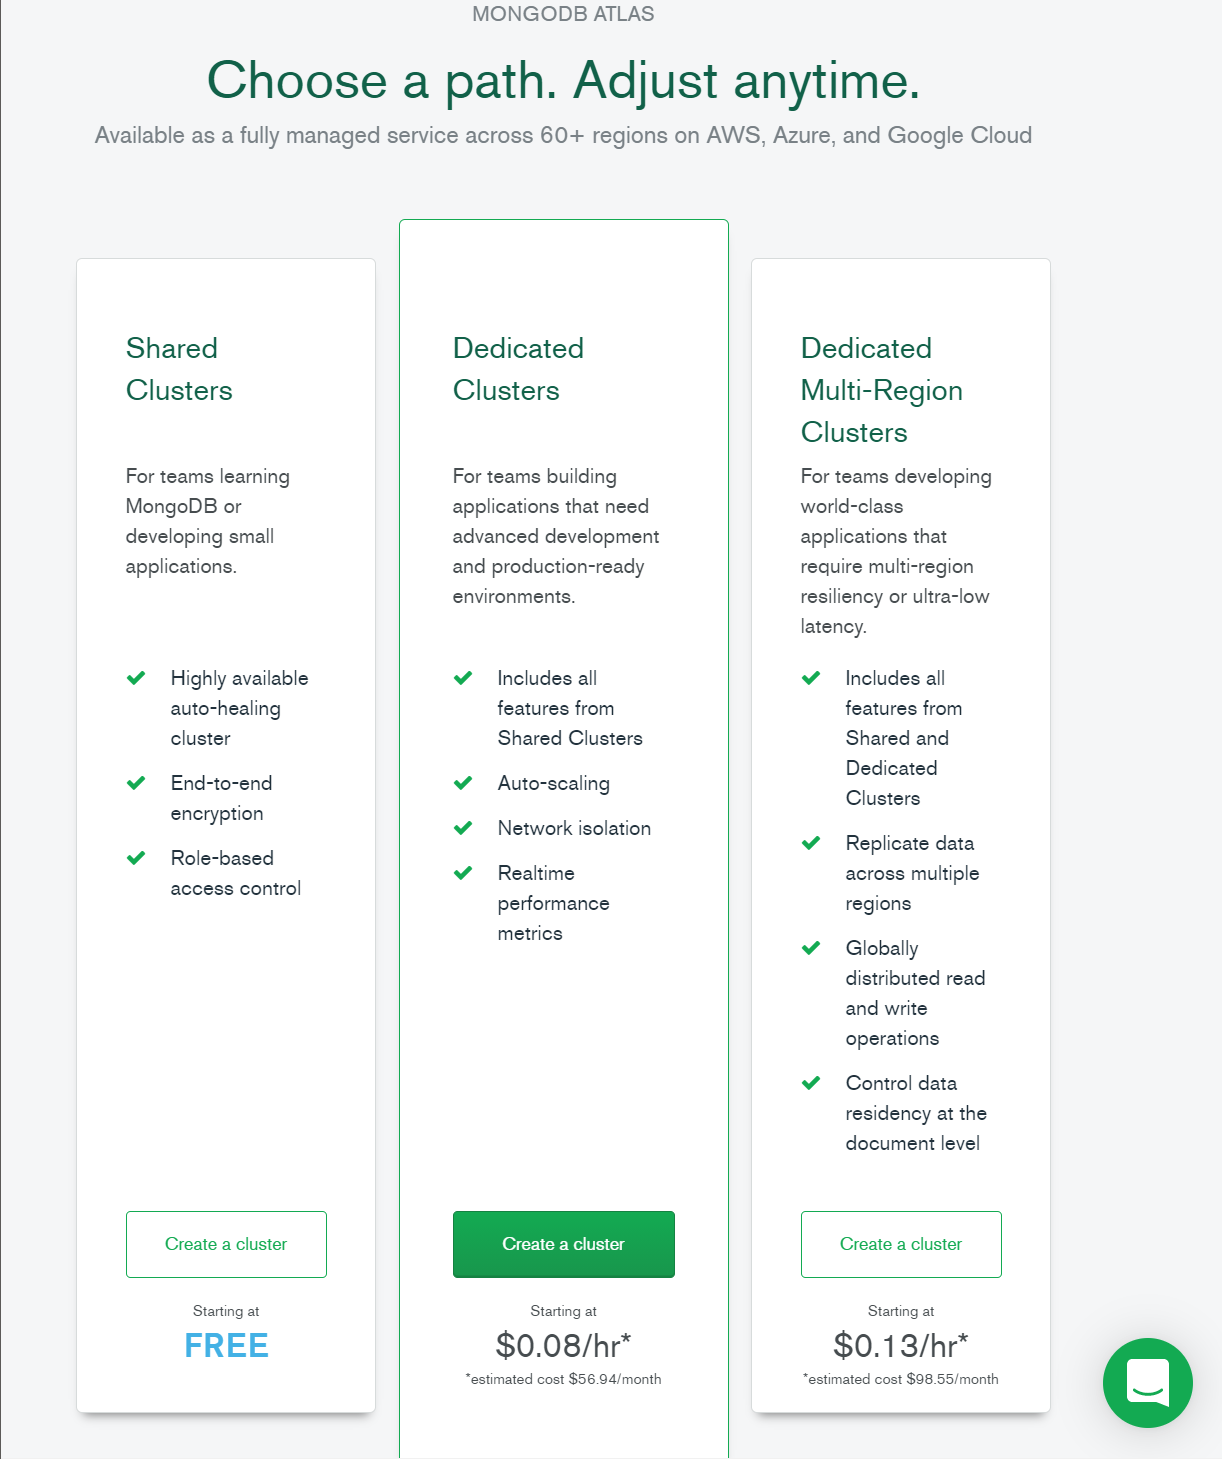
When choosing a path, select the free tier.
Once you've selected a tier, let's set up our cluster/database.
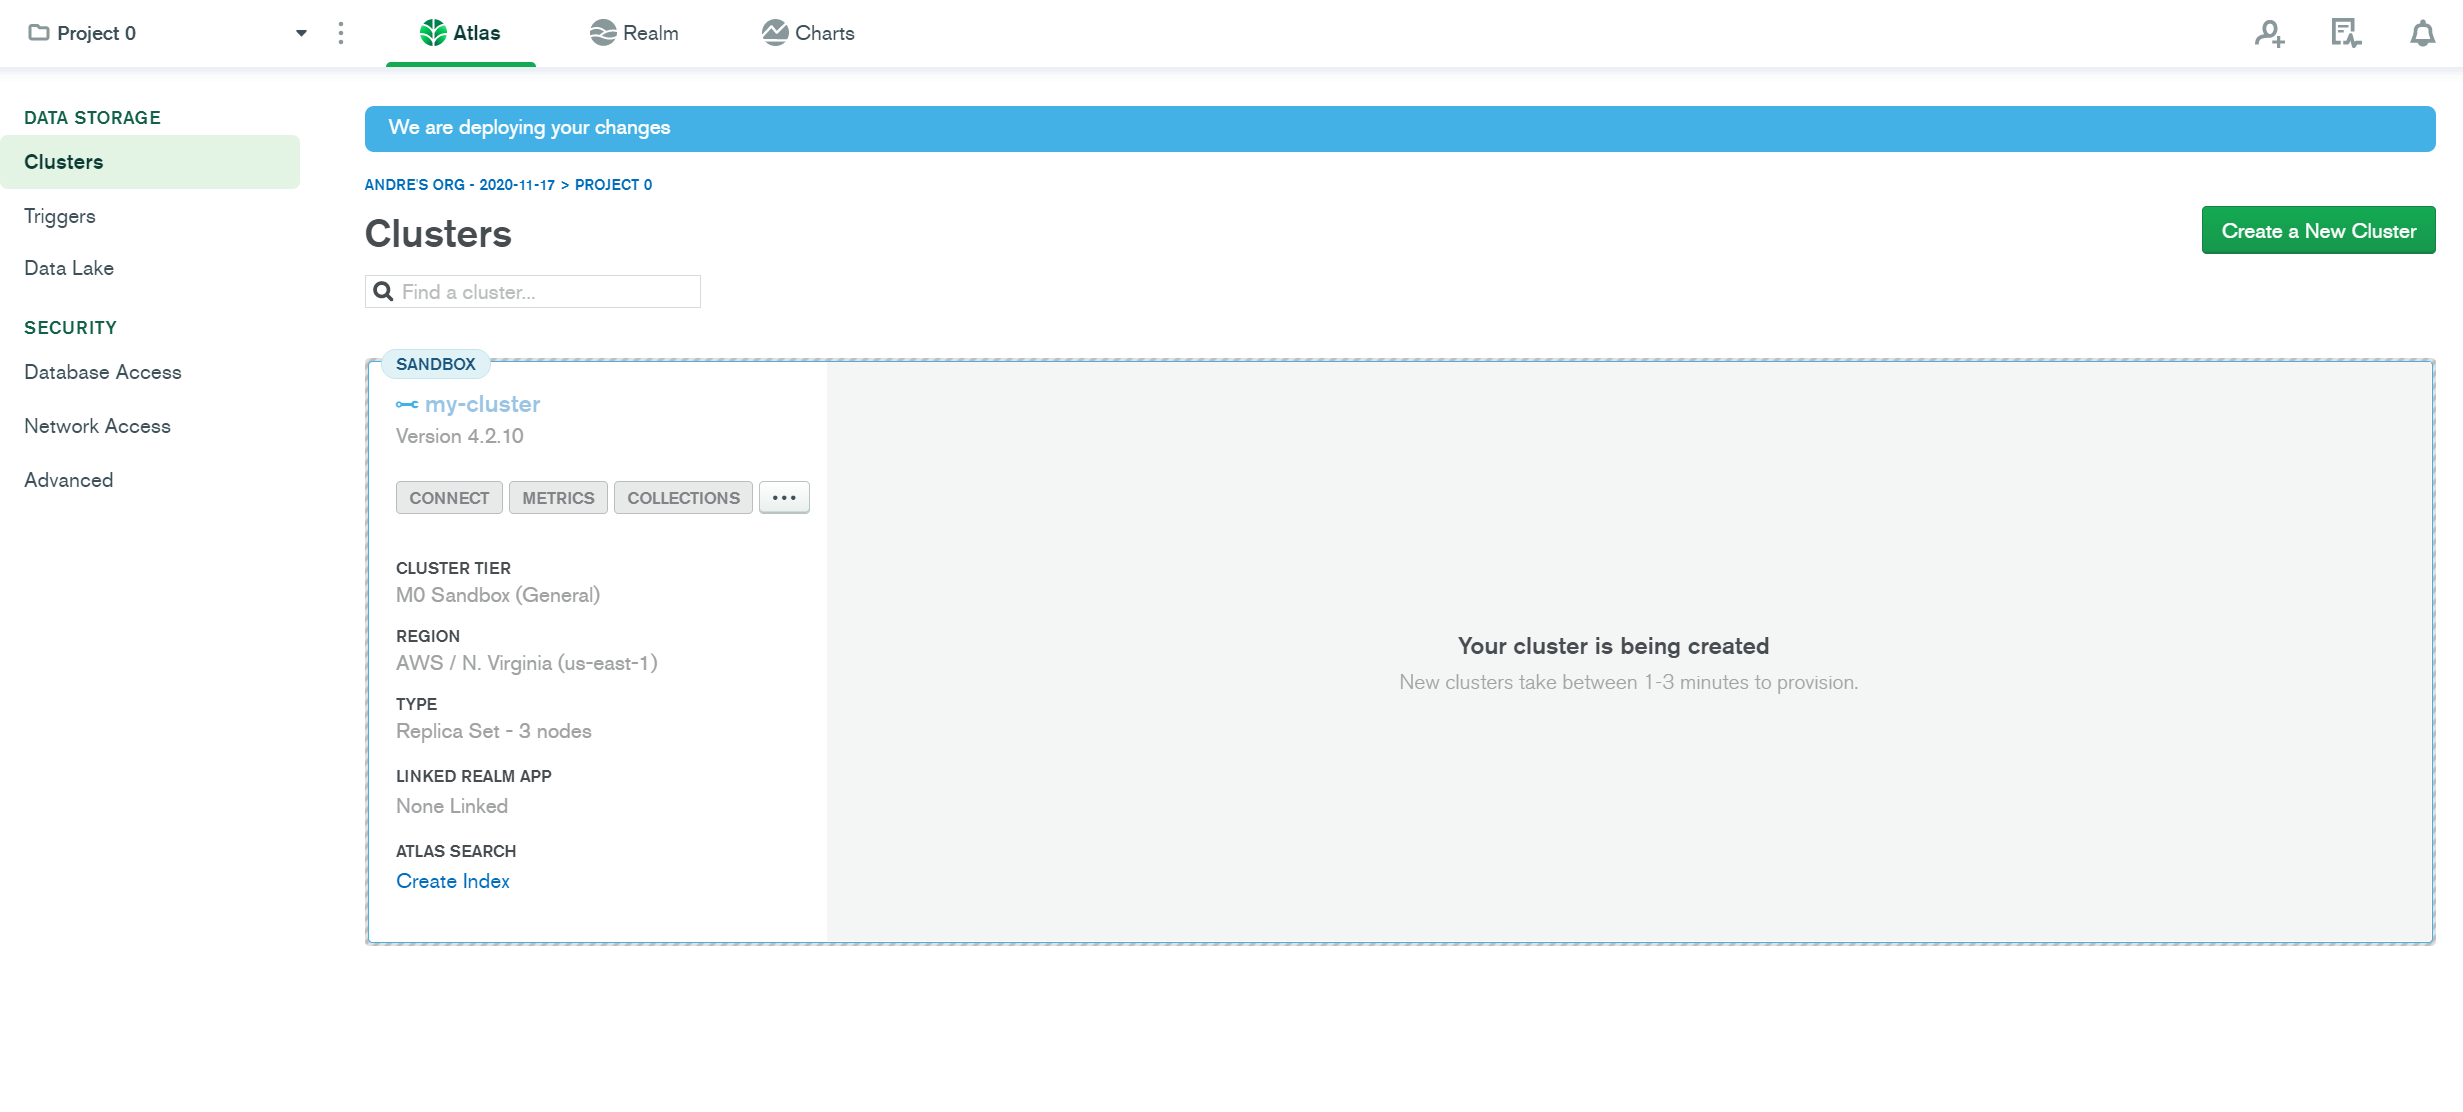
You can leave most of these settings as default, double check that your Cluster Tier is M0 Sandbox. Give your cluster a name, ideally this should be the name of your database.
You cluster should now be provisioning.
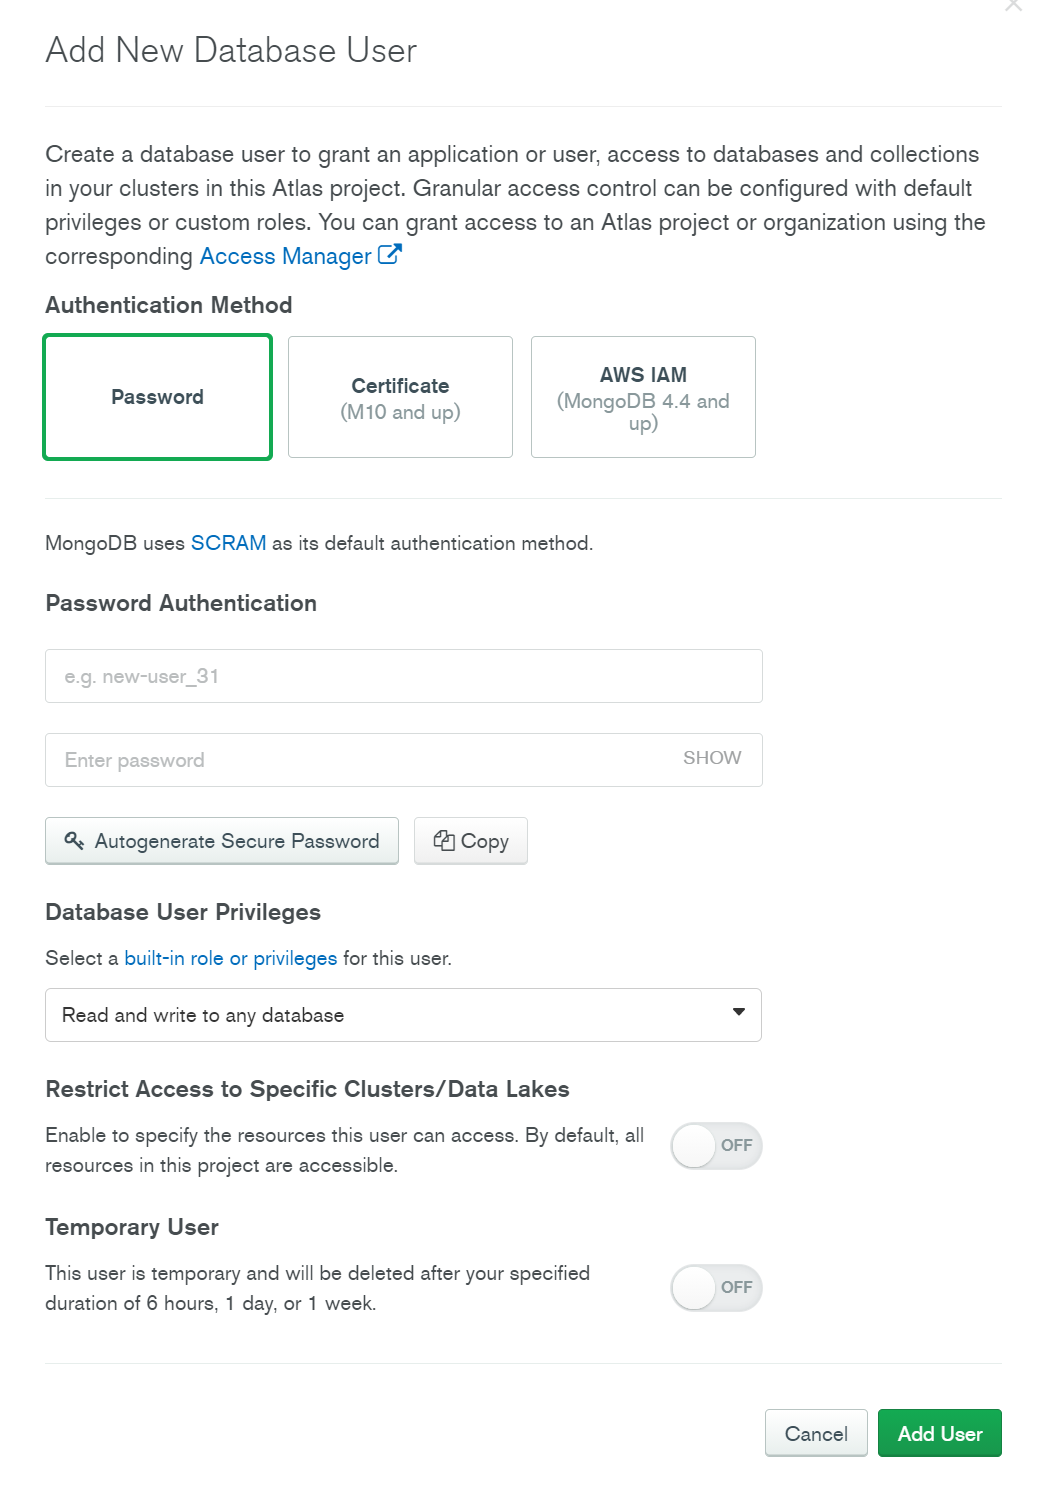
Click on Database Access on the left sidebar. Create a new database user.
Don't lose this password!
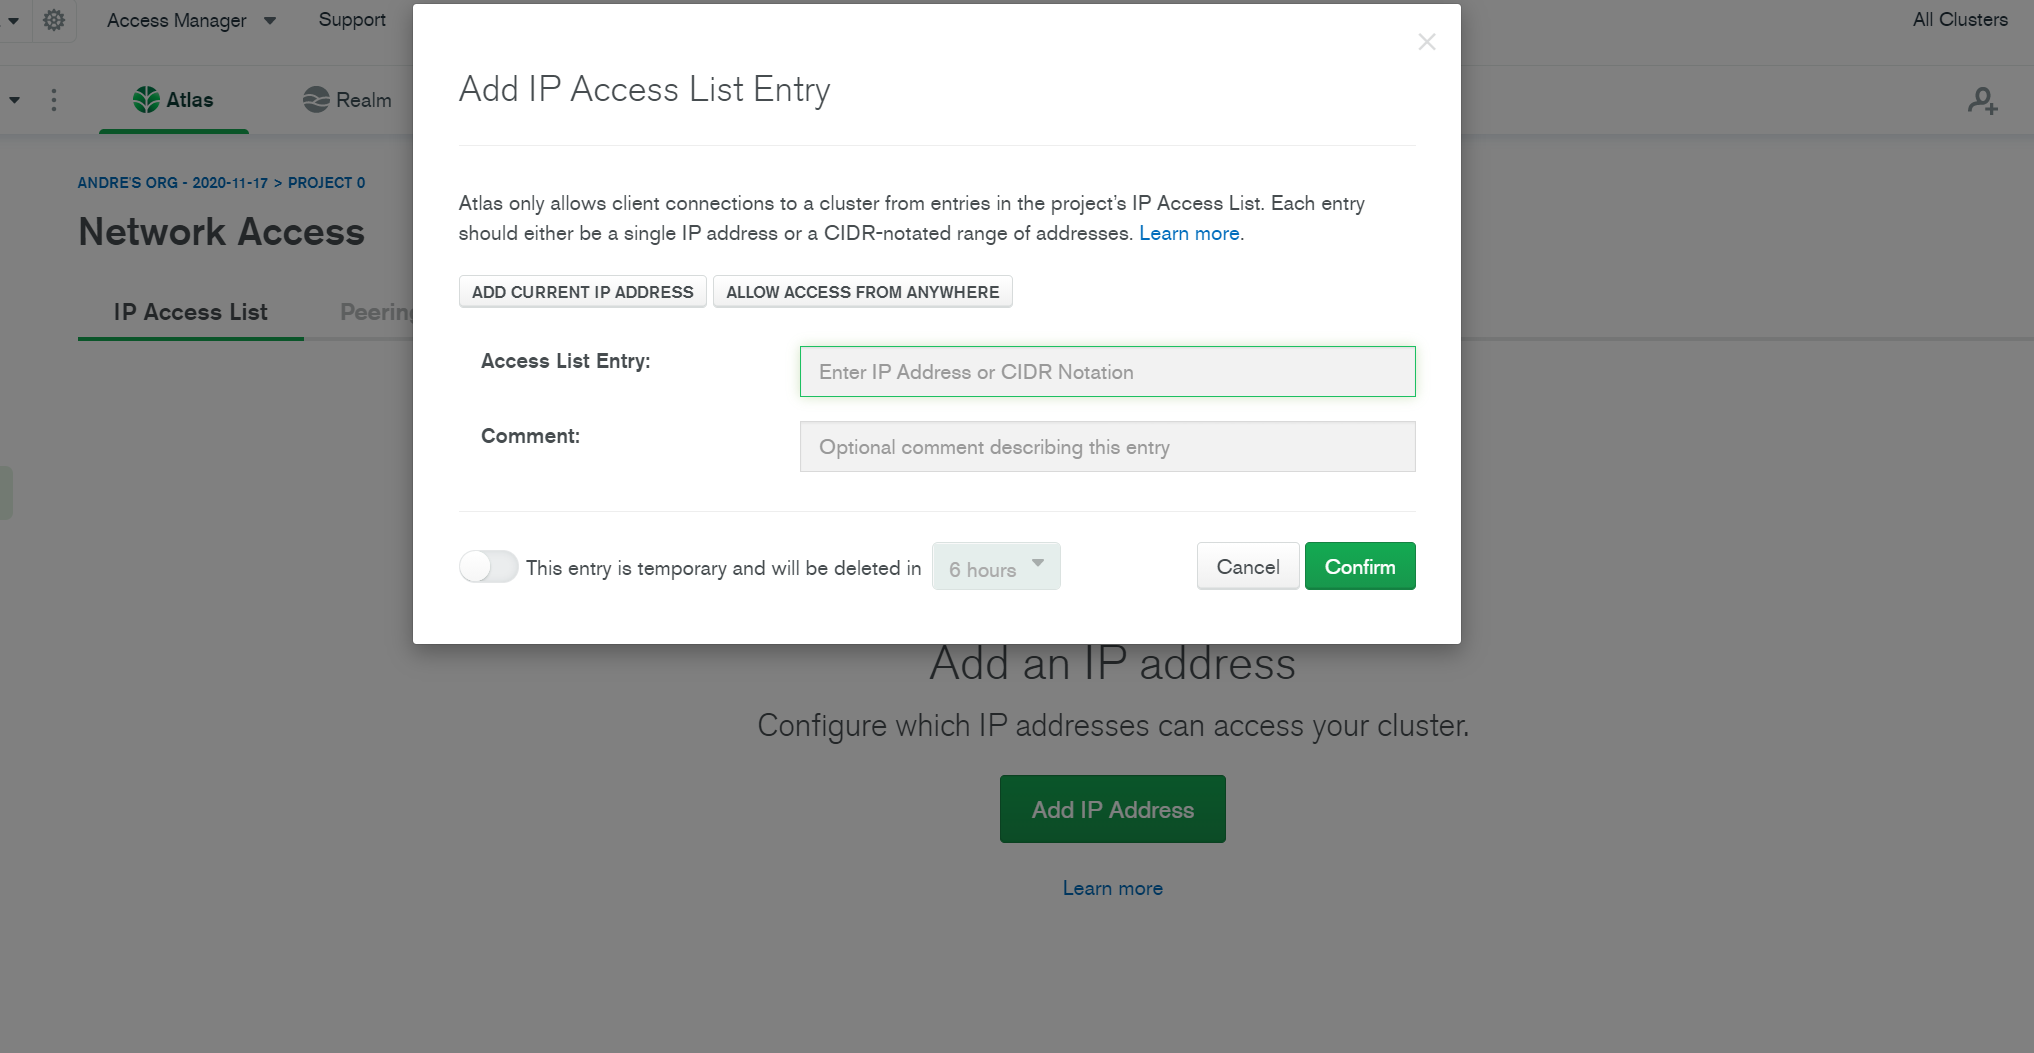
Select the Network Access option from the left sidebar. And click on Add IP Address.
Select Allow Access From Anyhwere. Confirm your changes.
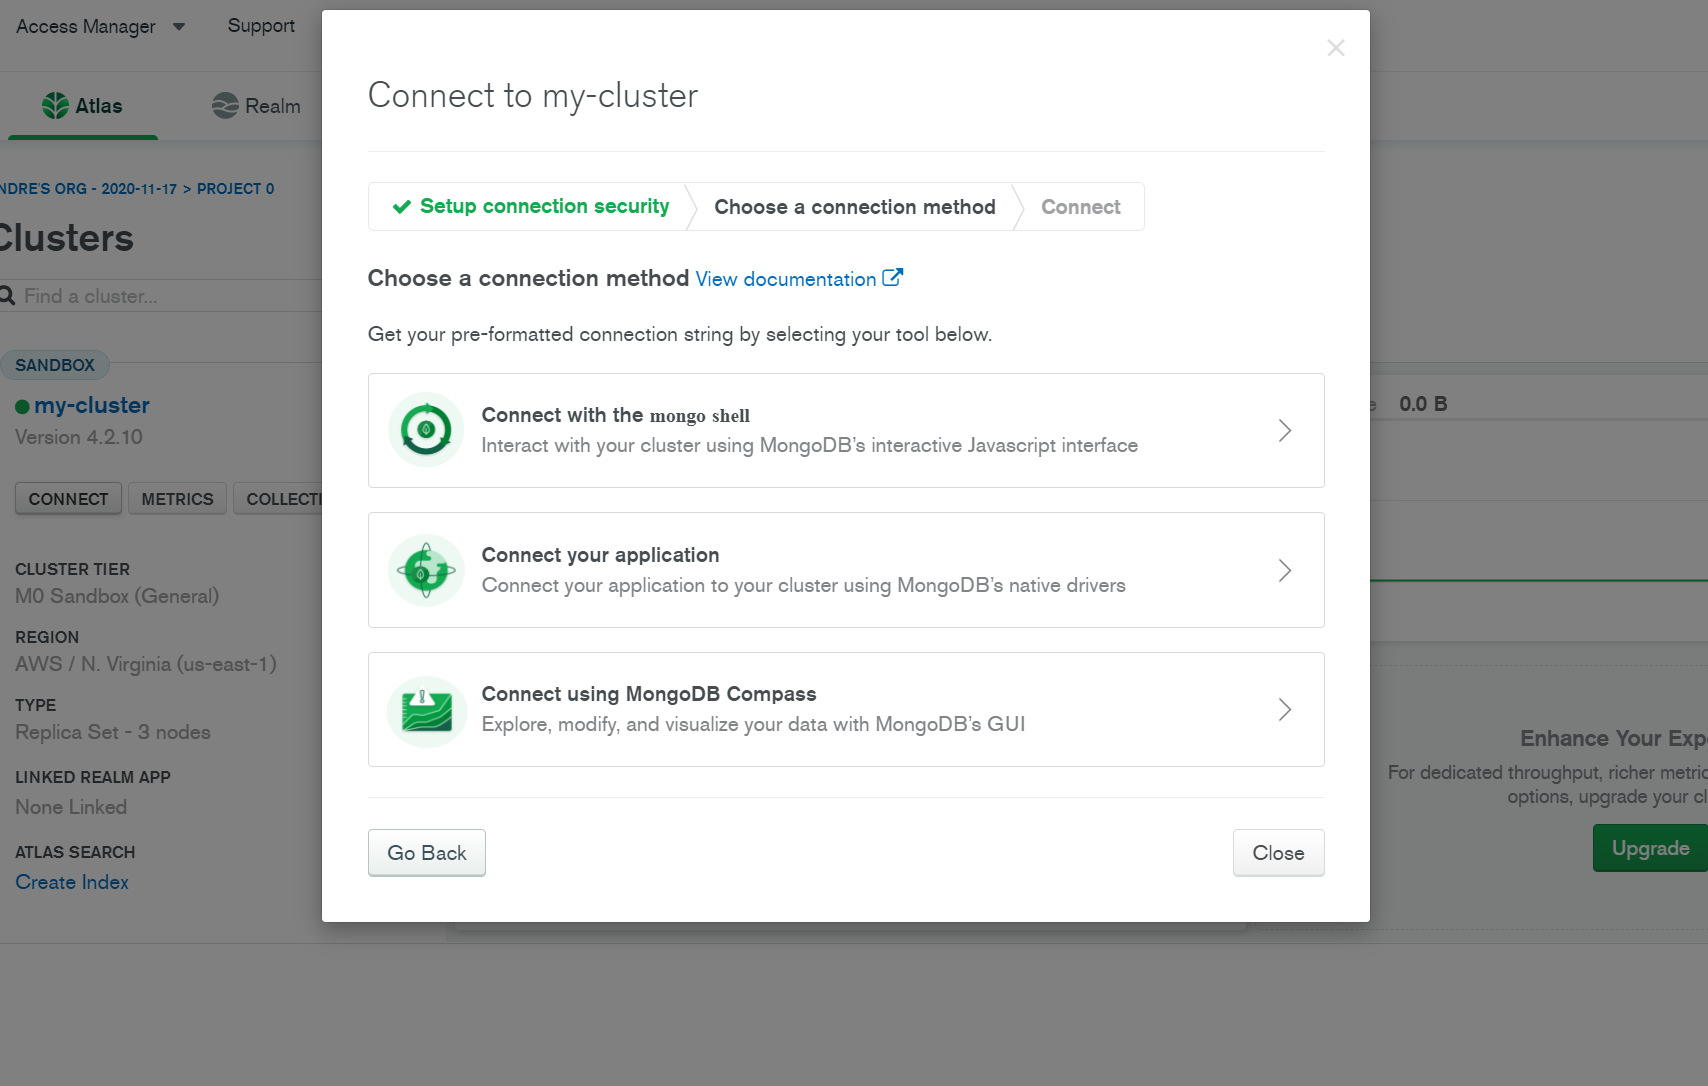
Select the Clusters option on the left sidebar and click on CONNECT underneath your cluster name.
Select connect your application:
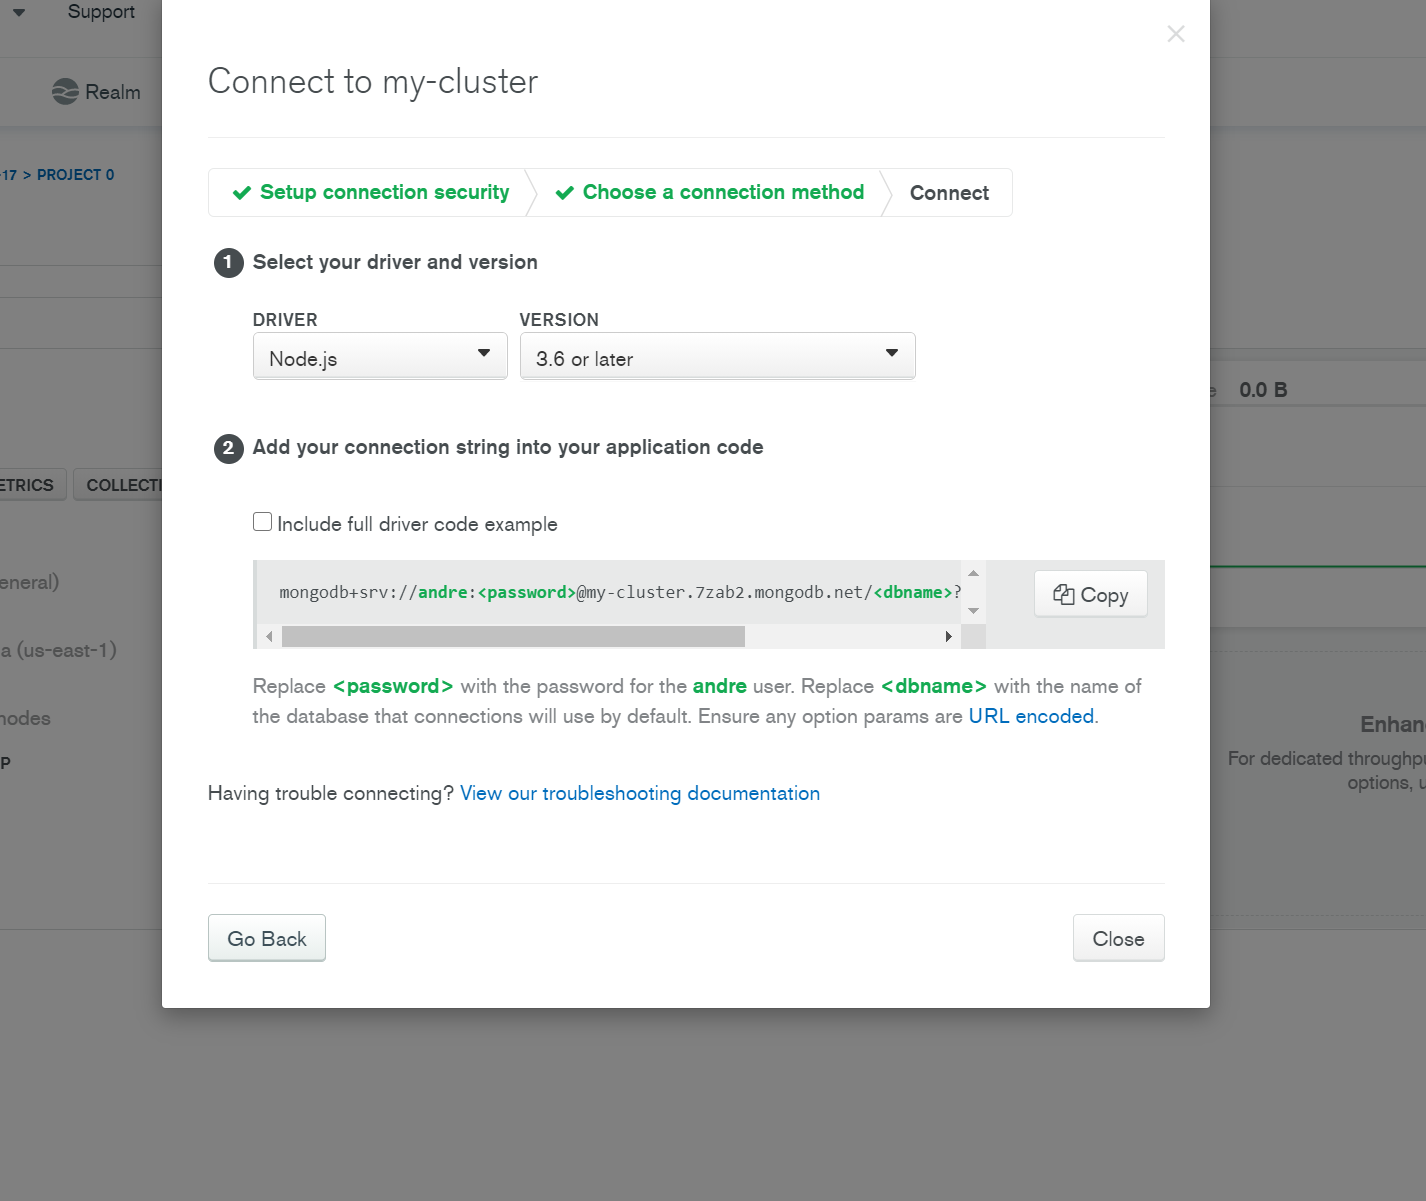
Copy the connection url, do not lose this!
We now need to prep our code for deployment.
Let's install the dotenv package to read environment variables:
Note: This should be done along side your server code, or your base directory for your project.
npm install dotenvNOTE: Only do this step if you have environment variables
touch .envIn your server.js:
-
Require path from
path:const path = require('path')
-
Telling Express to serve our react app:
NOTE: This should be added after your middleware and above
app.listenif (process.env.NODE_ENV === 'production') { app.use(express.static(path.join(__dirname, 'client/build'))) app.get('*', (req, res) => { res.sendFile(path.join(`${__dirname}/client/build/index.html`)) }) }
Modify your db/index.js to the following:
const mongoose = require('mongoose')
require('dotenv').config() // Add this line

let dbUrl = process.env.NODE_ENV === 'production' ? process.env.MONGODB_URI : 'mongodb://127.0.0.1:27017/todo_tracker'

mongoose
  .connect(dbUrl, {
    useUnifiedTopology: true,
    useNewUrlParser: true,
    useFindAndModify: true
  })
  .then(() => {
    console.log('Successfully connected to MongoDB.')
  })
  .catch((e) => {
    console.error('Connection error', e.message)
  })
mongoose.set('debug', true)
const db = mongoose.connection

module.exports = db
Finally in your package.json for your server, add a new script in your scripts section:
"build": "cd client && rm -rf build && npm install && npm run build"In client/src/globals, modify your BASE_URL:
export const BASE_URL =
  process.env.NODE_ENV === 'production'
    ? `${window.location.origin}/api`
: 'http://localhost:3001/api'In your project folder type in the following command:
heroku createThis will create a heroku app for you.
Next we'll add our mongo db connection string to heroku for our Atlas Database:
Replace <your password> and <dbname> with the user password for your database and database name respectively, remember these must be an exact match.
heroku config:set MONGODB_URI='mongodb+srv://<username>:<database_password>@<cluster>.i57hr.mongodb.net/<database_name>?retryWrites=true&w=majority'Finally we'll add, commit and push our changes to heroku:
git add .
git commit -m <some message>
git push heroku main
The git push heroku main will only push the changes to heroku. To push them to github enter the following:
git pushWe can monitor what our app is doing with the following command:
heroku logs --tailIn this lesson, we successfully deployed our MERN app to heroku. The server will render the built React app and handle the clients api requests.
We used mongodb atlas to host our mongo database.
