InTag is a tool that allows you to add tags to folders and files from the explorer context menu. It can also scan nearby files and use their tags for convenience. The tool is designed to be small and lightweight.
- Add tags to folders and files from the explorer context menu
- Scan nearby files and use their tags for convenience
- Small and lightweight design
- NEW - added support of CLI usage
To use InTag, follow these steps:
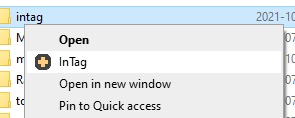
- Right-click the folder (on Windows 11, you may need to press ' Show more options'), and select InTag.
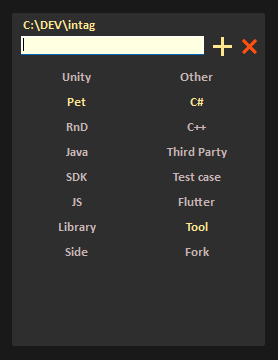
- Assign the desired tags to a folder (or file, if it supports System.Keywords metadata). The neighboring tags will be included in the list of available tags.
-
Once you have assigned the tags, click back to the folder or press the enter key to apply the changes. The tags will be assigned, but it may take some time for explorer to detect the changes. To cancel press the esc key.
NB. The tag input field should be focused and empty for the enter key worked.
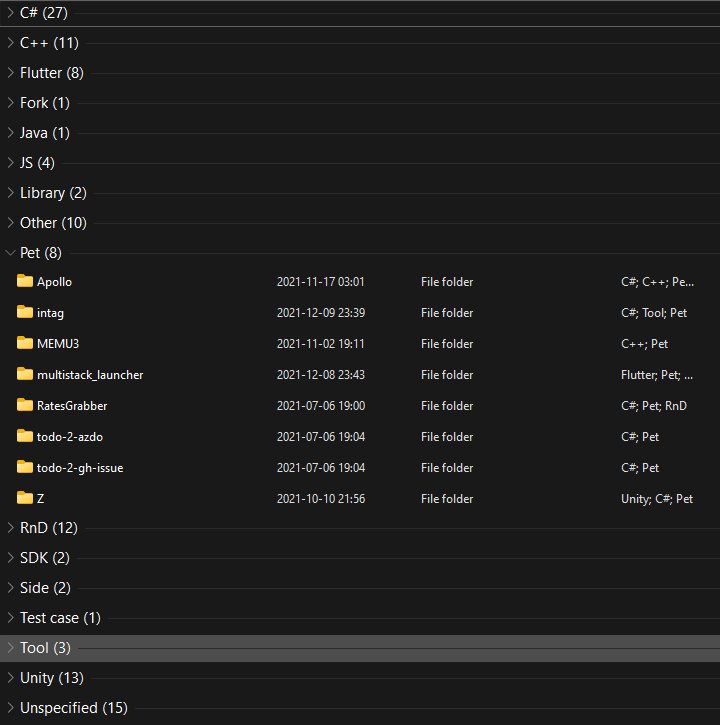
- Ensure that you have enabled grouping by tags by selecting "Context menu on the folder background > group by > More... > Select 'Tags' in the list".
# Add tags:
.\intag.exe --add "test_tag" --path "C:\path\to\folder\or\file"
# Remove tags:
.\intag.exe --remove "test_tag" --list "C:\path\to\list\file"
# Add And Remove tags (will combine files in list file and argument of "--path")::
.\intag.exe --add "test_tag" --remove "test_tag" --list "C:\path\to\list\file" --path "C:\path\to\folder\or\file"There are three methods for installing InTag:
- Automagical: Start the application once, and it should install itself automatically.
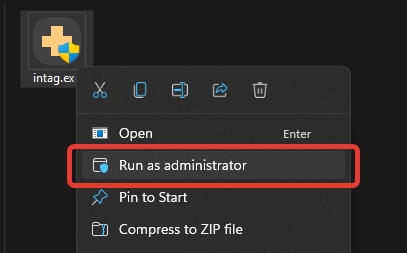
- Almost automagical: Right-click the application icon in explorer, and run the application with administrator rights.
- Manually: Place the .exe file in a directory of your choice, or add a registry entry.
To add the registry entry, use the following code snippets:
For (only) folders:
Windows Registry Editor Version 5.00

[HKEY_CLASSES_ROOT\Folder\shell\InTag]
"Icon"="\"C:\\<PUT YOUR PATH HERE>\\intag.exe\""

[HKEY_CLASSES_ROOT\Folder\shell\InTag\command]
@="\"C:\\<PUT YOUR PATH HERE>\\intag.exe\" --ui --path \"%1\""
For all files:
Windows Registry Editor Version 5.00

[HKEY_CLASSES_ROOT\*\shell\InTag]
"Icon"="\"C:\\<PUT YOUR PATH HERE>\\intag.exe\""

[HKEY_CLASSES_ROOT\*\shell\InTag\command]
@="\"C:\\<PUT YOUR PATH HERE>\\intag.exe\" --ui --path \"%1\""There are two methods for uninstalling InTag:
- Via argument: Run the exe file with the
--uninstallor-uargument. - Manually: Remove the
HKEY_CLASSES_ROOT\Folder\shell\InTagand(or)HKEY_CLASSES_ROOT\*\shell\InTagentries.
montoner0 - great PR with bunch of improvements and fixes, also nice suggestions
The code for individual file management was taken from the Windows API Code Pack.
For even better organization, check out Multistack Launcher,


