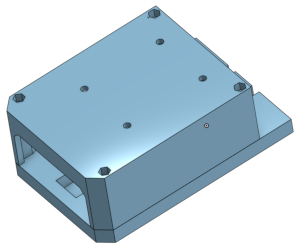
We support the following hardware:
- Raspbery Pi 4 or 5 without any special hardware (bunch of of-the-shelf components and 3D printed parts)
- Raspbery Pi 4 Compute module with custom carrier board. The carrier board is not part of this repository and is available on request.
Both version shares the same software, but are different in hardware (e.g. different GPIO layout, some extra features on custom carrier board). The target hardware is defined during compilation time. If you want to extend this project to different platforms or hardware, please refer to source code available in hardware directory.
The source design is available on Onshape, and you can access it here.
The design files for 3D printing are available in the repository's 3mf directory. You can find the file ScannerAssembly.3mf containing the models to be printed.
For optimal results, we recommend printing the assembly with PLA. Don't forget to adjust the 3MF file according to your printer specifications. If you need assistance with this, consider including a brief guide or tips on printer adjustments.
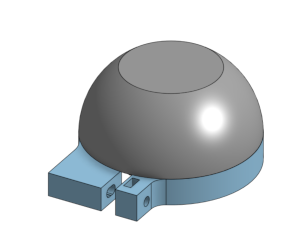
Additionally, we recommend printing a protective cap for Livox Mid-360, which you can find in the LivoxCap.3mf file.
Feel free to reach out if you have any questions or need further assistance!
Time-lapse video guide to build and configure the system.
Currently Raspbian Bullseye is recommended for the system. The system is tested on Raspbian Bullseye. The software can run other distros (e.g. Ubuntu) but it is not tested and maintained.
sudo apt-get update
sudo apt-get upgrade
sudo apt-get install build-essential cmake git rapidjson-dev debhelper build-essential ntfs-3g libserial-dev libgpiod-devsudo nano /etc/dhcpcd.confAnd add in the end:
interface eth0
static ip_address=192.168.1.5/24
static routers=0.0.0.0
Note that, target hardware is defined during compilation time using -DMANDEYE_HARDWARE_XXX:BOOL=ON parameter.
The next example shows how to build the app for Raspberry Pi 4 without custom carrier board.
git clone https://github.com/JanuszBedkowski/mandeye_controller.git
cd mandeye_controller
git submodule init
git submodule update
mkdir -p build && cd build
cmake .. -DCMAKE_BUILD_TYPE=Release -DMANDEYE_HARDWARE_STANDARD:BOOL=ON
make -j4
Before running the application, you should test the wiring and hardware. You can use the following commands to test the hardware:
cd mandeye_controller/build
./led_demo
./button_demo
Both program should work correctly, without need of sudo. If not , check if your user is in gpio group, if not add it:
sudo usermod -a -G gpio $USERFollow manual for build and configuration of USB mount https://gist.github.com/michalpelka/82d44a21c29f34ee5320c349f8bbf683
cd /tmp
git clone https://github.com/rbrito/usbmount.git
cd usbmount
dpkg-buildpackage -us -uc -b
cd ..
sudo apt install ./usbmount_0.0.24_all.deb
Edit config sudo nano /etc/usbmount/usbmount.conf:
by changing keys:
FILESYSTEMS="vfat ext2 ext3 ext4 hfsplus ntfs fuseblk"
FS_MOUNTOPTIONS="-fstype=vfat,users,rw,umask=000 -fstype=exfat,users,rw,umask=000"
VERBOSE=yes
Install udev rules:
sudo mkdir /etc/systemd/system/systemd-udevd.service.d
sudo nano -w /etc/systemd/system/systemd-udevd.service.d/00-my-custom-mountflags.conf
and add content:
[Service]
PrivateMounts=no
Restart udev:
sudo systemctl daemon-reexec
sudo service systemd-udevd restart
Verify if usb mount works correclty:
touch /media/usb/testtail -f /var/log/syslogCreate a file /usr/lib/systemd/system/mandeye_controller.service with content.
Note that you need to adjust your user's name:
[Unit]
Description=Mandeye
After=multi-user.target

[Service]
User=mandeye
StandardOutput=null
StandardError=null
ExecStartPre=/bin/sleep 20
ExecStart=/home/robot/mandeye_controller/build/control_program
Restart=always

[Install]
WantedBy=multi-user.target
Next reload daemons, enable and start the service`
sudo systemctl daemon-reload
sudo systemctl enable mandeye_controller.service
sudo systemctl start mandeye_controller.service
You can check status of the service with:
sudo systemctl status mandeye_controller.service
