A nano project to start a Vaadin project. Perfect for Micro-UIs packed as fat jar in a docker image.
The target of this project is a minimal rampup time for a first hello world. Why we need one more HelloWorld? Well, the answer is quite easy. If you have to try something out, or you want to make a small POC to present something, there is no time and budget to create a demo project. You don´t want to copy paste all small things together. Here you will get a Nano-Project that will give you all in a second.
Clone the repo and start editing the class BasicTestUI or BasicTestUIRunner.
Nothing more.
This project will not use any additional maven plugin or technology. Core Kotlin and the Vaadin Dependencies are all that you need to put a Vaadin app into a Servlet-container.
Here we are using the plain meecrowave as Servlet-Container. http://openwebbeans.apache.org/meecrowave/index.html
As mentioned before, there is not additional technology involved. No DI to wire all things together.
But let´s start from the beginning.
The class BasicTestUIRunner will ramp up the Container and
holds the Servlet- and UI- class as inner static classes.
Here all the basic stuff is done. The start will init. a ServletContainer at port 8080.
If you want to use a random port, use randomHttpPort() instead of httpPort = 8080
The WebApp will deployed as ROOT.war.
object BasicTestUIRunner {

  @JvmStatic
  fun main(args: Array<String>) {
    Meecrowave(object : Meecrowave.Builder() {
      init {
        //        randomHttpPort();
        httpPort = 8080
        isTomcatScanning = true
        isTomcatAutoSetup = false
        isHttp2 = true
      }
    })
        .bake()
        .await()
  }

}
The Servlet itself will only bind the UI Class to the Vaadin Servlet.
  @WebServlet("/*")
  @VaadinServletConfiguration(productionMode = false, ui = MyUI::class)
  class MyProjectServlet : VaadinServlet()
The UI itself will hold the graphical elements.
  @PreserveOnRefresh
  @Push
  class MyUI : UI() {
    override fun init(request: VaadinRequest) {
      content = BasicTestUI()
    }
  }
After this you can start the app invoking the main-method.
The UI itself is quite easy. There is only a button you can click. For every click, the counter will be increased.
class BasicTestUI : Composite() {

  private val button = Button()
  private val label = Label()

  private var counter = 0

  init {
    label.id = LABEL_ID
    label.value = counter.toString()

    button.id = BUTTON_ID
    button.caption = BUTTON_ID
    button.addClickListener { e -> label.value = (++counter).toString() }

    compositionRoot = VerticalLayout(button, label)
  }

  companion object {
    // read http://vaadin.com/testing for more infos
    @JvmField val BUTTON_ID = buttonID().apply(BasicTestUI::class.java, "buttonID")
    @JvmField val LABEL_ID = buttonID().apply(BasicTestUI::class.java, "labelID")
  }
}For testing the Vaadin app, the Open Source project Testbench-NG is used. This is a jUnit5 / Webdriver - manager AddOn for the Selenium and Testbench projects. To read more about it, plase have a look at
https://github.com/vaadin-developer/vaadin-testbench-ng The lates version of Testbench NG is :
The next step is to create a PageObject for the UI. This can be done straight forward.
class BasicTestPageObject(webDriver: WebDriver, containerInfo: ContainerInfo)
  : AbstractVaadinPageObject(webDriver, containerInfo) {

  fun button(): ButtonElement {
    return btn().id(BasicTestUI.BUTTON_ID)
  }

  fun counterLabel(): LabelElement {
    return label().id(BasicTestUI.LABEL_ID)
  }
}
Now we can start writing logical tests. One could be
@VaadinWebUnitTest
internal class BasicUnitTest {

  @Test
  fun test001(pageObject: BasicTestPageObject) {
    pageObject.loadPage()

    Assertions.assertEquals("0", pageObject.counterLabel().text)
    pageObject.button().click()
    Assertions.assertEquals("1", pageObject.counterLabel().text)
    pageObject.screenshot()
  }
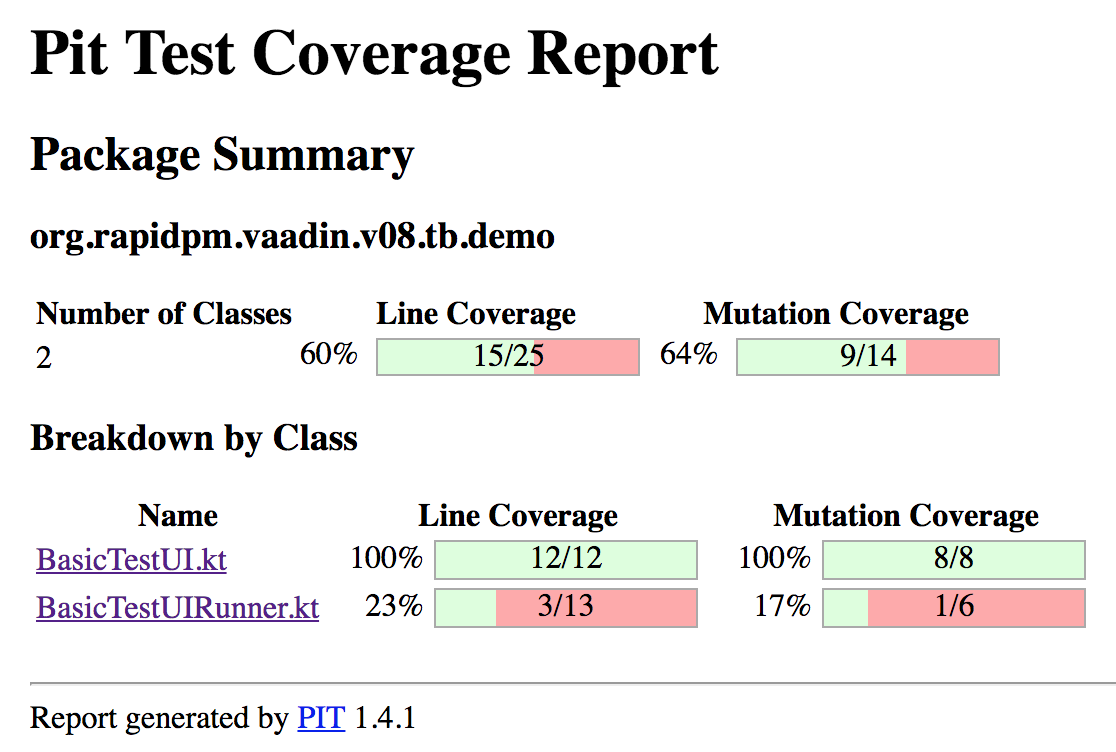
}This project will give you the basic config for MutationTesting as well. Invoke the maven target pitest:mutationCoverage to create the report. The report itself will be under target/pit-reports
Happy Coding.
if you have any questions: ping me on Twitter https://twitter.com/SvenRuppert or via mail.
