UART control access to XY6020L DCDC converter board.
The library implements a simplified ModBus for the data link layer. With the provided functions it is easy to control the DCDC operation and use them as safe low voltage power supply for many applications.
In combination with a small sized Arduino board, the XY6020L can be adapted to different applications, for example as a solar maximum power point tracker:
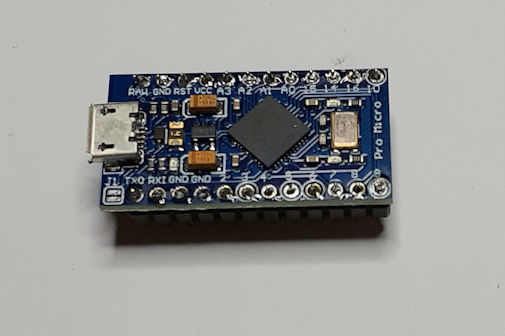
The library is tested with an Arduino Pro Micro clone from China, but also other board shall work.
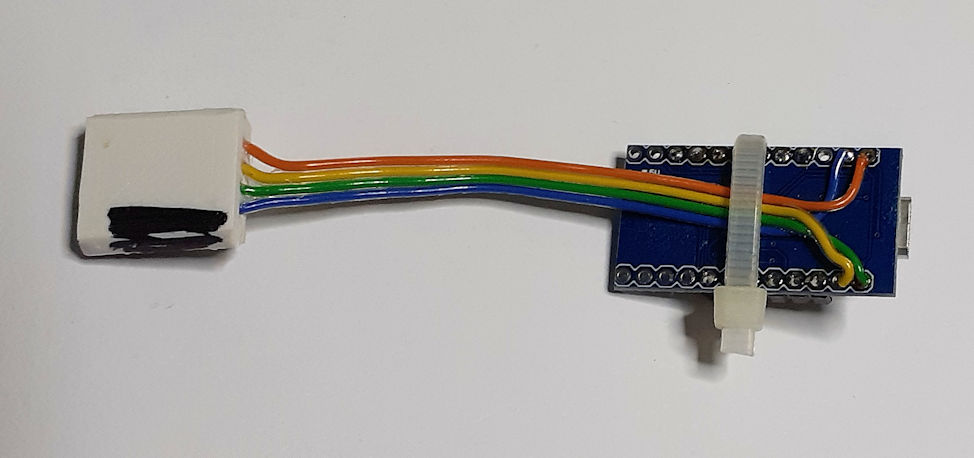
These devices provides 2 independent UART drivers. One for USB serial programming and debugging and the other one for the TX/RX pins. Together with the 5 V supply from the XY6020L you need only 4 wire to control the DCDC converters operation.
Special thanks to users:
- g-radmac on allaboutcircuits forum for his discovery of the UART protocol!
- RikBen68 for informing me about the existing manual from tinkering4fun and the valuable improvement tips.
- tinkering4fun for creation of the manual
- No blocking program flow
- cached voltage and current set commands
- automatic update of internal register from XY6020L
- Translation from chinese manual from user tinkering4fun
- @allaboutcircuits: Exploring programming a XY6020L power supply via modbus
- Simply Modbus FAQ
The internal registers of the XY6020L are stored temporarily. Please use this manual as reference.
Read access:
They are updated automatically on a cyclical basis or can be requested explicitly.
Write access:
If the registers are to be changed, set methods are available. For the registers to be updated frequently, as
- constant voltage: setCV( word cv)
- constant current: setCC( word cc)
- output state: setOutput(bool onState)
- output lock: setLockOn(bool onState)
the write accesses are temporarily stored in a ring buffer so that no update is lost if the send buffer is still full.
Data Type
The data type is kept the same as transfered from XY6020L. There is almost a scaling of 100 from the physical value is used.
For example:
- a voltage of 10 V has a value of 1000
- a current of 4.23 A has a value of 423
The library does not use blocking code so that the programme flow is not stopped, thus enabling control loops. As the XY6020L requires up to 100 ms for responses, the receipt of requested data must be queried via polling.
The content of the registers is queried for all registers at once using the ReadAllHRegs() method. If HRegUpdated() returns true, the contents are available in the buffer (hRegs) and can be read using get methods.
Automatic Update of Holding Registers
In addition to polling, all internal registers are automatically updated cyclically. This can be inhibited via the option switch XY6020_OPT_NO_HREG_UPDATE in the class constructor.
- void task(void);
This function must be called cyclically in the loop() method.
It controls the receipt and sending of messages and the cyclical updating of the registers.
Example:
xy6020l xy(Serial1, 1);
:
void loop()
{
    xy.task();
wait till new data arrived and has been decoded
    if(xy.HRegUpdated())
    {
data access to internal buffer
        vIn = xy.getInV();
        :
        // do some calculations...
        :
This places the update CV register in the ring buffer and xy.task() will transmit it as soon as the send buffer is empty
        xy.setCV( vOut );
    }
}
The methods
- word getModel(void)
- word getVersion(void) provides the result from the model and version register.
Example for non-automatically update of Holding Registers:
xy6020l xy(Serial1, 0x01, 50, XY6020_OPT_SKIP_SAME_HREG_VALUE | XY6020_OPT_NO_HREG_UPDATE);

void loop() {
Request to read all holding register so that model and version registers are read too:
xy.ReadAllHRegs();
Call the XY6020L class driver as long as the reply is received and decoded:
    while(!xy.HRegUpdated())
        xy.task();
Write model and version numbers to the serial monitor of Arduino IDE
    sprintf( tmpBuf, "\nM:%04X V:%04X\n", xy.getModel(), xy.getVersion() );
    Serial.print(tmpBuf);
}
Output
M:6100 V:0074
The XY6020L supports up to 10 preset memories, which set the constant voltage and current settings as well as protection values. Changed presets only become active after a restart.
The following function allow an easy access to the preset settings:
- bool setPreset( word preset)
- void SetMemory(tMemory& mem)
- bool GetMemory(tMemory* pMem)
- void PrintMemory(tMemory& mem)
Example of setting memory 2 as 12 V supply
xy6020l xy(Serial1, 0x01, 50, XY6020_OPT_SKIP_SAME_HREG_VALUE | XY6020_OPT_NO_HREG_UPDATE);
:
void loop() {
    xy.task();
    :
Set tMemory struct to 12 V output voltage and 5 A max current. At 10 V input supply, the XY6020L will switch off output.
    // 12 V supply
    Mem.Nr = 2;
    Mem.VSet = 1200;
    Mem.ISet =  500;
    Mem.sLVP = 1000;
    Mem.sOVP = 1300;
    Mem.sOCP =  620;
    Mem.sOPP = 1040;
    Mem.sOHPh= 0;
    Mem.sOHPm= 0;
    Mem.sOAH = 0;
    Mem.sOWH = 0;
    Mem.sOTP = 110;
    Mem.sINI = 0;
    xy.SetMemory(Mem);
    xy.PrintMemory(Mem);
    :
}
Output:
List Memory Content:
Nr: 2
V-SET = 1200 (Voltage setting)
I-SET = 500 (Current setting)
S-LVP = 1000 (Low voltage protection value)
S-OVP = 1300 (Overvoltage protection value)
S-OCP = 620 (Overcurrent protection value)
S-OPP = 1040 (Over power protection value)
S-OHP_H = 0 (Maximum output time - hours)
S-OHP_M = 0 (Maximum output time - minutes)
S-OAH = 0 (Maximum output charge Ah)
S-OWH = 0 (Maximum output energy Wh)
S-OTP = 110 (Over temperature protection)
S-INI = 0 (Power-on output switch)
xySetup.ino
-
prints diagnosis via USB serial port
-
prints model and version number
-
sets °C as temperature unit
-
writes 3 memory presets as example
-
prints settings of all 10 memory
dcdcmbus.ino
- Usage of XY6020L DCDC for simple max power point tracking of a solar module driving a electrolytic cell
- Cells voltage start from ~3 V and current will rise up to ~3A at 4 V.
- At ~19 V the 20V pannel has its maximum power.
- Simple I-controler increases the cell voltage till the power consumption from the solar panel drives its voltage below 19 V.
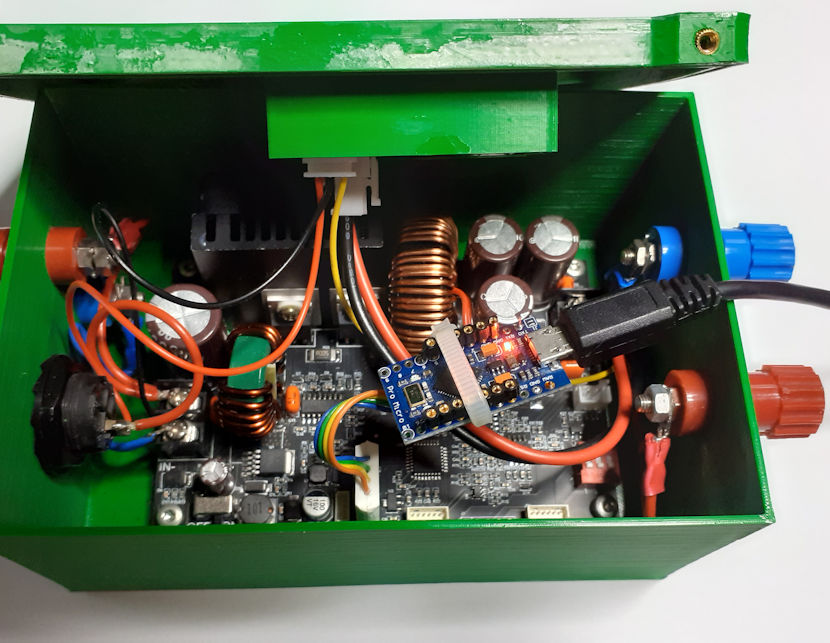
Hardware: Arduino Pro Micro Clone from China
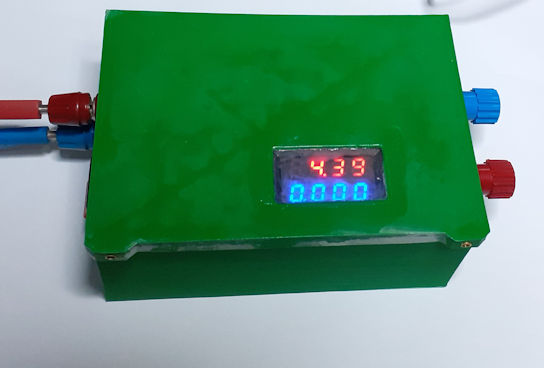
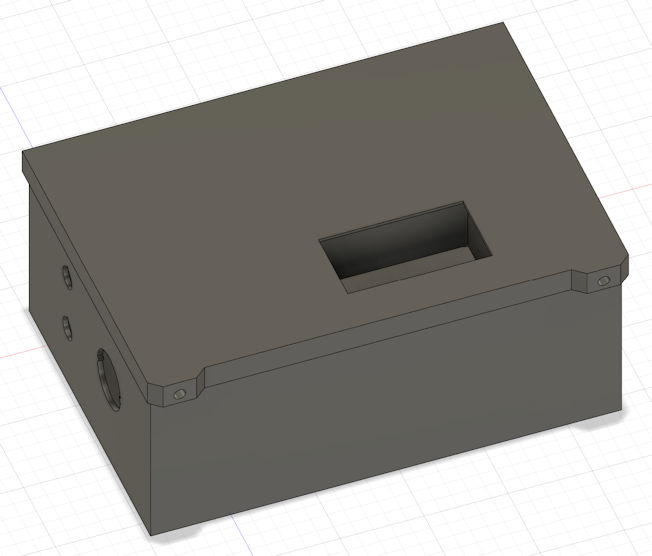
The water proof case hold on its top side a 4 digit U/A display, which can be switch off/on via a switch at the left side.
The models source is in folder Case3D as Fusion360 file as well as the top and button side of the case as STL file.
Author: Jens Gleissberg Date: 2024 License: GNU Lesser General Public License v3.0 or later
