naver-blog-backer는 네이버 블로그를 백업(크롤링)과 백링크 두 API를 제공하는 패키지입니다.
- 백업(crawling) API는 개인 네이버 블로그의 글을 아카이빙 목적으로 기존 포스트를 마크다운언어 파일로 저장합니다.
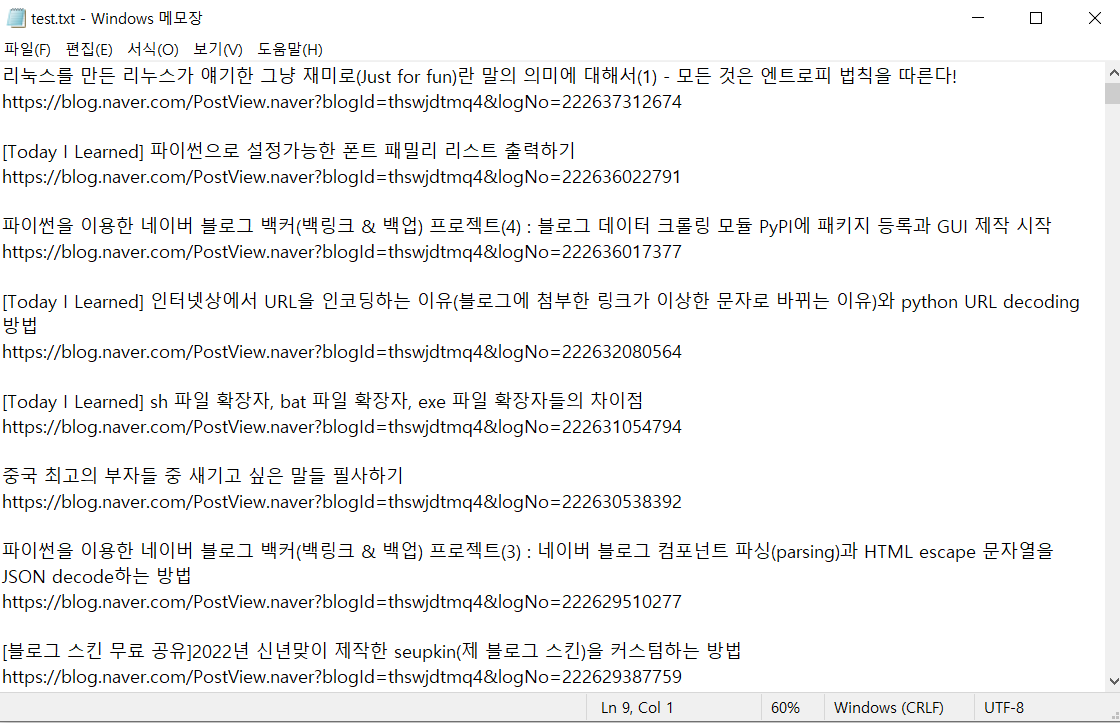
- 백링크 API는 기존 네이버 블로그 사용자들의 애로사항인 구글 검색 엔진에 포스트가 인덱싱 되지 않는 문제를 해결하기 위한 포스트 백링크 텍스트 파일로 저장합니다.
※ 일반 사용자분들께서는 해당 폴더 내에 위치한 'backer.exe'파일을 다운 받으시면 됩니다.
본래 임의의 프로그램을 실행시키는 것은 해킹 취약합니다. 다운로드 시 백신 프로그램이나 window defense에 검출될 수 있으나 안심하시길 바랍니다 😄
※ 해당 패키지는 아래의 두 패키지를 참고하여 만들어졌습니다.
$ pip install naver-blog-backer
naverblogbacker는 crawling과 backlinking 2가지 서비스를 제공합니다.
- crawling use case
    from naverblogbacker.utils import isEmptyDirectory
    from naverblogbacker.blog import BlogCrawler
    import os

    myId = 'YOUR NAVER ID'
    myPath = 'SAVE DIRECTROY PATH'
    mySkipSticker = 'TRUE OR FALSE'

    if isEmptyDirectory(dirPath=myPath):

        myBlog = BlogCrawler(targetId=myId, skipSticker=mySkipSticker, isDevMode=False)
        myBlog.crawling(dirPath=myPath)

        # 정상적으로 실행 시 백업 후 에러 포스트 개수가 출력
        print(f'[MESSAGE] Complete! your blog posts, the number of error posts is {BlogCrawler.errorPost}')
        # 위의 메세지를 잘 보기 위해 프로그램 종료 전 정지
        os.system("pause")
※ SAVE DIRECTORY PATH는 반드시 빈 폴더여야 합니다. 그렇지 않으면, 에러가 발생하고 프로그램이 종료됩니다.
output
- backlink use case
    from naverblogbacker.blog import BlogCrawler
    import os

    myId = 'YOUR NAVER ID'
    myPath = 'SAVE DIRECTROY PATH'

    myBlog = BlogCrawler(targetId=myId, skipSticker=mySkipSticker, isDevMode=False)
    myBlog.backlinking(dirPath=myPath)

    # 정상적으로 실행 시 백업 후 에러 포스트 개수가 출력
    print(f' [MESSAGE] Complete! created your backlinks')
    # 위의 메세지를 잘 보기 위해 프로그램 종료 전 정지
    os.system("pause")
※ 백링크 생성 api는 반드시 빈 폴더일 필요가 없습니다.
output
targetId: 백업 및 백링크를 위한 사용할 네이버 블로그 아이디입니다.dirPath: 백업 혹은 백링크 결과물을 저장할 경로입니다.skipSticker: (optional) 블로그 포스트 내 스티커 이미지를 저장할지 말지에 대한 옵션입니다. 기본값은 True이며, True를 스티커 이미지를 스킵해 저장하지 않는 것을 뜻합니다.isDevMode: (optional) naver-blog-backer 모듈 내 처리들에 대한 상세 히스토리를 볼 수 있는 개발자 모드 옵션입니다. 기본값은 False이며, 만약 True로 전환 시 [DEV MODE] 메세지가 출력됩니다.
- using pthon script (the code is tests folder in this repository)
import os
from naverblogbacker.utils import isEmptyDirectory
from naverblogbacker.blog import BlogCrawler
from pick import pick


def main(myId, myPath, myOption):
    if myOption is 'backlink':
        try:
            myBlog = BlogCrawler(targetId=myId, skipSticker=True, isDevMode=False)
            myBlog.backlinking(dirPath=myPath)
            print(f' [MESSAGE] Complete! created your backlinks')
            os.system("pause")

        except Exception as e:
            print(e)
            os.system("pause")

    elif myOption is 'backup':
        try:
            if not isEmptyDirectory(dirPath=myPath):
                pass

            myBlog = BlogCrawler(targetId=myId, skipSticker=True, isDevMode=False)
            myBlog.crawling(dirPath=myPath)
            print(f'[MESSAGE] Complete! your blog posts, the number of error posts is {BlogCrawler.errorPost}')
            os.system("pause")

        except Exception as e:
            print(e)
            os.system("pause")

    else:
        print(f' [MESSAGE] Sorry, It`s currently not supported')
        os.system("pause")

if __name__ == '__main__':
    myId = 'YOUR NAVER ID'
    myPath = 'SAVE DIRECTORY'
    myOption =  'CHOOSE OPTIONS IN [backlink, backup]'

    main(myId, myPath, myOption)
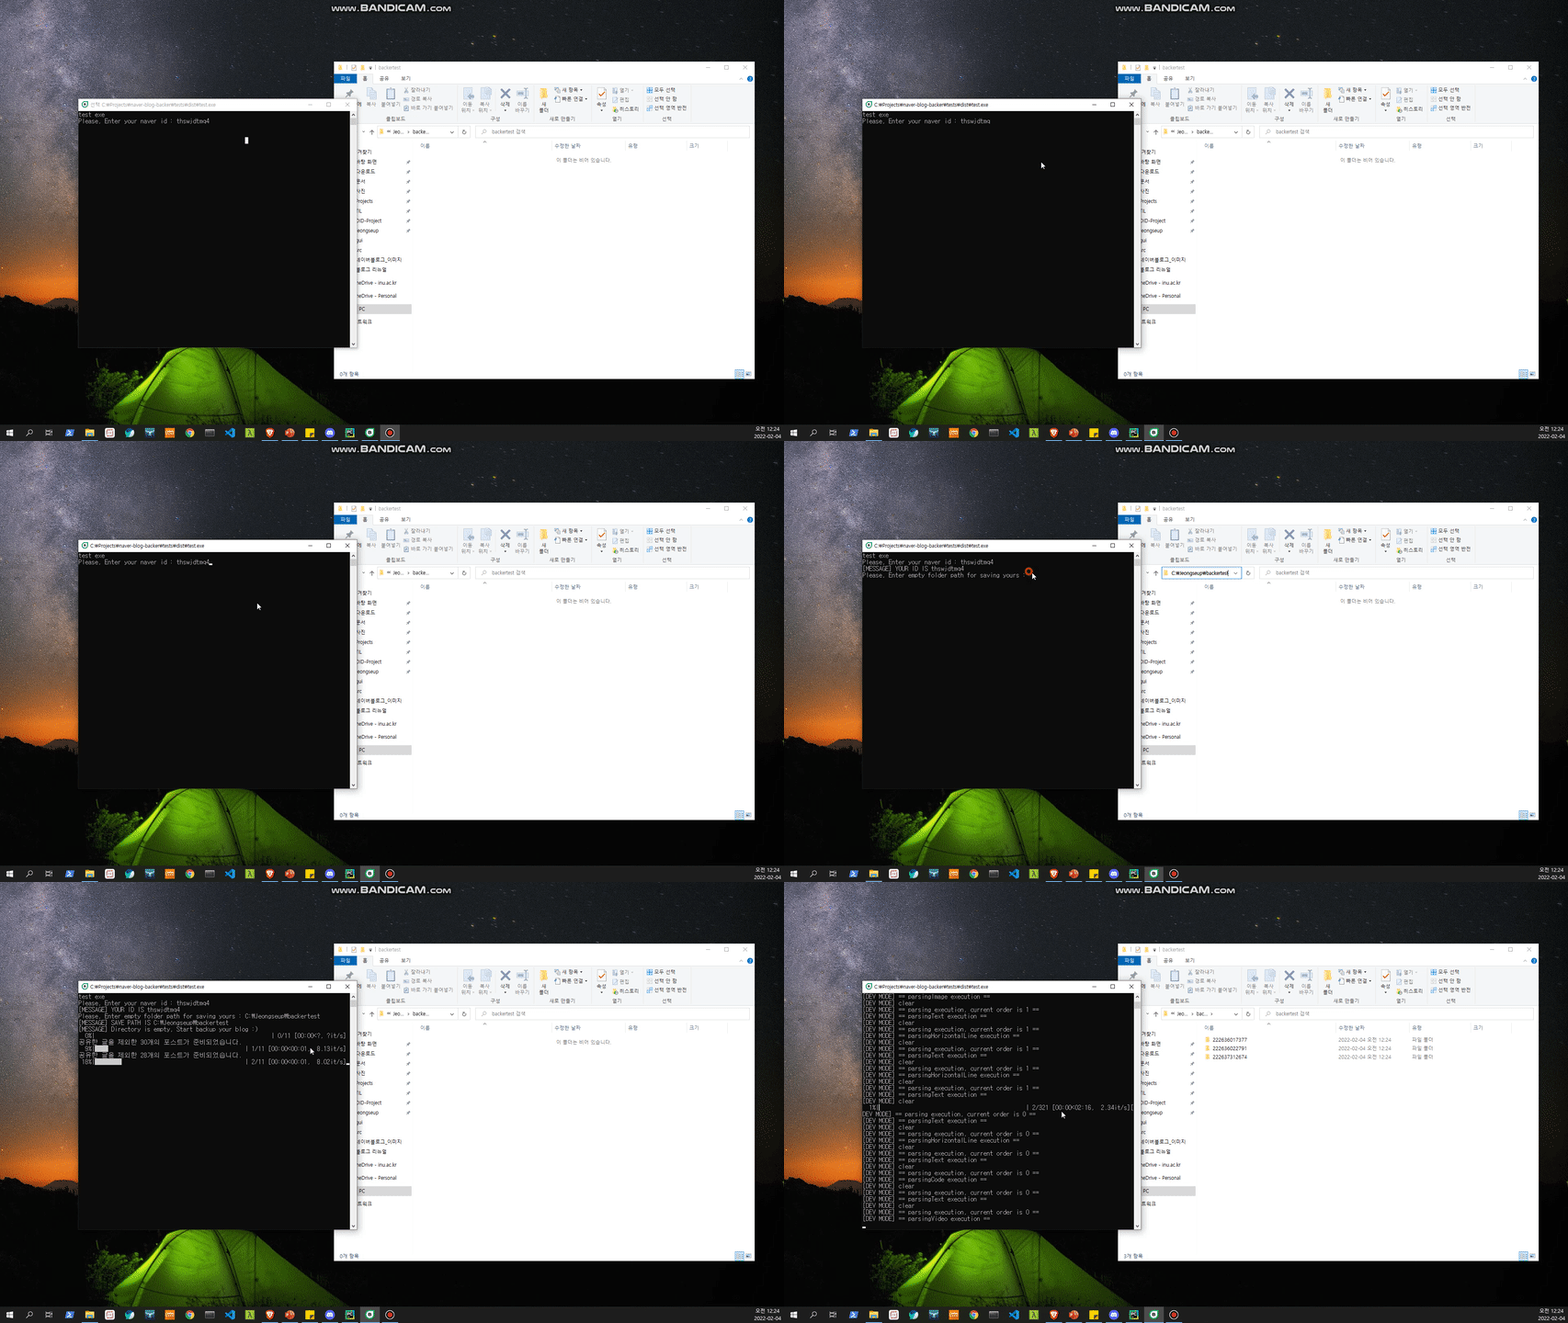
sample
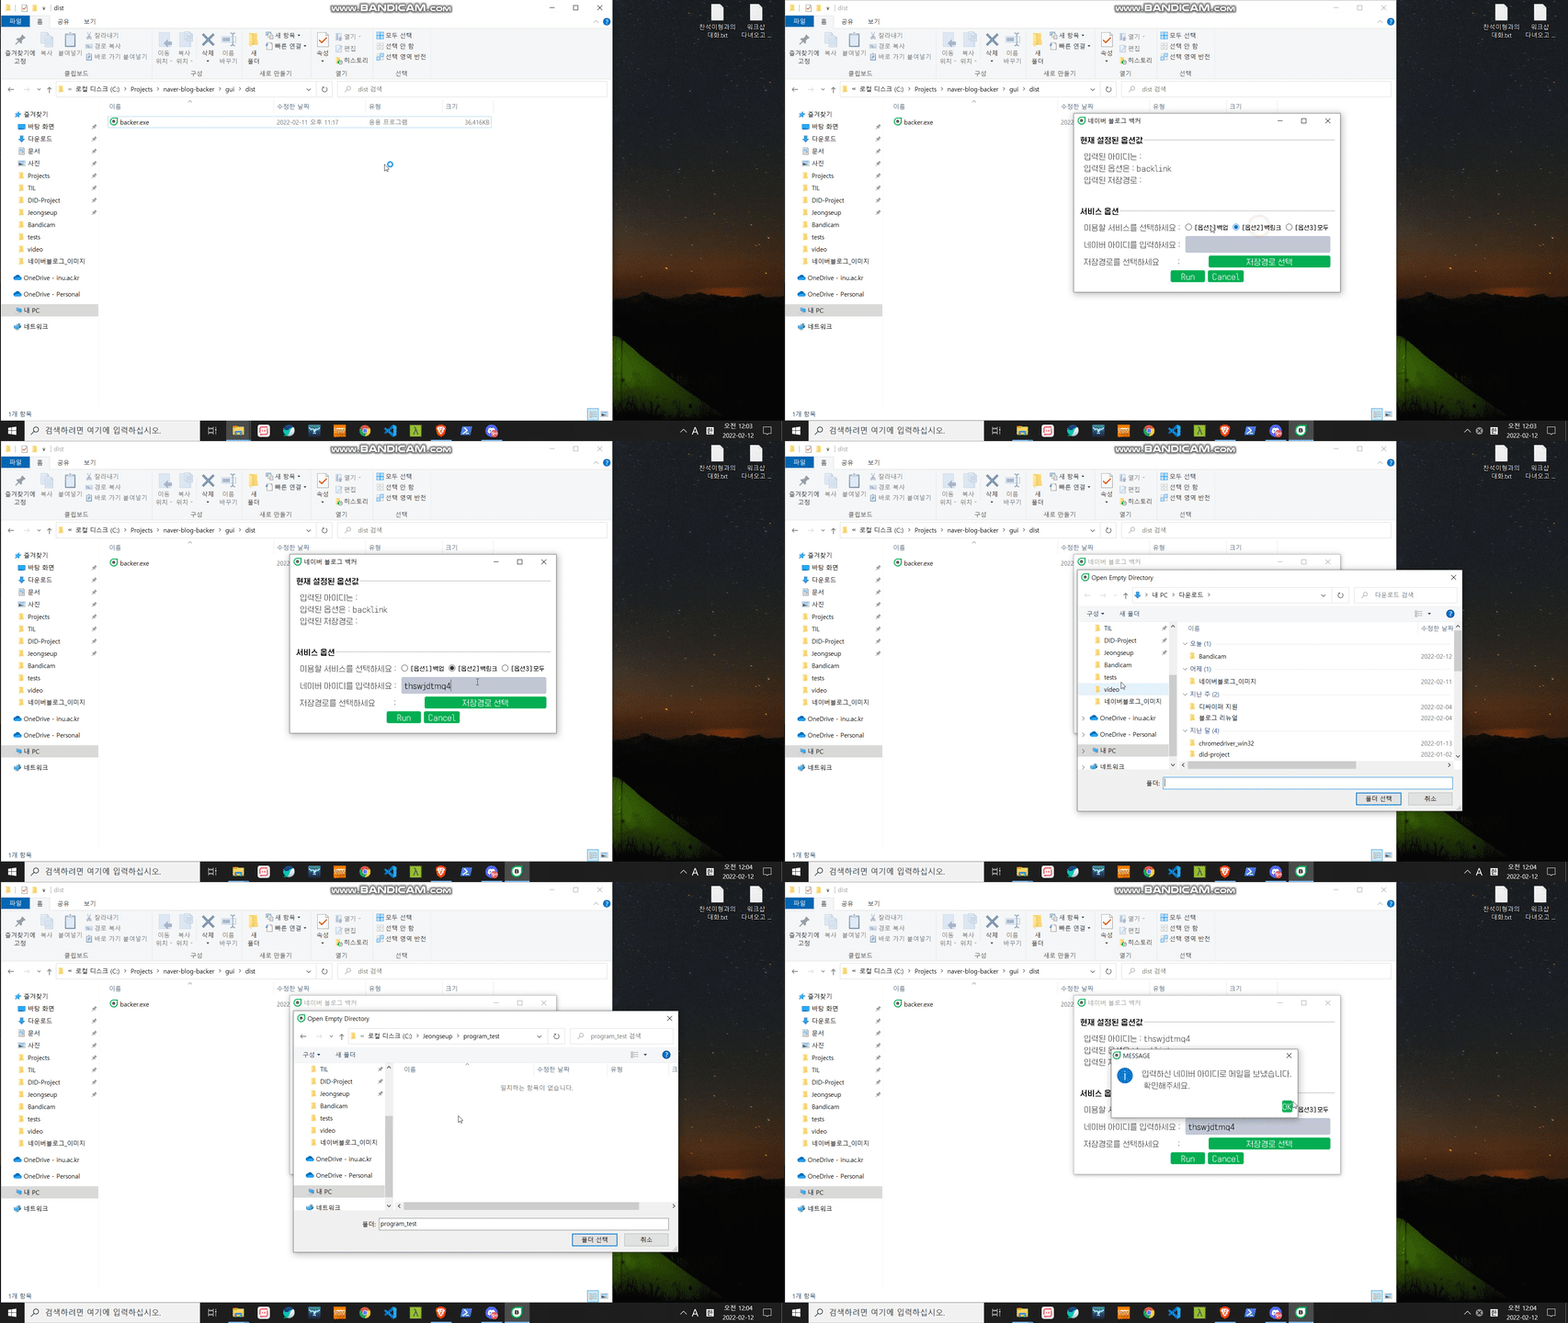
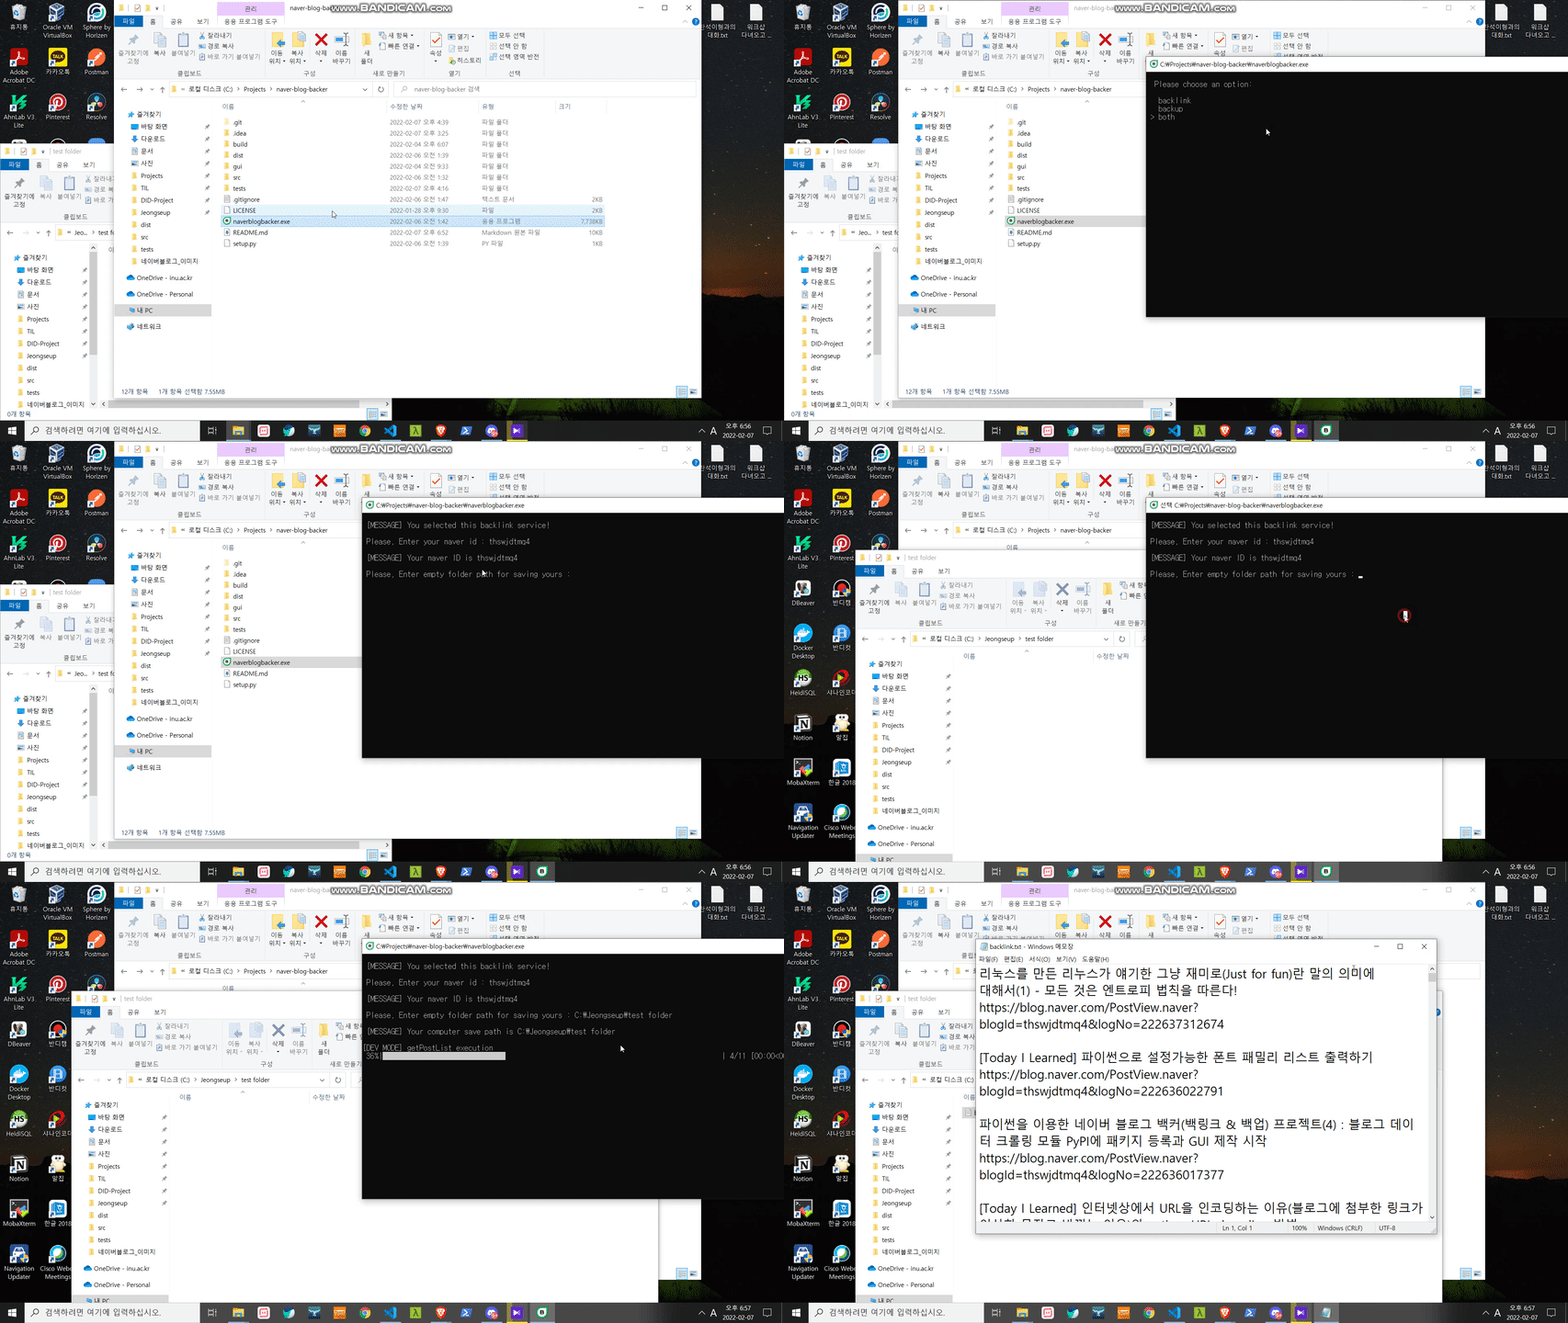
- using program (the program, naverblogbacker.exe, is root path in this repository)
sample
현재 이 패키지는 네이버 블로그 에디터 버젼 4만을 지원합니다. (스마트 에디터 one) 만약 백업할 수 없는 버젼의 포스트를 마주하게 되면 자동으로 종료합니다.
Test bed
EXE packing
Add authentication & GUI version serving
GUI version beta release
해당 라이브러리 및 프로그램 개발과 관련된 메모를 위한 공간입니다.
-
code stype : cameCase
-
package component python script file
- blog.py
- componentParser.py
- post.py
- utils.py
-
how it works?
-
Collect specific blog's posts as a list by requesting naver blog api.
-
In one post item, Bring the inframe data with bs4 package by using BlogPost class
-
If it get inframe data, one component would be parsing and saving data while for loop
-
In the end of for loop, it make full text data into one file. And then save it with its assets like imags, video.
-
Repeats steps 2 to 4 until counting post list length
-
지원하는 에디터 버젼의 Component 구성은 크게 HEADER와 CONTENT로 나뉩니다. 그리고 모든 컨텐츠는 <div class="se-component"></div>로 구성되어 있습니다.
-
HEADER
- 카테고리명 : se-component & se-documentTitle > se-component-content > ... > blog2_series
- 제목 : se-component se-documentTitle > se-component-content > ... > se-title-text
-
CONTENT
-
텍스트 컴포넌트(se-component & se-text)
-
일반 텍스트 : se-component & se-text > se-component-content > se-section-text > se-module-text > p.se-text-paragraph & span
-
공백 텍스트 : se-component & se-text > se-component-content > se-section-text > se-module-text > p.se-text-paragraph & span (nothing)
-
링크 텍스트 : se-component & se-text > se-component-content > se-section-text > se-module-text > p.se-text-paragraph & se-link
-
해시태그 텍스트 : se-component & se-text > se-component-content > ... > se-module-text > se-text-paragraph > __se-hash-tag
-
-
소제목 컴포넌트(se-component & se-sectionTitle)
- 소제목 텍스트 : se-component & se-sectionTitle > se-component-content > ... > se-module-text > se-text-paragraph
-
인용구 컴포넌트(se-component & se-quotation)
- 인용구 텍스트 : se-component & se-quotation > se-component-content > ... > se-module-text > se-text-paragraph
-
구분선 컴포넌트(se-component & se-horizontalLine)
- 구분선 : se-component & se-horizontalLine > se-component-content > se-section-horizontalLine > se-module-horizontalLIne > ... > hr.se-hr (스타일에 따라 변하지는 않음)
-
일정 컴포넌트(se-component & se-schedule) ※ 지원하지 않음
- 일정 텍스트 : se-component & se-schedule > se-component-content > se-section-schedule > se-module-schedule > ... > p.se-schedule-title
- 일정 데이트 : se-component & se-schedule > script[data-module] > data.startAt, data.endAt
-
코드 컴포넌트(se-component & se-code)
- 소스 코드 : se-component & se-code > se-component-content > se-section-code > se-section-code > se-module-code > se-code-source
-
라이브러리(책, 영화) 컴포넌트(se-component & se-material)
- 링크 데이터 : se-component & se-material > se-component-content > se-section-material > a[data-linkdata]
-
이미지 컴포넌트(se-component & se-image)
- 이미지 소스 : se-component & se-image > se-component-content > se-section-image > se-module-image > a[data-link, src] or a > img[data-lazy-src]
- 이미지 텍스트 : se-component & se-image > se-component-content > se-section-image > se-module-text & se-caption > p.se-text-paragraph > span
-
스티커 컴포넌트(se-component & se-sticker)
- 이미지 소스 : se-component & se-sticker > se-component-content > se-section-sticker > se-module-sticker > a > img.se-sticker-image[src]
- 이미지 텍스트 : se-component & se-sticker > se-component-content > se-section-sticker > se-module-text & se-caption > p.se-text-paragraph > span
-
비디오 컴포넌트(se-component & se-video)
- 비디오 컴포넌트 : se-component & se-video > se-component-content > se-section-video
- 비디오 소스 : se-component & se-video > script > data-module (vid, inkey)
- api 요청(https://apis.naver.com/rmcnmv/rmcnmv/vod/play/v2.0/vid=?inkey=?)
- json 페이지 내 저장 URL 위치
-
파일 컴포넌트(se-component & se-file)
- 파일 데이터 : se-component & se-file > se-component-content > se-section-file > se-module-file > a[data-link]
- link로 api 요청
- 파일 데이터 : se-component & se-file > se-component-content > se-section-file > se-module-file > a[data-link]
-
지도 컴포넌트(se-component & se-placeMap) ※ 지원하지 않음
- 지도 데이터 : se-component & se-placeMap > se-component-content > se-section-placeMap > se-module-text > a.se-map-info > se-map-title & se-map-address
-
임베디드 컴포넌트(se-component se-oembed)
- 비디오 데이터 : ... > content['data-module']
- 비디오 URL
- 비디오 제목
- 비디오 썸네일 URL
- 비디오 description
- 비디오 데이터 : ... > content['data-module']
-
