 DataSurgeon (ds) is a versatile tool designed for incident response, DLP, penetration testing, and CTF challenges. It allows for the extraction of various types of sensitive information including emails, phone numbers, hashes, credit cards, URLs, IP addresses, MAC addresses, SRV DNS records and a lot more!
- Supports Windows, Linux and MacOS
- Support recursive file analysis within directories
- Plugin Support
- CSV Output
- Extraction Features
- Recent Updates
- Quick Install
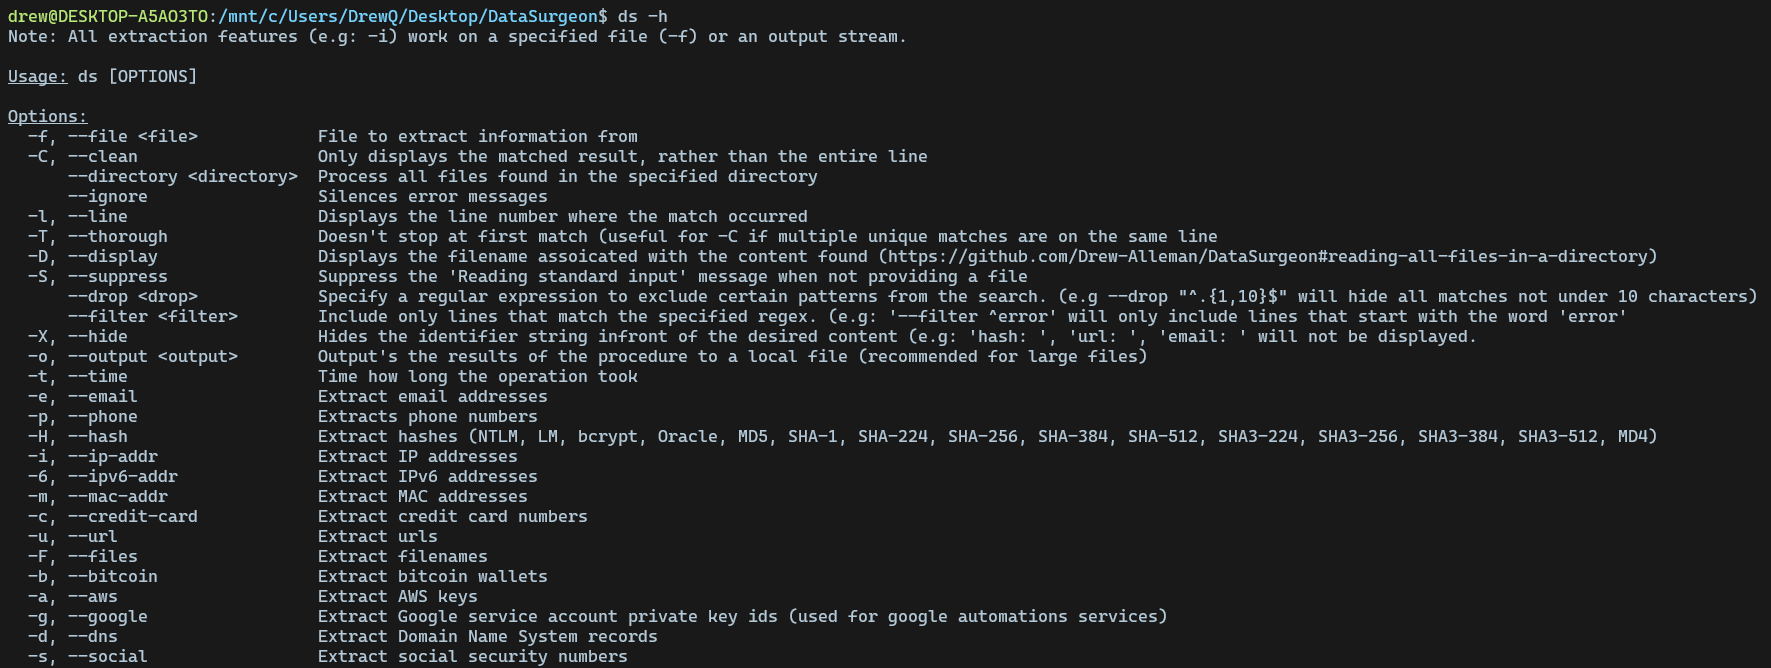
- Command Line Arguments
- Examples
- Speed Tests
- Managing Plugins
- Reporting Issues
- Project Goals
To learn how to manage plugins please follow the guide here.
- Emails
- Phone numbers
- Social Security Numbers
- Credit Cards
- Bitcoin wallets
- URL's
- IPv4 Addresses and IPv6 addresses
- MAC Addresses
- SRV DNS Records
- Google API Private Key ID's
- AWS Keys
- CVE Numbers (PLUGIN)
- Files
- Windows Registries (PLUGIN)
- MD4 & MD5
- SHA-1, SHA-224, SHA-256, SHA-384, SHA-512
- SHA-3 224, SHA-3 256, SHA-3 384, SHA-3 512
- MySQL 323, MySQL 41
- NTLM
- bcrypt
This update brings a plugin management system to DataSurgeon. You can now add, remove, and list plugins using the --add, --remove, and --list options.
I also added a new plugin, ds-winreg-plugin, that can find Windows registry paths.
To add a new plugin, use --add <URL>, where the URL is a GitHub repository with a plugins.json file. To remove a plugin, use --remove <URL>. To see all your plugins, use the --list option.
Once a plugin is added, you can use it as an argument in DataSurgeon. The argument's name is the "Argument Long Name" in the plugin's plugins.json file.
The quick installer can also be used to update DataSurgeon.
Install Rust and Github then RESTART YOUR TERMINAL.
read -p "Would you like to add 'ds' to your local bin? This will make 'ds' executable from any location in your terminal. (y/n) " response && wget -q -O - https://raw.githubusercontent.com/Drew-Alleman/DataSurgeon/main/install/install.sh | bash -s -- "$response"
Enter the line below in an elevated powershell window.
IEX (New-Object Net.WebClient).DownloadString("https://raw.githubusercontent.com/Drew-Alleman/DataSurgeon/main/install/install.ps1")
Relaunch your terminal and you will be able to use ds from the command line.
curl --proto '=https' --tlsv1.2 -sSf https://raw.githubusercontent.com/Drew-Alleman/DataSurgeon/main/install/install.sh | sh
Here I use wget to make a request to stackoverflow then I forward the body text to ds . The -F option will list all files found. --clean is used to remove any extra text that might have been returned (such as extra html). Then the result of is sent to uniq which removes any non unique files found. Ig you wanted you can remove the warning message at the top 'Reading standard input..' by using -S.
$ wget -qO - https://www.stackoverflow.com | ds -F --clean | uniq
Here I am pulling all mac addresses found in autodeauth's log file using the -m query. The --hide option will hide the identifer string infront of the results. In this case 'mac_address: ' is hidden from the output. The -T option is used to check the same line multiple times for matches. Normallly when a match is found the tool moves on to the next line rather then checking again.
$ ./ds -m -T --hide -f /var/log/autodeauth/log
2023-02-26 00:28:19 - Sending 500 deauth frames to network: BC:2E:48:E5:DE:FF -- PrivateNetwork
2023-02-26 00:35:22 - Sending 500 deauth frames to network: 90:58:51:1C:C9:E1 -- TestNet
You can use the --directory option to read all files in the specified directory recursively. The -D option is used to display the filename where the match was found. -l or --line is used to display the line number the content was found on.
$ ds --directory test_dir/ -Dl
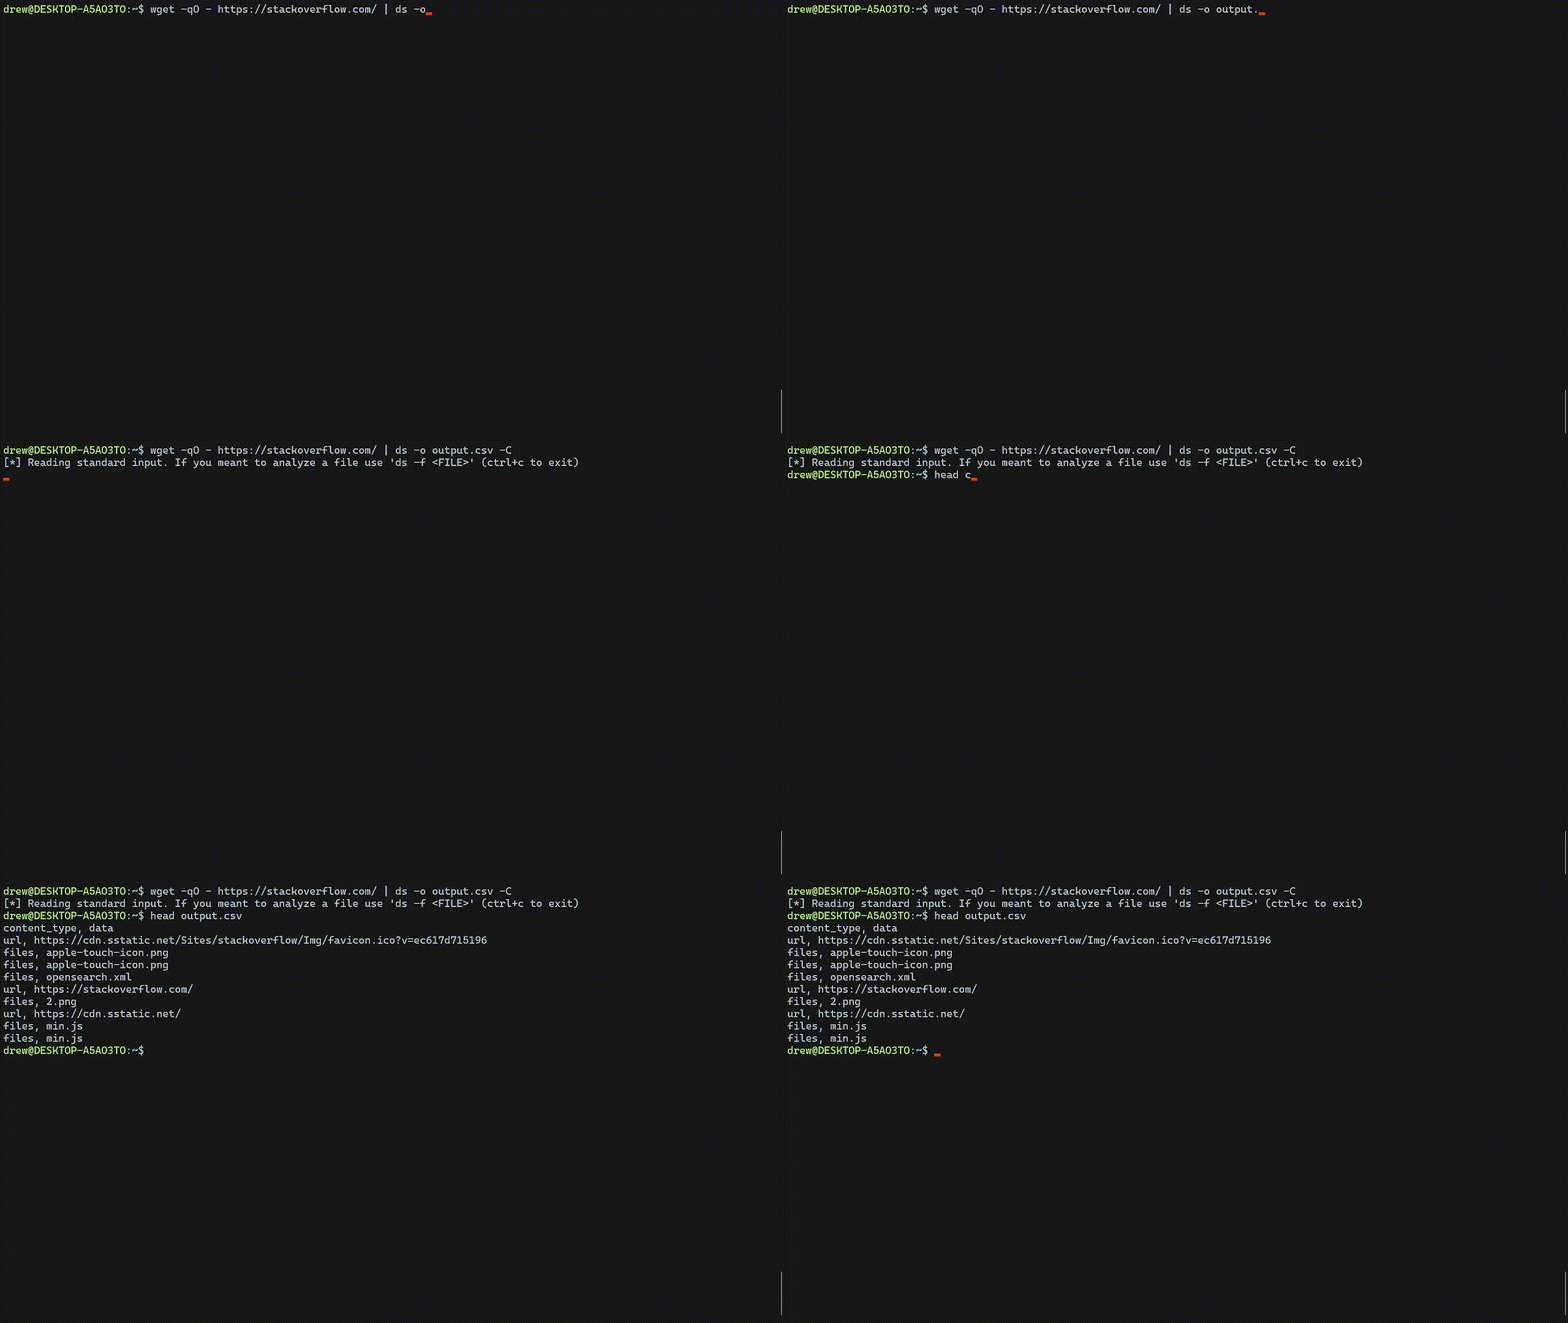
To output your results to a CSV file, use the -o option followed by the name of the file you want to save your data to. The -D and -X are supported. The format is: ds -o <FILENAME>.csv (.csv is needed).
$ wget -qO - https://www.stackoverflow.com | ds -o output.csv -C
When no specific query is provided, ds will search through all possible types of data, which is SIGNIFICANTLY slower than using individual queries. The slowest query is --files. Its also slightly faster to use cat to pipe the data to ds.
Below is the elapsed time when processing a 5GB test file generated by ds-test. Each test was ran 3 times and the average time was recorded.
Processor	Intel(R) Core(TM) i5-10400F CPU @ 2.90GHz, 2904 Mhz, 6 Core(s), 12 Logical Processor(s)
Ram         12.0 GB (11.9 GB usable)
| Command | Speed |
|---|---|
cat test.txt | ds -t |
00h:02m:04s |
ds -t -f test.txt |
00h:02m:05s |
cat test.txt | ds -t -o output.txt |
00h:02m:06s |
| Command | Speed | Query Count |
|---|---|---|
cat test.txt | ds -t -6 |
00h:00m:12s | 1 |
cat test.txt | ds -t -i -m |
00h:00m:22 | 2 |
cat test.txt | ds -tF6c |
00h:00m:32s | 3 |
When filling out a new issue please answer ALL questions on the bug template. Issues with not enough information will be closed.
- JSON output
- Untar/unzip and a directorty searching mode
- Base64 Detection and decoding


