First and foremost, create a repository from this template repository (the one you're in now! 😊 ).
In order to do so, click 'Use this template' and create your repository.
Upload your desired code into the new repository, or alternatively you can also choose to do so directly into the Codespace (we will see how to do this in a later step).
Once creating the desired repository, press . (period key) from the main repository page to switch over to dev mode.
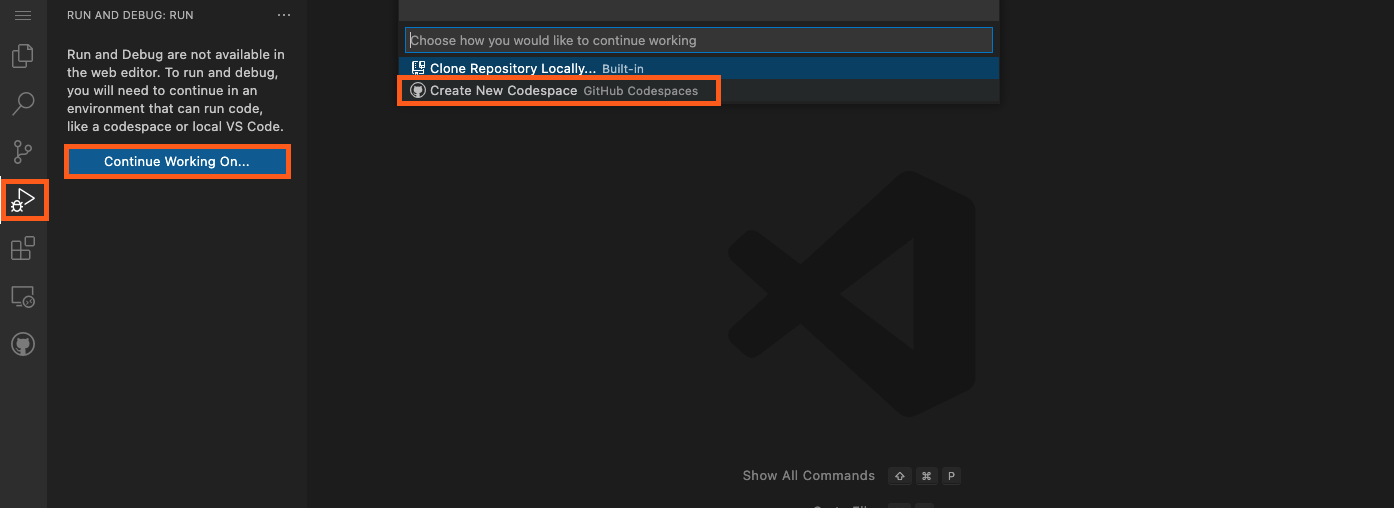
Within dev mode, by clicking the 'Run and Debug' button you can create a new Codespace.
If you haven't already done so, you can import your code from your personal files by clicking File > Open File.
Once you're inside Codespaces with your desired code, you can edit, run and debug it.
Editing
Let's say you want to edit the template ent/schema. For example, add a field named title to the User schema.
In ent/schema/user.go:
To generate this, we will run the command go generate ./ent in the Codespaces terminal.
To see if the command worked successfully, we can see that changes were made to files (files on the left-hand side became yellow, meaning changes were made that were not staged yet). Also, we can check inside ent/user/user.go if our field was added:
To learn more about working with ent, click here.
Saving Changes
If you have made changes to your code, by clicking on 'Source Control' you can directly stage, commit and push them into the repository.
By clicking the '+' you can stage your changes.
To commit the changes, enter a message and click the check mark. This button will automatically commit straight into the master branch.
Now that your repository is ready, click here to submit an issue on the Ent repository.
When submitting your issue, a best practice would be to provide sufficient context, link to your new repository, and you're done!


