This repository is for Jackal UGV elevator navigation.
In this simultion, we will be using the Clearpath Jackal tranverse between 2 floors (floor 0 and floor 1) using an elevator. Few barrier were placed in the world for the UGV to navigate. The simulation world can be found here.
Fig.1 - Simulated Environment
- Navigate from point 1:
(4.0, -5.0, 0.5)to point 2:(3.0,-0.5,0.5) - Enter the lift at level 0 (point 2:
(3.0,-0.5,0.5)to point 3:(0.0,-0.5,0.5)) - Send the lift from level 0 to level 1
- Exit lift at level 1 to point 4:
(3.0,-0.5,3.2) - Switch Map to level 1 and localize robot
- Navigate from point 5:
(3.0,-0.5,3.2)to point 6:(4.0,5.0,3.2
For ROS Melodic:
$ sudo apt-get install ros-melodic-jackal-*
For ROS Noetic:
$ sudo apt-get install ros-noetic-jackal-*
Change the ROS distro to Melodic if needed. The steps are the same
- Create a ROS Workspace (for example
catkin_ws)
$ source /opt/ros/noetic/setup.bash
$ mkdir -p ~/catkin_ws/src
$ cd ~/catkin_ws/
$ catkin_make$ sou

$ cd ~/catkin_ws/src
$ git clone git@github.com:arwinder-jaspal/robot-multi-floor-navigation.git
- Clone Additional Reposity
$ cd ~/catkin_ws/src
$ git clone git@github.com:jackal/jackal_simulator.git
$ git clone git@github.com:jackal/jackal_desktop.git
$ git clone git clone https://<username>@bitbucket.org/swaroophs/jackal_elevator.git
- Build the Workspace
$ cd ~/catkin_ws
$ catkin_make
For Mapping, we will use the gmapping package from ROS.
- To launch the package:
$ source ~/catkin_ws/devel/setup,bash
$ roslaunch multi_floor_nav mapping.launch
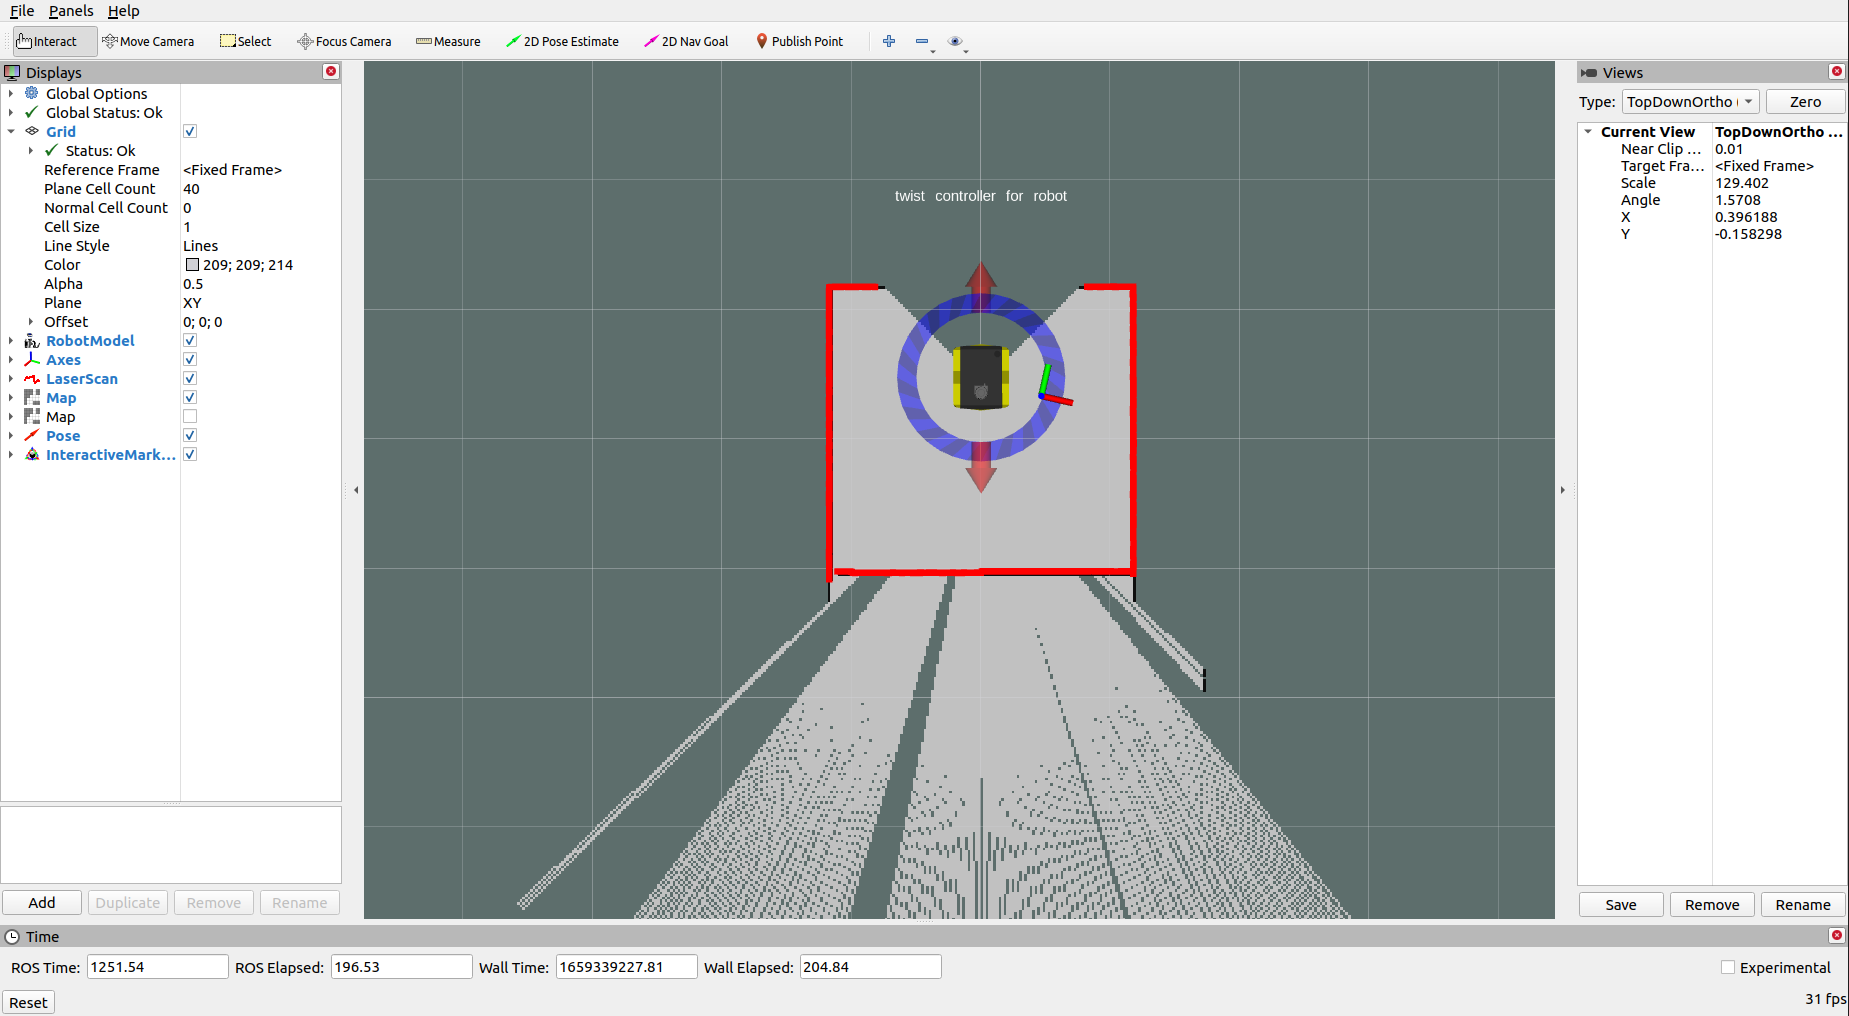
This will launch RViz and Gazebo for mapping.
To begin mapping, use the Interaction Marker on RViz

Fig.1 - Rviz For Mapping With Interactive Marker
- Once, map is generated, on a new terminal run the
map_savernode frommap_serverpackage to write the map to file.
$ source ~/catkin_ws/devel/setup.bash
$ rosrun map_server map_saver -f <map_filename>.yaml
This will save 2 files (1 .pgm file and 1 .yaml) to the current directory
This will by default generate the map for floor 0. To map for floor 1, edit the z_pos param in the mapping launch file and repeat steps 1 and 2.
$ cd ~/catkin_ws/src/robot-multi-floor-navigation/multi_floor_nav/launch
$ nano mapping.launch
The map files are already generated for this repo
- To run the simulation 2 terminals is needed
- 1 terminal to launch the nodes
- 1 terminal to start the simulation
- Build the workspace
$ cd ~/catkin_ws
$ catkin_make
- Source both the terminal
source ~/catkin_ws/devel/setup.bash
- Launch the navigation nodes on the first terminal
$ roslaunch multi_floor_nav nav.launch
This will launch the few nodes:
- gazebo: for visualization
- map_server: 2 map server will be launch(one for each map file) to load laser maps
- amcl: for robot localization
- move_base: for planning
- rviz: for visualization
- change_map_node: for handle map switching operations
- multi_floor_nav_node: node with a state machine to handle map switching, sending of move_base goals and odom goals, and controlling the elevator
- On the second terminal, we will send the signal to start the state machine on multi_floor_nav_node. To do so, run the following command ONCE:
$ rostopic pub /start std_msgs/Empty "{}"
This will start the state machine on multi_floor_nav_node.
The purpose for this topic is to allow enough time on slower machines to load visualization tools such as Gazebo.
