🚨 Important information for the teachers, please read this if you are a teacher.
Contributions are GitHub's bread-and-butter, the main purpose. It's time to start your first GitHub contribution.
Git offers a way to push code to a repository without owning it, or even being invited to it, it's called a Pull Request and the main goal of this exercise is to create your first Pull Request. Here is a 12min video explaining pull requests.
During this project, you will start building your professional profile, one of the most significant accomplishments you can have at the academy:
-
It will be the first version of your developer portfolio.
-
This will be the first version of your Resume (as a coder).
-
It will give more context to your learning experience: you can see a table of everything you will learn throughout the course.
Open this Student Showcase (still in beta): Here you can find the list of some students that have their profile already built, you can also click around each student to find their public information (GitHub profile, Twitter usernames, Linkedin profiles, etc.).
Don't worry about the content of your profile, today its just about the YML structure and making sure you show up on the students list, later you can do more updates to your profile.
- Open this URL and fork the repository https://github.com/4GeeksAcademy/4GeeksAcademy

A new repository will be created in your account.
-
Open the new forked repository using a provisioning tool like Codespaces (recommended) or Gitpod (ask your teacher on how to open your fork).
-
In your Codespace, create a file
<your_github_username>.ymlfile inside/site/resumes/with your profile information.
The YML file must contain all your personal and professional information.
Open this template and copy its contents to start making your profile: example.yml
💡 Important: You should test your
YMLsyntax here: https://www.yamllint.com/
- Commit and push your changes.
$ git add .
$ git commit -m "my profile"
$ git push origin master
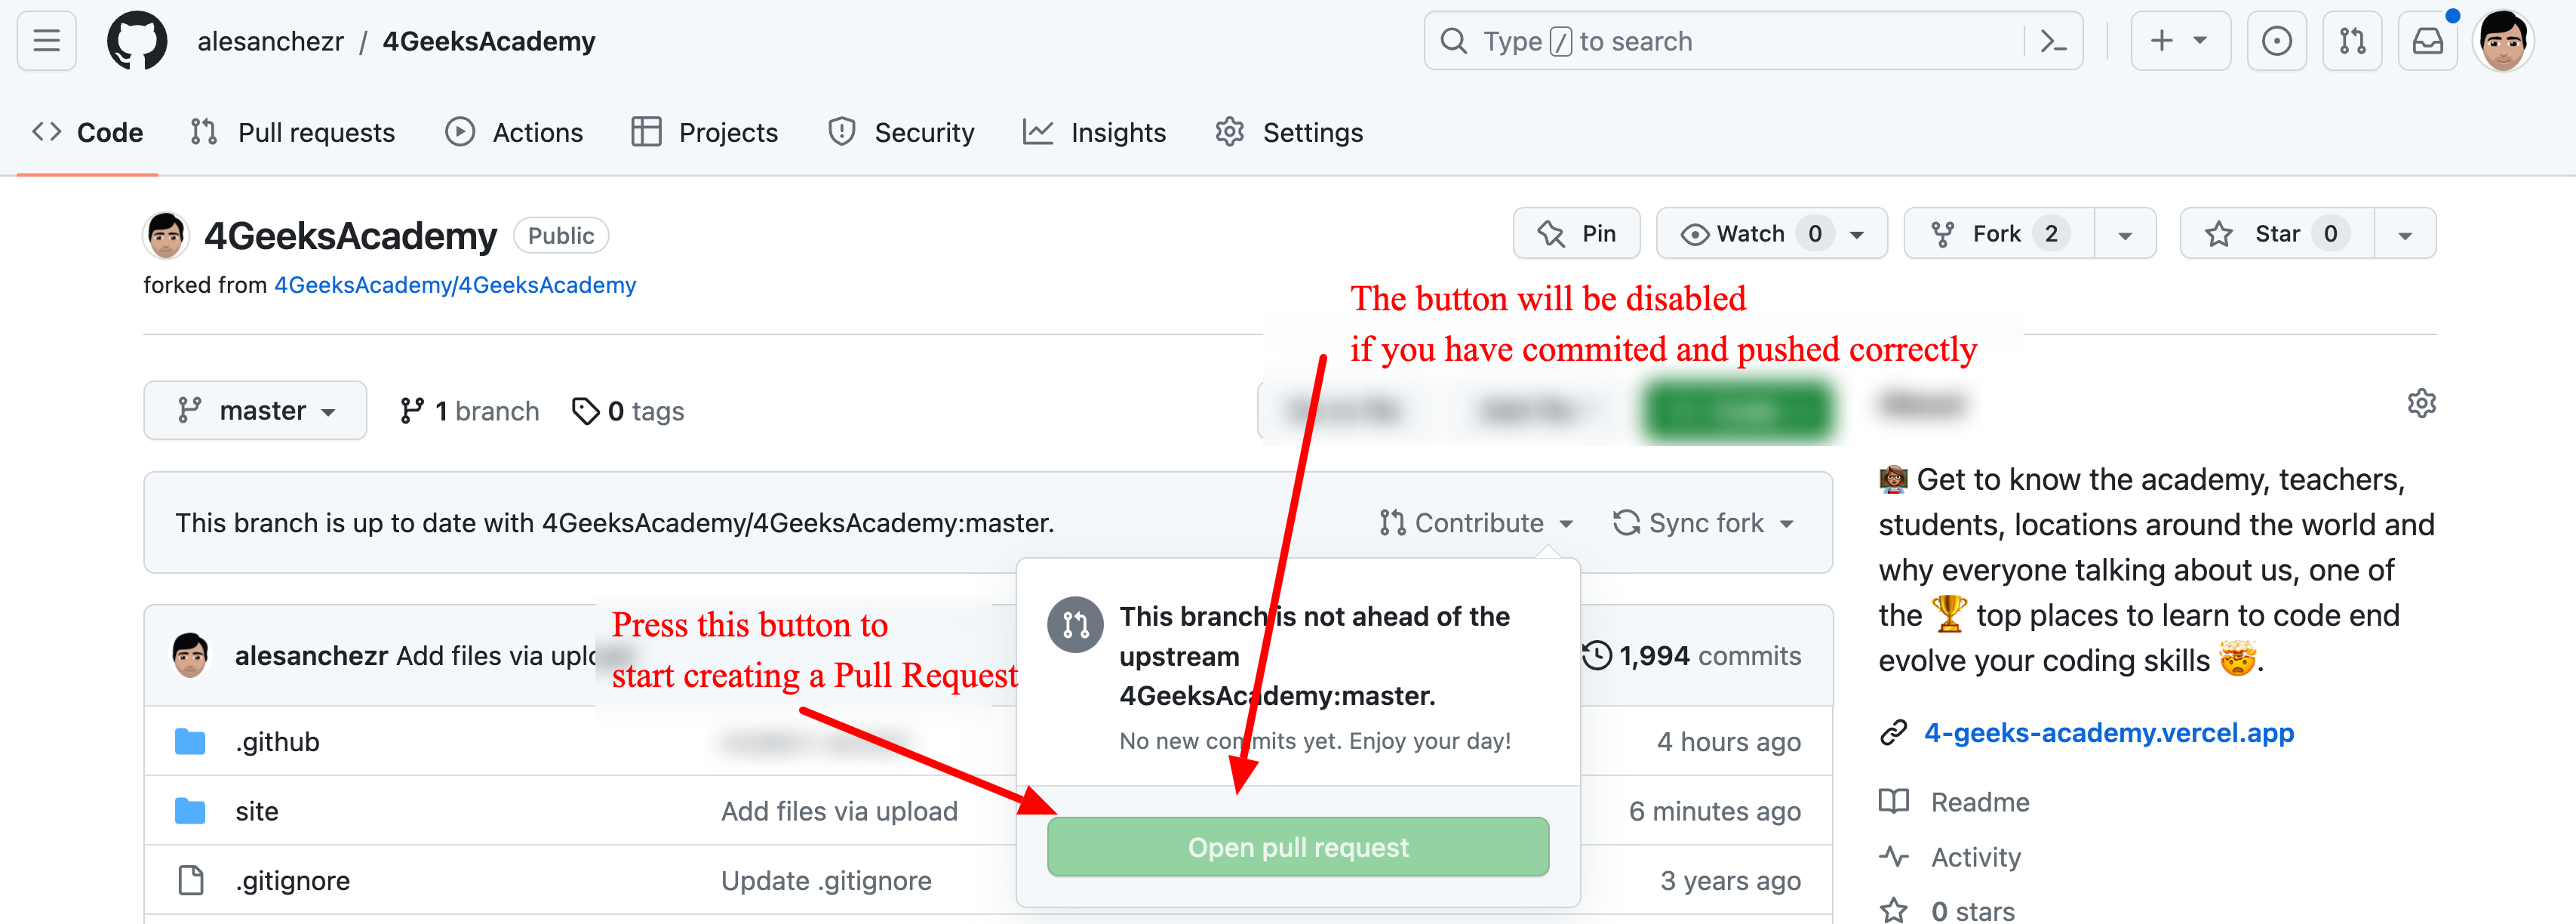
- Go back to GitHub and look for the recently created repository. In it you will find a button to "Pull Request" your changes back into the main repository.
After completing the PR (Pull Request) the application will automatically generate your own student portfolio, to see it, see if your name appears here:
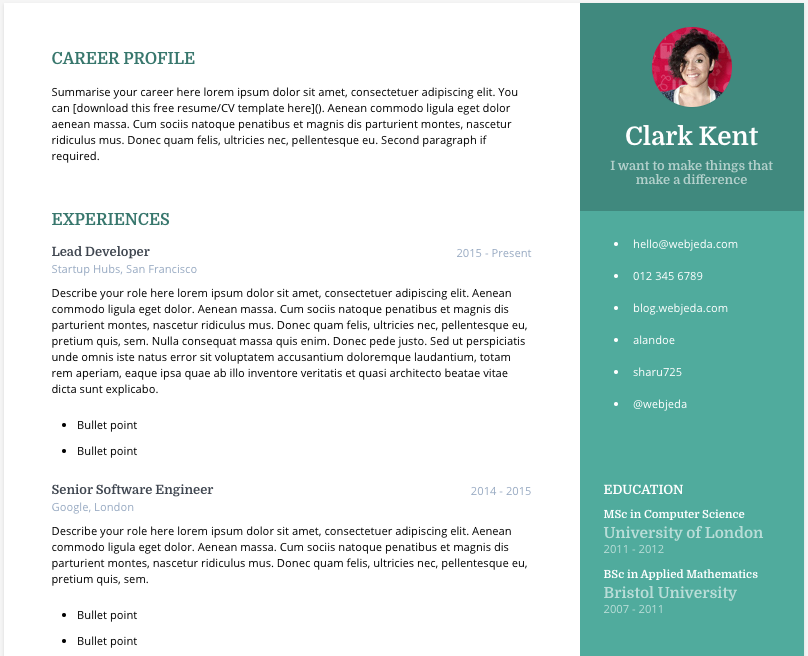
Your profile should look like the following:

The YML file it's comprised of 5 major sections:
basic_info: Personal info.
education: Previous studies.
experiences: Previous jobs.
projects: Describe the projects you've built as a developer.
skills: List your skills with a percentage of expertise.

You can pick a different template and skin, for example:
template: "online-cv"
skin: "blue"
This and many other projects are built by students as part of the 4Geeks Academy Coding Bootcamp by Alejandro Sanchez and many other contributors. Find out more about our Full Stack Developer Course, and Data Science Bootcamp.