Makefiles which are small as possible for using Arduino libraries.
The regular procedure of adopting custom designed development boards on Arduino is revising boards.txt to match the new dev boards. In this project it is aiming to be able to adopt your own new board by changing few lines in Makefile. It is convenient for engineers who are not using only off-the-shelf boards.
It is also beneficial who are constrained (or like) to use only an editor for developments or would like to understand how to build Arduino libraries with Makefiles.
Currently supporting AVR and STM32 only. I have no intention to make this project to replace arduino-mk.
- Prerequisites
- Basic flow
- Makefiles for AVR and STM32
- Configuring Makefiles to point installed Arduino
- Configuring Makefiles for dev boards
- Usage
- Appendix
- Credits
- TODO
- Arduino core libraries which comes with Arduino IDE
- SparkFun Arduino Boards Addon Files
- Arduino_Core_STM32 for programming STM32
- Devlopment tools, gcc and etc for the cpu
The latest Arduino IDE must be installed on development machine. (tested on 1.8.13) Only supports Linux for the host development PC. I only have tested on Ubuntu 18.04 at the moment.
Arduino Pro Micro requires addon files from SparkFun.
The Arduino_Core_STM32 must be installed who programs STM32 as well.
I do not have a plan supporting Windows at the moment for keeping the Makefile simple which is the main objective of this project.
Link to how to install Arduino IDE:
(https://ubuntu.com/tutorials/install-the-arduino-ide#2-installing-via-a-tarball)
(I had to replace ./install.sh to sudo ./install.sh in the instruction in my case.)
Link to how to install SparkFun Arduino Boards Addon Files:
(https://github.com/sparkfun/Arduino_Boards)
Link to how to install Arduino_Core_STM32:
(https://github.com/stm32duino/Arduino_Core_STM32)
These are the minimum packages required to build. (Only tested on Ubuntu at the moment)
$ sudo apt-get -y update
$ sudo apt-get -y install apt-utils apt xz-utils wget git
For AVR:
$ sudo apt-get -y install binutils-avr gcc-avr avr-libc avrdudeFor STM32:
$ sudo apt-get -y install gcc-arm-none-eabi binutils-arm-none-eabi
$ sudo dpkg --add-architecture i386 && sudo apt-get update
$ sudo apt install libusb-1.0.0:i386- Download Makefile for your project
- Customize the path where Arduino libraries are installed
- Customize variables in Makefile for your dev boards
- Build and upload
First download Makefiles as bellow at the location where the main sources for your developments.
For AVR:
$ wget https://raw.githubusercontent.com/mcd500/arduino-commandliners/master/MakefileFor STM32:
$ wget https://raw.githubusercontent.com/mcd500/arduino-commandliners/master/Makefile-stm32The Makefile is for AVR only. The Makefile-stm32 is for STM32 only.
For STM32, copying Makefile-stm32 to Makefile:
$ cp Makefile-stm32 Makefileshould be fine for most of the time, since building binaries for both AVR and STM32 is rare.
If your project require to co-exist both, then:
$ make -f Makefile-stm32every time will do with having two different Makefiles.
The one of the source files must be main.cpp since Arduino libraries expect to be called from c++.
I have prepared main.cpp for testing customized Makefiles in later procedures. It is just an example of blinking led from Arduino porject.
$ wget https://raw.githubusercontent.com/mcd500/arduino-commandliners/master/main.cppSome lines in Makefile must match where the arduino is installed in host machine. This is my example.
ARDUINO_DIR = $(HOME)/projects/arduino-1.8.13-linux64/arduino-1.8.13
Change the portion of 1.8.13 with the Arduino version installed.
The ARDUINO_DIR have to be pointing the directory where following files after untar the arduino-1.8.13-linux64.tar.xz.
$ ls
arduino                 examples    java       reference      tools-builder
arduino-builder         hardware    lib        revisions.txt  uninstall.sh
arduino-linux-setup.sh  install.sh  libraries  tools
Some more lines to modify for STM32 in Makefile-stm32.
ARM_GCC_PATH := $(HOME)/.arduino15/packages/STM32/tools/xpack-arm-none-eabi-gcc/9.2.1-1.1/bin/
TOOLS_DIR = $(HOME)/.arduino15/packages/STM32/tools
CMSIS_DIR = $(TOOLS_DIR)/CMSIS/5.5.1
The 9.2.1-1.1 and 5.5.1 differs depending on the Arduino version.
Typically additional packages of STM32 and CMSIS are in locations bellow after following install procedure of Arduino_Core_STM32.
TOOLS_DIR = $(HOME)/.arduino15/packages/STM32/tools
CMSIS_DIR = $(HOME)/.arduino15/packages/STM32/tools/CMSIS/5.5.1
These are the lines to match the dev boards, which I have tested on AVR. For 3.3V 8MHz models, change the AVR_FREQ ?= 16000000L to 8000000L.
- Uno 5V 16MHz
AVR_FREQ ?= 16000000L
MCU ?= atmega328p
VARIANT = standard
ARD_CFLAGS := -DARDUINO=10813 -DARDUINO_AVR_UNO -DARDUINO_ARCH_AVR
MONITOR_PORT ?= /dev/ttyACM0
MONITOR_BAUDRATE = 115200
AVRDUDE_PROGRAMMER = arduino # choose it from upload.protocol in boards.txt
The MCU could be chosen from atmega32u4 atmega328p atmega168 atmega2560 atmega1280 atmegang atmega8 attiny85.
The values to select the VARIANT are directory name under ${ARDUINO_DIR}/hardware/arduino/avr/variants.
It must to have Arduino version similar to -DARDUINO=10813 in ARD_CFLAGS to build libraries successfully. The version 1.8.13 will be 10813, 1.5.0 will be 10500.
The -DARDUINO_ARCH_AVR is also required for AVR.
The -DARDUINO_AVR_UNO is not mandatory, I include it there just because genuine Arduino IDE adds it.
The MONITOR_BAUDRATE and AVRDUDE_PROGRAMMER must have the exact value on each board for avrdude to upload the binary correctly.
The available values could be found from the upload.protocol in boards.txt. The boards.txt could be found at ${ARDUINO_DIR}/hardware/arduino/avr/boards.txt.
The MONITOR_PORT may vary depend on the USB chip on the dev boards. The easiest way to find the value is to watch which appears when connecting the board under /dev/ on your host machine. Most of the time the AVR Arduino boards are /dev/ttyACM0 and /dev/ttyUSB0 from other vendors.
- Pro Micro 5V 16MHz from SparkFun
AVR_FREQ ?= 16000000L
MCU ?= atmega32u4
ARDUINO_VAR_PATH := $(HOME)/.arduino15/packages/SparkFun/hardware/avr/1.1.13/variants
VARIANT = promicro
ARD_CFLAGS := -DARDUINO=10813 -DARDUINO_AVR_MICRO -DARDUINO_ARCH_AVR -DUSB_VID=0x1b4f -DUSB_PID=0x9206
MONITOR_PORT ?= /dev/ttyUSB0
MONITOR_BAUDRATE = 57600
AVRDUDE_PROGRAMMER = avr109
The Pro Mirco is from SkarkFun. It have to be adjusted ARDUINO_VAR_PATH. Any boards added Additional Boards Manager URLs at File -> Preferences, they are added to .arduino15/packages/ with Providers name/hardsare, such as SparkFun/hardware.
Look inside the ${HOME}/.arduino15/packages/SparkFun/hardware and search for the directory variants.
There will be a directory promicro to match the board to set as VARIANT. Same way to fine ARDUINO_VAR_PATH and VARIANT is possible for the boards from any other vendors.
- Pro Mini 5V 16MHz
AVR_FREQ ?= 16000000L
MCU ?= atmega328p
VARIANT = standard
ARD_CFLAGS := -DARDUINO=10813 -DARDUINO_AVR_PRO -DARDUINO_ARCH_AVR
MONITOR_PORT ?= /dev/ttyUSB0
MONITOR_BAUDRATE = 57600
AVRDUDE_PROGRAMMER = arduino
See how to connect UART to PC.
Most of the boards works with MONITOR_BAUDRATE = 57600.
For STM32 in Makefile-stm32.
- NUCLEO-F411RE
MCU ?= cortex-m4
FPU ?= fpv4-sp-d16
ISAFLAGS  = -mcpu=$(MCU) -mfpu=$(FPU) -mfloat-abi=hard -mthumb
VARIANT = NUCLEO_F4x1RE
HAL_SRC = STM32F4xx
ARD_CFLAGS := -DSTM32F4xx -DARDUINO=10813 -DARDUINO_NUCLEO_F411RE -DARDUINO_ARCH_STM32 -DBOARD_NAME="NUCLEO_F411RE" -DSTM32F411xE -DHAL_UART_MODULE_ENABLED
MASS_OPTION = -O "NODE_F411RE,NUCLEO"
TODO: add more description here
After changing your sources, then typing from command line:
$ makewill build binaries.
If you would like to write the image to the dev board every time after updating sources:
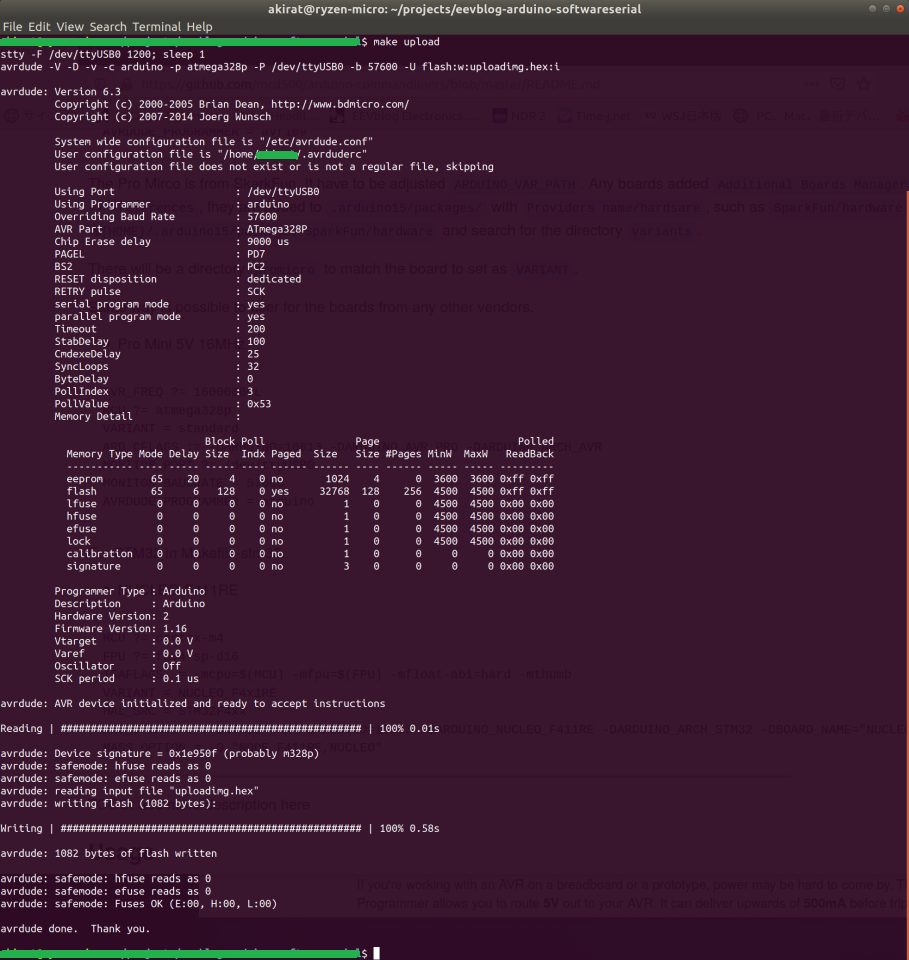
$ make uploadwill build the sources and write it to dev board consequently.
Use bellow for mass storage method of writing binary to STM32:
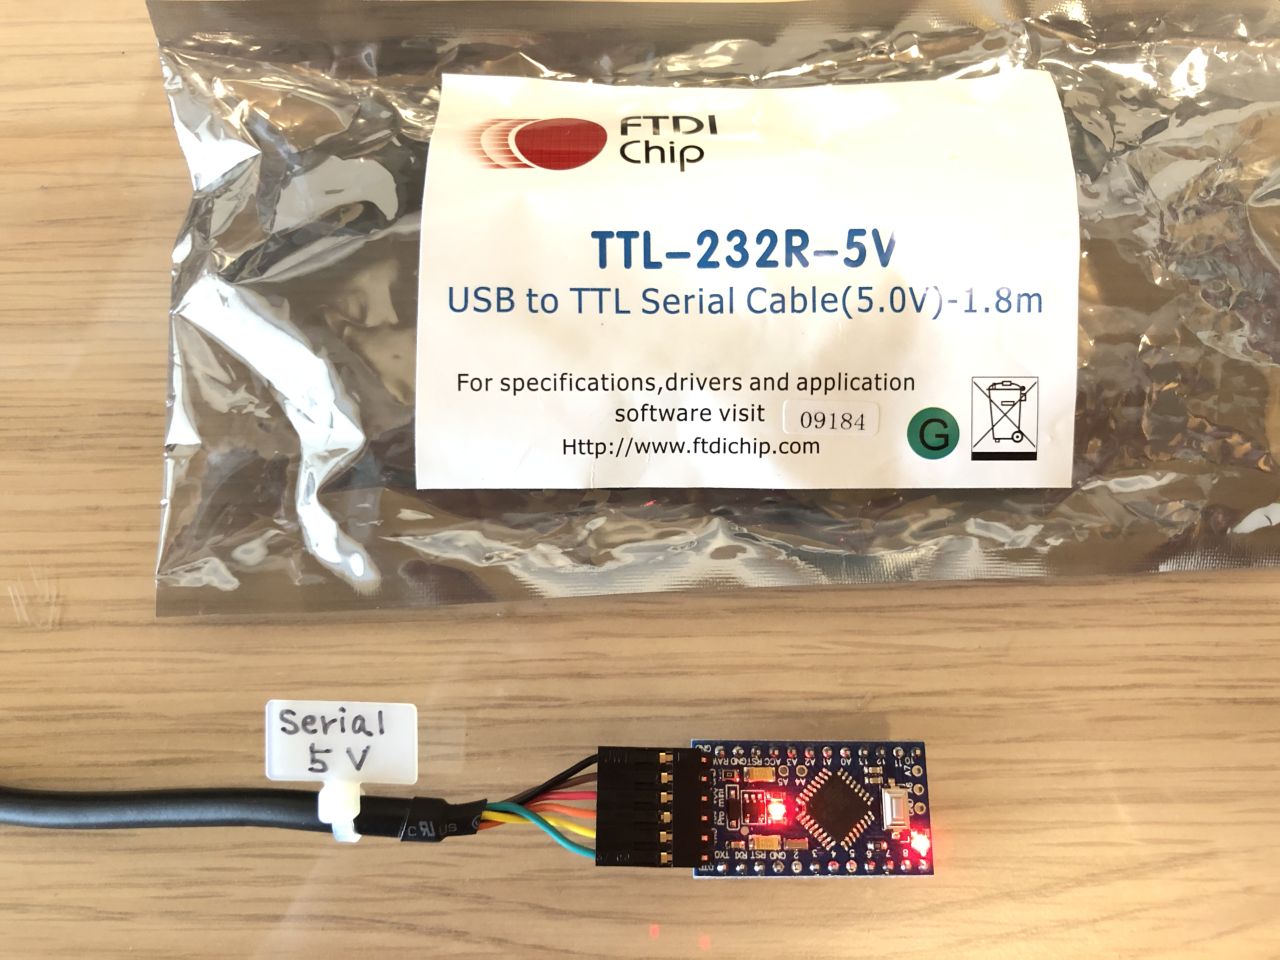
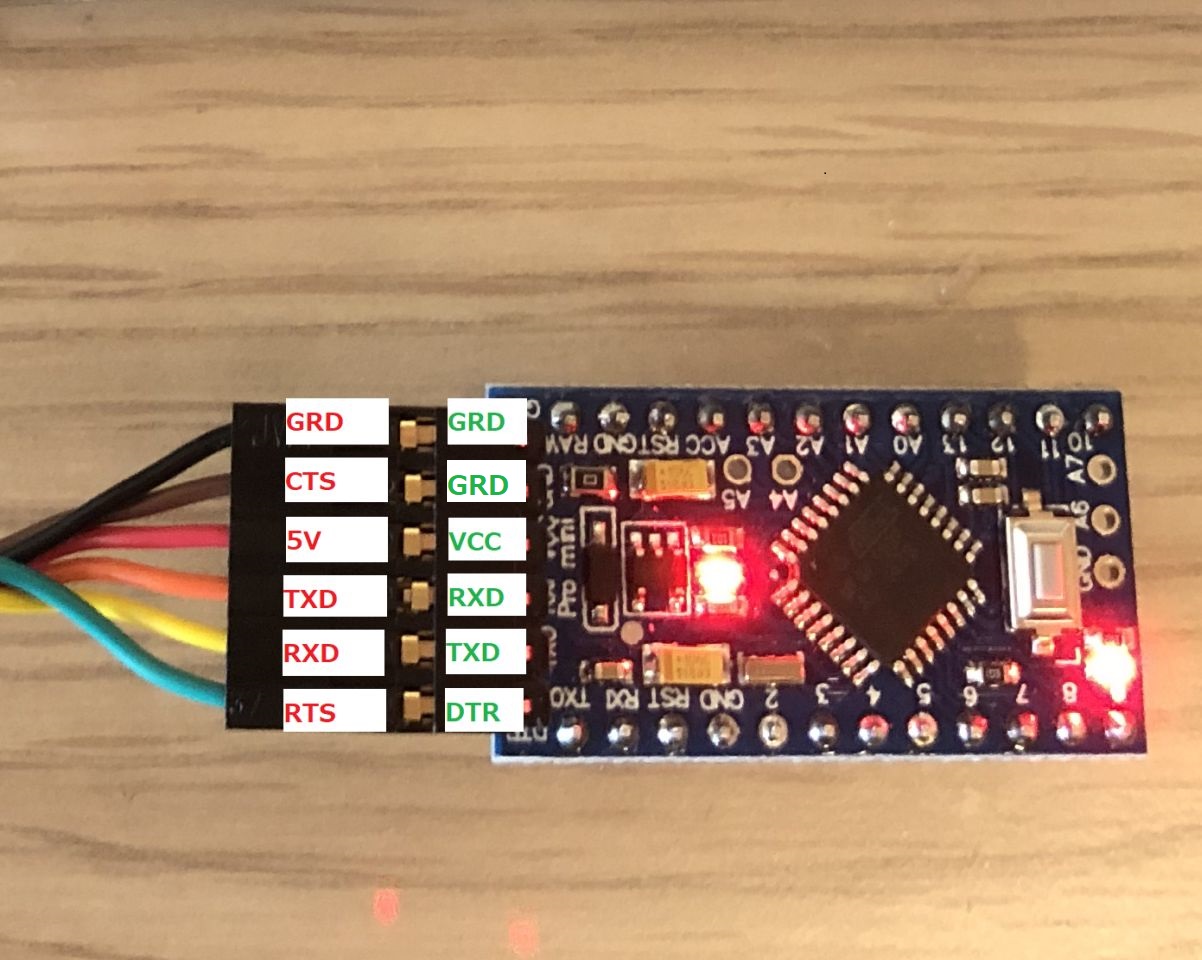
$ make -f Makefile-stm32 upload-massI used a ftdi usb serial/UART converter cable. Any usb serial boards are fine connecting wires as described in the second pictures:
| USB-UART | Target board |
|---|---|
| GRD | GRD |
| 5V or 3.3V | VCC, mine is 5V 16MHz board |
| TXD | RXD |
| RXD | TXD |
| RTS | DTR |
The CTS from usb-serial is not used.
Use 3.3V usb-serial boards instead of 5V when the target boards is for 3.3V.
The first initial Makefile was developed for the question at eevblog forum by @ksoviero. https://www.eevblog.com/forum/programming/i-dont-understand-libraries-in-c/ After my post at the forum, I spent about three days in my spare time and it became to this porject. Thanks!
The Makefile is derived from arduino-mk project. This is main reason for selecting GPL for this project.
Support more STM32 boards.
Support serial mode writing for STM32.
Would like to support RISC-V in the future.


