Note: Use of this software is governed by an Apache 2.0 license, and can be found in the “LICENSE” file.
JP4Agent (Juniper P4 Agent)
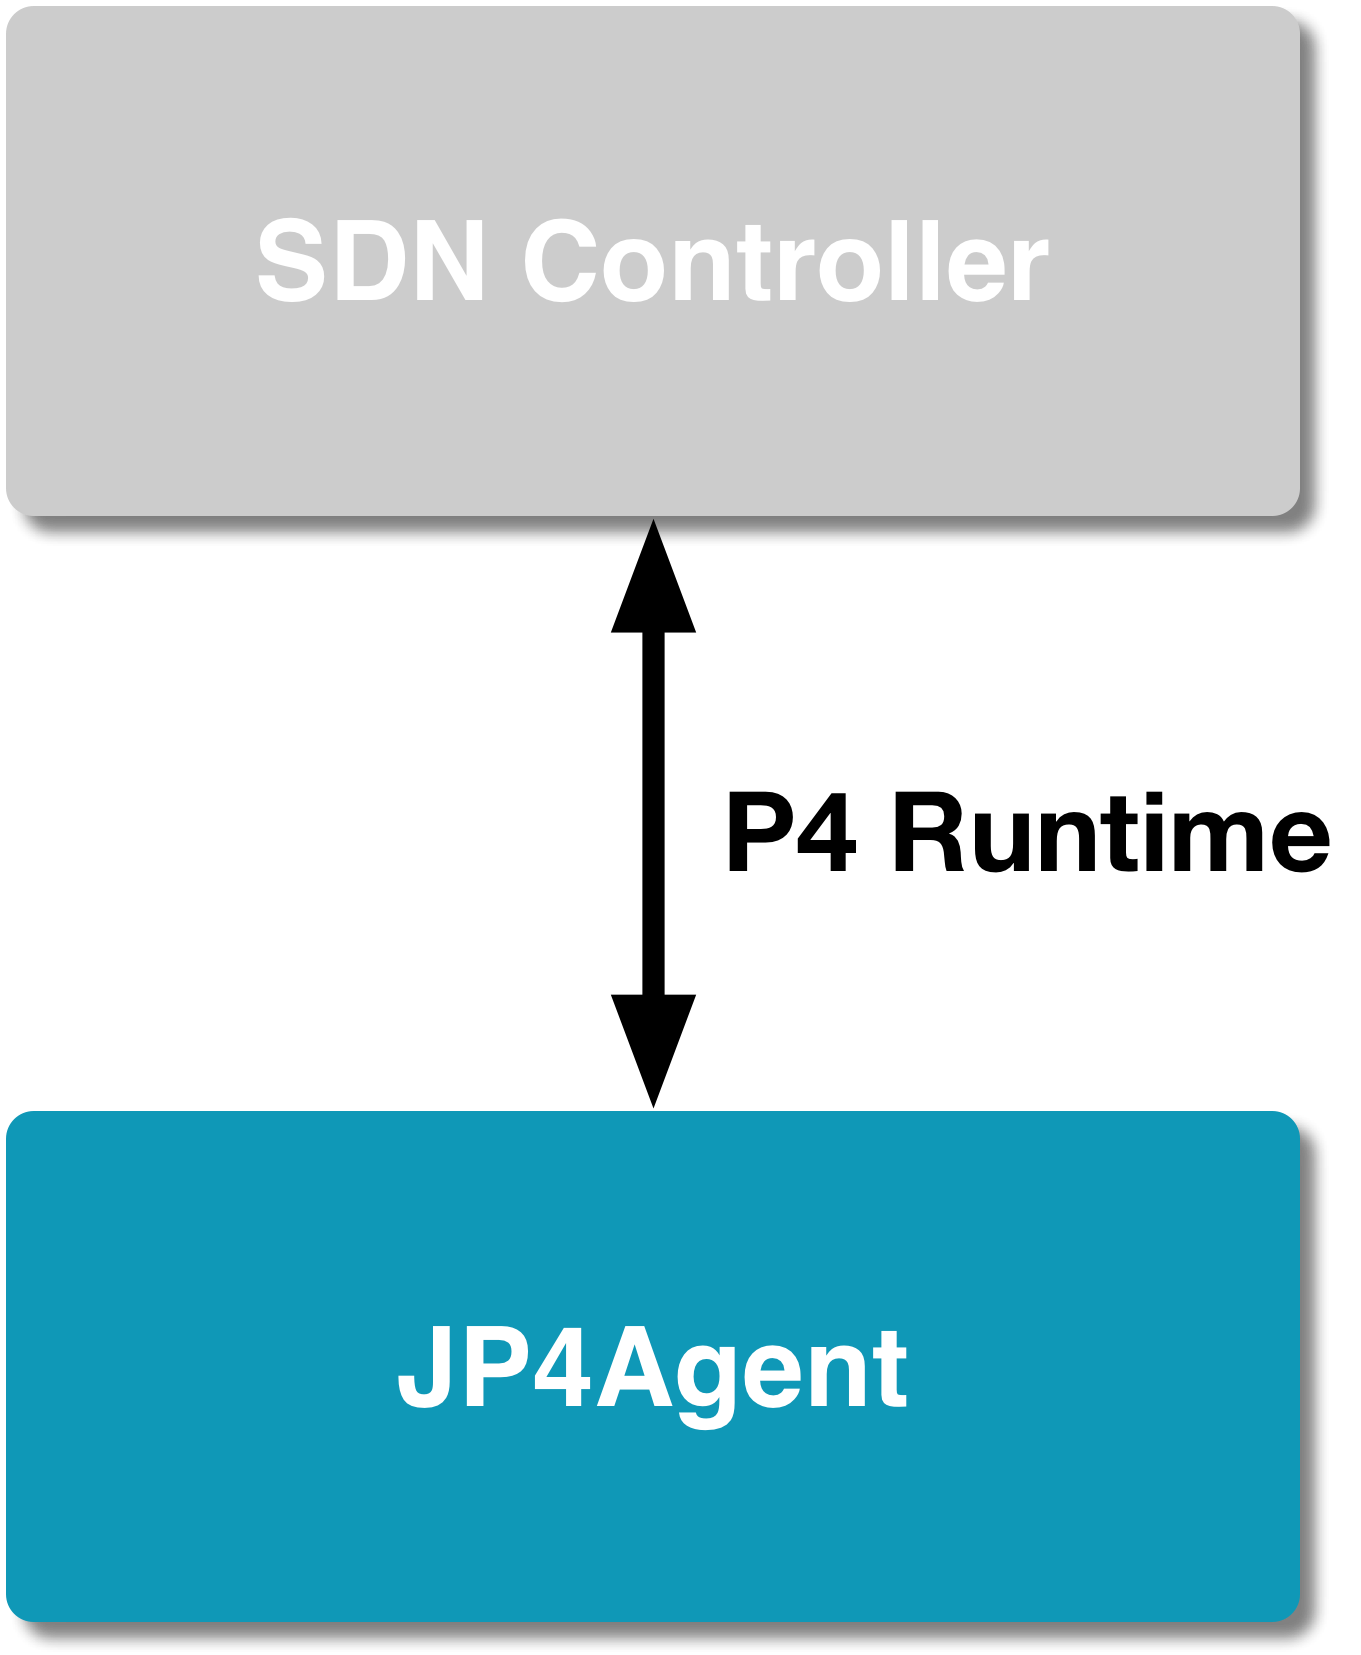
Juniper's P4 Runtime server implementation.
JP4Agent GitHub Repository
This repository provides:
- JP4Agent source code
- Setup configuration and scripts
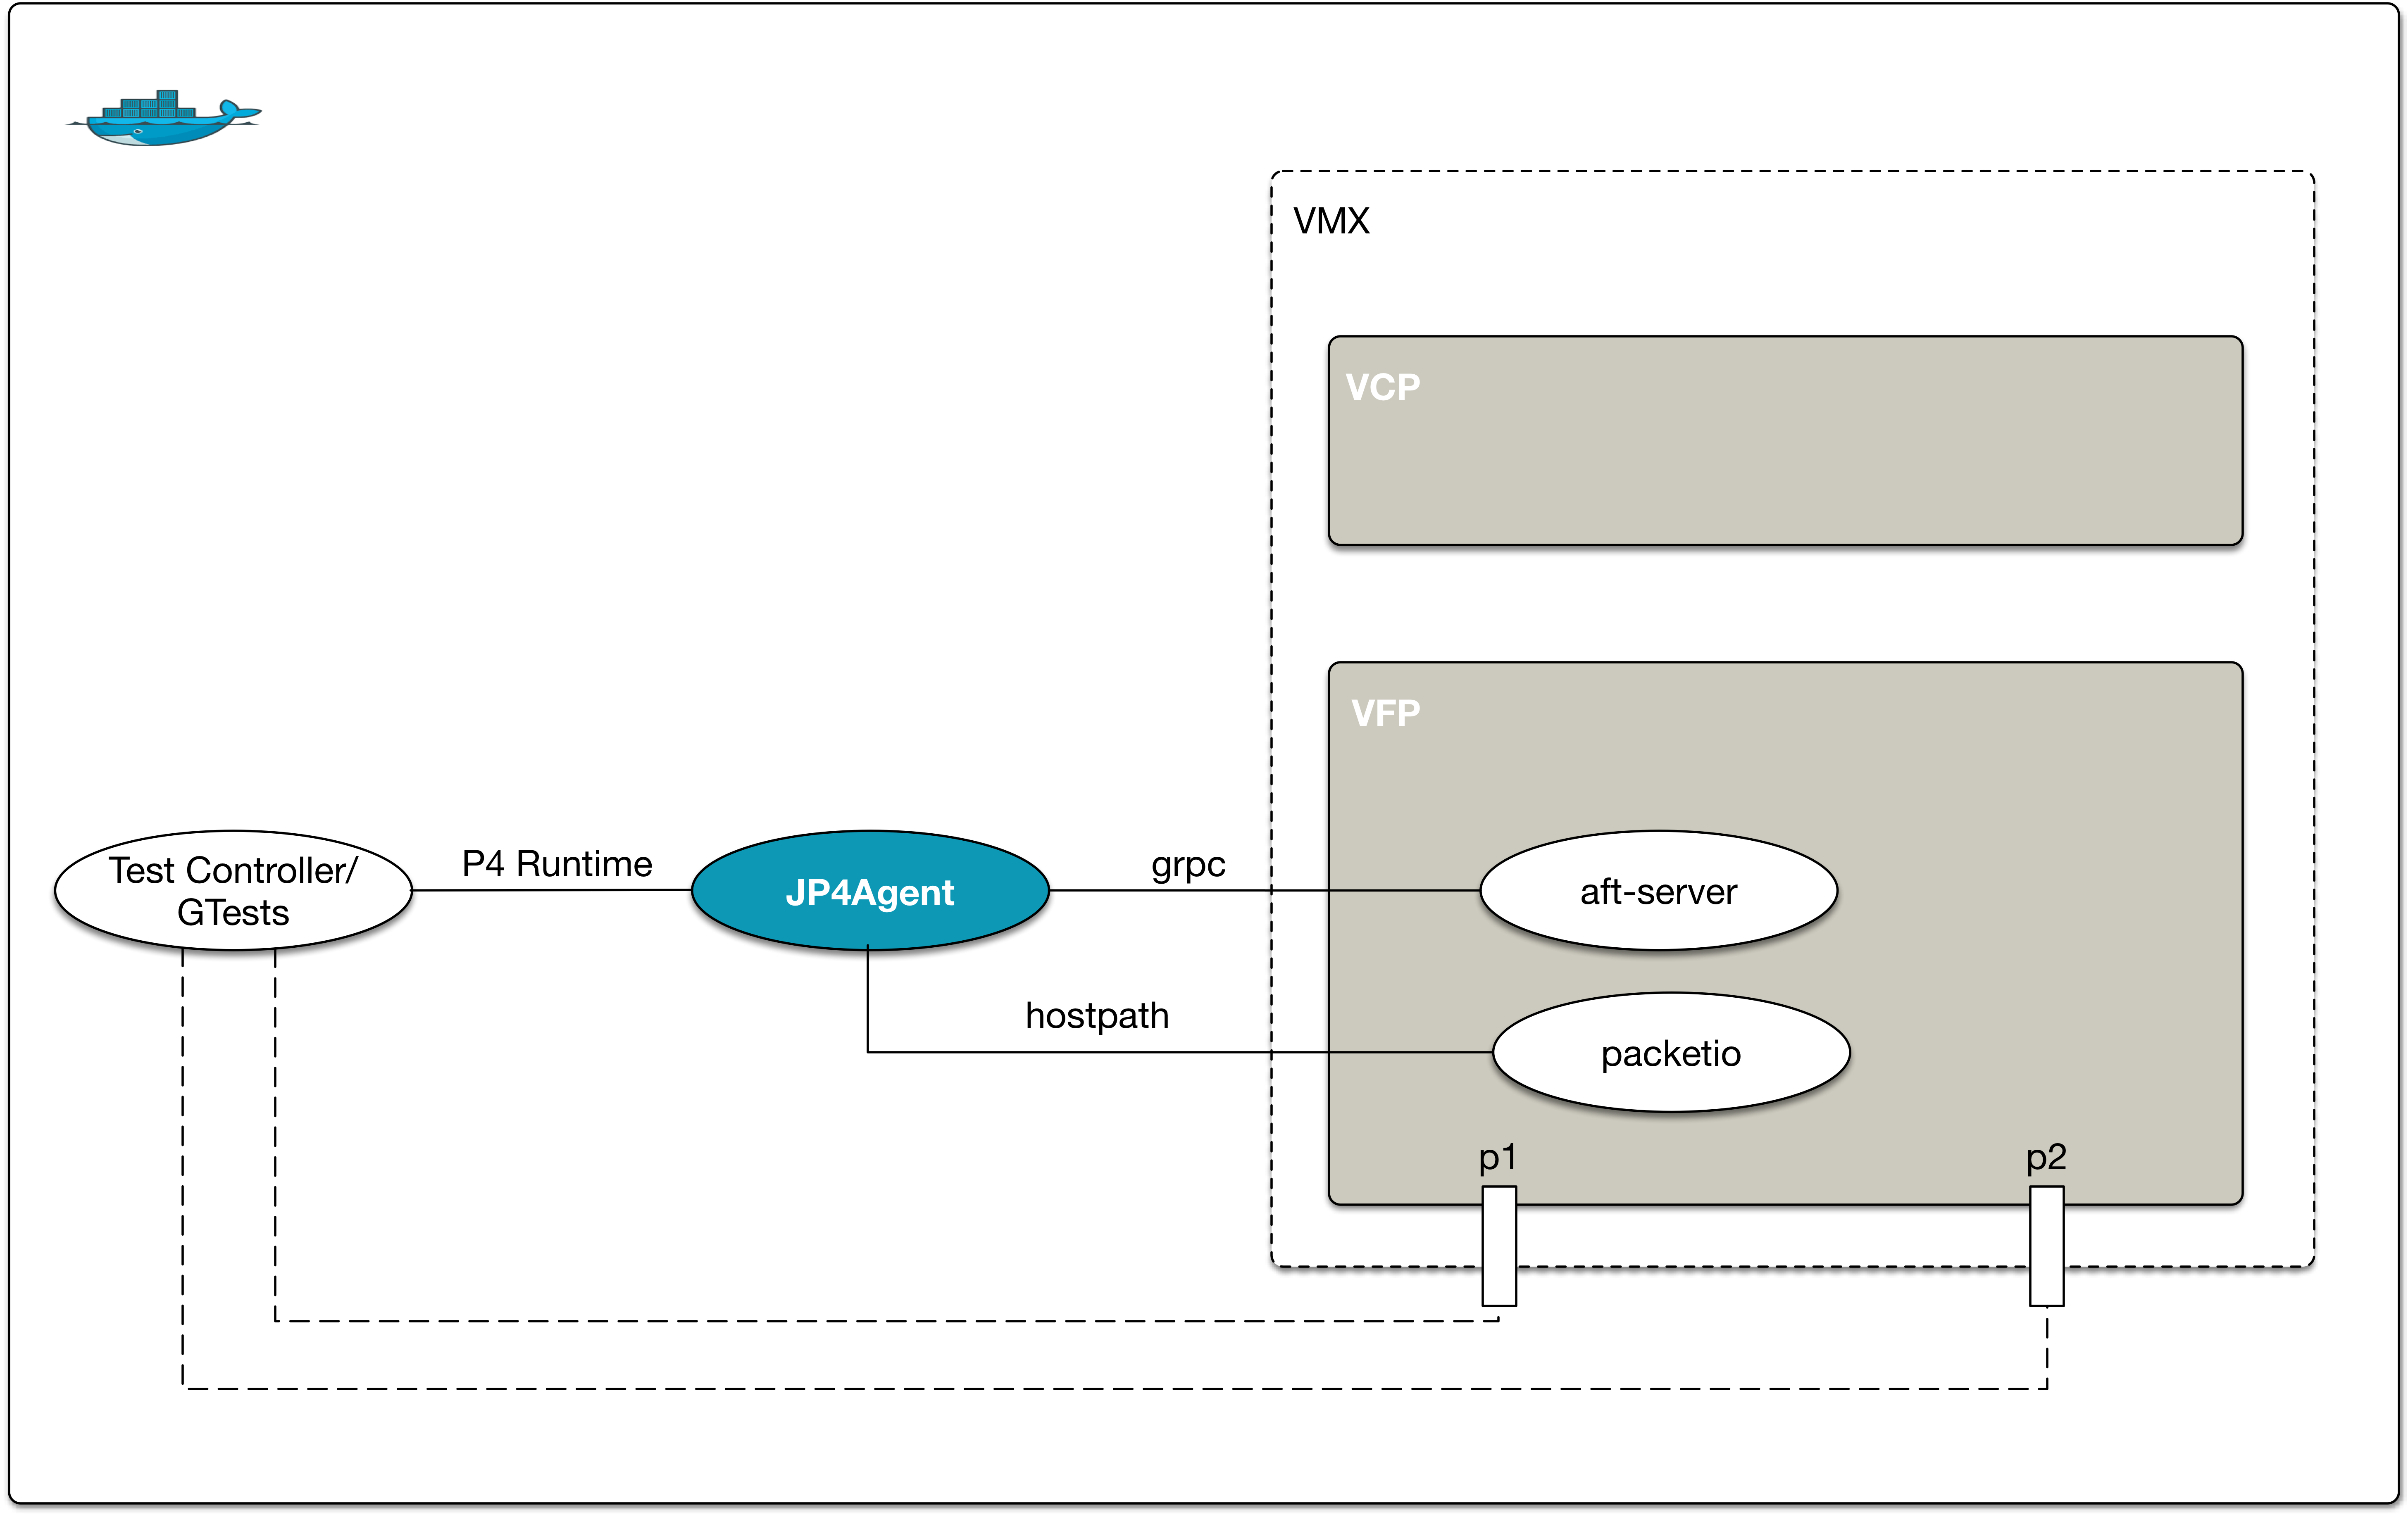
- Test controller and gtest code
- Dockerfile(s), configuration and scripts for Docker container where VMX and JP4Agent run
- Regression scripts
Repository Directory Structure
 -- JP4Agent
    |-- LICENSE              License
    |-- README.md            This README file
	|-- AFI                  AFI data model
	|-- build                Build scripts
	|-- cli                  Command line
	|-- config               JP4Agent Configurations
	|-- docs                 Documentation
	|-- src
	|   |-- afi              AFI HAL
	|   |-- jp4agent         JP4Agent
	|   |-- pi               PI layer
	|   |-- targets
	|   |   |-- aft          AFT target HALP
	|   |   |-- brcm         Broadcom target HALP
	|   |   `-- null         Null target HALP
	|   `-- utils            Utils
	|-- test
	|   |-- controller       Test controller
	|   `-- gtest            GTests for JP4agent
	`-- tools
		|-- config           Setup configuration
		|-- docker           Dockerfile(s), configuration and scripts for Docker
		`-- scripts          Setup and regression scripts
Requirements
Juniper Networks Software
VMX tarball provided by Juniper
jnprP4vmx.tgz : Contains all the images/packages needed to run VMX in a container
Note: Please contact Juniper to get 'jnprP4vmx.tgz'.
Contacts are listed at the bottom of this page.
System Requirements
Hardware requirements
=====================
Processor:
    Any x86 processor (Intel or AMD) with VT-d capability
Number of Cores:
    4 (1 for VCP and 3 for VFP)
Memory:
    Minimum:
    8 GB (2 GB for VCP, 6 GB for VFP)
    Additional
    2 GB recommended for host OS
Storage:
    Local or NAS. Minimum 100 GB is recommended.

Software requirements
=====================
Operating system
    Ubuntu 14.04 LTS or 16.04 LTS
Docker
    Community Edition (CE) or Enterprise Edition (EE)
STEP 1. Install Docker engine on Linux host server
Please refer to instructions provided on the following page to install Docker engine on the host server
https://docs.docker.com/engine/installation/linux/ubuntu/
STEP 2. Pull p4-vmx Docker image
Note: Docker ID (https://hub.docker.com) is needed for this step.
Please create, if you do not already have one.
Contact Juniper to get access to the Docker image repo.
Contact is listed at the bottom of this page.
docker login
<< Enter username and password when prompted
[sudo] docker pull juniper/p4-vmx:latest
STEP 3. Get VMX tarball from Juniper and extract it
Get 'jnprP4vmx.tgz' tarball from Juniper and extract it to any preferred location on the host.
E.g.,
export HOST_VMX_LOC=/home/sandesh/VMX
mkdir $HOST_VMX_LOC
mv jnprP4vmx.tgz $HOST_VMX_LOC
cd $HOST_VMX_LOC
tar xf jnprP4vmx.tgz
STEP 4. Clone JP4Agent repo
Clone JP4Agent to any preferred folder on the host.
E.g.,
cd $HOME
git clone git@github.com:Juniper/JP4Agent.git
STEP 5. Set env variable JP4AGENT_REPO to JP4Agent repo location
export JP4AGENT_REPO=$HOME/JP4Agent
STEP 6. Update VMX setup configuration
Update the configuration in file $JP4AGENT_REPO/tools/config/vmx-cfg.xml
to modify the following:
  1. The 2 host interfaces to use for traffic : by default eth1 & eth2
  2. The management interface to use: by default eth0
  3. Console ports for vCP & vFP: by default 8601 & 8602
  4. Management IPs for vCP & vFP to ssh into it
  5. Location where 'jnprP4vmx.tgz' tarball was extracted.
STEP 7. Install required packages on host server
cd $JP4AGENT_REPO/tools/scripts
[sudo] ./install_packages.sh
STEP 8. Setup VMX
NOTE:
- vMX instance runs on the Host.
- This step runs Docker with networking mode 'host' (--network=host),
to make all host interfaces availabe inside docker.
Please note this mode disables network isolation of the Docker container i.e.
container shares the networking namespace of the host.
cd $JP4AGENT_REPO/tools/scripts
./setup-vmx
Please wait for the following message to appear before proceeding with next step.
"VMX Setup Complete!"
Please login to the vCP using ssh and verify that interfaces xe-0/0/0:1 and xe-0/0/0:2 are up
Note: Please go through "Working with VMX" section of 'docs/README.md' to learn
how to work with VMX setup, viz., how to login to VCP and VFP, run Junos CLI commands etc.
STEP 9. Run regression
cd $JP4AGENT_REPO/tools/scripts
./run-regression
Please observe the output. When the output shows 'GTEST RESULT: PASS', you are good to go.
You can open url http://<host ip>:9000 in browser to see the regression results visually.
STEP 10. Connect external tester and send unidirectional traffic
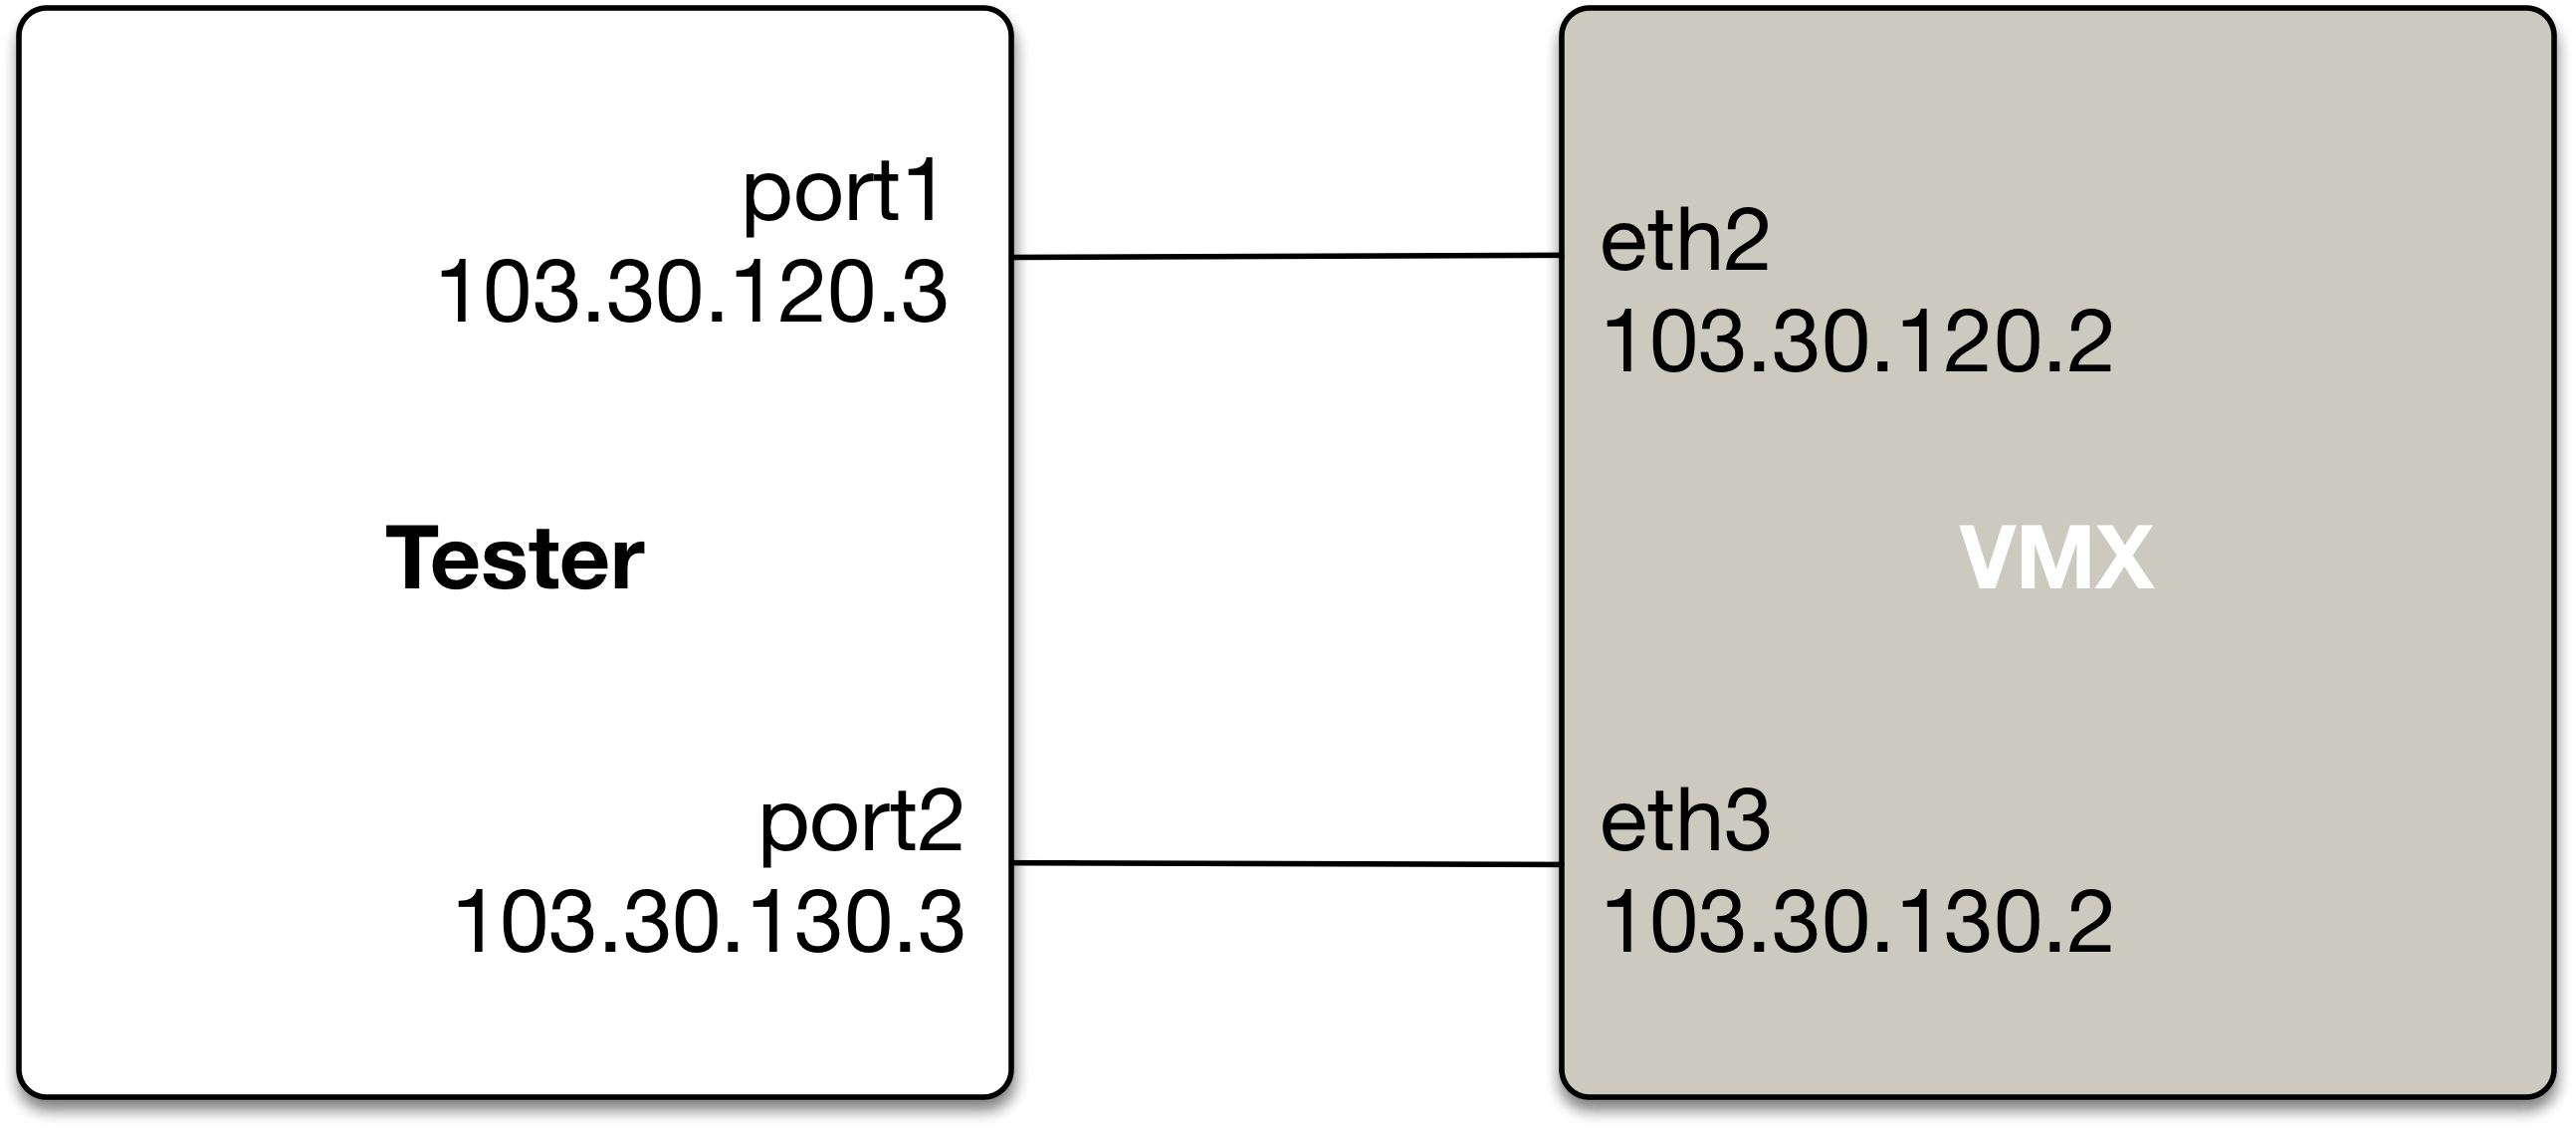
Connect the 2 interfaces specified in vmx-cfg.xml with an external tester
Configure Port 1: IP 103.30.120.3/24 and external gateway 103.30.120.2/24
Configure Port 2: IP 103.30.130.3/24 and external gateway 103.30.130.2/24

In the example below,
if1=eth2
if2=eth3
STEP 11. Before stopping docker container, shutdown vmx gracefully
cd /root/VMX
../JP4Agent/tools/docker/scripts/stop_vmx.sh

In case docker is stopped accidentally without graceful vmx shutdown, clean up from the host
cd $JP4AGENT_REPO/tools/scripts
[sudo] ./bridge_cleanup.sh
Contact
Sandesh Kumar Sodhi
sksodhi at juniper.net


