DenseSSD : Machine vision-based detections for transparent chemical vessels towards safe automation of material synthesis
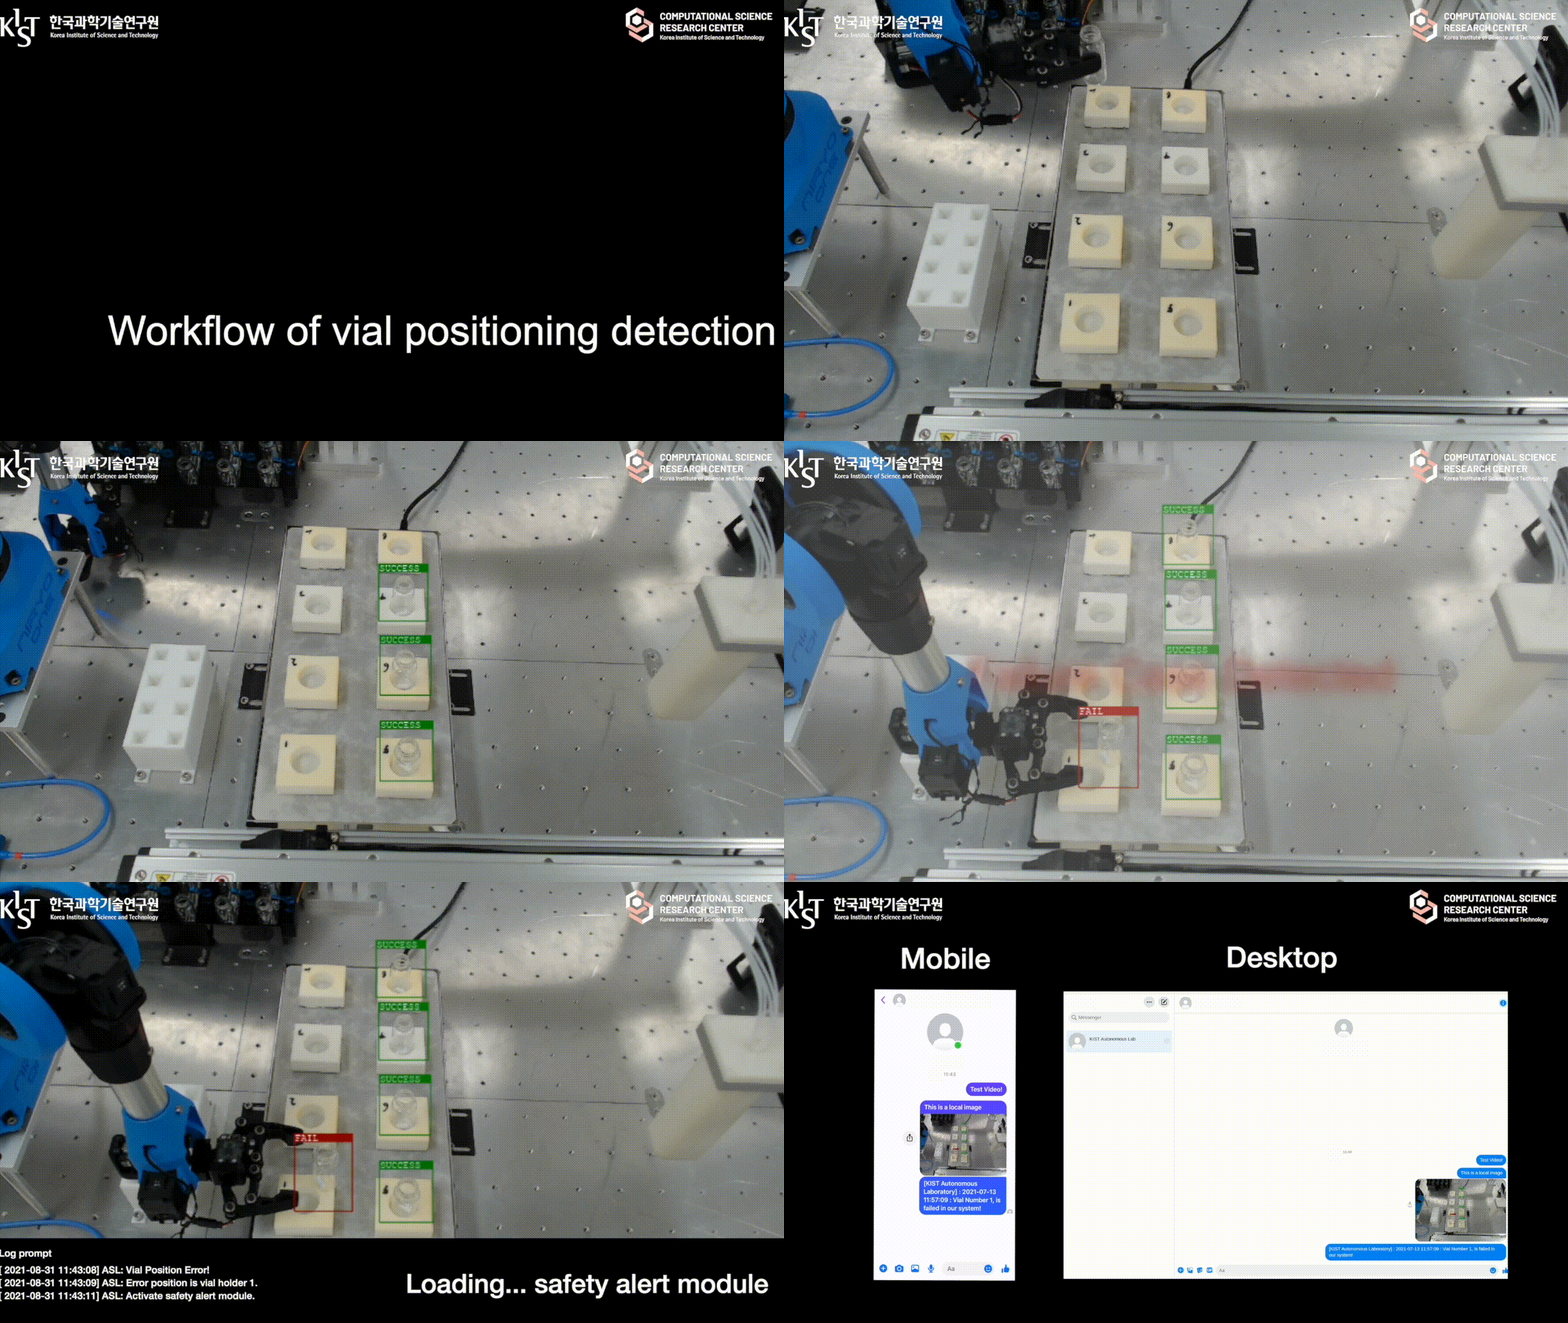
This repository contains an DenseSSD that predicts vial-positioning detection using object detection techniques. DenseSSD can play vital roles in addressing these safety issues as well as can alert to user's messenger to notify and fix safety issues as soon as possible.
Using conda
conda env create -f requirements_conda.txtUsing pip
pip install -r requirements_pip.txtPlease ensure that after unzipping the pre-trained folder and set up the directories as follows:
DenseSSD
├── dataset
│   └── test_result
│   └── test_sample
│   └── training_sample
├── experiments
├── info
├── model
│   └── denseSSD.py
│   └── MultiBoxLoss.py
├── Niryo
│   └── niryo.py
│   └── test_niryo.py
│   └── vial_storage.py
├── pre-trained
│   └── model.pth
├── utils
│   └── data_split.py
│   └── utils.py
│   └── vialPositioningDataset.py
│   └── xml2file.py
├── config.py
└── detect.py
└── train.py
└── how_to_use_DenseSSD.ipynb
We also provide the codes as follows:
- DenseSSD architecture & MultiBoxLoss (see model)
- train DenseSSD model (see train.py)
- detection code for test sample (see detect.py)
- More detailed usage for DenseSSD (see how_to_use_DenseSSD.ipynb jupyter-notebook)
Module import
from PIL import Image
from natsort import natsorted
import warnings
warnings.filterwarnings("ignore", category=DeprecationWarning)
warnings.filterwarnings("ignore", category=UserWarning)
import os
import numpy as np
import torch
config.py
| Parameter | Part | Description |
|---|---|---|
device |
GPU device | allocate model on gpu. |
test_sample_image_dir |
Data path | directory path of test images. |
test_result_image_dir |
Data path | directory path of results of test images. |
image_dir_train |
Data path | directory path of training images. |
info_dir_train |
Data path | directory path of training images's annotation. |
train_label |
Data path | training labels on text files which use YOLO dataset types (see on dataset/train.txt). |
val_label |
Data path | validation labels on text files which use YOLO dataset types (see on dataset/valid.txt). |
model_path |
Data path | set pre-trained model path (if we have pre-trained model). |
C |
Hyperparameters | the number of classes, (ex. C=3, define the class number by adding 1 for 'background' label). |
batch_size |
Hyperparameters | batch_size, it depends on researchers. |
init_lr |
Hyperparameters | initial learning rate, it depends on num_epochs (if you control steps of lr reduction, please looking for update_lr function in train.py ). |
weight_decay |
Hyperparameters | weight_decay, it depends on researchers. |
num_epochs |
Hyperparameters | epochs, it depends on researchers. |
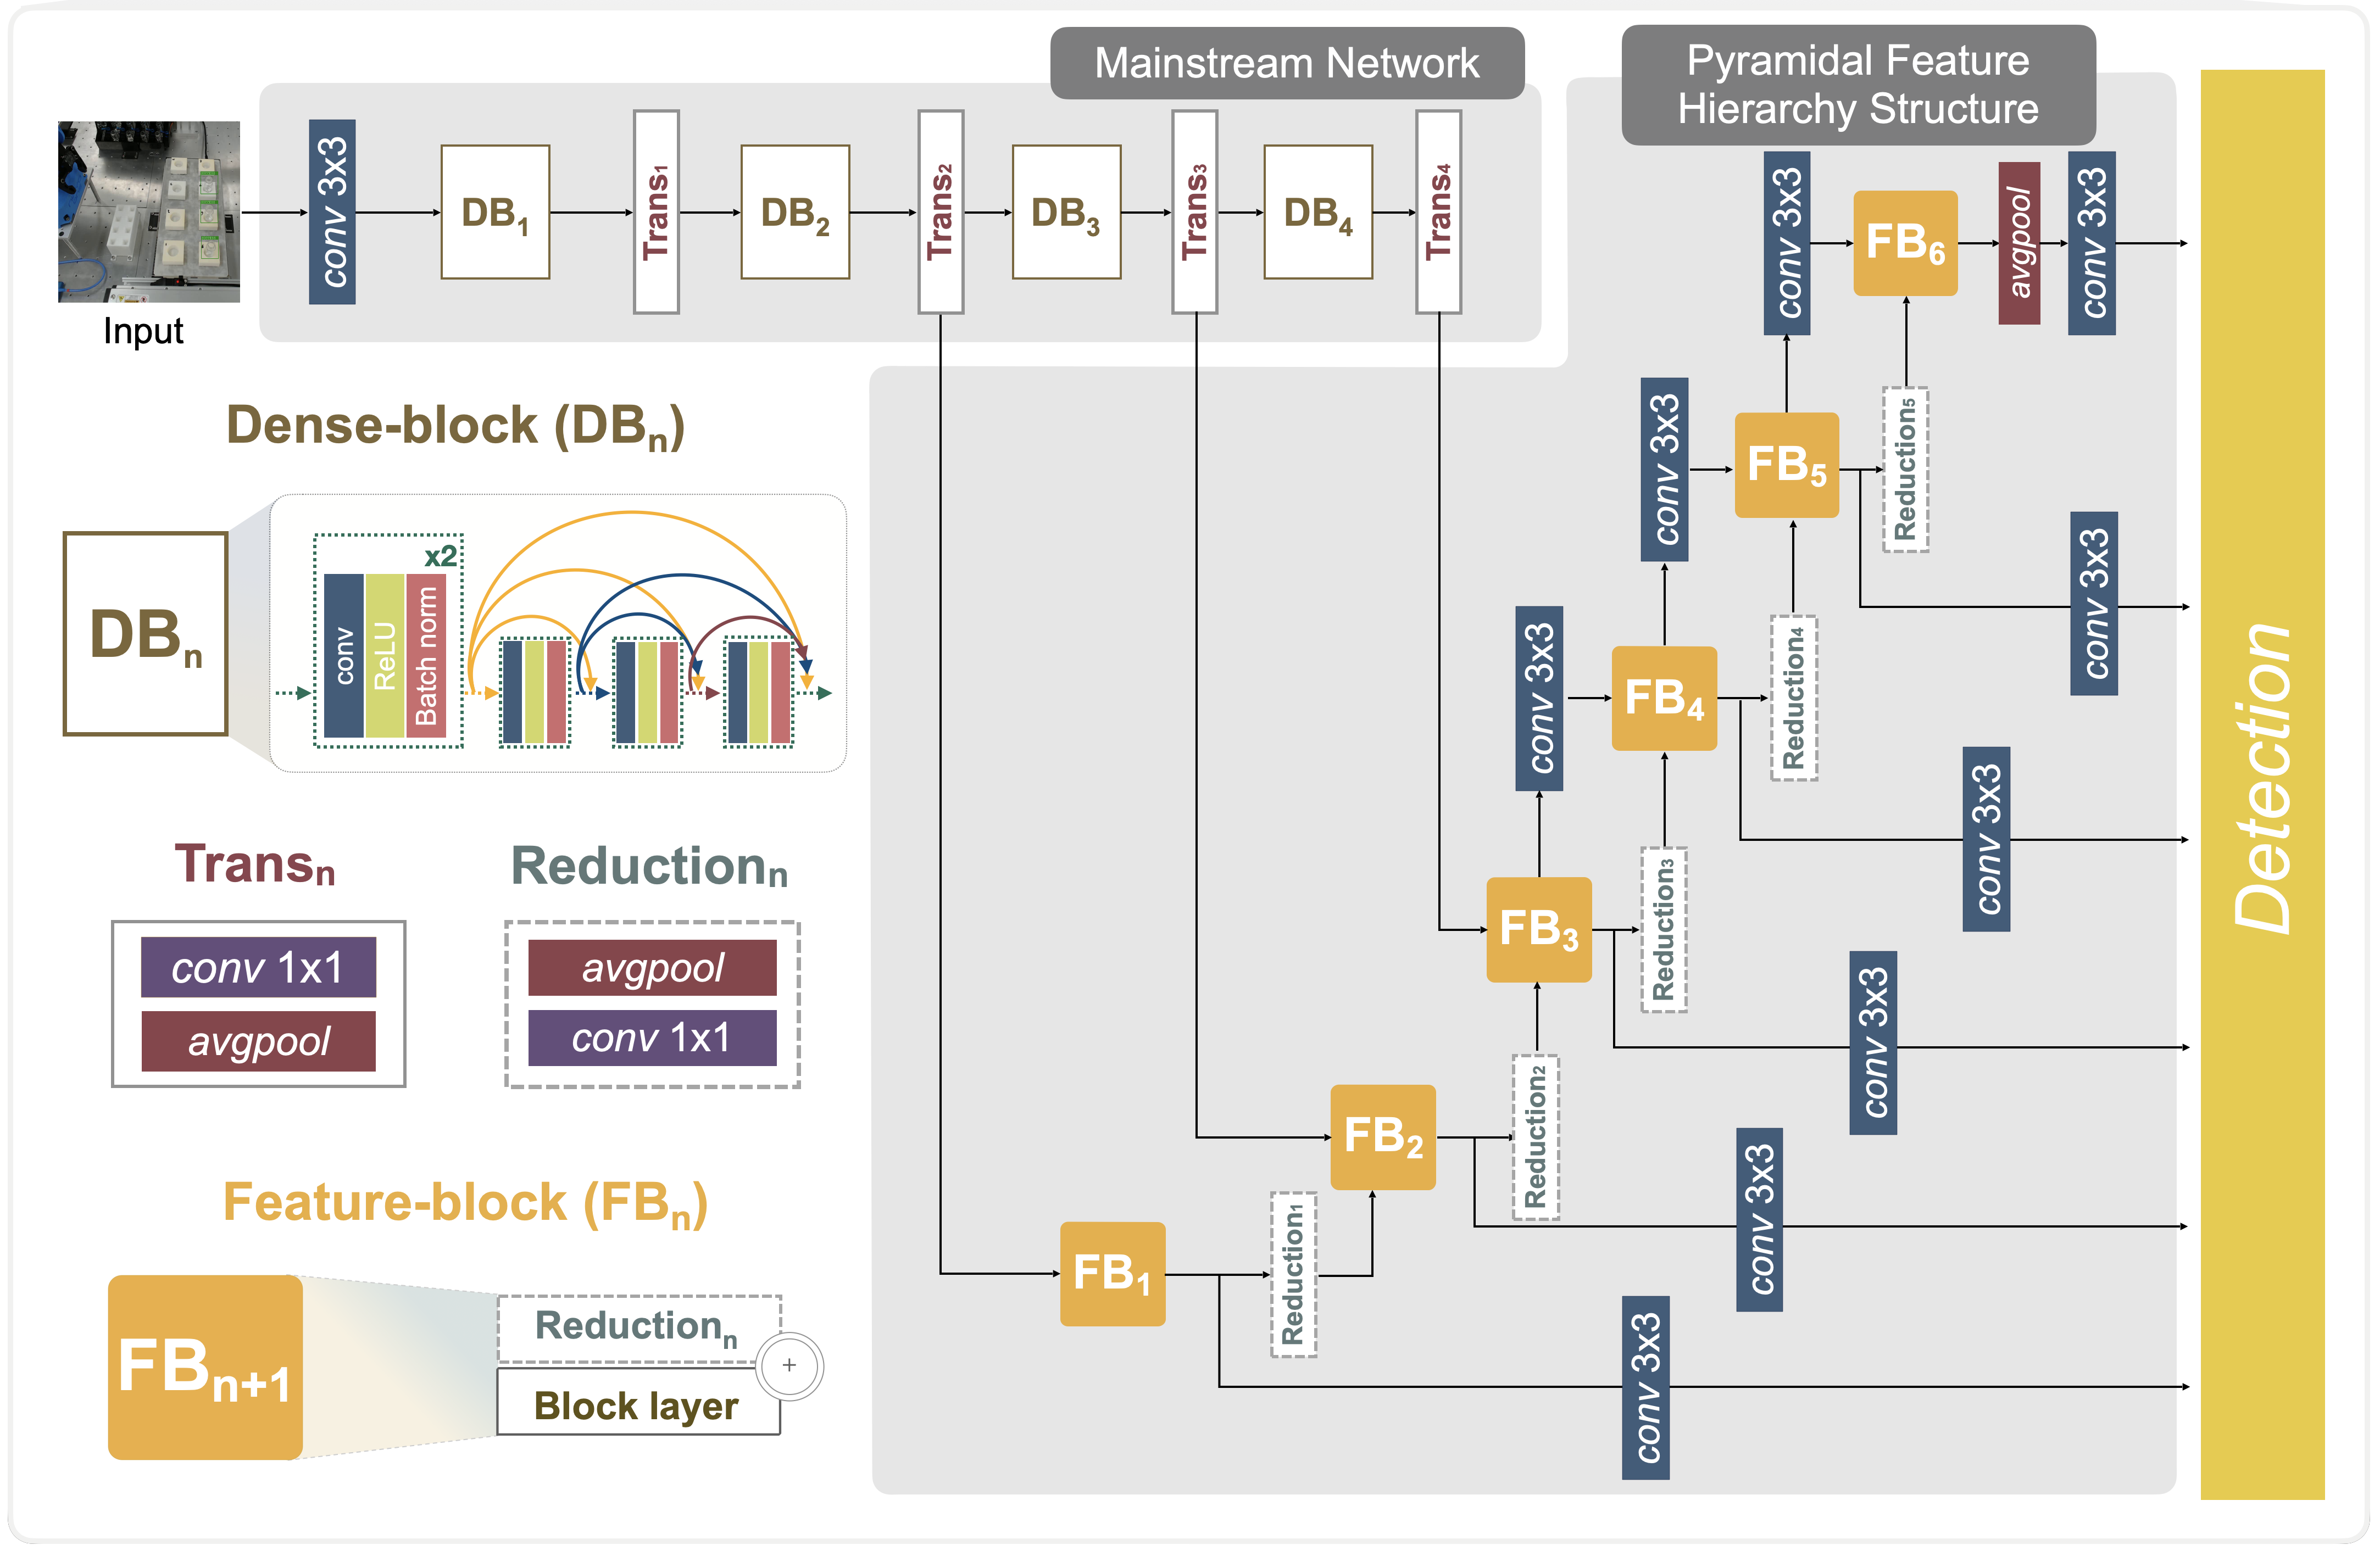
model/denseSSD.py
class denseSSD
├── denseNet (denseblock)
│ └── Bottleneck
│ └── Transition
│ └── Dimension_Reduction
└── PredictionLayer
model.py include the architecture of DenseSSD model using pytorch.
And those architecture follow our architecture's image
# import our module
import config # config
from model.denseSSD import denseSSD # our detection model
from train import train # train function
from detect import visualize_detection # test function
Examples: Train model
torch.cuda.empty_cache()
# if you don't have any pre-trained model?
print('---------------------------------')
print("Train new model!")
print('---------------------------------')
model = denseSSD(n_classes=config.C)
device = torch.device(config.device) # match GPU
model.to(device) # allocate our model on GPU
train(model, config)
Examples: Load pre-trained model
torch.cuda.empty_cache()
# if you have pretrained model?
print('---------------------------------')
print("Loading pre-trained model!")
print('---------------------------------')
model = denseSSD(n_classes=config.C)
model_path = config.model_path
model.load_state_dict(torch.load(model_path))
model.to(config.device) # allocate our model on GPU
model.eval()
Examples: Testing samples
print('---------------------------------')
print("Load testing samples!")
print('---------------------------------')
image_dir = config.test_sample_image_dir
files = os.listdir(image_dir)
files = natsorted(files)
print('---------------------------------')
print("Detection begins!")
print('---------------------------------')
for file in files:
    image_path = os.path.join(image_dir, file)
    original_image = Image.open(image_path, mode='r')
    original_image = original_image.convert('RGB')

    _, objects = visualize_detection(model, original_image, min_score=0.2, max_overlap=0.5, top_k=200,
                                        path=config.test_result_image_dir+"/"+file)
    print(config.test_result_image_dir+"/"+file)
    print("Test scene file - %s: %d vials detected!" % (file, objects))
print("\nTest completed!\n")We tested the codes with:
- PyTorch 1.7.0 under Ubuntu OS 16.04/18.04 LTS and Anaconda3 (Python 3.7 and above)
- PyTorch 1.7.0 under Windows 10 and Anaconda3 (Python 3.7 and above)
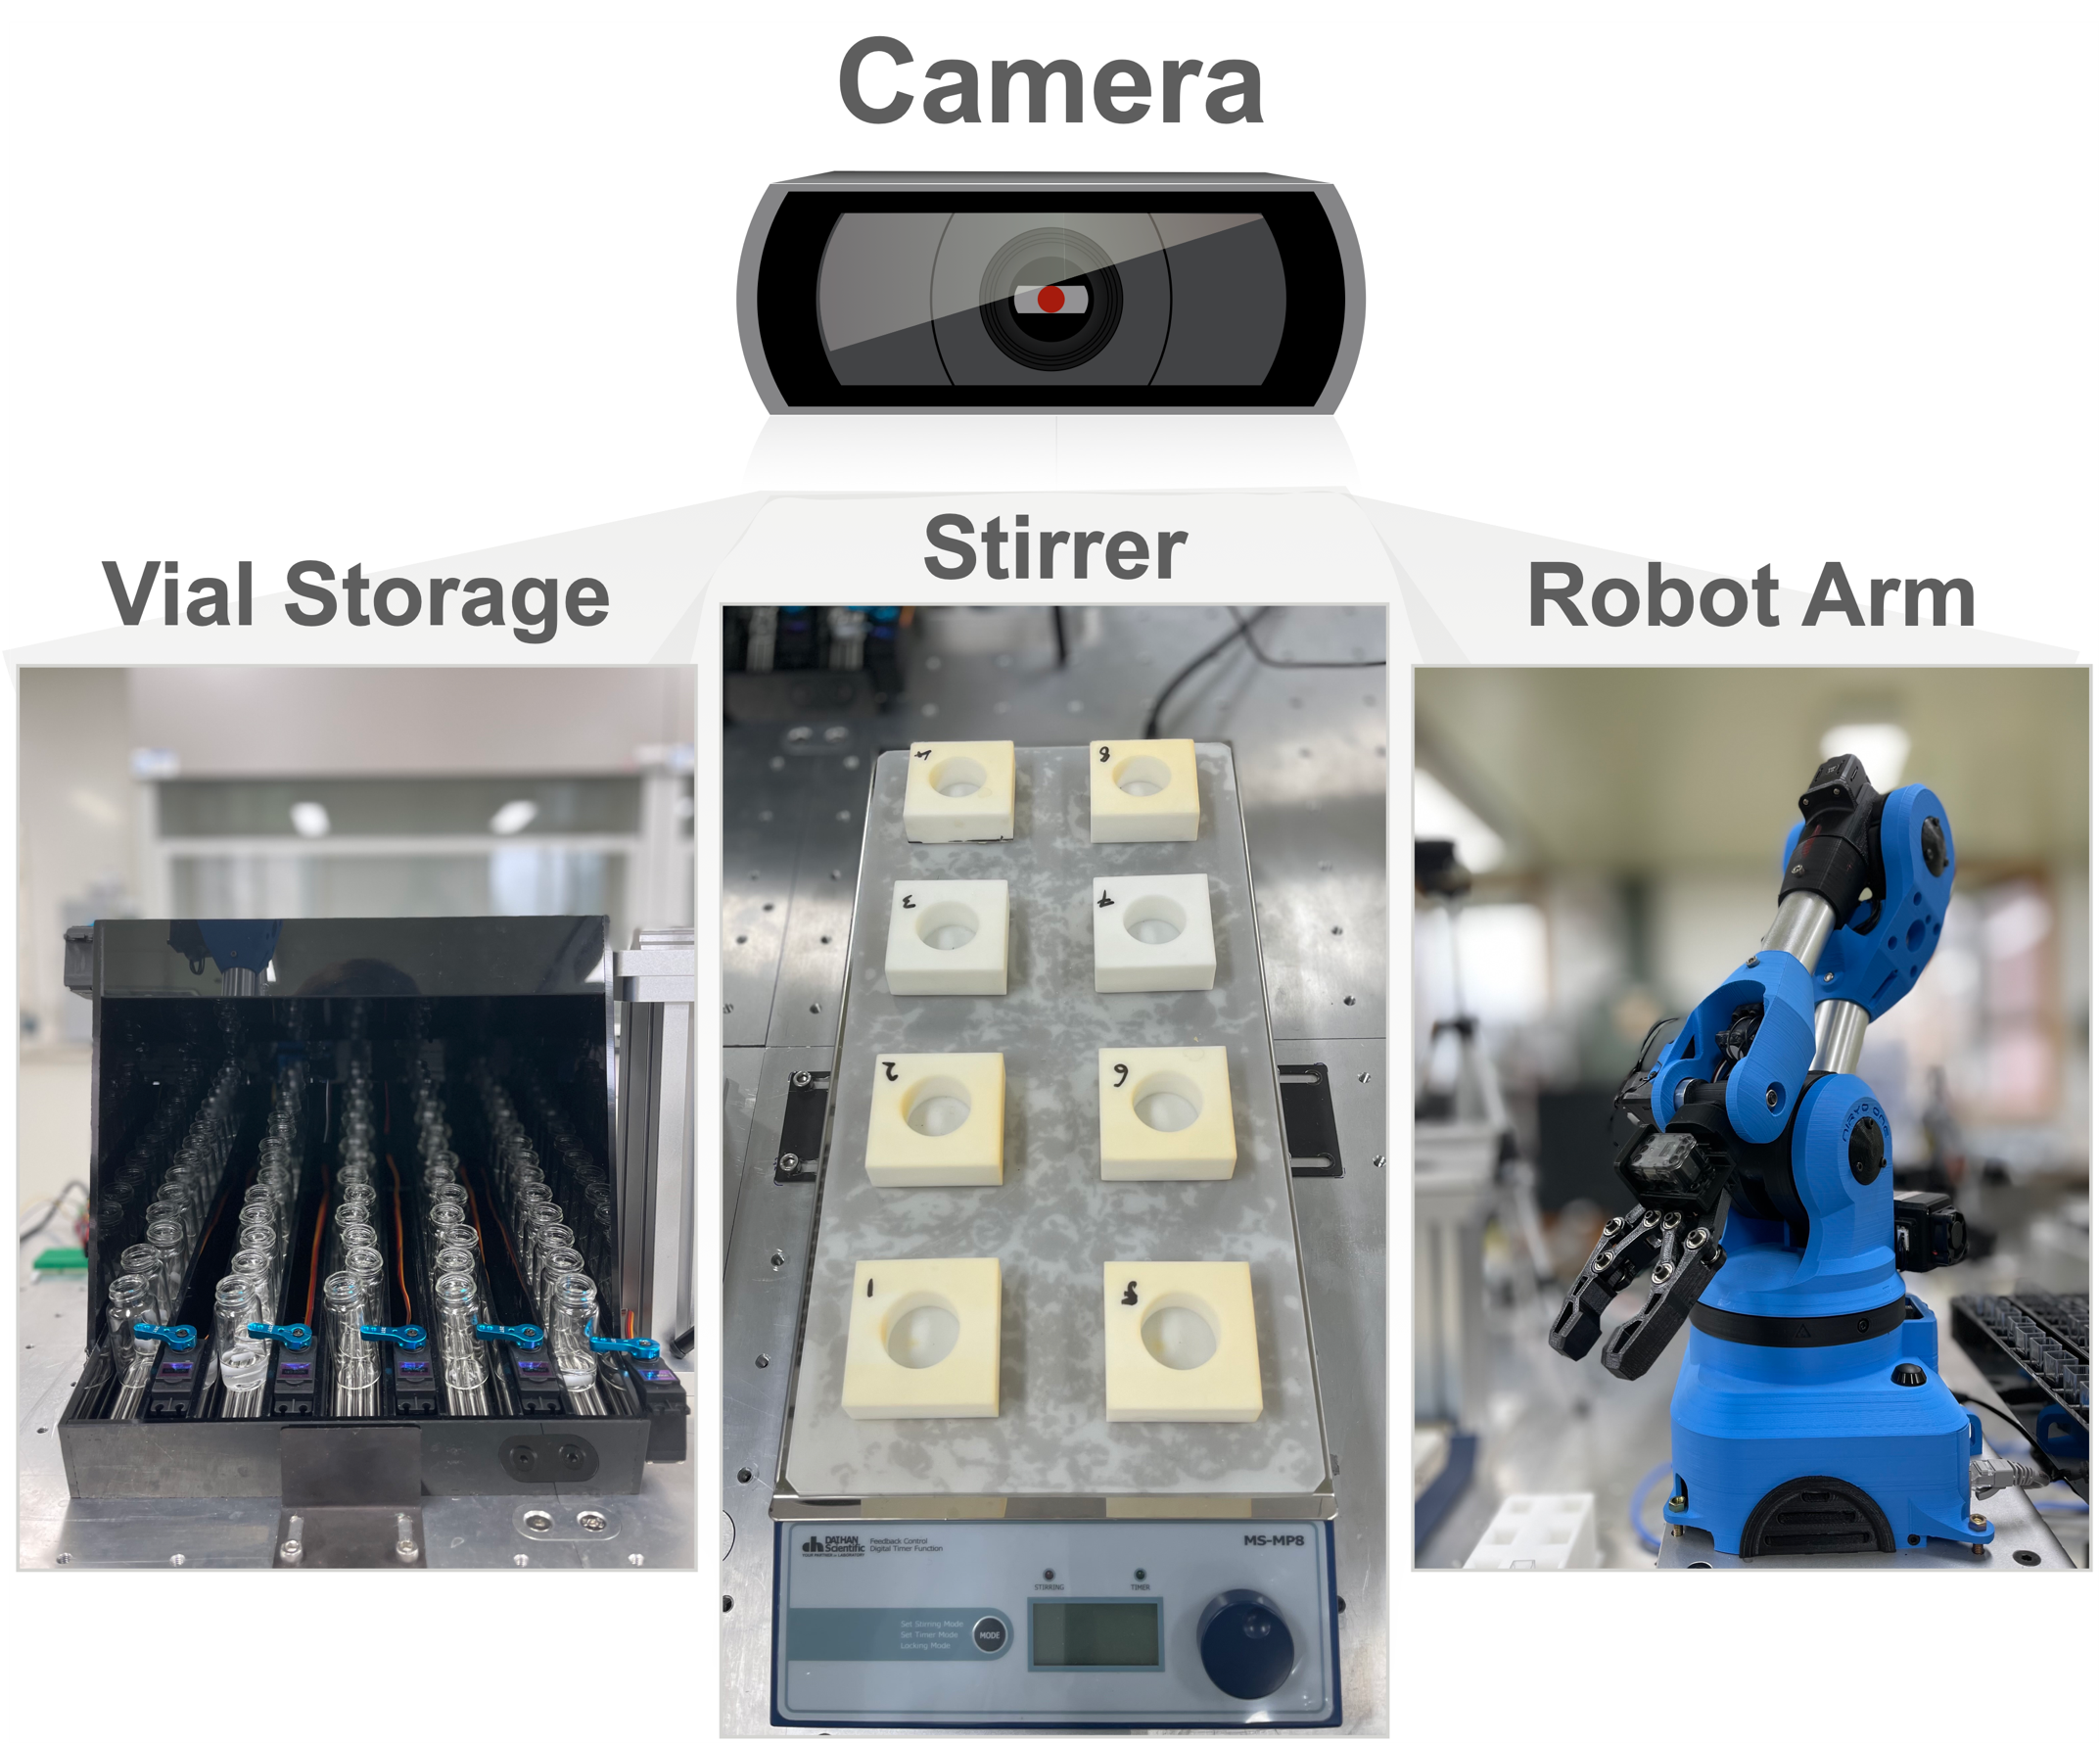
- Vial storage
- Web camera: logitech C920
- Stirrer: DaiHan Scientific
- Robot arm: Niryo (detail settings)
Please cite us if you are using our model in your research work:
@article{DenseSSD2024,
    author    = {Tiong, Leslie Ching Ow and Yoo, Hyuk Jun and Kim, Nayeon and Kim, Chansoo and Lee, Kwan-Young and Han, Sang Soo and Kim, Donghun},
    title     = {Machine vision-based detections of transparent chemical vessels toward the safe automation of material synthesis},
    journal   = {npj Computational Materials},
    year      = {2024},
    volume    = {10},
    number    = {42},
    doi       = {10.1038/s41524-024-01216-7}
}


