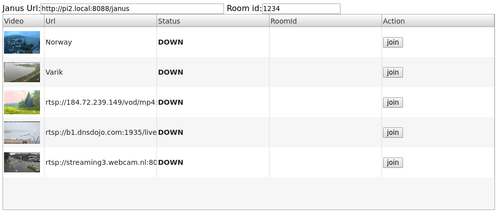
This is a try to stream video sources through WebRTC using simple mechanism.
It embeds a HTTP server that implements API and serve a simple HTML page that use them through AJAX.
The WebRTC signaling is implemented throught HTTP requests:
-
/api/call : send offer and get answer
-
/api/hangup : close a call
-
/api/addIceCandidate : add a candidate
-
/api/getIceCandidate : get the list of candidates
The list of HTTP API is available using /api/help.
Nowdays there is 3 builds on Travis CI :
- for x86_64 on Ubuntu Xenial
- for armv7 crosscompiling with gcc-linaro-arm-linux-gnueabihf-raspbian-x64 (this build is running on Raspberry Pi2 and NanoPi NEO)
- for armv6+vfp crosscompiling with gcc-linaro-arm-linux-gnueabihf-raspbian-x64 (this build is running on Raspberry PiB and should run on a Raspberry Zero)
It is based on :
mkdir ../webrtc
pushd ../webrtc
fetch webrtc
gn gen out/Release --args='is_debug=false use_custom_libcxx=false rtc_use_h264=true ffmpeg_branding="Chrome" rtc_include_tests=false use_ozone=true rtc_include_pulse_audio=false'
ninja -C out/Release
popd
make SYSROOT=<path to WebRTC>/src/build/linux/debian_stretch_amd64-sysroot live555
make WEBRTCROOT=<path to WebRTC> WEBRTCBUILD=<Release or Debug> SYSROOT=<path to WebRTC>/src/build/linux/debian_stretch_amd64-sysroot
where WEBRTCROOT and WEBRTCBUILD indicate how to point to WebRTC :
- $WEBRTCROOT/src should contains source (default is ../webrtc)
- $WEBRTCROOT/src/out/$WEBRTCBUILD should contains libraries (default is Release)
- $SYSROOT should point to sysroot used to build WebRTC (default is /)
./webrtc-streamer [-H http port] [-S[embeded stun address]] -[v[v]]  [url1]...[urln]
./webrtc-streamer [-H http port] [-s[external stun address]] -[v[v]] [url1]...[urln]
./webrtc-streamer -V
     	-H [hostname:]port : HTTP server binding (default 0.0.0.0:8000)
     	-S[stun_address]   : start embeded STUN server bind to address (default 0.0.0.0:3478)
     	-s[stun_address]   : use an external STUN server (default stun.l.google.com:19302)
     	-t[username:password@]turn_address : use an external TURN relay server (default disabled)
    	-a[audio layer]    : spefify audio capture layer to use (default:3)
     	[url]              : url to register in the source list
    	-v[v[v]]           : verbosity
    	-V                 : print version
Arguments of '-H' is forwarded to option 'listening_ports' of civetweb, then it is possible to use the civetweb syntax like '-H8000,9000' or '-H8080r,8443'.
webrtc-streamer rtsp://217.17.220.110/axis-media/media.amp \
			rtsp://85.255.175.241/h264 \
			rtsp://85.255.175.244/h264 \
			rtsp://184.72.239.149/vod/mp4:BigBuckBunny_175k.mov
You can access to the WebRTC stream coming from an RTSP url using webrtcstreamer.html page with the RTSP url as argument, something like:
https://webrtc-streamer.herokuapp.com/webrtcstreamer.html?rtsp://217.17.220.110/axis-media/media.amp
Instead of using the internal HTTP server, it is easy to display a WebRTC stream in a HTML page served by another HTTP server. The URL of the webrtc-streamer to use should be given creating the WebRtcStreamer instance :
var webRtcServer = new WebRtcStreamer(<video tag>, <webrtc-streamer url>, <request interface>);
A short sample HTML page using webrtc-streamer running locally on port 8000 :
<html>
<head>
<script src="request.min.js" ></script>
<script src="webrtcstreamer.js" ></script>
<script>
    var webRtcServer      = new WebRtcStreamer("video",location.protocol+"//"+window.location.hostname+":8000", request);
    window.onload         = function() { webRtcServer.connect("rtsp://pi2.local:8554/unicast") }
    window.onbeforeunload = function() { webRtcServer.disconnect() }
</script>
</head>
<body>
    <video id="video" />
</body>
</html>
A simple way to publish WebRTC stream to a Janus Gateway Video Room is to use the JanusVideoRoom interface
var janus = new JanusVideoRoom(<janus url>, <webrtc-streamer url>, <request interface>)
A short sample to publish WebRTC streams to Janus Video Room could be :
<html>
<head>
<script src="request.min.js" ></script>
<script src="janusvideoroom.js" ></script>
<script>
	var janus = new JanusVideoRoom("https://janus.conf.meetecho.com/janus", null, request);
	janus.join(1234, "rtsp://pi2.local:8554/unicast","pi2");
	janus.join(1234, "rtsp://217.17.220.110/axis-media/media.amp","media");
</script>
</head>
</html>
This way the communication between Janus API and WebRTC Streamer API is implemented in Javascript running in browser.
The same logic could be implemented in NodeJS using the same JS API :
var request = require('then-request');
var JanusVideoRoom = require('./html/janusvideoroom.js');
var janus = new JanusVideoRoom("http://192.168.0.15:8088/janus", "http://192.168.0.15:8000", request)
janus.join(1234,"mmal service 16.1","video")
You can start the application using the docker image :
docker run -p 8000:8000 -it mpromonet/webrtc-streamer
You can expose V4L2 devices from your host using :
docker run --device=/dev/video0 -p 8000:8000 -it mpromonet/webrtc-streamer
The container entry point is the webrtc-streamer application, then you can :
-
get the help using :
docker run -p 8000:8000 -it mpromonet/webrtc-streamer -h -
run the container registering a RTSP url using :
docker run -p 8000:8000 -it mpromonet/webrtc-streamer -n raspicam -u rtsp://pi2.local:8554/unicast


