board schematic, layout and instructions on how to operate the board
There are lots of operating Systems (Distributions) for the Raspberry Pi. Most of them are based on Linux. The Foundation’s official supported operating system is Raspberry Pi OS. There are 3 Variants:
- Raspberry Pi OS with desktop and recommended software
- Raspberry Pi OS with desktop
- Raspberry Pi OS Lite (just Console, smallest in size)
In our case Raspberry Pi OS with desktop is the the best choice. You can not just copy the files to a Micro SD Card to install the Operating System. To boot Raspberry Pi OS you have to install the Operating System on the Micro SD Card. Look at Installing operating system images for how to do this. balenaEtcher installs itself to the Userprofile, take care of that when trying to use with different Accounts! You will need administrative rights to format the Micro SD Card, so installing and using balena Etcher as Administrator is a good choice. To be able to connect via ssh to the Raspberry Pi (headless) you can place the Files ssh und wpa_supplicant.conf in the boot Folder of the Micro SD Card during the verify Cycle of balena Etcher. When using a SD Card to Micro SD Card Adapter, there is a Switch called LOCK. Take care, that the Switch is in the unlocked position (balena Etcher will tell you if the Micro SD Card is write protected). When you access the Micro SD Card using Microsoft Windows, it asks for formatting the Device. Don't do this! Now you can power up the Raspberry Pi with the plugged in Micro SD Card. If the Rasperry Pi is connected to a Monitor, you can you can read the Raspberry Pi's IP Address. When you operate the Raspberry Pi headless you can use IP Scanners like the Advanced IP Scanner to get the IP Address. Transfering Files is easy with WinSCP. You can start a Terminal Program from within WinSCP itself or download PuTTY. When connected, you can enable VNC via
pi@raspberrypi:~ $ sudo raspi-configand use a Viewer like VNC Viewer
Create a new File called proxy.conf and edit it. You can use an Editor like nano or vi
pi@raspberrypi:~ $ sudo touch /etc/apt/apt.conf.d/proxy.conf
pi@raspberrypi:~ $ sudo vi /etc/apt/apt.conf.d/proxy.conf
Add the following Lines to the empty File:
Acquire {
  HTTP::proxy "http://proxy.htl-steyr.ac.at:8082/";
  HTTPS::proxy "https://proxy.htl-steyr.ac.at:8082/";
}
If you do not need the proxy (e.g. at home), you can just rename the File to disable the proxy:
pi@raspberrypi:~ $ sudo mv /etc/apt/apt.conf.d/proxy.conf /etc/apt/apt.conf.d/proxy.conf.htlUsing apt-get (Advanced Packaging Tool) you can update the Operating System and install Software. The most important apt-get commands are:
| command | description |
|---|---|
| update | downloads the package lists from the repositories |
| upgrade | updates the list of available packages and their versions |
| install | installs one or more program package(s) |
| purge | removes a program package including the configuration |
| apt-get needs the time and date to be set to an actual value! You can do this by typing |
pi@raspberrypi:~ $ sudo date -s "13 Jun 2020 09:20:00"
pi@raspberrypi:~ $ date # returns current time and date
To do the necessary software Maintenance you should enter
pi@raspberrypi:~ $ sudo apt-get -y update && sudo apt-get -y dist-upgradeSetting the Time Zone and enabling ntp (network time protocol)
pi@raspberrypi:~ $ sudo timedatectl set-timezone Europe/Vienna
pi@raspberrypi:~ $ sudo timedatectl set-ntp trueTo manage ressources Linux uses the Device Tree. Parts of it are configured in the File config.txt. You can also add devices via the EEPROM on a HAT. To configure devices virtual Filesystems (/dev, /sys, /proc) are frequently used.
Our HAT uses PWM channels. The root user can access the onboard chanels.
If the user pi should use the pripheral, you have to give him the rights to do this:
Edit the File /etc/udev/rules.d/99-com.rules
pi@raspberrypi:~ $ sudo vi /etc/udev/rules.d/99-com.rulesand change
chown -R root:gpio /sys/devices/platform/soc/*.pwm/pwm/pwmchip* && chmod -R 770 /sys/devices/platform/soc/*.pwm/pwm/pwmchip*\
to
        chown -R root:gpio /sys/devices/platform/soc/*.pwm/pwm/pwmchip* && chmod -R 770 /sys/devices/platform/soc/*.pwm/pwm/pwmchip*;\
        chown -R root:gpio /sys/devices/platform/soc/*.i2c/i2c*/*/pwm/pwmchip* && chmod -R 770 /sys/devices/platform/soc/*.i2c/i2c*/*/pwm/pwmchip*\
mind the semicolon ; to be added to the first Line!
Controlling the PWM Unit can be done in the virtual Filesystem /sys/class/pwm/pwmchip*.
When using Python python-periphery can access the PWM channels.
Keyboard, Mouse, Joysticks and Game Controllers can easily be accessed using python-evdev
Download the latest Version of the eepromutils and compile the utils
pi@raspberrypi:~ $ sudo apt-get install -y git
pi@raspberrypi:~ $ git clone https://github.com/raspberrypi/hats.git
pi@raspberrypi:~ $ git clone https://github.com/htl-ooe/board.git
pi@raspberrypi:~ $ cd hats/eepromutils && make ; cd
pi@raspberrypi:~ $ sudo dtc -@ -H epapr -O dtb -o "/boot/overlays/smartcar-V1-2.dtbo" -W no-unit_address_vs_reg './board/hat/smartcar-V1-2-overlay.dts'compiles the device tree source file and copies it to /boot/overlays
pi@raspberrypi:~ $ ./hats/eepromutils/eepmake ./board/hat/eeprom_settings.txt ./board/hat/smartcar-V1-2.eep /boot/overlays/smartcar-V1-2.dtbogenerates the contents of the EEPROM
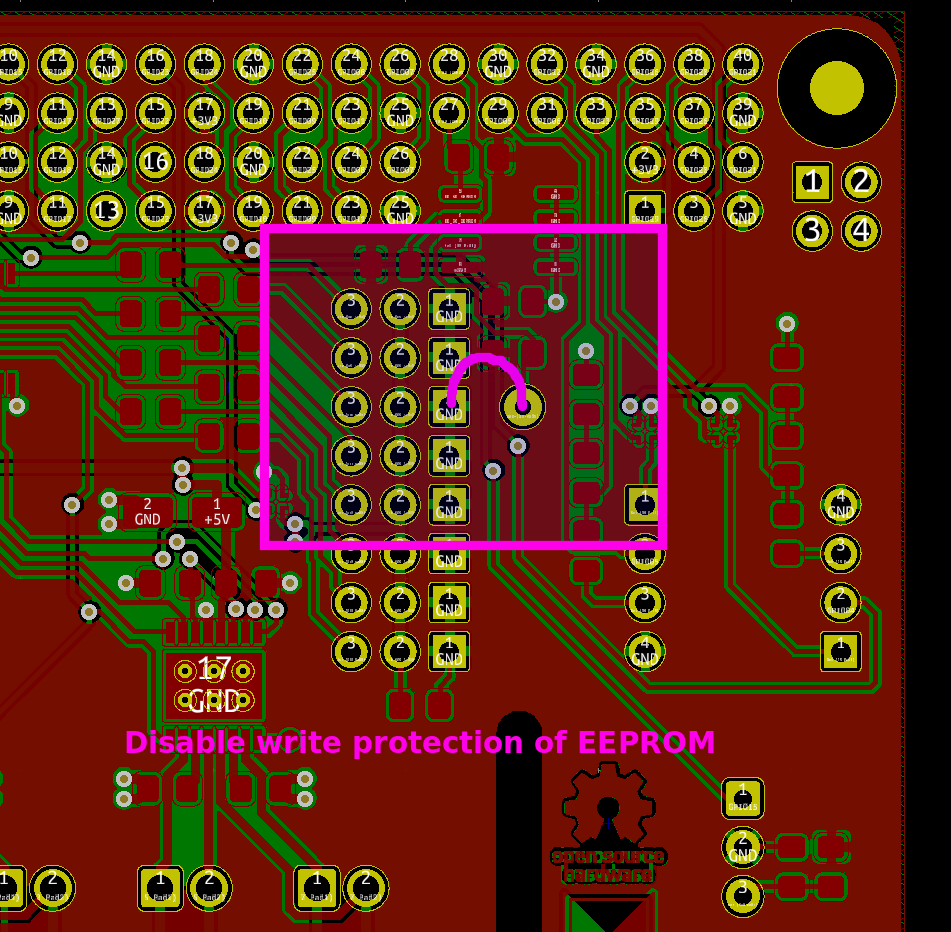
Disable the write protection with a piece of wire or calipers:

pi@raspberrypi:~ $ sudo ./hats/eepromutils/eepflash.sh -w -f=./board/hat/smartcar-V1-2.eep -t=24c512writes smartcar-V1-2.eep to the EEPROM, assumed that you disabled the Write Protection and i2c-0 can be enabled. Propably you need dtparam=i2c_vc=on in config.txt.
pi@raspberrypi:~ $ sudo reboot --force
pi@raspberrypi:~ $ sudo apt-get install -y raspberrypi-kernel-headersinstalls the header Files for the Kernel
pi@raspberrypi:~ $ sudo /home/pi/board/drivers/install.shcompiles the srf04.c File and copies it to the propper directory. When you did this once you can copy the compiled module to another Raspberry Pi and do not have to compile (download the rpi headers) again.
install ir-keytable
pi@raspberrypi:~ $ sudo apt-get install -y ir-keytableselect the desired Protocol (templates: /lib/udev/rc_keymaps) eg: rc6_mce
pi@raspberrypi:~ $ sudo ir-keytable -p rc-5,rc-5-sz,jvc,sony,nec,sanyo,mce_kbd,rc-6,sharp,xmp -w /lib/udev/rc_keymaps/rc6_mce.tomlto test type
pi@raspberrypi:~ $ ir-keytable --testto bind actions (triggers) to a IR Key edit eg. /etc/triggerhappy/triggers.d/power.conf (new File) and add the line KEY_POWER 1 sudo /sbin/halt to shutdown with the power key