VolPA - Volumetric Population Analysis
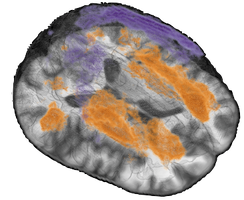
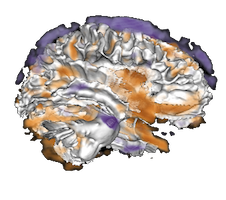
This is a repository that contains scripts to run volumetric population analysis on brain image data sets. For a general introduction see Brain morphometry.
The analysis pipeline contains an optimal transport feature extraction step and can perform VBM and TBM with and without optimal transport features. The scripts perform preprocessing, feature extraction, analysis and visualization.
The scripts perform feature extraction using:
- Standard and modified VBM approaches (VBM)
- A novel approach based on optimal transport (UTM) that aims to mitigate some concerns with VBM/TBM.
For both approaches different statistical analysis are available:
- Voxel based correlation analysis: Correlation of individual voxels
Example result visualization - Component based analysis
Example result visualization- PCA: Principal component based statistical models
- SpatCA: Spatially regularized component based statistical models (SpatCA)
- Parcellation based analysis
Example result visualization
The component and parcel based analysis visualization provide several options for statistical models and custom statistical models can be incorporated through R scripting within the shiny user interface.
Depending on the feature extraction (with or without optimal transport features) the results have slightly different interpretations.
If you are interested in using only the optimal transport feature extraction step in your own analysis pipeline have a look at the R package OTFeatures.
References
The analysis approach is based on the work in:
Gerber S, Niethammer M, Styner M, Aylward S.
Exploratory Population Analysis with Unbalanced Optimal Transport.
Med Image Comput Comput Assist Interv. 2018
Pubmed Link
A journal article with improvements and additions to the method is in progress.
The spatial component analysis approach is described in:
Gerber, Samuel, and Marc Niethammer.
Spatial Component Analysis to Mitigate Multiple Testing in Voxel-Based Analysis.
International Conference on Medical Image Computing and Computer-Assisted Intervention 2020
Link
This paper also describes the statistical model employed in the parcel and component based analysis.
Running the UTM analysis:
There are three stages to running the scripts:
- Preprocessing
- See python folder
- UTM analysis on extracted data
- See Scripts folder
- Visualization of results
- See Scripts/Shiny
For a more detailed description see the documentation in doc folder.
Examples
To run the examples install the requirements first
Small Image Data Set
For a self contained example see run-example.py.
The example processes a set of images, saves pre-processed images
and passes the pre-processed images to the analysis script.
From console in the python folder run:
python3 run-example.py
Toy Data Set
For a toy example see Example/Annulus.
From console in the Example/Annulus folder:
source run.sh
cd Results
Rscript app.R
OASIS-1 Data Set
For an example on the OASIS-1 data set see run-oasis-1.py.
From console in the python folder run:
mkdir OASIS-1
cd OASIS-1
python3 ../download-oasis-1.py
cd ..
mkdir OASIS-1-Results
python3 run-oasis-1.py --input_folder ./OASIS-1 --input_cs ./OASIS-1/oasis_cross-sectional.csv --output_folder ./OASIS-1-Results
This will create itermediate images in OASIS-1-Results and analysis outputs in OASIS-1-Results/results. The analysis runs white matter, gray matter with affine and with diffeomoprhic registration to the SRI24 atlas. To visualize the results copy app.R, render.js, shiny-help.md and atlas.Rdata into the OASIS-1-Results/results/gray and run the shiny app:
cp ../Scripts/Shiny/app.R OASIS-1-Results/results/gray
cp ../Scripts/ShinyVtkScripts/render.js OASIS-1-Results/results/gray
cp ../Atlas/sri24/labels/atlas.Rdata OASIS-1-Results/results/gray
cp ../Scripts/Shiny/shiny-help.md OASIS-1-Results/results/gray
cd OASIS-1-Results/results/gray
Rscript app.R
For visualizing parcel or component results copy app.R or app.R instead. For visualizing results on white matter or different registration repeat above steps OASIS-1-Results/results/white or appropriate folder in OASIS-1-Results/results.
Visualization of the Results
The results are visualzed with Shiny applications in the folders
Each folder contains a upload.to.shinyapps.R for bundling of relevant files from the output of the main script.
Install
Requirements to Run Scripts
Preprocessing
- python 3
- packages
- antspy (make sure to install from source, the wheel is broken)
- pandas
- argparse
- numpy
- nibabel
- dipy
Analysis
- R >= 3.6
- R packages dependencies: x11, gl/glu, libpng, curl, git dev libraries
- These need to be installed before the R packages are installed (use package manager of choice for your system)
Once these dependencies are installed several packages are required. For installing all packages use:
install.packages("devtools")
library(devtools)
Sys.setenv("R_REMOTES_NO_ERRORS_FROM_WARNINGS" = "true")
devtools::install_github("samuelgerber/utmR")
Or use the install-all.sh shell script.
This will install:
- R packages (Packages folder contains a script to install all):
- mop
- gmra
- msr
- vtkwidgets
- data.table
- lmvar
- mmand
- Rtsne
- stringr
- glmnet
- foreach
- doParallel
- RColorBrewer
- optparse
- pracma
- yaml
- ANTsR (requires devtools which depends on curl and git development libraries)
- shiny
- shinyBS
- shinythemes
- stringr
- markdown
- broom
- corrplot
- shinyWidgets
- DT
Acknowledgement
This work was supported by the National Institute Of Mental Health of the National Institutes of Health under Award Number R42MH118845. The content is solely the responsibility of the authors and does not necessarily represent the official views of the National Institutes of Health.

