This repository describes steps for installing the elements that make up SAMURAI-IoT-Access (UE-non3GPP + N3IWF + Free5gc). The installation process involves 3 different machines 1st responsible for running 5GC, 2nd responsible for running N3IWF and 3rd responsible for running UE-non3GPP. The main objective is to provide communication between IoT devices and the 5G core, enabling the construction of a scenario similar to the one illustrated in the following figure.
- SO: Ubuntu 20.04 (LTS) x64
- Uname -r: >= 5.4.0-122-generic
- Memory: 4 GB
- Disk: 80 GB
- SO: Ubuntu 20.04 (LTS) x64
- Memory: 2 GB
- Disk: 20 GB
- SO: Ubuntu 20.04 (LTS) x64
- Memory: 2 GB
- Disk: 20 GB
Before starting the installation, it is necessary to edit the 5gc-install.yml, n3iwf-install.yml and ue-non3gpp-install.yml files, informing the respective IP addresses where each of the artifacts will be deployed in the variable declaration structure.
The installation steps for each of the 3 components are described below. Attention: All installation steps described below must be performed with root privileges (SUDO SU).
Access via terminal the machine where the 5GC will be executed. Install python + git + ansible:
sudo apt update && apt -y install python && sudo apt -y install git && sudo apt -y install ansible
Clone this repository:
git clone https://github.com/LABORA-INF-UFG/SAMURAI-IoT-Access.git
Install GOLang 1.14.4:
cd SAMURAI-IoT-Access &&  ansible-playbook -K golang-1.14-install.yml
source ~/.bashrc
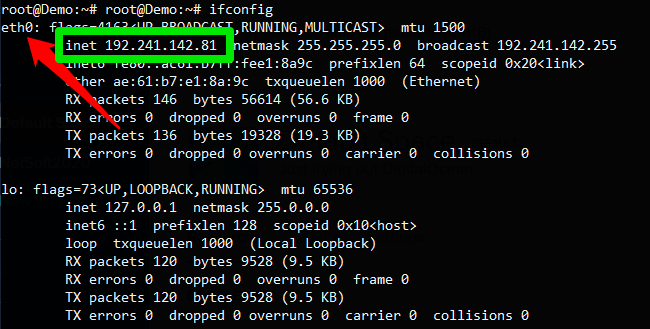
Run ifconfig and get the name of internet network interface, that provides to the host with access to the internet, like as illustrated in the figure below:
This interface that will be used by the UPF to provide internet access to the UE's registered in the 5GC.
Edit the 5gc-install.yml and replace the <<IP-address-visible-to-n3iwf>> marker with the IP address of the machine where the core is being deployed, and which must be visible to n3iwf.
Run the following Ansible playbook (password for sudo is required):
cd SAMURAI-IoT-Access && ansible-playbook -K 5gc-install.yml -e "internet_network_interface=<< internet network interface name>>"
Wait a few seconds for Ansible to finish configuring the 5GC. The result of the execution should look something like the one shown in the figure below.
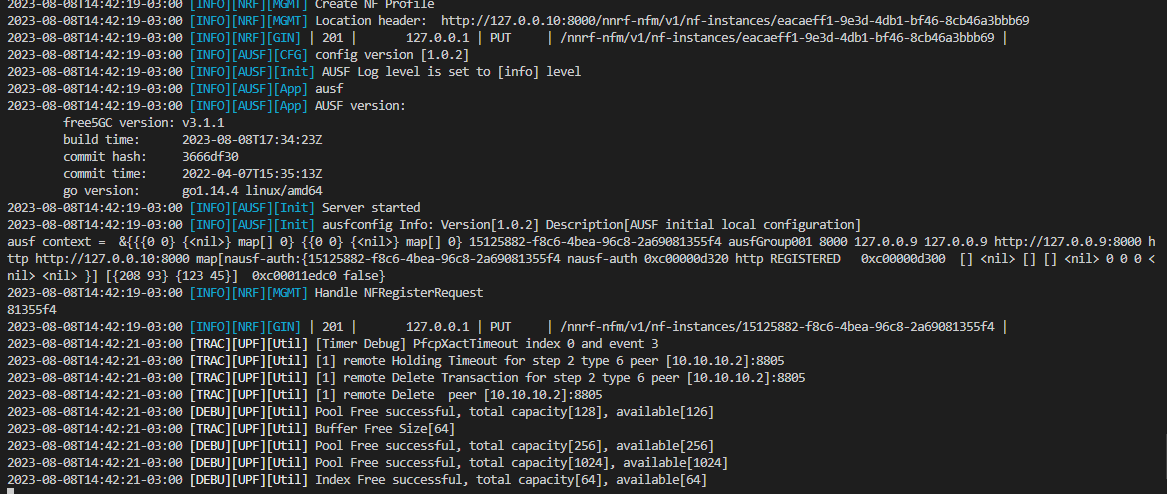
After installation we must initialize the 5GC. The entire installation was performed following the standard for applications written in GOLang. Go to /root/go/src/free5gc and run the following command to init 5GC functions ./run.sh . After execution, the expected result is something similar to what is shown in the following figure.
Important Note: In the image above, the verbosity level of the UPF LOG was defined as TRACE. In a standard installation, the verbosity level is probably defined as INFO, so the output will probably not be identical to the image above, which does not mean an 5GC initialization failure. Pay attention to any messages labeled as ERROR in the log output, they will be printed in red color and then they will indicate some failure in the installation process.
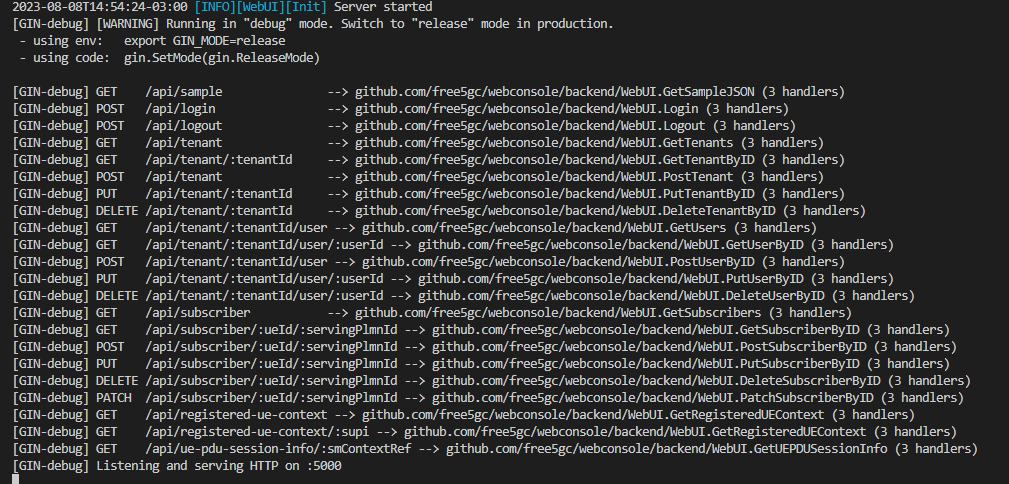
After initializing the microservices that control the data and control planes, it is also necessary to initialize the API that controls access to the 5GC database in MongoDB. This service will be used later for the registration of UEs in the 5GC. Open another terminal and access the /root/go/src/free5gc/webconsole directory. Then type the following command go run server.go. . After execution, the expected result is something similar to what is shown in the following figure.
Access via terminal the machine where the N3IWF will be executed. Install python + git + ansible:
sudo apt update && apt -y install python && sudo apt -y install git && sudo apt -y install ansible
Clone this repository:
git clone git clone https://github.com/LABORA-INF-UFG/SAMURAI-IoT-Access.git
Install GOLang 1.14.4:
cd SAMURAI-IoT-Access &&  ansible-playbook -K golang-1.14-install.yml
source ~/.bashrc
Edit the n3iwf-install.yml and replace the following markers with their respective IP addresses:
<<IP-address-for-IKE-communication-visible-to-UEnon3GPP>>: This parameter must be replaced by the IP address of the machine where the N3IWF was installed, it must be visible to UEnon3GPP and will be used for communication and subsequent establishment of communication tunnels for the data and control planes.<<5G-core-ip-address-for-connection-to-AMF>>: This parameter must be replaced by the IP address of the machine where free5GC was installed. It will be used to establish communication between N3IWF and the AMF for subsequent validation of UE-non3GPP access credentials and construction of communication tunnels for the data and control planes.<<N3IWF-IP-address-for-communication-with-UPF>>: This parameter must be replaced by the N3IWF IP address, which must be visible by the UPF (free5GC). It will be used for bi-directional communication between N3IWF and UP when building the GTP tunnel for user data plane communication traffic.
Run the following Ansible playbook to install N3IWF (password for sudo is required):
cd SAMURAI-IoT-Access && ansible-playbook -K n3iwf-install.yml
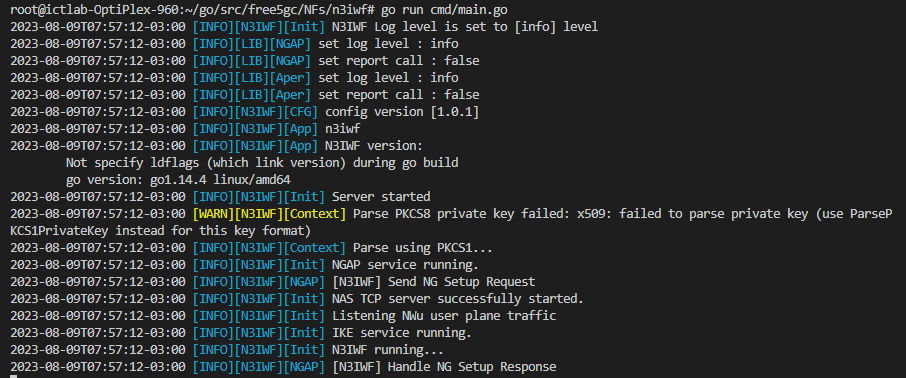
After installing the N3IWF and with the 5GC properly initialized (see instructions here), access the /root/go/src/free5gc/NFs/n3iwf directory. Then type the following command go run cmd/main.go . After execution, the expected result is something similar to what is shown in the following figure.
Access via terminal the machine where the UE-non3GPP will be executed. Install python + git + ansible:
sudo apt update && apt -y install python && sudo apt -y install git && sudo apt -y install ansible
Clone this repository:
git clone https://github.com/LABORA-INF-UFG/SAMURAI-IoT-Access.git
Install GOLang 1.21.3:
cd SAMURAI-IoT-Access &&  ansible-playbook -K golang-1.21-install.yml
source ~/.bashrc
Edit the ue-non3gpp-install.yml and replace the following markers with their respective IP addresses:
<<IP-address-for-IKE-communication-with-n3iwf>>: This parameter must be replaced by the N3IWF IP address, visible to UE-non3GPP, to establish UDP communication for initial communication to establish communication tunnels for the data and control planes.<<IP-address-of-UEnon3GPP-visible-to-n3iwf>>: This parameter must be replaced by the UEnon3GPP IP address. The address must be visible to N3IWF and will be used for bidirectional communication during the tunnel construction process for data and control plane communication traffic.
Run the following Ansible playbook to install UE-non3GPP (password for sudo is required):
cd SAMURAI-IoT-Access && ansible-playbook -K ue-non3gpp-install.yml
Wait a few seconds for Ansible to finish configuring the UE-non3GPP. The result of the execution should look something like the one shown in the figure below.
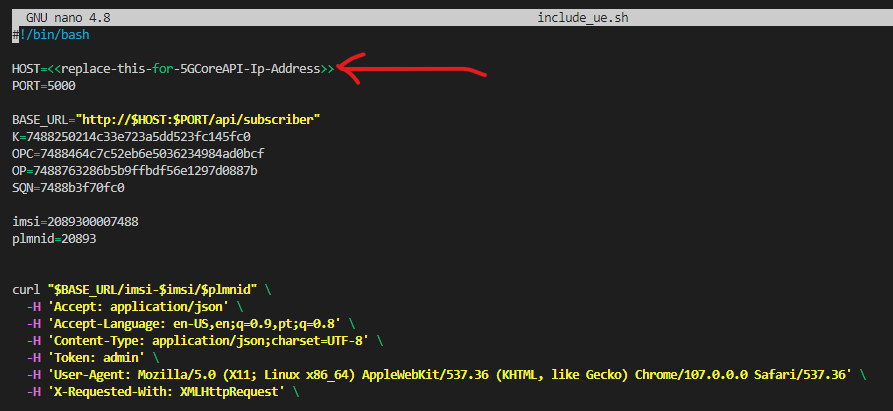
After installing UE-non3GPP and with the 5GC API properly initialized (see instructions here), access the /root/go/src/UE-non3GPP/assets dir. Then open the include_ue.sh file in a text editor (VI or Nano) and replace <<replace-this-for-5GCoreAPI-Ip-Address>> with the IP address of the machine where the 5GC is running.
Attention, if the machine where the UE-non3GPP is being configured does not have access to the machine where the 5GC is, the include_ue.sh file can be moved to another machine to be executed. The purpose of the include_ue.sh is to register the UE in the 5GC's MongoDB database, avoiding the need for registration through the Free5GC Web User Interface. May need to assign permission to run include_ue.sh file (chmod 777 -R include_ue.sh). After executing include_ue.sh, a log message will be presented in the terminal where the 5GC API is being executed. The expected result is something similar to the one shown in the figure below (unconsidered the error message).
After performing the installation of the SAMURAI-IoT-Access components, we will test if the components were configured correctly. Open new terminal on the machine where UE-non3GPP was installed, go to the /root/go/src/UE-non3GPP dir and run the following command go run cmd/main.go ue. After executing the command, the expected result is something similar to the one shown in the following figure.
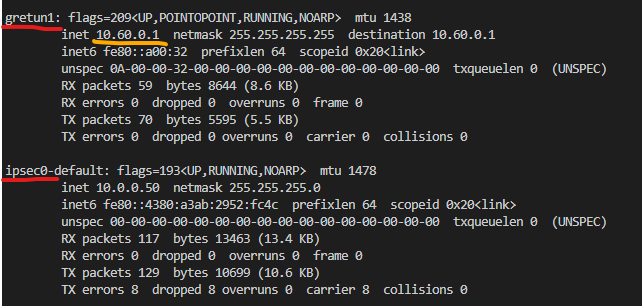
On the same machine, open another terminal and type ifconfig. This command will list all available network interfaces. You should check if there are two network interfaces that were created by running UE-non3GPP on the list, they are: ipsec0 and gretun1, as highlighted by the red line in the image below.
In the figure above, observe the IP address highlighted by the yellow line. This address was provided by the UPF, and it is through it that UE-non3GPP will gain access to the data network. To test the connection through the 5GC, just run a PING command specifying the gretun1 network interface:
ping -I gretun1 8.8.8.8
The expected result is something similar to the one shown in the following figure.
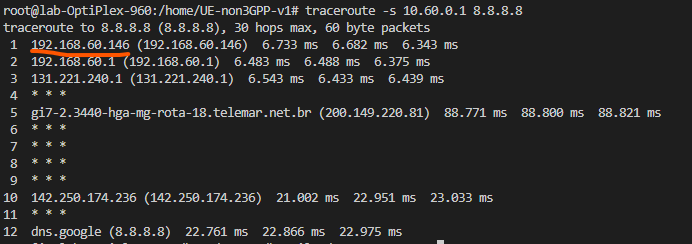
The above log output indicates internet access through the network interface generated by UE-non3GPP. With the command traceroute -s 10.60.0.X 8.8.8.8 applied to the gretun1 interface, we will see that the traffic on the interface generated by UE-non3GPP has as its output route (1st hop IP address) the IP address of the network interface that gives access to the internet on the machine where it is being run the 5GC, as shown in the image below.
Because it is a complex environment involving several components with different responsibilities and which must work in an integrated manner, some problems may arise during execution. Possible problems and their respective solutions are listed below.
Eventually, the machine responsible for running the N3IWF can throw errors related to the xfrm interface. It is a set of kernel modules and userspace tools that allow configuration and management of IPsec policies and transformations. When a problem related to the xfrm interface occurs, the log reported in N3IEF will be equivalent to the one shown in the following image.
Solution:
- Terminate the N3IWF execution
- run xfrm state flush:
ip xfrm state flush - run xfrm policy flush:
ip xfrm policy flush - Restart the N3IWF
When running UE-non3GPP two network interfaces are created (gretun and ipsec). When terminating UE-non3GPP, in theory these interfaces should be removed, however in some cases they remain active. In these situations, it is necessary to remove the interfaces created so as not to generate a network conflict in the case of a new execution of the UE-non3GPP code on the machine. To remove the interfaces, just run the commands below:
sudo ip link del ipsec0
sudo ip link del gretun1
The 5GC network functions are initialized through a ./run.sh. If, eventually, the connection with the terminal that initialized the .sh is closed improperly, the functions will continue running as loose processes on the execution stack. When trying to initialize the 5GC again, errors related to connection ports that are already in use will be triggered.
To solve the problem, just run ./force_kill.sh, is located in the same directory as the run.sh script. When executing ./force_kill.sh all active processes related to the execution of the 5GC functions will be terminated and a new execution can be performed.
For a UE to be able to use the 5GC functionalities, it must be duly registered in the database. This record is performed through a Rest API provided by the 5GC. If eventually the terminal used to initialize the API is closed improperly, port 5000 will remain in use, preventing a new execution. In this case, the process must be terminated using kill -9 as described below:
- Find the PID of the process that is using port 50000:
sudo netstat -nlp | grep :5000 - Kill the process through the PID::
kill -9 <<PID-Nº>>
In experimental scenarios, where the UE-non3GPP + 5GC connection procedures are repeated several times, it may happen that MongoDB persists inconsistent information. In these cases, it is interesting to delete the database and register the UEs again. To resolve the issue, perform the following steps:
- Terminate the execution of UE-non3GPP, N3IWF and 5GC.
- Access through a new terminal on the machine where 5GC was installed.
- Type in terminal
mongoto connect MongoDB CLI. - In MongoDB CLI type
use free5gcto connect to free5gc base. - Type
db.dropDatabase()to completely delete the 5gc database.
After deleting the database, initialize 5GC, initialize API Server, initialize N3IWF, register UE-non3GPP and test SAMURAI-IoT-Access components.

