A guide to set up Amazon Web Services' Simple Storage Service to house some content without using it for user uploads in an application.
Why would you want to use an AWS S3 Bucket? While Heroku's PostgreSQL database is good for storing most of your data in an organized format, it's not optimized for large file storage, and that includes images and music files, files that you might want to use in your application. AWS's S3 is an object storage service which allows you to store images, music files, or any other kind of large file that PostgreSQL wouldn't be able to store well. Using AWS or some other content delivery network (CDN) will allow you to use larger files without impacting your application's performance in a negative way.
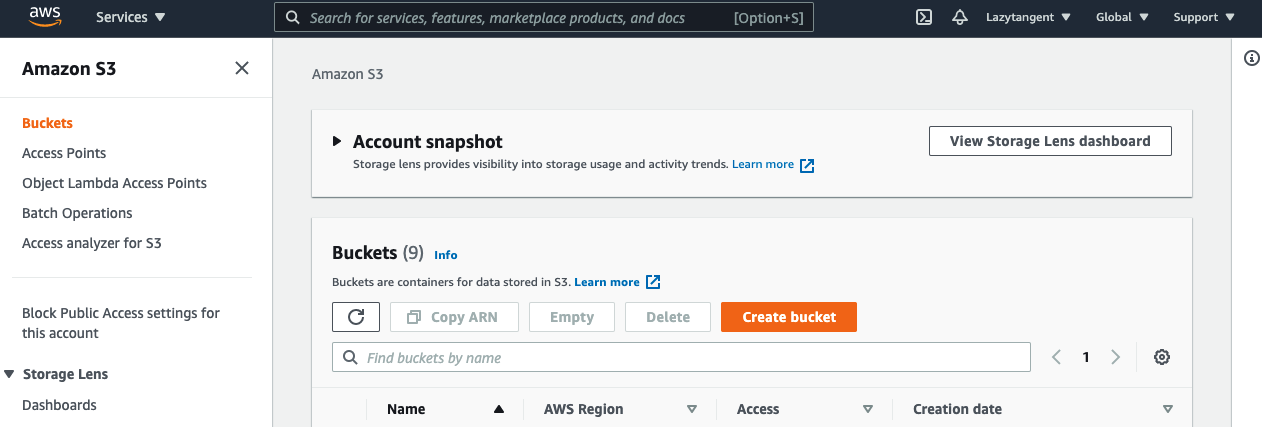
Navigate to the AWS Console, create an account if you haven't used AWS yet, or log in if you have. Once you are logged in there, you should have arrived on the Amazon S3 Buckets page.
Click on the orange button "Create Bucket", enter a name, choose a region, and leave all other options as default. It you are planning on using this bucket to provide hosting for some of the resources you have for seeders or something, you'll want to uncheck the checkbox that says "Block all public access". You'll need to also check the checkbox that appears after you've unchecked the previous one that says that you acknowledge that the "current settings might result in this bucket and the objects within becoming public."
Scroll to the bottom and click "Create Bucket". You might run into an error where the name is already taken, so be sure to choose a fairly unique name. If your bucket was created successfully, then you'll be taken back to the Amazon S3 Buckets page.
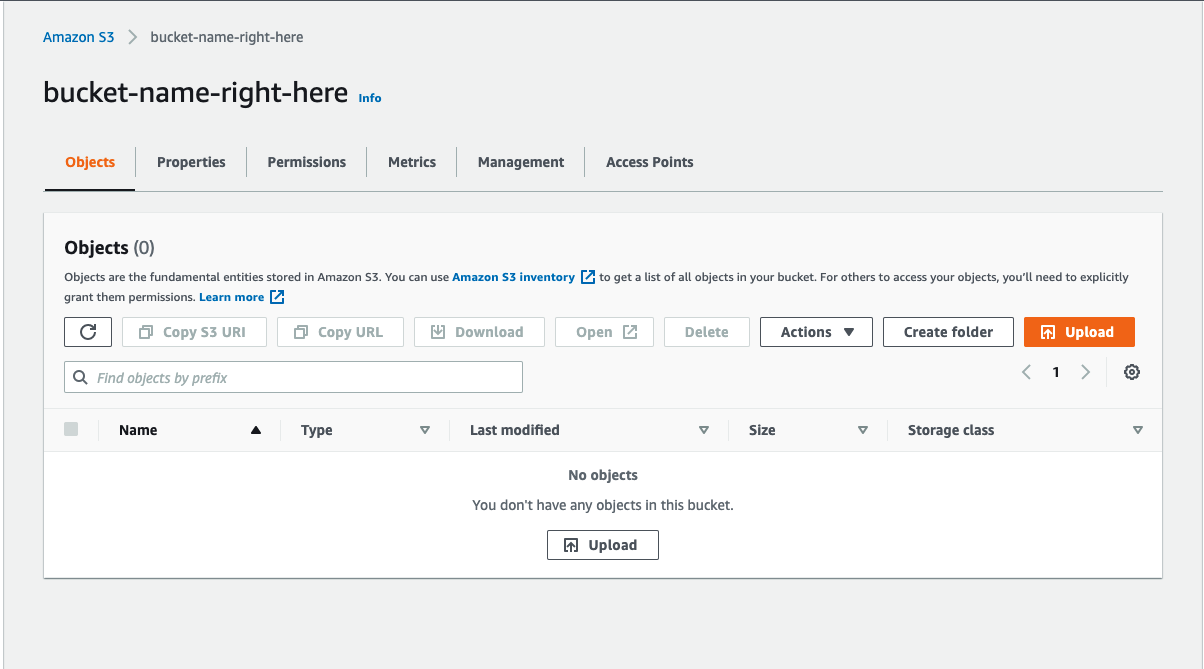
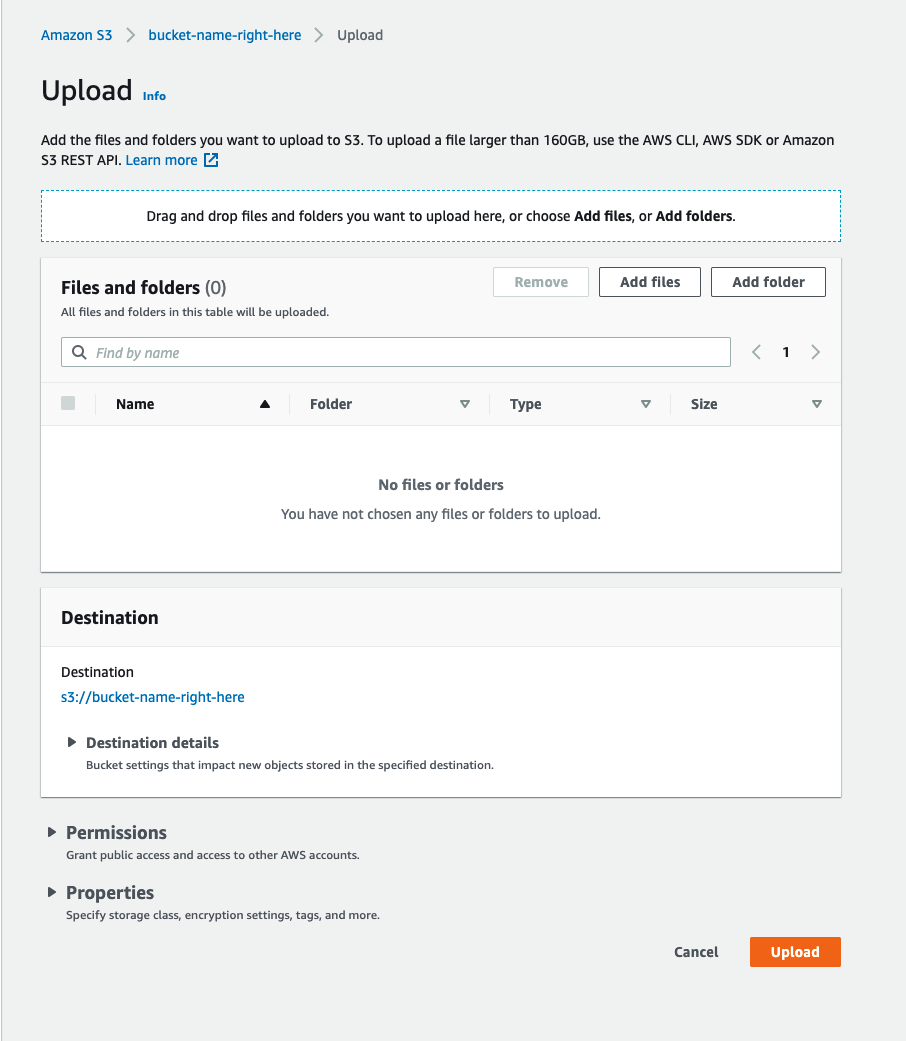
Select the bucket that you just made. On the next page, you can click either "Upload" button. It will direct you to a page where you can upload files and/or folders to your bucket. On this next page, use the "Add files" button, "Add folder" button, or drag and drop your files to start the upload process.
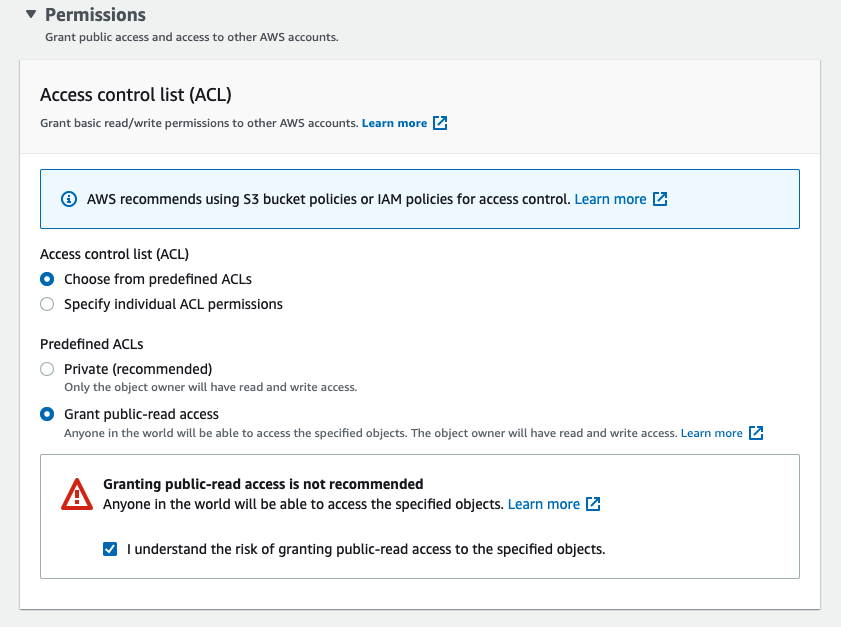
If you want these resources to be available publicly, which you probably do, then open up the "Permissions" details and choose the radio button by "Grant public-read access" to make the resources in this batch of uploads readable by anyone with the link. Once you've confirmed that the current settings are all correct, click the "Upload" button at he bottom of the page.
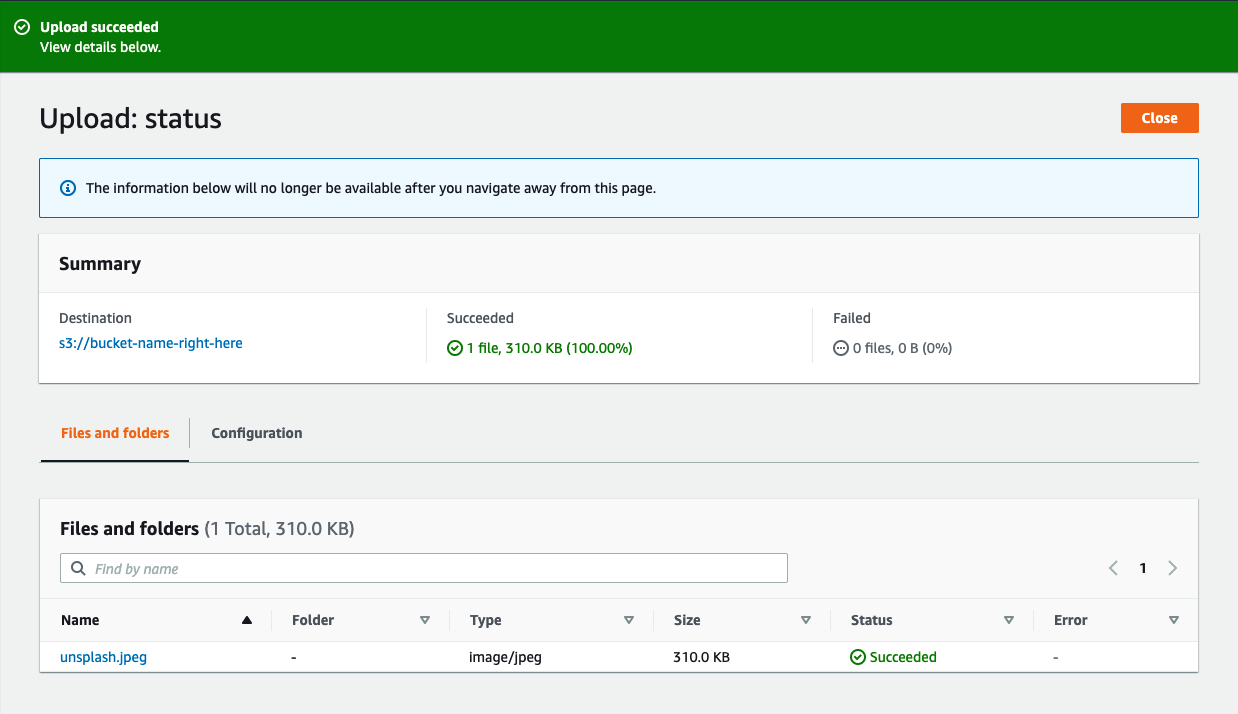
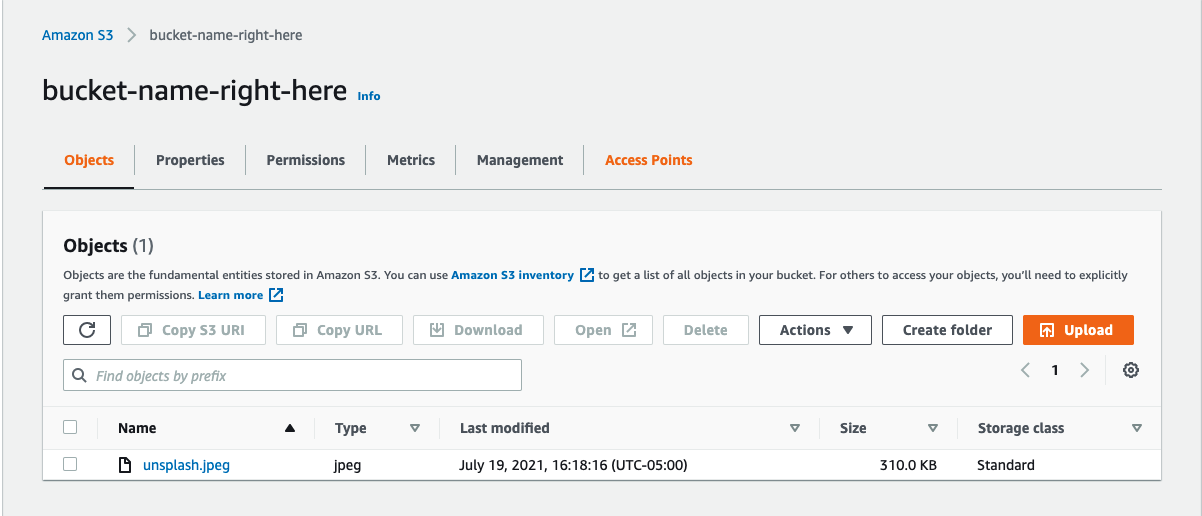
You should arrive at an upload status page, and it might take a second before your files get uploaded. Once the files have been successfully uploaded, you can click on the "Close" button in the upper right hand corner of the page. This will take you back to your bucket's page, and it should show the items that were just uploaded.
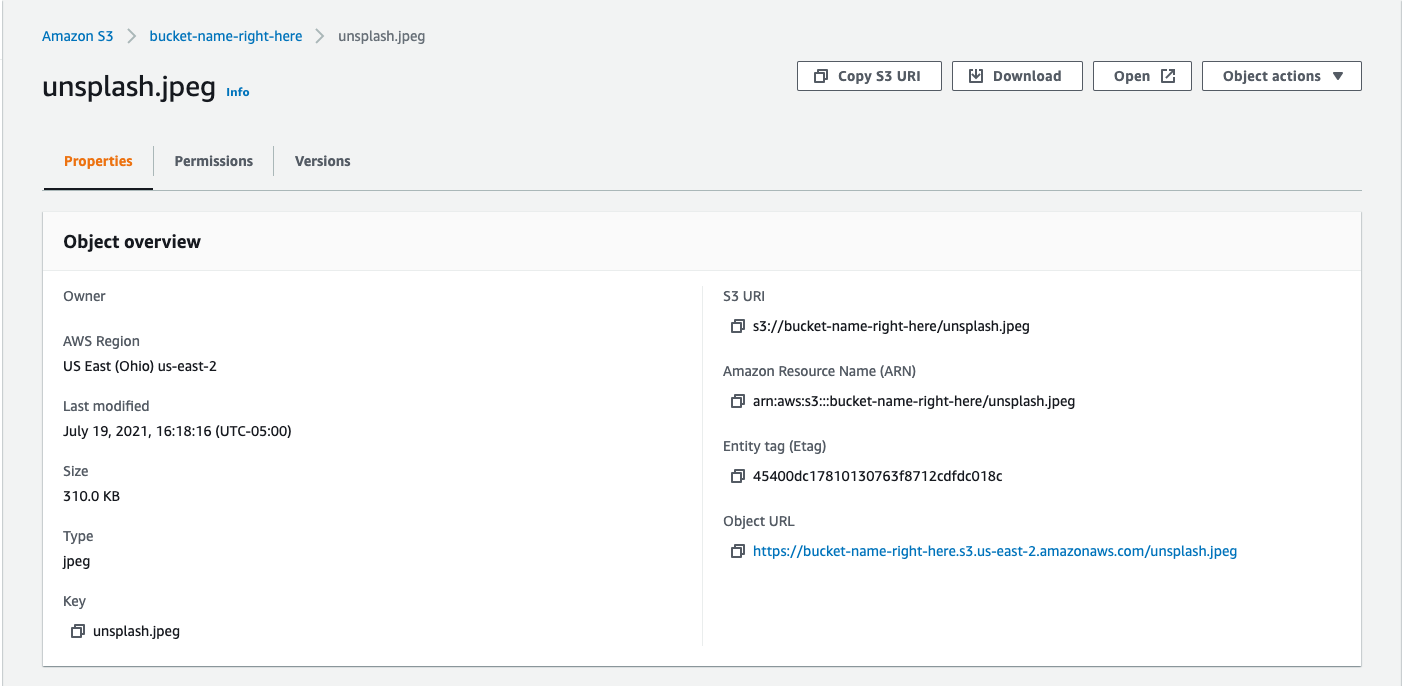
From your bucket page, click on the resource you want the URL for. This will direct you to the details page for this one object in your bucket. If you have already set the permissions in the last step to public, then you should be able to click on the blue URL under the "Object URL" label and view whatever resource it was. You can take that same URL and use it in your seeder files or wherever else you need this resource.
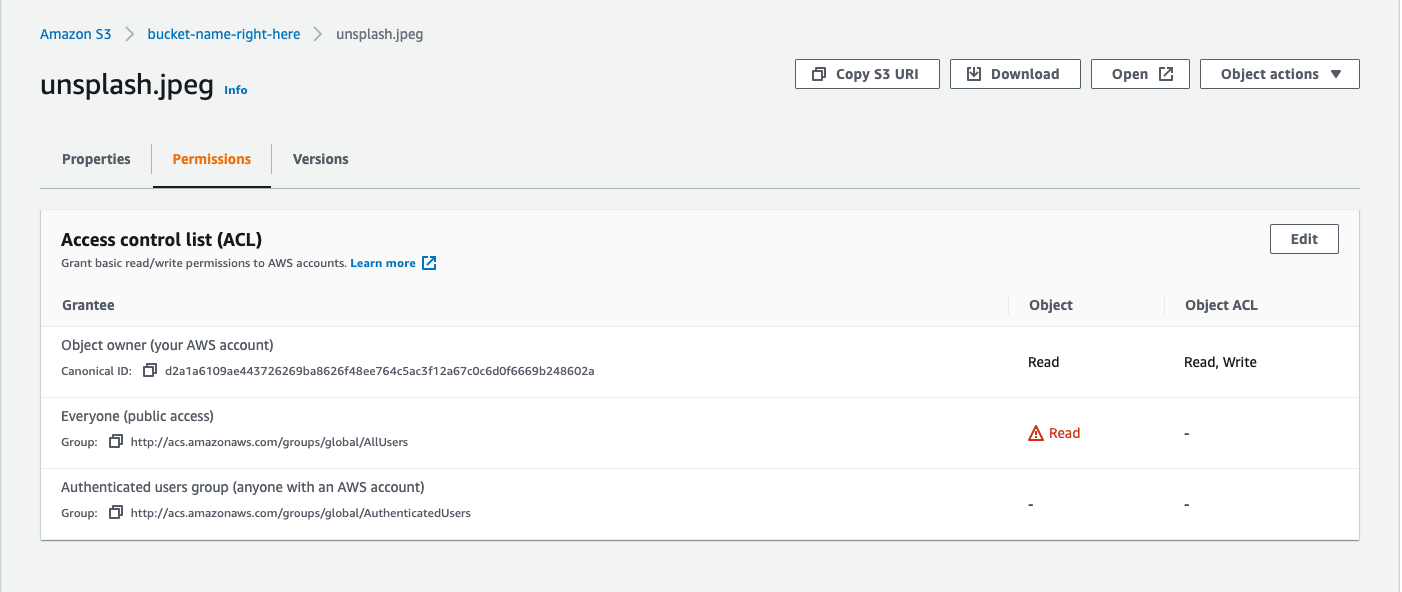
If you later decide that the permissions on an object is not what you want it to be, come back to this detail page for that object, and click on the "Permissions" tab. Click the "Edit" button on the next page.
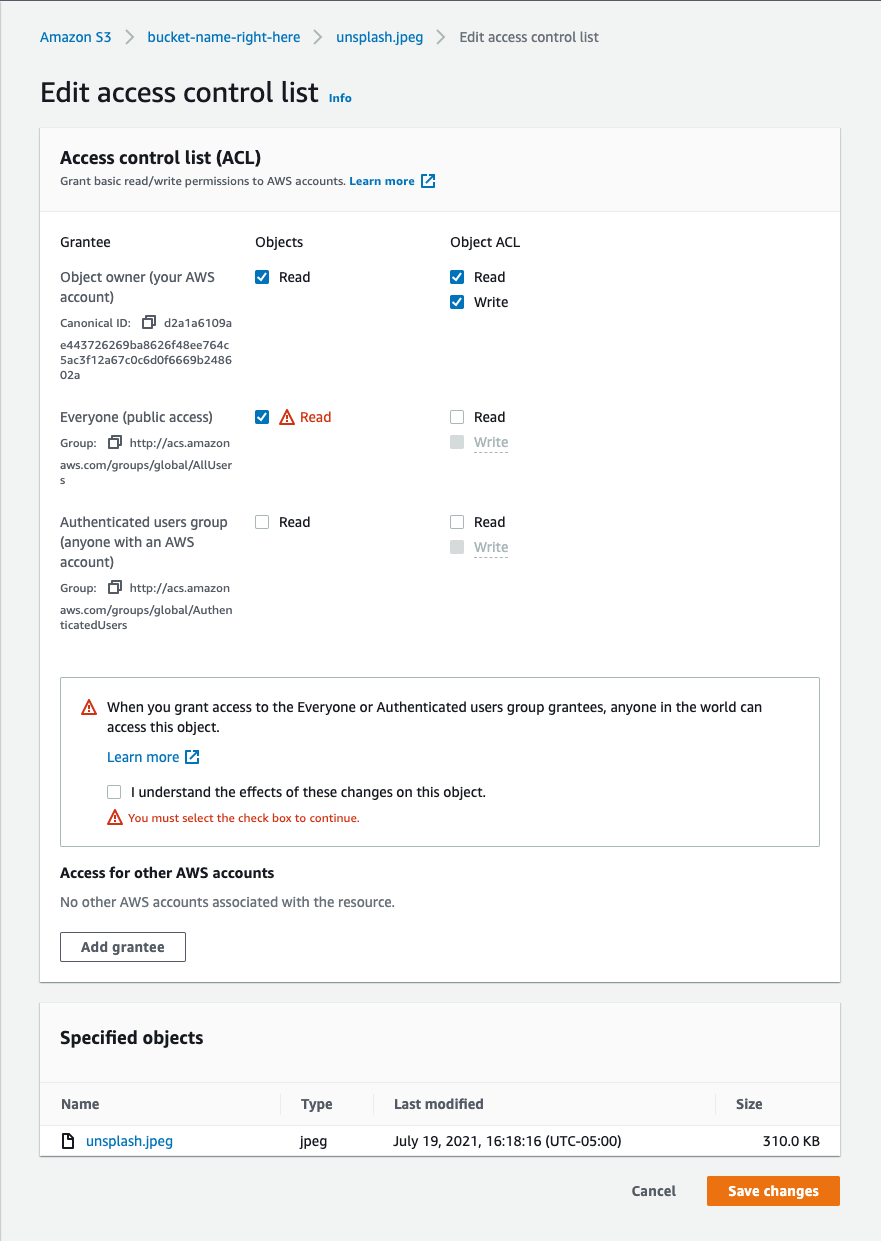
On the next page, "Edit access control list", you'll be able to check or uncheck checkboxes that will determine who can access your resources. Make sure that you also check the checkbox that says "I understand the effects of these changes on this object" if you are changing permissions to allow for public read of the object to confirm the changes before you click on the "Save changes" button at the bottom of the page.
You'll be taken back to your object's detail page if the changes were successfully changed, and you can use the "Object URL" in blue to test out whether the change was what you wanted it to be.
If you've changed your permissions to make the object private read-only, meaning that only the creator and any accounts with the necessary permissions can view the file, then you should see something with "Access Denied" if you try opening the "Object URL" in a browser where you are not logged into your AWS account.
